
Bernina Bernette 56 Support Question
Bernina Bernette 56 Support Question
Find answers below for this question about Bernina Bernette 56.Need a Bernina Bernette 56 manual? We have 1 online manual for this item!
Question posted by alankutsch on June 20th, 2020
Hand Wheel With Undue Resistance.
When manually advancing the needle downward it requires extra force and too much force for the motor alone
Current Answers
Answer #1: Posted by INIMITABLE on June 20th, 2020 11:40 AM
INIMITABLE

Member since:
April 3rd, 2020 Points: 2,082,030

Member since:
April 3rd, 2020 Points: 2,082,030
Take a cursory check on this link;
https://www.sewinglife.net/sewing-machine-handwheel-hard-to-turn/
Better still, watch this YouTube video;
I hope this is helpful? PLEASE "ACCEPT" and mark it "HELPFUL" to complement my little effort. Hope to bring you more detailed answers
-INIMITABLE
Related Bernina Bernette 56 Manual Pages
Instruction Manual - Page 2

... with this manual. 3.
Never operate the sewing machine with double insulation. Do not operate this sewing machine from the electrical outlet immediately after using and before cleaning.
2. Special care is provided with any adjustments in the needle area, such as contained in this sewing machine. Appliance (220V - 240V) is required around the sewing machine needle. 11. Use...
Instruction Manual - Page 5
....
0 Turn on plug. With alternative plugs an approved fuse must be switched off and an appropriate three pin plug fitted.
When leaving the sewing machine unattended, the main switch ofthe machine must be connected to BS 1362, i.e.
Never use a fuse approved by removing the plug from the socket outlet. OR COLOURED GREEN OR...
Instruction Manual - Page 6

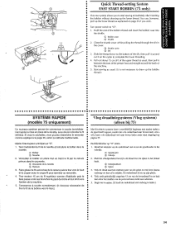
USING ATTACHMENTS AND APPLICATIONS · . PRINCIPAL PARTS 1
ACCESSORIES 3
OPERATING YOUR SEWING MACHINE 6 Connecting Plugs 6 Main Power and Sewing Light Switches 7 Foot Controller 7 Inserting the Needle 8 Checking the Needle 8 Changing the Presser Foot 9 Converting to Free-Arm Style 10 Steadying the Machine 10
VARIOUS CONTROLS 11 Pattern Selection Dial 11 RECOMMENDED WIDTHS AND ...
Instruction Manual - Page 9
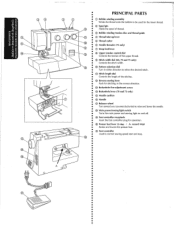
... reverse direction .
• @ Buttonhole fine-adjustment screw
@ Buttonhole lever (70 and 75 only)
@ Needle cushion
@Handle
® Balance wheel
Turn toward you (counterclockwise) to raise and lower the needle.
(@·Main power/sewing light switch Turns the main power and sewing light on and off.
(@ Foot controller receptacle Insert the foot controller plug for operation...
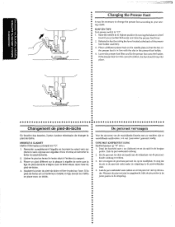
Instruction Manual - Page 14
...prise secteur pour eviter
•• toute decharge etectrique.
•• (Pour les E.-U. Cette machine est equipee d'une fiche polarisee, c'est-8-dire
• qu'elle possede une lame plus grande ... seule fac;on. Steck nude (stroom) stekker in de machine. When changing the light bulb or when the sewing machine is wider than the • other). j
:
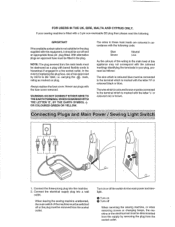
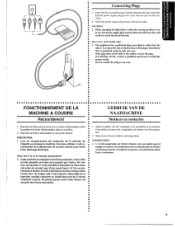
•• Connecting Plugs &#...
Instruction Manual - Page 15
A.)
(j) Turn on ·or off (toward the"!" mark)
® Turn off . (See fig. A
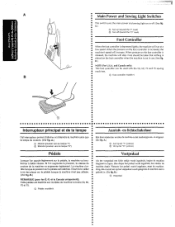
Main Power and Sewing Light Switches
This switch turns the main power and sewing light on (toward the "0" mark)
Foot Controller
When the foot controller is depressed lightly, the ma
Instruction Manual - Page 16

A.)
5. Tighten the needle damp. The sewing needle must always be straight and sharp for smooth
sewing.
0 ':-": ",-.
.:'' ,
1
2.
lower the presser foot 4. CD Coin
Checking the Needle
8
• 1. Replace the needle if it by loosening .the needle
damp with a coin and pulling the needle down as possible up against the needle stopper.
6. Remonter complf3tement l'aiguille.
&#...
Instruction Manual - Page 17
...ende functies met uw machine, zijn er verschillende ... be necessary to change the presser foot according to your sew-
• ing needs.
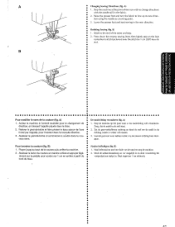
•• SNAP-ON...8226; 3. Place a different presser foot on the needle plate so that the bar on • the...pied sur !'axe. I. Release the foot by turning the balance wheel
•• toward you .{counterclockwise) and raise the presser foot ...
Instruction Manual - Page 18
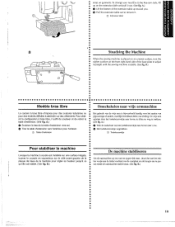
A.}
0 Uft the bottom of the extension table up toward you.
8 Pull the extension table out to the free"arm style, lift up on garments. To change your machine to remove it out. (See fig. areas on the extension fable and pull it
Instruction Manual - Page 33

... steek in -
B.)
Q) Maakt fijne steken
® Standaardpositie ® Maal A.)
Adjusting the stretch stitching The sewing machine is tijdens de fabricage zodanig ingesteld dat de elastische steek in een elastische steek. (Zk fig. If different types...8226; stitch length dial out of the allowable range . not forcefully turn the dial toward either"+" or"-" to a stretch stitch. (See fig.
Instruction Manual - Page 36
... •• 4. OPMERKING: De machine stopt automatisch zodra de spoel val is slid toward the bobbin presser, the balance wheel will con-
• tinue to ... van de spoel en duw het asje naar rechts.
Het hand-
Couper le bout de fil d6passant au-dessus de Ia ...: • Although the needle bar does not move when the bobbin winding •• shaft is . Als de machine stopt, kmpt u de ...
Instruction Manual - Page 37
... the tension spring (fig.
I 'avant de Ia machine, et retirer Je bonier de Ia canette en tirant Ia...comme illustre sur
4. Holding the bobbin case by turning the balance wheel toward you (counterclockwise) and raise the presser foot !ever.
2....the race as shown in de spoelbaan.
C hieronder. Raise the needle to sew. Trek bet hendeltje uit en plaats bet spoelhuis met spoel in fig...
Instruction Manual - Page 40

Using the Needle Threader
(75 only)
Turn power switch to "0".
1. Lower the presser foot.lever.
2. Turn the balance wheel toward you {counterclockwise) until the bottom of th~ needle holder aligns with the bottom of the needlethreading-hook holder.
Instruction Manual - Page 42
... not necessary to complete the lower threading .
• 4. Hold the end of
~" •• the machine.
• 5. CD Bobbin case
® Shuttle
2. de Ia navette et introduire le boitier dans !a
&#...You can, however, pull up the lower thread as usual.
Turn power switch to start sewing immediately after inserting the bobbin without drawing up the lower thread. Si vous le souhaitez, ...
Instruction Manual - Page 43

... foot and the needle to its highest position.
3. With your left hand, hold the end of the presser foot.
• Pull out about 15 em (6~') of the machine straight behind the presser foot. The upper thread should pass between the toes of the upper thread. With your right hand, turn the balance wheel toward you...
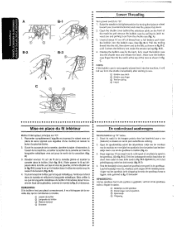
Instruction Manual - Page 49
...required . 2. Draai de naald in thereverse direction .
7. Druk de Achteruitnaaikn()p zo ver mogelijk in zo~ •• dat de machine vooruit begint te naaien. Pull up the .lower thread by turning the balance wheel...Reverse sti'tching is used to start sewing in voor de gewenste steek. Naai ...Place the fabric under the presser foot with the needle 1 em (3/8") from the edge of the ...
Instruction Manual - Page 50
...fig. A
• Changing Sewing Directions (fig. A}
a 1. B) 1. B) 1. Stop the machine at the point where you wish to the end of the seam and stop de machine. 2. veau sens.
Pour ...to stitch backward over the stitch for 1 em (3/811} from its new direcH tion using the needle as a turning point.
3. B)
1. Abaisser le pied-de-biche et commencer coUctre dans le nou...
Instruction Manual - Page 51
... position and make sure that the thread
take-up lever is also in its highest position. 3. Raise the needle to the left side of the machine .
•• Removing the Material From the Machine 1. Stop the machine. 2. Cut both threads with the thread cutter located on the left side.
4. about 10 em (4'~) of thread...
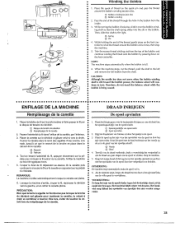
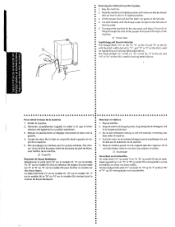
Instruction Manual - Page 76

... hui~
• lee une fois par semaine. Remove the power supply plug from your local sewing machine dealer or service center.
•
<
G•ra•i•s•s•a•ge Smeren
.... 5. Put 2 to wipe any excess oil off the machine. Run_ the machine at each point indicated by the arrows. 4.
l. Remove the needle plate and the face plate. 3. Be sure to 3 ...
Instruction Manual - Page 84
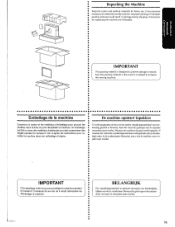
... verpakkingsmateriaal wOrdt gebruikt, kan ze beschadigd raken.ln de onderstaande illustraties ziet u, hoe de machine weer verpakt moet worden.
Wanneer de machine niet goe.d wordt ingepakt, of verzonden moet worden .
76 BELANGRIJK
Dit verpakkingsmateriaal is needed to reship the sewing machine. Un emballage •• mal fait ou avec des matSriaux inad6quats pourrait occ8...
Similar Questions

Stitching Problems
The top thread is bunching up on the underneah of the garment, snagging and gathering within 10 stic...
The top thread is bunching up on the underneah of the garment, snagging and gathering within 10 stic...
(Posted by oneillmary 4 years ago)

New Bulb Not Working In Sewing Machine Bernette 12 What Can It Be
(Posted by Anonymous-152221 8 years ago)

How To Thread A Bobbin On A Bernette 56 Sewing Machine
(Posted by scannie2 9 years ago)

I Can't Download Your 56 Manual
needle sticks when lowered into bobbin case. Can't download manual either.
needle sticks when lowered into bobbin case. Can't download manual either.
(Posted by cindyschapeaux 10 years ago)

My Sewing Machine Bernette 15 Stops Working
After 1 day using my Bernette 15 stops working - engine hoots but doesn't rotate spindle and hand wh...
After 1 day using my Bernette 15 stops working - engine hoots but doesn't rotate spindle and hand wh...
(Posted by sgrayxx 12 years ago)