
Bernina Bernette 56 Support Question
Bernina Bernette 56 Support Question
Find answers below for this question about Bernina Bernette 56.Need a Bernina Bernette 56 manual? We have 1 online manual for this item!
Question posted by pattystanley on April 6th, 2012
Can Hem Carharts With This Machine? Have Jeans Needle Tried Setting For Zipper.
The person who posted this question about this Bernina product did not include a detailed explanation. Please use the "Request More Information" button to the right if more details would help you to answer this question.
Current Answers
Related Bernina Bernette 56 Manual Pages
Instruction Manual - Page 2

... controller free from all instructions before changing the light bulb.
Do not use ." Appliance (220V - 240V) is required around the sewing machine needle. 11. The symbol [J is used as threading the needle, changing the needl\3, threading the bobbin, or changing the presser foot. 15. Do not allow this instruction manual. 16. Do not pull or...
Instruction Manual - Page 5
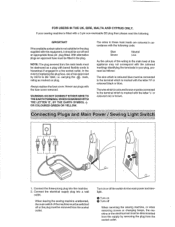
...must be destroyed as a plug with bared flexible cords is hazardous if engaged in your sewing machine is marked with the coloured markings identifying the terminals in a live socket outlet. OR COLOURED... as marked on 8 Turn off
When servicing the sewing machine, or when removing covers or changing lamps, the machine or the electrical set must be disconnected from the supply by ASTA to ...
Instruction Manual - Page 6

... 25 Stitch Width Dial (60, 70 and 75 only 26 Reverse Sewing Lever 27 Drop Feed Lever 27
THREADING THE MACHINE 28 Winding the Bobbin 28 Lower Threading 29 Upper (Needle) Threading 30 Using the Needle Threader (75 only 32 Quick Thread-setting System FAST START BOBBIN (75 only 34 Drawing Up Lower Thread (50...
Instruction Manual - Page 16

... de persvoet zakken. 4. Retirer l'aiguille eventuel!ement presente en dSyissant Ia fixation •
Hoofdschakelaar op "0" zetten. 1. CD Coin
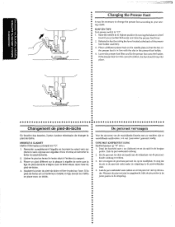
Checking the Needle
8
• 1. The sewing needle must always be straight and sharp for smooth
sewing.
0 ':-": ",-.
.:'' ,
1
2. Retirer Ia fiche de !a prise de courant. • 2. Remove the power supply plug from the electrical outlet...
Instruction Manual - Page 17
... should snap into place.
Raise the needle to "0" . • 1. Place a different presser foot on the needle plate so that the bar on ... vervangen
Voor bet uitvoeren van de verschil!ende functies met uw machine, zijn er verschillende naaldvoeten, ook we! 'persvoeten' genoemd,... It may be necessary to change the presser foot according to your sew-
• ing needs.
•• SNAP-ON TYPE
•...
Instruction Manual - Page 33

... het gekozen patroon in - A
·MW-----
•
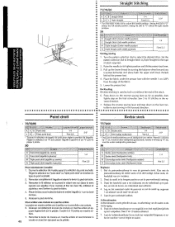
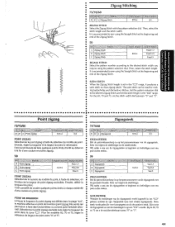
Stretch Stitching
Selecting a stretch stitch Setting the stitch length diat to "B" changes the selected pattern to adjust the stitch. (See fig... the stretch stitching can be turned past B -". A.)
Adjusting the stretch stitching The sewing machine is tijdens de fabricage zodanig ingesteld dat de elastische steek in te stellen. (Zie ...
Instruction Manual - Page 36
... from the shaft.
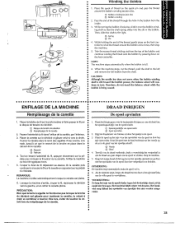
•• CAUTION: • Although the needle bar does not move when the bobbin winding •• shaft is fulL •• 6. Passer l'extr€mite du fil dans !'orifice de Ia can9tte, par !'int8rieur.
•• 3. Arr6ter Ia machine • au bout de qyetques tours.
•• 5. Couper...
Instruction Manual - Page 37
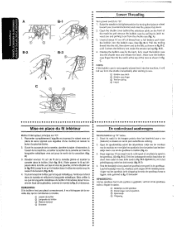
...case finger fits into the slot, then down and to sew.
Open de spoelhuisklep achter bet afneembare vakje aan de voorkant van.de machine en verwijder bet spoelhuis door het geheel aan het hendeltje naar...4. vinger van het spoelhuis irt-de uitsparing bovenin de spoelbaan komt te
a 4. Raise the needle to "0" .
1. Open the shuttle cover behind the extension table on commence coudre. Holding ...
Instruction Manual - Page 40

Using the Needle Threader
(75 only)
Turn power switch to "0".
1. Turn the balance wheel toward you {counterclockwise) until the bottom of th~ needle holder aligns with the bottom of the needlethreading-hook holder. Lower the presser foot.lever.
2.
Instruction Manual - Page 42
... thread down to the bottom of
~" •• the machine.
• 5. Si vous le souhaitez, vous pouvez neanffioins ... Bobbin case
® Shuttle
2.
Start sewing as explained on the cutter to start sewing immediately after inserting the bobbin without drawing...;• infSrieur. Tenir l'extrSmite du fi!
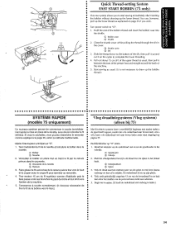
Quick Thread-setting System FAST START BOBBIN (75 only)
This new system allows you...
Instruction Manual - Page 43

... The upper thread should pass between the toes of both threads and place them toward you (counterclockwise) until the needle moves down and back up from the bobbin in a loop. With your right hand, turn the balance wheel toward... upper thread. With your left hand, hold the end of the machine straight behind the presser foot. • •
Drawing Up lower Thread
(50, 60 and 70 only)
1.
Instruction Manual - Page 49
... de naald in zo~ •• dat de machine vooruit begint te naaien. Press down on the foot... de persvoethendel omhoog.
•• 3. Sew 5 to Jock or reinforce the end of...en onderdraad naar achteren. •• 4. Set the
pattern selection dial to select the desired stitch... Place the fabric under the presser foot with the needle 1 em (3/8") from the edge of de drievoudige ...
Instruction Manual - Page 50
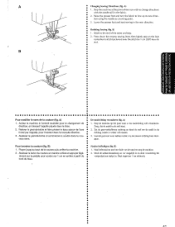
... de persvoet weer zakken zodat u in the new direction.
• Finishing Sewing (fig. A
• Changing Sewing Directions (fig. Stitch to stitch backward over the stitch for 1 em (3/811} from its new direcH tion using the needle as a turning point.
3. Arreter Ia machine I'endroit souhaite pour le changement de
direction, en laissant l'aiguille plqu6e dans...
Instruction Manual - Page 51
... the needle to the left side of the machine .
•• Cut both threads with the thread cutter located on the left side.
4. To prepare the machine for the next seam, puf! about 10 em (4'~) of thread through the toes of the presser foot toward the back of the face plate.
5. Stop the machine...
Instruction Manual - Page 52
...van de zigzagsteek wordt ingesteld in op het pat.i-oonnummer van de zigzagsteek. Set the pattern selection dial •• to sew using the Straight Stitch at the beginning and
• end of the.... POINT DE BOURDON
Lorsque Ia longueur du point zigzag est dSfinie dans Ia plage "c::J", Ia machine effectue un point de bourdon (point zigzag tres s~rre) qui
a peut servir faire des boutonnieres...
Instruction Manual - Page 53
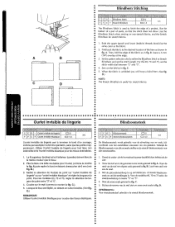
... to finish the edge of a project, like the bottom of a pair of the hem as shown in fig. Fold back the fabric to either the Bl,indhem Stitch or Stretch Bllndhem and set the stitch width dial between "3" and "5".
4. Sew on the fold as the fabric.
2. Utiliser l'ourlet invisible de lingerie pour tout...
Instruction Manual - Page 63

... que 1). Stop the machine when the needle is at the left side of the stitches,
then raise the needle from the material.
1. Turn the pattern selection dial to 6 stitches. 3.
Coudre Ia l€vre droite jusqu'a ce que_f'aigullle atteigne les points
a formes Ia phase 1. Set the pattern selection dial to 6 stitches. 3. Sew the right side...
Instruction Manual - Page 67
... see
•• step 1.
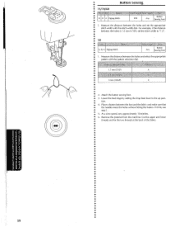
• 5. Attach the button sewing foot. • 3. Remove the material from the machine. lower the feed dogs by setting the drop feed lever to
"1
.5" .
50
1. Cut the ...slow speed, sew approximately 10 stitches. •• 6. For example, if the distance
• between the foot and the fabric and make sure that • the needle enters the holes...
Instruction Manual - Page 69

...; the foot by raising the lever located at the back of the
zipper, attach the presser foot holder to gather. Set the pattern selection dial to adjustthe needle
position. Pull the lower thread{s) to the right pin on the zipper foot.
(See fig. When sewing the left side of the presser foot,
• move the...
Instruction Manual - Page 85
Threading 29, 34
Pattern Widths 12-15
Winding 28 o Performance Checklist 70-71
Bridging Stitch 12 Buttonhole Sewing 52, 54
Presser Foot Replacement 9 Principal Parts 1
Buttonhole Fine Adjustment 57
ButtC?n Sew·ing 59
Q
c
Quick Thread-setting System 34
Chart of Sewing Fabrics, Needles and Thread Combinations 39 Cleaning 69 Connecting Plugs 6
R
' Repacking 76
Reverse ...
Similar Questions

Lost My Manual And Now I Don't Know How To Set The Buttons For Just A Straight
lost my manual and don't know how to set my machine for straight stitche
lost my manual and don't know how to set my machine for straight stitche
(Posted by jeanthornberry 1 year ago)

The Needle On My Bernina Bernette 56 Does Not Move Up And Down.
The needle desends one time into the fabric and does not come back up on its own. There are not any ...
The needle desends one time into the fabric and does not come back up on its own. There are not any ...
(Posted by midwifmom 6 years ago)
New Bulb Not Working In Sewing Machine Bernette 12 What Can It Be
(Posted by Anonymous-152221 8 years ago)

Needle Can't Connect With Bobbin
needle wont connect with bobbin and handwheel gets very tight
needle wont connect with bobbin and handwheel gets very tight
(Posted by jennifertown 9 years ago)

My Sewing Machine Bernette 15 Stops Working
After 1 day using my Bernette 15 stops working - engine hoots but doesn't rotate spindle and hand wh...
After 1 day using my Bernette 15 stops working - engine hoots but doesn't rotate spindle and hand wh...
(Posted by sgrayxx 12 years ago)