Bernina 1008 Support Question
Bernina 1008 Support Question
Find answers below for this question about Bernina 1008.Need a Bernina 1008 manual? We have 1 online manual for this item!
Question posted by bime on August 27th, 2013
How To Fix A Bernina 1008 Foot Control
The person who posted this question about this Bernina product did not include a detailed explanation. Please use the "Request More Information" button to the right if more details would help you to answer this question.
Current Answers
Related Bernina 1008 Manual Pages
Owners Manual - Page 4
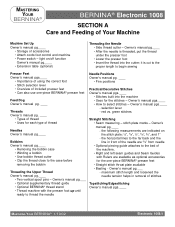
... back and the line in removal of accessories • Attach cords foot control and machine • Power switch - Owner's manual pgs.____
- Owner's ...BERNINA® 1/10/02
Electronic 1008/4 light on the stitch plate: ¼", 3/8", ½", 5/8", ¾", and 1" - it is threaded, put the thread under the presser foot • Lower the presser foot • Insert the thread into the machine...
Owners Manual - Page 5

... ____ for step-by -step cleaning and oiling instructions
Cleaning the Outside of the Machine • Wipe with damp cloth. Here's an idea...Use your BERNINA® machine serviced. MASTERING YOUR BERNINA® 1/10/02
Electronic 1008/5 MASTERING YOUR
BERNINA®
BERNINA® Electronic 1008
Satin Stitches • Thread bobbin case finger to the success of stitches
Changing...
Owners Manual - Page 6
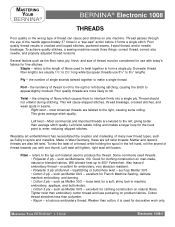
... for embroidery, very abrasion resistant. • Polyester 3 ply cordonnet -
MASTERING YOUR BERNINA® 1/10/02
Electronic 1008/6 Thread passes through the eye of the needle approximately 37 times in West Germany, these are also left twist. To achieve quality stitches, a sewing machine needs three things: correct thread, correct size needle, and properly adjusted thread...
Owners Manual - Page 7

...:
Needle system - 130/705H Needle point - MASTERING YOUR
BERNINA®
BERNINA® Electronic 1008
NEEDLES
Along with a larger groove should be used.
• Always make a stitch
Need To Know
• Needle should fit in the groove on the front of the most crucial for getting good results and keeping your sewing machine but is one .
Owners Manual - Page 8
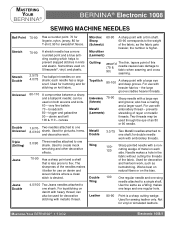
... and groove; One regular needle and one shank. Sometimes used through the eye of the fabric. Used for vinyl or simulated leathers. MASTERING YOUR
BERNINA®
BERNINA® Electronic 1008
SEWING MACHINE NEEDLES
Ball Point Stretch
Stretch Double Universal
Double Universal Triple (Drilling) Jeans
Jeans Double
70-90
Has a rounder point. 70 for lingerie, nylon...
Owners Manual - Page 9

... 1008 has 5 fixed needle positions. • Fold fabric in the center of the stitch width knob. • Position the fold of the fabric on the 1" mark on the right side of the fabric.
MASTERING YOUR BERNINA® 1/10/02
Electronic 1008/9 Leaving the fabric under the foot - move the needle position back to center. • Sew...
Owners Manual - Page 10

...; Place fabric pieces right sides together and
align them with the guide line. • Sew a 5/8" seam on one 6" edge. • Sew a 2" seam along the opposite edge.
MASTERING YOUR BERNINA® 1/10/02
Electronic 1008/10 MASTERING YOUR
BERNINA®
BERNINA® Electronic 1008
SEAMING
Fabric: Needle: Thread:
Presser Foot:
Firm fabric - 2 pieces, 4" x 6" each 90/14 Embroidery 30 wt.
Owners Manual - Page 12

... 1/10/02
Electronic 1008/12
MASTERING YOUR
BERNINA®
BERNINA® Electronic 1008
TOPSTITCHING/EDGESTITCHING
Fabric: Needle: Thread:
Presser Foot:
Firm fabric - 4" x 6" 90/14 Embroidery 30 wt. cotton embroidery Contrasting color Edgestitch Foot #10 (optional accessory)
Owner's manual pg.____ • Cut fabric in half to create 2 pieces each 2" x 6". • Sew two pieces together...
Owners Manual - Page 13
...'s manual pg.____ • Fold each fabric piece in the same manner. MASTERING YOUR
BERNINA®
BERNINA® Electronic 1008
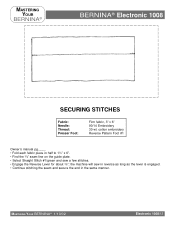
SECURING STITCHES
Fabric: Needle: Thread: Presser Foot:
Firm fabric, 3" x 6" 90/14 Embroidery 30 wt. the machine will sew in reverse as long as the lever is engaged. • Continue stitching the seam and secure the end...
Owners Manual - Page 14

... along the right side of the fabric, tapering
and widening the stitching while sewing. • Move the needle position to 3" x 6". MASTERING YOUR BERNINA® 1/10/02
Electronic 1008/14 MASTERING YOUR
BERNINA®
BERNINA® Electronic 1008
SATIN STITCH
Fabric: Needle: Thread: Presser Foot:
Firm fabric - 2 pieces, 3" x 6" each 90/14 Embroidery 30 wt. Repeat until the stitching...
Owners Manual - Page 15

... Rulers
Set of Your Machine
Hard Case
Slide-on Extension Table with Guide
Feet-ures
Edgestitch Foot #10
Stabilizers - Assortment or
size ____ and type ____
size ____ and type ____
size ____ and type ____
size ____ and type ____
Needle Threader
Bobbins - MASTERING YOUR
BERNINA®
BERNINA® Electronic 1008
WISH LIST Care...
Owners Manual - Page 17
...manual pg.____ • Jeans Foot #8 prevents needle deflection • Non-Stick Straight Stitch Foot #53 • This stitch sews strong seams on the foot, causing the stitch to sink ...it is formed over the guide on heavy fabrics
Zigzag -
MASTERING YOUR
BERNINA®
BERNINA® Electronic 1008
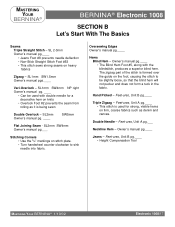
SECTION B Let's Start With The Basics
Seams Triple Straight Stitch -
Feet-ures...
Owners Manual - Page 18
MASTERING YOUR
BERNINA®
BERNINA® Electronic 1008
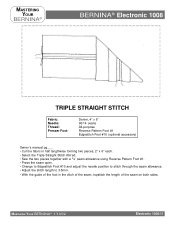
TRIPLE STRAIGHT STITCH
Fabric: Needle: Thread: Presser Foot:
Denim, 4" x 6" 90/14 Jeans All-purpose Reverse Pattern Foot #1 Edgestitch Foot #10 (optional accessory)
Owner's manual pg.___ • Cut the fabric in half lengthwise forming two pieces, 2" x 6" each. • Select the Triple Straight Stitch #9/red. • Sew the two ...
Owners Manual - Page 28

... T-shirts and pajamas. sew half of the stitch plate. • Select stitch #1/green; Narrow the width as needed to "walk" the machine through the first stitch....the hem.
MASTERING YOUR
BERNINA®
BERNINA® Electronic 1008
DOUBLE NEEDLE HEM
Fabric: Needle: Thread: Presser Foot:
Cotton interlock - 6" x 7" Double 3.0/80 All-purpose, 2 colors Reverse Pattern Foot #1
Owner's manual pg...
Owners Manual - Page 34

... models 1630 and artista 180. MASTERING YOUR
BERNINA®
BERNINA® Electronic 1008
BUTTONHOLE FEET
A number of buttonhole feet are available for counting stitches.
BUTTONHOLE FOOT #3 The standard 5mm buttonhole foot. "C" indicates a "coded" foot, with any BERNINA® sewing machine
BUTTONHOLE FOOT #3C The standard 9mm buttonhole foot. Works with a light sensor that allows...
Owners Manual - Page 41
... the fabric, while the right swing falls off of the right edge of the presser
foot and sew.
MASTERING YOUR
BERNINA®
BERNINA® Electronic 1008
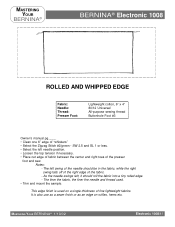
ROLLED AND WHIPPED EDGE
Fabric: Needle: Thread: Presser Foot:
Lightweight cotton, 6" x 4" 80/12 Universal All-purpose sewing thread Buttonhole Foot #3
Owner's manual pg.____ • Clean one 6" edge of fine lightweight fabrics...
Owners Manual - Page 42
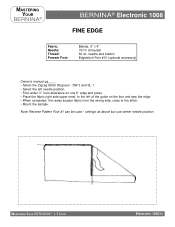
... most, to the left of the guide on the foot and sew the edge. • When completed, trim away surplus fabric from the wrong side, close to the stitch. • Mount the sample. MASTERING YOUR
BERNINA®
BERNINA® Electronic 1008
FINE EDGE
Fabric: Needle: Thread: Presser Foot:
Batiste, 6" x 4" 70/10 Universal 60 wt. MASTERING YOUR...
Owners Manual - Page 51
MASTERING YOUR
BERNINA®
BERNINA® Electronic 1008
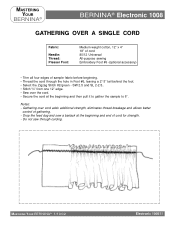
GATHERING OVER A SINGLE CORD
Fabric:
Needle: Thread: Presser Foot:
Medium weight cotton, 12" x 4" 18" of cord 80/12 Universal All-purpose sewing Embroidery Foot #6 (optional accessory)
• Trim all four edges of gathering. - SW 2.5 and SL 2-2.5.. • Stitch 5/8" from one 12" edge. • Sew over cord adds additional ...
Owners Manual - Page 56
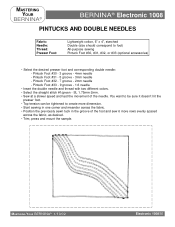
... and test the movement of the foot and sew 6 more dimension. • Start sewing in the groove of the needle. MASTERING YOUR BERNINA® 1/10/02
Electronic 1008/56 You want to be sure it doesn't hit the
presser foot. • Top tension can be tightened to foot) All-purpose sewing Pintuck Foot #30, #31, #32, or #33 (optional...
Owners Manual - Page 57

...174;
BERNINA® Electronic 1008
CORDED PINTUCKS
Fabric:
Needle: Thread: Presser Foot:
Lightweight cotton, 5" x 5", starched Gimp Cord Double 3.0/80 All-purpose sewing 5 Groove Pintuck Foot #31 (optional accessory)
• Thread the cord through the hole in both needles and the bobbin. • Sew four random corners. Note: Cord should be colorfast and shrinkproof.
• Thread machine...
Similar Questions

Fixing Pressure Foot Of E56 Bernette Machine
how to fix picot pressure foot
how to fix picot pressure foot
(Posted by meera59 1 year ago)


Bernina 807 817 Starts Sewing Before I Use The Foot Control
(Posted by pjwiddowson 10 years ago)

Bernina 1008 Cabinet
I want to get lockable cabinets for the 2 bernina 1008s that I purchased for the school where I teac...
I want to get lockable cabinets for the 2 bernina 1008s that I purchased for the school where I teac...
(Posted by dcarlson2 11 years ago)

Connection Supply And Foot Control
Hello, I need a replacement for both as lost. model Bernettee 330. Thanks.
Hello, I need a replacement for both as lost. model Bernettee 330. Thanks.
(Posted by Sharonhanlon 12 years ago)