Get support for Acer GT7700-UQ9550A

Acer GT7700-UQ9550A Support Question

Acer GT7700-UQ9550A Support Question

Find answers below for this question about Acer GT7700-UQ9550A.
Need a Acer GT7700-UQ9550A manual? We have 1 online manual for this item!
Question posted by kamich561 on June 22nd, 2012

Side Panell

How to open the side panel? i cant open it

Current Answers

There are currently no answers that have been posted for this question.
Be the first to post an answer!

Remember that you can earn up to 1,100 points for every answer you submit. The better the quality of your answer, the better chance it has to be accepted.

Related Acer GT7700-UQ9550A Manual Pages

User Manual - Page 9

... use vi 1 First things first 1 Specifications 2 Package contents 5 Accessing the User's Guide 5 2 System tour 7 External and internal structure 8 Closed front panel 8 Front panel 10 Using the memory card reader 12 Rear panel 14 Internal components 16 System board 18 Mainboard 18 System board switches and connectors 22 IDE connector 22 Serial ATA connector...
User Manual - Page 10

...power 32 Turning on your computer 34 Turning off your computer 36 4 Using your desktop 37 Using the keyboard(optional) 38 Using the mouse(optional) 40 Using the ...Preinstallation instructions 56 Post-installation instructions 57 Opening your Aspire G7200 58 Removing and installing the bezel door 58 Removing and installing the side panel 60 Removing and installing a hard drive...
User Manual - Page 32

20 Back panel I/O 2 System tour English Code Mouse Keyboard 1394 port Serial port eSATA port LAN Jack USB ports CS-Out RS-Out SS-Out Line-In Line-...
User Manual - Page 36

... speed communication port that sends/receives 16 bytes FIFOs and connects to the front panel switches and LEDs. English 24 2 System tour Front panel connectors The front panel connectors (F_PANEL1) are for electrical connection to a serial device. F_PANEL1 front panel pin definition PIN SIGNAL DESCRIPTION 1 Storage_LED + Hard disk LED pull-up 2 FP PWR/SLP...
User Manual - Page 37

... indicators Indicator Power HDD Network activity Network link Location Front panel (Power button) Front panel (Easy-swap HDD) Rear panel (Network port) Rear panel (Network port) Color Blue Status On Blinking Green Amber Blinking On Green/ Amber Flashing Orange Off On Blinking Green Off On Orange On Description System ...
User Manual - Page 42

... PS/2 mouse and keyboard cable into any of the USB ports located on the rear panel of your computer. Note: The peripherals shown in select countries. USB interface You can also... keyboard port (purple port) and mouse port (green port) located on the front and rear panels of your computer. English 30 3 Setting up your computer Connecting the computer Setting up your reference...
User Manual - Page 43

... two network ports to the monitor manual for additional instructions and information. It also allows your computer to the S-video port located on the rear panel of your computer. Note: Refer to work as a home gateway and it provides advanced networking features including teaming, load balancing, fail-over, and TCP/IP...
User Manual - Page 45

English 33 1 Plug the power cable into the power cable socket located on the rear panel of your computer. 2 Plug the other end of the power cable into a power outlet.
User Manual - Page 50

..., and 12 function keys that uses them. 6 Numeric keypad Press these keys to activate the function. 5 Function keys (F1 - it opens the application's context menu. F12) Lets you move the cursor around the screen. English 38 4 Using your desktop Using the keyboard(optional) The gaming keyboard has several types of your keyboard.
User Manual - Page 53

... optical drive Your computer may come with extra care. Press the optical drive's eject button located on the front panel of your computer's optical drive: 1. This drive is located on the front panel. However, they are also compact, lightweight and easy to play not only old CD-ROMs, CD-I disks, and video...
User Manual - Page 54

When the disk tray slides open, place the disk gently on the optical drive, or stop the computer from the center to avoid leaving smudges or fingerprints. English 3. Taking care of your optical disks • Keep your desktop 2. Do not wipe in use a clean, dust-free cloth and wipe in a straight line from...
User Manual - Page 55

... like a digital video camera, external storage devices, or external optical drives to the 4-pin and 6-pin fast IEEE 1394 located on the front and rear panel of your printer IEEE 1394 devices You can connect a USB printer to make connections through various options. This section describes how to an available USB...
User Manual - Page 60

...media card slot, four on the front and four on the front and rear panels of your desktop USB devices Universal Serial Bus (USB) is a serial bus design capable of the USB ports located on... the rear panel. Note: The USB devices shown below are for reference only. With USB, ...
User Manual - Page 69

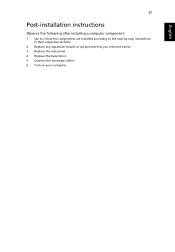
... installed according to the step-by-step instructions in their respective sections. 2 Replace any expansion boards or peripherals that you removed earlier. 3 Replace the side panel. 4 Replace the bezel door. 5 Connect the necessary cables. 6 Turn on your computer.
User Manual - Page 70

The side panel is removable to allow access to the following section for instructions. Refer to the computer's internal components. ... the four screws that you have turned off your computer and all peripherals connected to it. You need to open your computer before you can install upgrade components. Read the "Preinstallation instructions" on page 56. English 58 6 Upgrading your computer...
User Manual - Page 71

English 59 To install the bezel door: 1 Perform the preinstallation instructions described on page 56. 2 Align the door hinges to the screw holes on the side panels. 3 Secure the hinges on the panels with the four screws you removed earlier.
User Manual - Page 72

English 60 6 Upgrading your computer Removing and installing the side panel To remove the side panel: 1 Remove the bezel door. c Lift the panel upward to the previous section for instructions. 2 Remove the side panel. Refer to detach it. a Release the locks on the rear side b Hold the rear edge of the panel with both hands then slide the panel towards the rear of the chassis.
User Manual - Page 73

English 61 To install the side panel: 1 Perform the preinstallation instructions described on page 56. 2 Align the tabs on the panel with the slots on the chassis. 3 Slide the panel toward the front of the chassis until it is fully closed. 4 Lock the side panel.
User Manual - Page 105

... drive 41 install 65 remove 65 optical drives CD-ROM/DVD-ROM/CD-RW/BD/ HD-DVD drive inserting CDs/DVDs/BDs/HDDVDs 41 R rear panel 14 recovering your system 76 remove computer cover bezel door 58 side...
User Manual - Page 106

...31 external monitor 31 keyboard 30 mouse 30 connecting power cable 32 keyboard 29 monitor 29 mouse 29 side panel install 61 remove 61 system board audio card 22 connectors 22 Index mainboard 18 switches 22 system memory install...34 power switch 34 U upgrade computer 66 installation precautions post-installation 57 open computer 58 remove computer cover 58 replace components memory 66 AS G7200 V1.0

Similar Questions

How To Remove The Side Panel From Acer Aspire 3800?
My Acer Aspire 3800 is dusty inside and I wish to clean it. The perforated side panel seems to be th...
(Posted by Crumbs 7 years ago)
How Do I Open The Back Panel Of Z3800
how do I open the back panel of Z3800
(Posted by jims16uk 7 years ago)
Button 'recovery' On Front Panel Of Desktop
Say me, please, in witch case use button RECOVERY on front panel of desctop PC ACER Veriton S2610G? 
(Posted by osb4419 11 years ago)
Front Panel
HOW TO iDENTIFY THE FRONT PANEL CONNECTIONS, AS i AM FITTING THIS BOARD INTO ANOTHER CASE i NEED TO ...
(Posted by brian17432 11 years ago)
Acer Aspire T180-ud400b Front Panel
I need to check the power switch on the front panel
(Posted by davidsbell 11 years ago)
Ask a New Question
Use the box below to post a new question about this Acer product .
Points & Prizes
  • You can earn points for nearly everything you do on HelpOwl.com
  • You can trade in those points for gift cards at leading retailers such as Amazon.com and Walmart
  • It's that simple!
See How it Works
Create a Free Account

Acer Manuals

Find free Acer GT7700-UQ9550A manuals and user guides available at ManualOwl.com. Try out our unique manual viewer allowing you to interact with manuals from directly within your browser!

Acer Reviews

View thousands of Acer user reviews and customer ratings available at ReviewOwl.com.

Contact Information

Complete Acer customer service contact information including steps to reach representatives, hours of operation, customer support links and more from ContactHelp.com.

Scoreboard Ratings

See detailed Acer customer service rankings, employee comments and much more from our sister site.

Acer Recalls

Find comprehensive Acer recall information updated hourly on RecallOwl.com.