
User Guide
Page 18
...devices (RSS-210) 36 Exposure of humans to -disk recovery 20 Password 20 Using software 21 Playing DVD movies 21 Power management 22 eMachines Recovery Management 23 Burn backup discs 24 Restore 25 Restore Windows from backup discs 26 Troubleshooting 29 Troubleshooting tips 29 Error messages 29 Regulations... 17 Expanding through options 18 Connectivity options 18 Built-in network feature 18 Universal Serial Bus (USB) 18 Installing memory 19 BIOS utility 20 Boot sequence 20 Enable disk-to RF fields (RSS-102) 36 LCD panel ergonomic specifications 36
...devices (RSS-210) 36 Exposure of humans to -disk recovery 20 Password 20 Using software 21 Playing DVD movies 21 Power management 22 eMachines Recovery Management 23 Burn backup discs 24 Restore 25 Restore Windows from backup discs 26 Troubleshooting 29 Troubleshooting tips 29 Error messages 29 Regulations... 17 Expanding through options 18 Connectivity options 18 Built-in network feature 18 Universal Serial Bus (USB) 18 Installing memory 19 BIOS utility 20 Boot sequence 20 Enable disk-to RF fields (RSS-102) 36 LCD panel ergonomic specifications 36
User Guide
Page 24
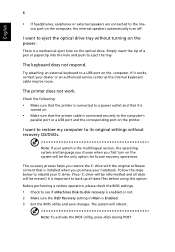
... Make sure that is a mechanical eject hole on the computer, the internal speakers automatically turn on the computer. Note: To activate the BIOS utility, press during POST. This recovery process helps you restore the C: drive with the original software content that the printer is Enabled. 3 Exit... the BIOS utility and save changes. Before performing a restore operation, please check the BIOS settings. 1 Check to see if eMachines Disk-to back up all data files before using this option. out port on the ...
... Make sure that is a mechanical eject hole on the computer, the internal speakers automatically turn on the computer. Note: To activate the BIOS utility, press during POST. This recovery process helps you restore the C: drive with the original software content that the printer is Enabled. 3 Exit... the BIOS utility and save changes. Before performing a restore operation, please check the BIOS settings. 1 Check to see if eMachines Disk-to back up all data files before using this option. out port on the ...
User Guide
Page 34
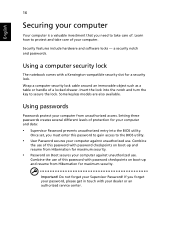
... around an immovable object such as a table or handle of protection for maximum security. Insert the lock into the BIOS utility. Combine the use of this password to gain access to the BIOS utility. • User Password secures your computer against unauthorized use. If you forget your password, please get in touch...
... around an immovable object such as a table or handle of protection for maximum security. Insert the lock into the BIOS utility. Combine the use of this password to gain access to the BIOS utility. • User Password secures your computer against unauthorized use. If you forget your password, please get in touch...
User Guide
Page 35
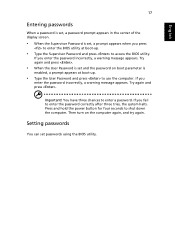
... the display screen. • When the Supervisor Password is set, a prompt appears when you press to enter the BIOS utility at boot-up . • Type the Supervisor Password and press to access the BIOS utility. Press and hold the power button for four seconds to enter a password. If you fail to use...! Setting passwords You can set and the password on the computer again, and try again. Then turn on boot parameter is set passwords using the BIOS utility. You have three chances to shut down the computer. If you enter the password incorrectly, a warning message appears.
... the display screen. • When the Supervisor Password is set, a prompt appears when you press to enter the BIOS utility at boot-up . • Type the Supervisor Password and press to access the BIOS utility. Press and hold the power button for four seconds to enter a password. If you fail to use...! Setting passwords You can set and the password on the computer again, and try again. Then turn on boot parameter is set passwords using the BIOS utility. You have three chances to shut down the computer. If you enter the password incorrectly, a warning message appears.
User Guide
Page 38
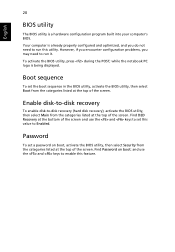
... is being displayed. while the notebook PC logo is a hardware configuration program built into your computer's BIOS. Password To set this value to run this feature. To activate the BIOS utility, press during the POST; Find D2D Recovery at the top of the screen and use the and ...and keys to run it. However, if you encounter configuration problems, you do not need to Enabled. Find Password on boot, activate the BIOS utility, then select Security from the categories listed at the top of the screen. Your computer is already properly configured and optimized, and ...
... is being displayed. while the notebook PC logo is a hardware configuration program built into your computer's BIOS. Password To set this value to run this feature. To activate the BIOS utility, press during the POST; Find D2D Recovery at the top of the screen and use the and ...and keys to run it. However, if you encounter configuration problems, you do not need to Enabled. Find Password on boot, activate the BIOS utility, then select Security from the categories listed at the top of the screen. Your computer is already properly configured and optimized, and ...
User Guide
Page 45
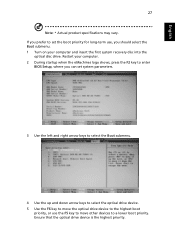
... the boot priority for long-term use, you should select the Boot submenu. 1 Turn on your computer. 2 During startup when the eMachines logo shows, press the F2 key to enter BIOS Setup, where you can set system parameters. 3 Use the left and right arrow keys to select the Boot submenu. 4 Use the...
... the boot priority for long-term use, you should select the Boot submenu. 1 Turn on your computer. 2 During startup when the eMachines logo shows, press the F2 key to enter BIOS Setup, where you can set system parameters. 3 Use the left and right arrow keys to select the Boot submenu. 4 Use the...
User Guide
Page 47
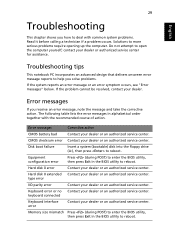
...or an error symptom occurs, see "Error messages" below. Memory size mismatch Press (during POST) to enter the BIOS utility, then press Exit in the BIOS utility to reboot. type error I/O parity error Contact your dealer. Equipment configuration error Press (during POST) to enter ...the BIOS utility, then press Exit in the BIOS utility to deal with the recommended course of action. CMOS checksum error Contact your dealer or an authorized service...
...or an error symptom occurs, see "Error messages" below. Memory size mismatch Press (during POST) to enter the BIOS utility, then press Exit in the BIOS utility to reboot. type error I/O parity error Contact your dealer. Equipment configuration error Press (during POST) to enter ...the BIOS utility, then press Exit in the BIOS utility to deal with the recommended course of action. CMOS checksum error Contact your dealer or an authorized service...

User Guide
Page 48
Some problems may be solved using the BIOS utility. English 30 If you still encounter problems after going through the corrective measures, please contact your dealer or an authorized service center for assistance.
Some problems may be solved using the BIOS utility. English 30 If you still encounter problems after going through the corrective measures, please contact your dealer or an authorized service center for assistance.


