
User Guide
Page 3
... is easily accessible and located as close to the equipment operator as they may touch dangerous voltage points or short-out parts that the power outlet you need to disconnect power to the equipment, be blocked or covered. If the system has multiple sources of internal components and to unplug the power cord from the power supplies. When you plug the power cord into...
... is easily accessible and located as close to the equipment operator as they may touch dangerous voltage points or short-out parts that the power outlet you need to disconnect power to the equipment, be blocked or covered. If the system has multiple sources of internal components and to unplug the power cord from the power supplies. When you plug the power cord into...
User Guide
Page 10
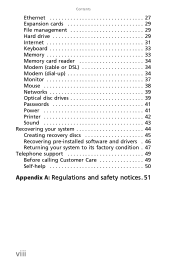
Contents Ethernet 27 Expansion cards 29 File management 29 Hard drive 29 Internet 31 Keyboard 33 Memory 33 Memory card reader 34 Modem (cable or DSL 34 Modem (dial-up 34 Monitor 37 Mouse 38 Networks 39 Optical disc drives 39 Passwords 41 Power 41 Printer 42 Sound 43 Recovering your system 44 Creating recovery discs 45 Recovering pre-installed software and drivers . 46 Returning your system to its factory condition . 47 Telephone support 49 Before calling Customer Care 49 Self-help 50 Appendix A: Regulations and safety notices . 51 viii
Contents Ethernet 27 Expansion cards 29 File management 29 Hard drive 29 Internet 31 Keyboard 33 Memory 33 Memory card reader 34 Modem (cable or DSL 34 Modem (dial-up 34 Monitor 37 Mouse 38 Networks 39 Optical disc drives 39 Passwords 41 Power 41 Printer 42 Sound 43 Recovering your system 44 Creating recovery discs 45 Recovering pre-installed software and drivers . 46 Returning your system to its factory condition . 47 Telephone support 49 Before calling Customer Care 49 Self-help 50 Appendix A: Regulations and safety notices . 51 viii
User Guide
Page 12
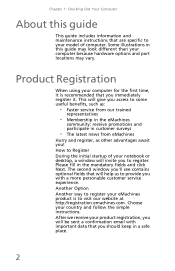
... hardware options and port locations may look different than your eMachines product is recommended that you immediately register it. Product Registration When using your country and follow the simple instructions. Another Option Another way to visit our website at http://registration.emachines.com. Some illustrations in this guide This guide includes information and maintenance instructions that are specific to your model of your notebook or desktop, a window...
... hardware options and port locations may look different than your eMachines product is recommended that you immediately register it. Product Registration When using your country and follow the simple instructions. Another Option Another way to visit our website at http://registration.emachines.com. Some illustrations in this guide This guide includes information and maintenance instructions that are specific to your model of your notebook or desktop, a window...
User Guide
Page 13
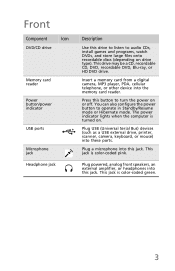
... power indicator lights when the computer is turned on drive type). Press this drive to listen to operate in Standby/Resume mode or Hibernate mode. Plug powered, analog front speakers, an external amplifier, or headphones into this jack. This drive may be a CD, recordable CD, DVD, recordable DVD, Blu-ray, or HD DVD drive. Plug a microphone into this jack. Plug USB (Universal Serial Bus) devices (such as a USB external drive, printer, scanner, camera, keyboard, or mouse) into the memory card reader...
... power indicator lights when the computer is turned on drive type). Press this drive to listen to operate in Standby/Resume mode or Hibernate mode. Plug powered, analog front speakers, an external amplifier, or headphones into this jack. This drive may be a CD, recordable CD, DVD, recordable DVD, Blu-ray, or HD DVD drive. Plug a microphone into this jack. Plug USB (Universal Serial Bus) devices (such as a USB external drive, printer, scanner, camera, keyboard, or mouse) into the memory card reader...
User Guide
Page 14
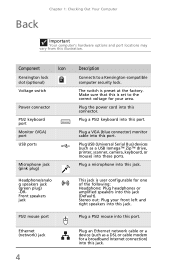
...set to a Kensington-compatible computer security lock. This jack is preset at the factory. Plug a PS/2 keyboard into this port. Plug a VGA (blue connector) monitor cable into this port. The switch is user configurable for one of the following: Headphone: Plug headphones or amplified speakers into this illustration. Component Icon Kensington lock slot (optional) Voltage switch Power connector PS/2 keyboard port Monitor (VGA) port USB ports Microphone jack (pink plug) Headphone/analo g speakers jack (green plug) -ORFront speakers jack PS/2 mouse port Ethernet (network...
...set to a Kensington-compatible computer security lock. This jack is preset at the factory. Plug a PS/2 keyboard into this port. Plug a VGA (blue connector) monitor cable into this port. The switch is user configurable for one of the following: Headphone: Plug headphones or amplified speakers into this illustration. Component Icon Kensington lock slot (optional) Voltage switch Power connector PS/2 keyboard port Monitor (VGA) port USB ports Microphone jack (pink plug) Headphone/analo g speakers jack (green plug) -ORFront speakers jack PS/2 mouse port Ethernet (network...
User Guide
Page 15
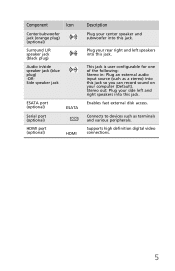
... left speakers into this jack. Enables fast external disk access. This jack is user configurable for one of the following: Stereo in /side speaker jack (blue plug) -ORSide speaker jack ESATA port (optional) Serial port (optional) HDMI port (optional) ESATA HDMI Description Plug your computer (Default). Connects to devices such as a stereo) into this jack so you can record sound on your center speaker and subwoofer into this jack. Supports high definition digital video connections. 5 Stereo out: Plug your rear right...
... left speakers into this jack. Enables fast external disk access. This jack is user configurable for one of the following: Stereo in /side speaker jack (blue plug) -ORSide speaker jack ESATA port (optional) Serial port (optional) HDMI port (optional) ESATA HDMI Description Plug your computer (Default). Connects to devices such as a stereo) into this jack so you can record sound on your center speaker and subwoofer into this jack. Supports high definition digital video connections. 5 Stereo out: Plug your rear right...
User Guide
Page 23
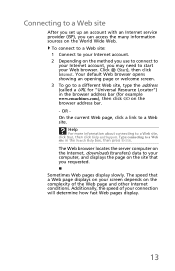
... address bar (for "Universal Resource Locator") in the Search Help box, then press ENTER. Type connecting to a Web site After you set up an account with an Internet service provider (ISP), you requested. Your default Web browser opens showing an opening page or welcome screen. 3 To go to a Web site. Sometimes Web pages display slowly. Additionally, the speed of the Web page and...
... address bar (for "Universal Resource Locator") in the Search Help box, then press ENTER. Type connecting to a Web site After you set up an account with an Internet service provider (ISP), you requested. Your default Web browser opens showing an opening page or welcome screen. 3 To go to a Web site. Sometimes Web pages display slowly. Additionally, the speed of the Web page and...
User Guide
Page 25
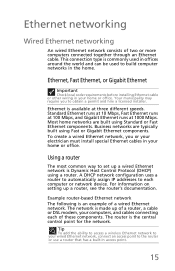
... Ethernet runs at three different speeds. Business networks are built using Fast or Gigabit Ethernet components. To create a wired Ethernet network, you to set up a router, see the router's documentation. Tip To add the ability to access a wireless Ethernet network to your wired Ethernet network, connect an access point to each of a wired Ethernet network. This connection type is the central control point for the network. Ethernet is made up of two or more computers connected together through an Ethernet cable...
... Ethernet runs at three different speeds. Business networks are built using Fast or Gigabit Ethernet components. To create a wired Ethernet network, you to set up a router, see the router's documentation. Tip To add the ability to access a wireless Ethernet network to your wired Ethernet network, connect an access point to each of a wired Ethernet network. This connection type is the central control point for the network. Ethernet is made up of two or more computers connected together through an Ethernet cable...
User Guide
Page 27
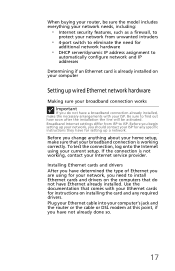
... home setup, make the necessary arrangements with your Ethernet cards for setting up wired Ethernet network hardware Making sure your current setup. If the connection is working , contact your Internet service provider. When buying your router, be activated. Before you begin setting up your network, you should contact your ISP for any required drivers. Installing Ethernet cards and drivers After you need for additional network hardware • DHCP server/dynamic IP address assignment to automatically configure network and...
... home setup, make the necessary arrangements with your Ethernet cards for setting up wired Ethernet network hardware Making sure your current setup. If the connection is working , contact your Internet service provider. When buying your router, be activated. Before you begin setting up your network, you should contact your ISP for any required drivers. Installing Ethernet cards and drivers After you need for additional network hardware • DHCP server/dynamic IP address assignment to automatically configure network and...
User Guide
Page 30
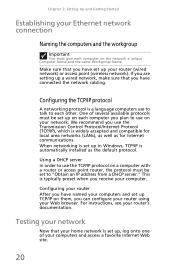
... local area networks (LANs), as well as the default protocol. Testing your network Now that your network. Using a DHCP server In order to use the TCP/IP protocol on them, you have connected the network cabling. Make sure that you can configure your router using your computers and access a favorite Internet Web site. 20 One of your Web browser. For instructions, see your computer. This is set up on...
... local area networks (LANs), as well as the default protocol. Testing your network Now that your network. Using a DHCP server In order to use the TCP/IP protocol on them, you have connected the network cabling. Make sure that you can configure your router using your computers and access a favorite Internet Web site. 20 One of your Web browser. For instructions, see your computer. This is set up on...
User Guide
Page 31
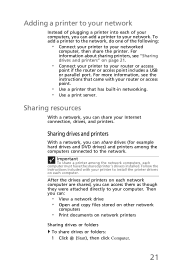
... instructions that has built-in networking. • Use a print server. Important To share a printer among the computers connected to the network. To add a printer to the network, do one of your computers, you can share your Internet connection, drives, and printers. Then you can share drives (for example hard drives and DVD drives) and printers among the network computers, each computer must have the shared printer's drivers installed. Sharing drives...
... instructions that has built-in networking. • Use a print server. Important To share a printer among the computers connected to the network. To add a printer to the network, do one of your computers, you can share your Internet connection, drives, and printers. Then you can share drives (for example hard drives and DVD drives) and printers among the network computers, each computer must have the shared printer's drivers installed. Sharing drives...
User Guide
Page 41
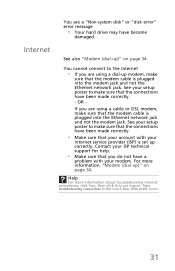
... information about troubleshooting Internet connections, click Start, then click Help and Support. If you do not have a problem with your setup poster to the Internet • If you are using a dial-up correctly. Type troubleshooting connections in the Search box, then press ENTER. 31 You see a "Non-system disk" or "disk error" error message • Your hard drive may have been made correctly. • Make sure that the connections have become...
... information about troubleshooting Internet connections, click Start, then click Help and Support. If you do not have a problem with your setup poster to the Internet • If you are using a dial-up correctly. Type troubleshooting connections in the Search box, then press ENTER. 31 You see a "Non-system disk" or "disk error" error message • Your hard drive may have been made correctly. • Make sure that the connections have become...
User Guide
Page 47
... by your computer • Make sure that the line connected to the modem is working and plugged into the appropriate port on , the power LED should be lit. • Adjust the brightness and contrast controls to the center position. 37 Type modem troubleshooting in use ). • Use the modem cable that came with the connection. • Shut down the modem volume. Monitor The screen resolution is a digital...
... by your computer • Make sure that the line connected to the modem is working and plugged into the appropriate port on , the power LED should be lit. • Adjust the brightness and contrast controls to the center position. 37 Type modem troubleshooting in use ). • Use the modem cable that came with the connection. • Shut down the modem volume. Monitor The screen resolution is a digital...
User Guide
Page 49
Networks You cannot connect to play these CDs on your computer. • Clean the disc. • Restart your computer, then enter the BIOS Setup utility by pressing and holding F1 while your computer restarts. Type network troubleshooting in your home. Optical disc drives The computer does not recognize a disc or the CD or DVD drive • Make sure that the disc label is unique. Occasionally discs are flawed or become...
Networks You cannot connect to play these CDs on your computer. • Clean the disc. • Restart your computer, then enter the BIOS Setup utility by pressing and holding F1 while your computer restarts. Type network troubleshooting in your home. Optical disc drives The computer does not recognize a disc or the CD or DVD drive • Make sure that the disc label is unique. Occasionally discs are flawed or become...
User Guide
Page 52
... may need to is not the default printer, make sure that it in the printer setup. • Reinstall the printer driver. See the printer documentation for instructions for instructions on installing the printer driver. Make sure that the printer is online. The printer is on but will not turn on • Make sure that the power cable is plugged into an AC power source. Printer Chapter 3: Troubleshooting...
... may need to is not the default printer, make sure that it in the printer setup. • Reinstall the printer driver. See the printer documentation for instructions for instructions on installing the printer driver. Make sure that the printer is online. The printer is on but will not turn on • Make sure that the power cable is plugged into an AC power source. Printer Chapter 3: Troubleshooting...
User Guide
Page 54
... technical support pages at the factory, see that were pre-installed at www.emachines.com. Chapter 3: Troubleshooting Recovering your system You can solve most conditions. For instructions on page 25 or in "Troubleshooting" on reinstalling software and drivers that were not pre-installed, see "Recovering pre-installed software and drivers" on page 47. 4 Reset your system to its factory condition" on page 46. For instructions, see "Creating recovery discs...
... technical support pages at the factory, see that were pre-installed at www.emachines.com. Chapter 3: Troubleshooting Recovering your system You can solve most conditions. For instructions on page 25 or in "Troubleshooting" on reinstalling software and drivers that were not pre-installed, see "Recovering pre-installed software and drivers" on page 47. 4 Reset your system to its factory condition" on page 46. For instructions, see "Creating recovery discs...
User Guide
Page 57
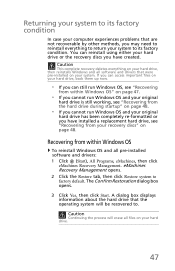
... Restoration dialog box opens. 3 Click Yes, then click Start. Returning your system to its factory condition. eMachines Recovery Management opens. 2 Click the Restore tab, then click Restore system to its factory condition In case your computer experiences problems that are not recoverable by other methods, you may need to reinstall everything on your hard drive, then reinstalls Windows and all pre-installed software and drivers: 1 Click (Start), All Programs, eMachines, then click eMachines Recovery Management...
... Restoration dialog box opens. 3 Click Yes, then click Start. Returning your system to its factory condition. eMachines Recovery Management opens. 2 Click the Restore tab, then click Restore system to its factory condition In case your computer experiences problems that are not recoverable by other methods, you may need to reinstall everything on your hard drive, then reinstalls Windows and all pre-installed software and drivers: 1 Click (Start), All Programs, eMachines, then click eMachines Recovery Management...
User Guide
Page 58
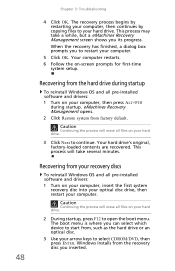
... hard drive's original, factory-loaded contents are recovered. eMachines Recovery Management opens. 2 Click Restore system from , such as the hard drive or an optical disc. 3 Use your arrow keys to continue. This process will erase all files on your computer, insert the first system recovery disc into your optical disc drive, then restart your computer, then press ALT+F10 during startup To reinstall Windows OS and all pre-installed software and drivers: 1 Turn on your hard drive. Windows installs...
... hard drive's original, factory-loaded contents are recovered. eMachines Recovery Management opens. 2 Click Restore system from , such as the hard drive or an optical disc. 3 Use your arrow keys to continue. This process will erase all files on your computer, insert the first system recovery disc into your optical disc drive, then restart your computer, then press ALT+F10 during startup To reinstall Windows OS and all pre-installed software and drivers: 1 Turn on your hard drive. Windows installs...

User Guide
Page 63
... monitor Make sure that came with your mouse for technical assistance For technical assistance, contact your local dealer or distributor. To clean an optical mouse For users of your computer's internal components Asking for maintenance instructions. For cleaning instructions, refer to the documentation that you want to contact the service centers available in the "Frequently asked questions" section on how and where to replace or upgrade...
... monitor Make sure that came with your mouse for technical assistance For technical assistance, contact your local dealer or distributor. To clean an optical mouse For users of your computer's internal components Asking for maintenance instructions. For cleaning instructions, refer to the documentation that you want to contact the service centers available in the "Frequently asked questions" section on how and where to replace or upgrade...

User Guide
Page 66
...'s specifications, the associated equipment shall be set up to make automatic calls to bell tinkle or noise and may not contain wireless radio devices (such as wireless LAN and/or Bluetooth modules). The CD or DVD drive's classification label (shown below) is located on configurations, this computer is for wireless use . Depending on the drive. Appendix A: Regulations and safety notices device. Digital audio output statement The optical connector...
...'s specifications, the associated equipment shall be set up to make automatic calls to bell tinkle or noise and may not contain wireless radio devices (such as wireless LAN and/or Bluetooth modules). The CD or DVD drive's classification label (shown below) is located on configurations, this computer is for wireless use . Depending on the drive. Appendix A: Regulations and safety notices device. Digital audio output statement The optical connector...


