User Guide
Page 11
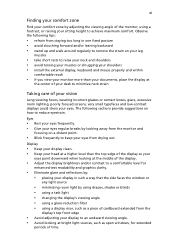
... to keep your eyes from drying out. The following tips: • refrain from staying too long in such a way that the side faces the window or any light source • minimizing room light by using drapes, shades or blinds • using a task light • changing the display's ...display's top front edge • Avoid adjusting your display to an awkward viewing angle. • Avoid looking at bright light sources, such as open windows, for enhanced text readability and graphics clarity. • Eliminate glare and reflections by: • placing your display in one fixed posture • ...
... to keep your eyes from drying out. The following tips: • refrain from staying too long in such a way that the side faces the window or any light source • minimizing room light by using drapes, shades or blinds • using a task light • changing the display's ...display's top front edge • Avoid adjusting your display to an awkward viewing angle. • Avoid looking at bright light sources, such as open windows, for enhanced text readability and graphics clarity. • Eliminate glare and reflections by: • placing your display in one fixed posture • ...
User Guide
Page 14
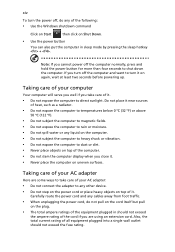
... magnetic fields. • Do not expose the computer to rain or moisture. • Do not spill water or any of the following: • Use the Windows shutdown command Click on Start then click on the plug. • The total ampere ratings of it. • Do not expose the computer to shut...
... magnetic fields. • Do not expose the computer to rain or moisture. • Do not spill water or any of the following: • Use the Windows shutdown command Click on Start then click on the plug. • The total ampere ratings of it. • Do not expose the computer to shut...
User Guide
Page 17
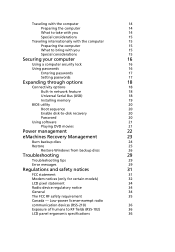
... of your battery pack xv Cleaning and servicing xv Touchpad 1 Touchpad basics (with two-click buttons) 1 Using the keyboard 2 Lock keys and embedded numeric keypad* 2 Windows keys 3 Special keys 4 Frequently asked questions 5 Battery pack 8 Battery pack characteristics 8 Maximizing the battery's life 8 Installing and removing the battery pack 9 Charging the battery 10...
... of your battery pack xv Cleaning and servicing xv Touchpad 1 Touchpad basics (with two-click buttons) 1 Using the keyboard 2 Lock keys and embedded numeric keypad* 2 Windows keys 3 Special keys 4 Frequently asked questions 5 Battery pack 8 Battery pack characteristics 8 Maximizing the battery's life 8 Installing and removing the battery pack 9 Charging the battery 10...
User Guide
Page 18
...) 36 Exposure of humans to -disk recovery 20 Password 20 Using software 21 Playing DVD movies 21 Power management 22 eMachines Recovery Management 23 Burn backup discs 24 Restore 25 Restore Windows from backup discs 26 Troubleshooting 29 Troubleshooting tips 29 Error messages 29 Regulations and safety notices 31 FCC statement 31...
...) 36 Exposure of humans to -disk recovery 20 Password 20 Using software 21 Playing DVD movies 21 Power management 22 eMachines Recovery Management 23 Burn backup discs 24 Restore 25 Restore Windows from backup discs 26 Troubleshooting 29 Troubleshooting tips 29 Error messages 29 Regulations and safety notices 31 FCC statement 31...
User Guide
Page 19
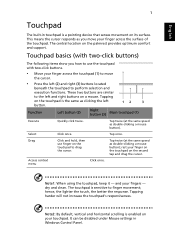
... execution functions. The touchpad is the same as double-clicking a mouse button). Tapping harder will not increase the touchpad's responsiveness. English 1 Touchpad The built-in Windows Control Panel. The central location on the second tap and drag the cursor. Click once. Note1: When using the touchpad, keep it -
... execution functions. The touchpad is the same as double-clicking a mouse button). Tapping harder will not increase the touchpad's responsiveness. English 1 Touchpad The built-in Windows Control Panel. The central location on the second tap and drag the cursor. Click once. Note1: When using the touchpad, keep it -
User Guide
Page 20
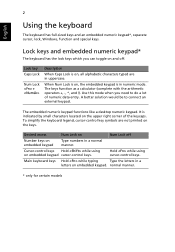
... you need to connect an external keypad. 2 English Using the keyboard The keyboard has full-sized keys and an embedded numeric keypad*, separate cursor, lock, Windows, function and special keys.
... you need to connect an external keypad. 2 English Using the keyboard The keyboard has full-sized keys and an embedded numeric keypad*, separate cursor, lock, Windows, function and special keys.
User Guide
Page 21
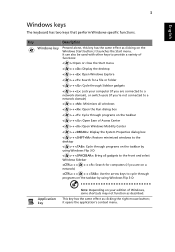
... on a + < > + : Use the arrow keys to a network domain) < > + : Minimizes all windows < > + : Open the Run dialog box < > + : Cycle through programs on the taskbar < > + : Open Ease of Windows, some shortcuts may not function as described. it launches the Start menu. It can also be used with...or switch users (if you're not connected to cycle through programs on the taskbar by using Windows Flip 3-D Application key Note: Depending on the Windows Start button; Key Description Windows key Pressed alone, this key has the same effect as clicking the right mouse button; it...
... on a + < > + : Use the arrow keys to a network domain) < > + : Minimizes all windows < > + : Open the Run dialog box < > + : Cycle through programs on the taskbar < > + : Open Ease of Windows, some shortcuts may not function as described. it launches the Start menu. It can also be used with...or switch users (if you're not connected to cycle through programs on the taskbar by using Windows Flip 3-D Application key Note: Depending on the Windows Start button; Key Description Windows key Pressed alone, this key has the same effect as clicking the right mouse button; it...
User Guide
Page 23
... page 4 for each one. Connect the AC adapter to recharge the battery pack. • Make sure that may be muted. In Windows, look at the volume control icon on . In Windows, look at the power indicator: • If it is not lit, no power is being supplied to the computer. English 5 Frequently...
... page 4 for each one. Connect the AC adapter to recharge the battery pack. • Make sure that may be muted. In Windows, look at the volume control icon on . In Windows, look at the power indicator: • If it is not lit, no power is being supplied to the computer. English 5 Frequently...
User Guide
Page 28
... next day with the computer turned off results in the battery bay. However, charging the battery with a fully charged battery. Checking the battery level The Windows power meter indicates the current battery level. Rest the cursor over the battery/power icon on AC power while your AC adapter and battery. Optimising...
... next day with the computer turned off results in the battery bay. However, charging the battery with a fully charged battery. Checking the battery level The Windows power meter indicates the current battery level. Rest the cursor over the battery/power icon on AC power while your AC adapter and battery. Optimising...
User Guide
Page 29
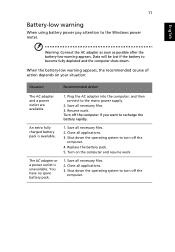
.... 2. Shut down the operating system to recharge the battery rapidly. Save all applications. 3. Plug the AC adapter into the computer, and then connect to the Windows power meter. Replace the battery pack. 5. Warning: Connect the AC adapter as soon as possible after the battery-low warning appears. Resume work . Save all...
.... 2. Shut down the operating system to recharge the battery rapidly. Save all applications. 3. Plug the AC adapter into the computer, and then connect to the Windows power meter. Replace the battery pack. 5. Warning: Connect the AC adapter as soon as possible after the battery-low warning appears. Resume work . Save all...

User Guide
Page 40
Windows handles all of these devices in power management unit that supports the advanced configuration and power interface (ACPI), which allows for your computer. System activity ...
Windows handles all of these devices in power management unit that supports the advanced configuration and power interface (ACPI), which allows for your computer. System activity ...
User Guide
Page 44
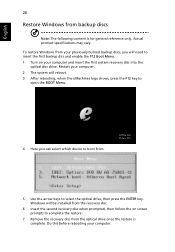
To restore Windows from your previously burned backup discs, you can select which device to boot from. 5 Use the arrow keys to ... 6 Insert the second recovery disc when prompted, then follow the on your computer. Actual product specifications may vary. Windows will reboot. 3 After rebooting, when the eMachines logo shows, press the F12 key to open the BOOT Menu. 4 Here you will need to insert the first... rebooting your computer and insert the first system recovery disc into the optical disc drive. English 26 Restore Windows from backup discs Note: The following content is complete.
To restore Windows from your previously burned backup discs, you can select which device to boot from. 5 Use the arrow keys to ... 6 Insert the second recovery disc when prompted, then follow the on your computer. Actual product specifications may vary. Windows will reboot. 3 After rebooting, when the eMachines logo shows, press the F12 key to open the BOOT Menu. 4 Here you will need to insert the first... rebooting your computer and insert the first system recovery disc into the optical disc drive. English 26 Restore Windows from backup discs Note: The following content is complete.

User Guide
Page 46
Press the ENTER key again to complete the restore. 9 Remove the recovery disc from the recovery disc. 8 Insert the second recovery disc when prompted, then follow the onscreen prompts to select Yes. Do this before rebooting your computer. Note: * Actual product specifications may vary. The system will reboot. 7 When you reboot, Windows will be installed from the optical drive once the restore is complete. English 28 6 Press the ESC key to enter the Exit submenu, press the ENTER key to Exit Saving Changes.
Press the ENTER key again to complete the restore. 9 Remove the recovery disc from the recovery disc. 8 Insert the second recovery disc when prompted, then follow the onscreen prompts to select Yes. Do this before rebooting your computer. Note: * Actual product specifications may vary. The system will reboot. 7 When you reboot, Windows will be installed from the optical drive once the restore is complete. English 28 6 Press the ESC key to enter the Exit submenu, press the ENTER key to Exit Saving Changes.


