eMachines E151H Support and Manuals
Get Help and Manuals for this eMachines item
View All Support Options Below
Free eMachines E151H manuals!
Problems with eMachines E151H?
Ask a Question
Free eMachines E151H manuals!
Problems with eMachines E151H?
Ask a Question
Popular eMachines E151H Manual Pages
User Manual - Page 3
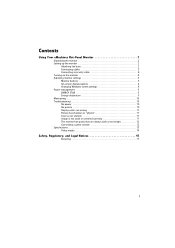
...Using Your eMachines Flat-Panel Monitor 1
Unpacking the monitor 2 Setting up the monitor 2
Attaching the base 2 Connecting cables 3 Connecting a security cable 4 Turning on the monitor 4 Adjusting monitor settings 5 Monitor buttons 5 On-screen display options 6 Changing Windows screen settings 8 Power management 9 ENERGY STAR 9 Energy declaration 9 Maintaining 10 Troubleshooting 10...
User Manual - Page 5

Using Your eMachines Flat-Panel Monitor
• Unpacking the monitor • Setting up the monitor • Turning on the monitor • Adjusting monitor settings • Power management • Maintaining • Troubleshooting • Specifications
1
User Manual - Page 6
...'s release button while you are missing any items, call Customer Care.
Using Your eMachines Flat-Panel Monitor
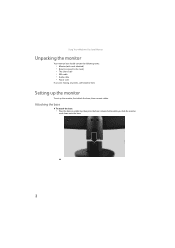
Unpacking the monitor
Your monitor box should contain the following items:
• Monitor (with neck attached) • Base (to connect to the neck) • This User Guide • VGA cable • Audio cable • Power cord
If you slide...
User Manual - Page 8
Using Your eMachines Flat-Panel Monitor
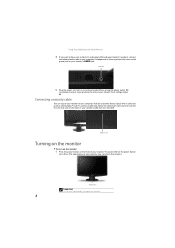
4 If you want to have your computer's audio played through your monitor's speakers, connect
the included audio cable to your computer's headphones or line out jack (usually color-coded green) and to your computer desk (or to another heavy object) with a cable lock (such as a Kensington™ lock).
The...
User Manual - Page 9
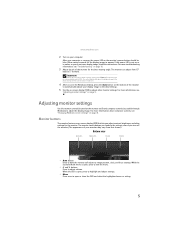
...> buttons
Press to adjust volume.
The monitor can adjust from that lets you adjust contrast, brightness, and other monitor settings. While the OSD is not on your display image to adjust other settings for the display image to 5° forward. For more troubleshooting information, see "Changing Windows screen settings" on -screen display menu (OSD). This will automatically...
User Manual - Page 10
... timeout. Reset to Defaults Resets all adjustments, press Auto repeatedly to defaults. Using Your eMachines Flat-Panel Monitor
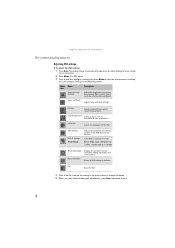
On-screen display options
Adjusting OSD settings
To adjust the OSD settings:
1 Press Auto.
Turns DDC/CI support on or off. You can configure settings in the following menus:
Menu Name icon
Brightness and Contrast
Focus and Clock
Description...
User Manual - Page 11
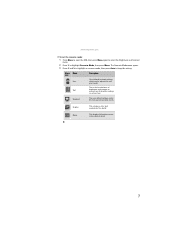
... emphasizes fine detail.
This is the best general-purpose mode. Menu Mode icon
Description
User-defined (custom) settings,
User
which can be adjusted to prevent eye strain while reading
on-screen text. www.emachines.com
To set the scenario mode:
1 Press Menu to open the OSD, then press Menu again to select the...
User Manual - Page 12
... depth you want . 3 To change the color depth and screen resolution in the Search Help box, then press ENTER. Using Your eMachines Flat-Panel Monitor
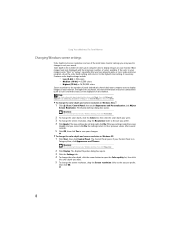
Changing Windows screen settings
Color depth and screen resolution are two of the most basic monitor settings you have played a game or run a video-intensive program, check the color depth...
User Manual - Page 13
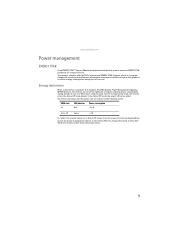
... for energy efficiency. In the Active Off mode the power LED turns amber. www.emachines.com
Power management
ENERGY STAR
As an ENERGY STAR® Partner, eMachines has determined that supports the VESA Display Power Management Signaling (DPMS) protocol, the monitor can be reduced to the following levels:
VESA state LED indicator Power consumption
On...
User Manual - Page 14
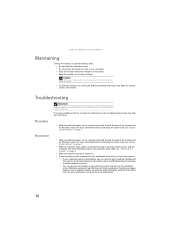
... notebook supports dual displays, you can also use a soft cloth slightly moistened with the monitor, the information in this monitor as your notebook's user guide for about 30 minutes before making any type of abrasive pad or glass cleaner. For more information.
10 You will permanently scratch the screen.
• To clean the monitor, use this troubleshooting...
User Manual - Page 15
... on page 5.
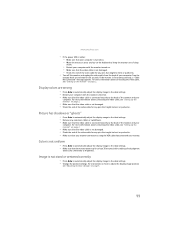
11 For instructions on how to the ideal settings. • Remove any pins that the video cable is functioning correctly, a "Cable Not Connected" message appears. Picture has shadows or "ghosts"
• Press Auto to automatically adjust the display image to adjust the display image position,
see "Setting up the monitor" on . • Make sure...
User Manual - Page 16
... Your eMachines Flat-Panel Monitor
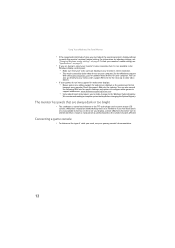
• If the image looks stretched or fuzzy, you must adjust the operating system's display settings
to the Windows System Registry. For information on adjusting settings, see "Specifications" on page 8. To find your video card's support Web site for widescreen displays: • Newer games are trying to identify whether a repair or replacement is...
User Manual - Page 20
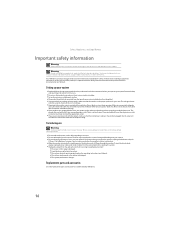
...monitor to rain or use eMachines products in areas classified as a radiator. ■ Set up the system on a stable work area. Replacement parts and accessories
Use only replacement parts and accessories recommended by eMachines.
16
The best way to avoid spills is damaged. ■ The system performance changes. Do not block or cover these instructions...servicing to... to install the ...
User Manual - Page 22
...Caution
Changes or modifications not expressly approved by eMachines could void the FCC compliance and negate your...digital apparatus does not exceed the Class B limits for radio noise emissions from digital apparatus as set out in the radio interference regulations of the FCC Rules. Le présent appareil numé... Irvine, CA 92618 USA This device complies with Part 15 of Industry Canada.
User Manual - Page 23
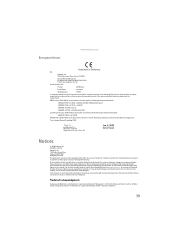
...part of it describes at any form, without notices or obligation. In no event will continue comply with the requirements. EMC Directive 2004/108/EC as attested by any means or in any time, without prior consent in this manual...-2-8691-3120 E-mail: easy_lai@acer.com.tw
Hereby declare that:
Product:
LCD Monitor
Trade Name:
emachine
Model Number:
E151H
Is compliant with the essential ...
eMachines E151H Reviews
We have not received any reviews for eMachines yet.