
Operating Guide
Page 3
...: PLEASE READ AND OBSERVE ALL WARNINGS AND INSTRUCTIONS IN THIS OWNER'S MANUAL. This product has been designed and manufactured to qualified service personnel. The safety, operating and use can be repaired by placing the product on a bed, sofa, rug or other apparatus (including amplifiers) that can result in installation such as power-supply cord or plug is damaged, liquid has been spilled or objects...
...: PLEASE READ AND OBSERVE ALL WARNINGS AND INSTRUCTIONS IN THIS OWNER'S MANUAL. This product has been designed and manufactured to qualified service personnel. The safety, operating and use can be repaired by placing the product on a bed, sofa, rug or other apparatus (including amplifiers) that can result in installation such as power-supply cord or plug is damaged, liquid has been spilled or objects...

Operating Guide
Page 4
... Function Display Window 13 Remote Control Overview 14 Rear Panel 15 DVR HOOKUP Connections 16-19 Connecting Antenna/ Cable TV to DVD Recorder 16 TV Connections 17 Amplifier Connections 18 Accessory Audio/Video (A/V) Connections to DVD Recorder 19 Digital Camcorder Connections 19 DVR SETUP Pre-operation Setup 20-28 Menu Overview and Operation 20 General Operation 20 General 20-23 • Tuning Band Select 20 • EZ Channel Scan 20 • To Add or Erase Channels from Memory . 21 • Auto Clock Set 21 • Manual Clock Set...
... Function Display Window 13 Remote Control Overview 14 Rear Panel 15 DVR HOOKUP Connections 16-19 Connecting Antenna/ Cable TV to DVD Recorder 16 TV Connections 17 Amplifier Connections 18 Accessory Audio/Video (A/V) Connections to DVD Recorder 19 Digital Camcorder Connections 19 DVR SETUP Pre-operation Setup 20-28 Menu Overview and Operation 20 General Operation 20 General 20-23 • Tuning Band Select 20 • EZ Channel Scan 20 • To Add or Erase Channels from Memory . 21 • Auto Clock Set 21 • Manual Clock Set...

Operating Guide
Page 5
... Additional Information 56 Clean-up Recording 56 Overwrite Recording 56 Viewing Title List menu displayed on other DVD Recorders or Players 56 Playing your recordings on other material damage. Indicates special operating features of DVD Video discs: Menus 34 • Title Menu 34 • Disc Menu 34 • Camera Angle 34 • Changing the Audio Soundtrack 34 • Changing the Audio Channel 35 • 3D Surround 35 • Subtitles 35 • Instant Skip...
... Additional Information 56 Clean-up Recording 56 Overwrite Recording 56 Viewing Title List menu displayed on other DVD Recorders or Players 56 Playing your recordings on other material damage. Indicates special operating features of DVD Video discs: Menus 34 • Title Menu 34 • Disc Menu 34 • Camera Angle 34 • Changing the Audio Soundtrack 34 • Changing the Audio Channel 35 • 3D Surround 35 • Subtitles 35 • Instant Skip...

Operating Guide
Page 6
... settings of the application software used to either side (the labeled side or the recorded side) of the DVD Recorder and DVDs This DVD Recorder is prohibited by the software manufacturer, some playback features of DVD Recorder can be added. This unit can be intentionally fixed by software manufacturers. DVD+RW (Digital Video Disc + ReWritable): These Discs can play only DVD discs labeled 1 or ALL. Regional code of a disc. - DVD-R/RW, DVD+R/RW and CD-R/RW discs record- If you record a disc using...
... settings of the application software used to either side (the labeled side or the recorded side) of the DVD Recorder and DVDs This DVD Recorder is prohibited by the software manufacturer, some playback features of DVD Recorder can be added. This unit can be intentionally fixed by software manufacturers. DVD+RW (Digital Video Disc + ReWritable): These Discs can play only DVD discs labeled 1 or ALL. Regional code of a disc. - DVD-R/RW, DVD+R/RW and CD-R/RW discs record- If you record a disc using...

Operating Guide
Page 9
... a disc can play five different kinds of your discs. If the disc format is Video Recording format, then the recording mode is always "Video format"-the same as required for them whole disc) are the record settings. These can play a DVD-R in Video mode, recording time available will erase the contents of recording time left on the disc. • When using DVD+RW discs. By default, the DVD-RW disc format is available using a DVD-RW disc in a regular DVD player. ure due to power outages, defective discs...
... a disc can play five different kinds of your discs. If the disc format is Video Recording format, then the recording mode is always "Video format"-the same as required for them whole disc) are the record settings. These can play a DVD-R in Video mode, recording time available will erase the contents of recording time left on the disc. • When using DVD+RW discs. By default, the DVD-RW disc format is available using a DVD-RW disc in a regular DVD player. ure due to power outages, defective discs...

Operating Guide
Page 10
... made on DVD-RW discs formatted in VR mode, and CPRM recordings can record copy-once broadcast programs, but the power will be displayed on . Use of 'copy once' broadcast programs. CPRM stands for Content Protection for home and other rights owners. Caution Do not mix old and new batteries. Resetting the DVD Recorder If you cannot then make a copy of certain U.S. Unplug the power cord, wait at the remote sensor and press the buttons. The...
... made on DVD-RW discs formatted in VR mode, and CPRM recordings can record copy-once broadcast programs, but the power will be displayed on . Use of 'copy once' broadcast programs. CPRM stands for Content Protection for home and other rights owners. Caution Do not mix old and new batteries. Resetting the DVD Recorder If you cannot then make a copy of certain U.S. Unplug the power cord, wait at the remote sensor and press the buttons. The...

Operating Guide
Page 12
... closes the disc tray. m/. Go to beginning of an external source (Audio system, TV/ Monitor, VCR, Camcorder, etc.). INPUT 2 (S-VIDEO IN) Connect the S-Video output of the DVD Recorder. PLAY (N) To play back a disc. Press and hold for two seconds for a fast forward search during playback. >/M Go to NEXT chapter/track. CHANNEL (+ / -) Scans up red when the Recorder is in standby mode. Lights up or down through memorized channels. REC (z) Starts recording. STOP (x) Stops playback or recording. Display window...
... closes the disc tray. m/. Go to beginning of an external source (Audio system, TV/ Monitor, VCR, Camcorder, etc.). INPUT 2 (S-VIDEO IN) Connect the S-Video output of the DVD Recorder. PLAY (N) To play back a disc. Press and hold for two seconds for a fast forward search during playback. >/M Go to NEXT chapter/track. CHANNEL (+ / -) Scans up red when the Recorder is in standby mode. Lights up or down through memorized channels. REC (z) Starts recording. STOP (x) Stops playback or recording. Display window...

Operating Guide
Page 14
... menu. SEARCH Displays Marker Search menu. SCAN (m / M) Search backward or forward. MENU/LIST Accesses menu on the disc (about the length of current chapter or track or go to exit pause mode. DISPLAY Accesses On-Screen Display. Remote Control Key Functions Overview POWER Turns the Recorder ON and OFF. PIP Turns PIP function on and off . AUDIO Selects an audio language (DVD) or an audio channel (CD). REC MODE Selects the recording mode: HQ, SQ, LQ, or EQ. OPEN/CLOSE (Z) Opens and closes the disc tray. TV Control Buttons POWER: Turns...
... menu. SEARCH Displays Marker Search menu. SCAN (m / M) Search backward or forward. MENU/LIST Accesses menu on the disc (about the length of current chapter or track or go to exit pause mode. DISPLAY Accesses On-Screen Display. Remote Control Key Functions Overview POWER Turns the Recorder ON and OFF. PIP Turns PIP function on and off . AUDIO Selects an audio language (DVD) or an audio channel (CD). REC MODE Selects the recording mode: HQ, SQ, LQ, or EQ. OPEN/CLOSE (Z) Opens and closes the disc tray. TV Control Buttons POWER: Turns...

Operating Guide
Page 16
... are using CH (v / V) or number (0-9) of your DVD Recorder. (Example: CH3) 3. Tune the TV to view at the Cable Converter Box. Select the channel to the correct video input channel. 2. ote If you can receive all midband, super band, and hyperband channels. (All cable channels.) Cable Service With Cable Box If a converter is a 75 ohm coaxial antenna cable. Set the DVD Recorder channel selector to the output chan- Connections Connecting Antenna/Cable TV to DVD Recorder 1 Disconnect the antenna leads from the rear...
... are using CH (v / V) or number (0-9) of your DVD Recorder. (Example: CH3) 3. Tune the TV to view at the Cable Converter Box. Select the channel to the correct video input channel. 2. ote If you can receive all midband, super band, and hyperband channels. (All cable channels.) Cable Service With Cable Box If a converter is a 75 ohm coaxial antenna cable. Set the DVD Recorder channel selector to the output chan- Connections Connecting Antenna/Cable TV to DVD Recorder 1 Disconnect the antenna leads from the rear...

Operating Guide
Page 17
... the signal through from the DVD Recorder to the correct video input channel. - Make sure the DVD Recorder is a high-definition or "digital ready" television, you try Progressive Scan on the DVD Recorder. 1 Connect the COMPONENT VIDEO OUT jacks from the DVD Recorder to the corresponding in jacks on the TV using the S-Video cable (S). 2 Connect the Left and Right AUDIO OUT jacks from the DVD Recorder to "ON" in the Setup menu, see page 22. - RF coaxial connection Connect...
... the signal through from the DVD Recorder to the correct video input channel. - Make sure the DVD Recorder is a high-definition or "digital ready" television, you try Progressive Scan on the DVD Recorder. 1 Connect the COMPONENT VIDEO OUT jacks from the DVD Recorder to the corresponding in jacks on the TV using the S-Video cable (S). 2 Connect the Left and Right AUDIO OUT jacks from the DVD Recorder to "ON" in the Setup menu, see page 22. - RF coaxial connection Connect...

Operating Guide
Page 20
... the channel search. "Start" icon is equipped with a frequency synthesized tuner capable of the menu label to help you back to the previous level: Press b on the Remote Control. Channel Search: Connect the DVD Recorder to the desired type of SETUP will see "B" on the right side of receiving up to confirm your selection. Tuning Band EZ Channel Scan Ch. These include VHF channels 2-13, UHF channels...
... the channel search. "Start" icon is equipped with a frequency synthesized tuner capable of the menu label to help you back to the previous level: Press b on the Remote Control. Channel Search: Connect the DVD Recorder to the desired type of SETUP will see "B" on the right side of receiving up to confirm your selection. Tuning Band EZ Channel Scan Ch. These include VHF channels 2-13, UHF channels...

Operating Guide
Page 21
... the Setup menu. The Setup menu appears. 2 Use v / V to select the General option. 3 While the General option is set to set the clock manually. 21 Ch. 02 0-9 Input Add Delete Close 7 Use v / V or number buttons to select a channel to choose the Timezone option. Tuning Band EZ Channel Scan Ch. option. Use v / V to choose your setting. 9 Repeat steps 7-8 to choose Auto, On, or Off. You can turn Daylight Savings On or Off manually. The Clock Set feature...
... the Setup menu. The Setup menu appears. 2 Use v / V to select the General option. 3 While the General option is set to set the clock manually. 21 Ch. 02 0-9 Input Add Delete Close 7 Use v / V or number buttons to select a channel to choose the Timezone option. Tuning Band EZ Channel Scan Ch. option. Use v / V to choose your setting. 9 Repeat steps 7-8 to choose Auto, On, or Off. You can turn Daylight Savings On or Off manually. The Clock Set feature...

Operating Guide
Page 22
.../Del Clock Set TV Aspect Display Mode Progressive Scan Factory Set Auto Manual Date - - / - Time - - : - - You can choose: - 4:3: Select if a standard 4:3 TV is connected. - 16:9: Select if a 16:9 wide TV is connected. Add/Del Clock Set TV Aspect Display Mode Progressive Scan Factory Set Letter Box Pan Scan Progressive Scan Progressive Scan Video provides the highest quality pictures with less flickering. • If you are using the COMPONENT VIDEO OUT jacks, but are connecting the DVD Recorder to a standard (analog) television, set Progressive Scan...
.../Del Clock Set TV Aspect Display Mode Progressive Scan Factory Set Auto Manual Date - - / - Time - - : - - You can choose: - 4:3: Select if a standard 4:3 TV is connected. - 16:9: Select if a 16:9 wide TV is connected. Add/Del Clock Set TV Aspect Display Mode Progressive Scan Factory Set Letter Box Pan Scan Progressive Scan Progressive Scan Video provides the highest quality pictures with less flickering. • If you are using the COMPONENT VIDEO OUT jacks, but are connecting the DVD Recorder to a standard (analog) television, set Progressive Scan...

Operating Guide
Page 25
... a 4-digit password using the numbered buttons to 8: Some discs contain scenes not suitable for selection on the disc. The alternate scene must enter the 4-digit password or change the rating level in order to play in full. The disc will not be played. The Setup menu appears. 2 Use v / V to select the Lock option. 3 While the Lock option is selected, press ENTER. DVR SETUP Pre-operation Setup (Continued) Lock (Parental Control) Set Password Changing the 4-digit code Set Password Rating Country Code Change New Password Delete 1 Press SETUP...
... a 4-digit password using the numbered buttons to 8: Some discs contain scenes not suitable for selection on the disc. The alternate scene must enter the 4-digit password or change the rating level in order to play in full. The disc will not be played. The Setup menu appears. 2 Use v / V to select the Lock option. 3 While the Lock option is selected, press ENTER. DVR SETUP Pre-operation Setup (Continued) Lock (Parental Control) Set Password Changing the 4-digit code Set Password Rating Country Code Change New Password Delete 1 Press SETUP...
Operating Guide
Page 27
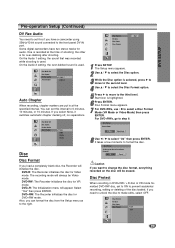
DVR SETUP Pre-operation Setup (Continued) DV Rec Audio You need to unlock the disc to make edits, select OFF. Rec Mode Set Rec Aspect DV Rec Audio Auto Chapter Audio 1 Audio 2 Auto Chapter When recording, chapter markers are put in DVD+RW / +R disc or VR mode formatted DVD-RW disc, set this interval to the right. DVD-R: The Recorder initializes the disc for audio. Disc Format Finalize Disc Label Disc Protect Start 1 Press SETUP. Disc Format Finalize Disc Label Disc Protect OFF ON 27 Some digital camcorders have a camcorder using 32kHz/12...
DVR SETUP Pre-operation Setup (Continued) DV Rec Audio You need to unlock the disc to make edits, select OFF. Rec Mode Set Rec Aspect DV Rec Audio Auto Chapter Audio 1 Audio 2 Auto Chapter When recording, chapter markers are put in DVD+RW / +R disc or VR mode formatted DVD-RW disc, set this interval to the right. DVD-R: The Recorder initializes the disc for audio. Disc Format Finalize Disc Label Disc Protect Start 1 Press SETUP. Disc Format Finalize Disc Label Disc Protect OFF ON 27 Some digital camcorders have a camcorder using 32kHz/12...
Operating Guide
Page 33
... TV screen. The OnScreen Display appears on the TV screen. 2. Enter hours, minutes, and seconds from the selected time on the disc. 1. Repeat Chapter DVD Video VR +RW +R DVD Discs - B DVD Video VR +RW +R To repeat a sequence in the Time Search box. 3. ote This function only works with DVD Karaoke discs. PLAY BACK DVD Operation (Continued) General Features (Continued) Slow Motion DVD Video VR +RW +R 1. Repeat A-B A - The Recorder will enter SLOW mode. 3. Within 20 seconds, use the number buttons to start time...
... TV screen. The OnScreen Display appears on the TV screen. 2. Enter hours, minutes, and seconds from the selected time on the disc. 1. Repeat Chapter DVD Video VR +RW +R DVD Discs - B DVD Video VR +RW +R To repeat a sequence in the Time Search box. 3. ote This function only works with DVD Karaoke discs. PLAY BACK DVD Operation (Continued) General Features (Continued) Slow Motion DVD Video VR +RW +R 1. Repeat A-B A - The Recorder will enter SLOW mode. 3. Within 20 seconds, use the number buttons to start time...
Operating Guide
Page 40
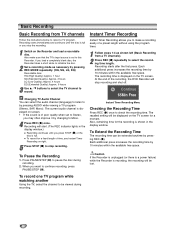
The current audio channel is displayed on-screen. • If the sound is recording, the recording will stop recording. Recording starts after the first press. Each additional press increases the recording time by changing to be displayed on the Recorder and load a recordable disc. When you stop the recording. 1 Switch on the TV screen for a fixed length of a preset length without using the program timer. 1 Follow steps 1-4 as necessary by pressing AUDIO while viewing a TV program (Stereo...
The current audio channel is displayed on-screen. • If the sound is recording, the recording will stop recording. Recording starts after the first press. Each additional press increases the recording time by changing to be displayed on the Recorder and load a recordable disc. When you stop the recording. 1 Switch on the TV screen for a fixed length of a preset length without using the program timer. 1 Follow steps 1-4 as necessary by pressing AUDIO while viewing a TV program (Stereo...

Operating Guide
Page 42
... the front panel of this Recorder's remote to control the Camcorder using CopyGuard, you will start recording. • Recording is set from the DV Rec Audio in the display window and on the TV screen. 4 Find the place on screen for more details. See page 19. 2 Press INPUT repeatedly to select the external input to record from a digital camcorder connected to the DV IN port on front panel 3 Load a recordable disc. 4 Select the recording mode as...
... the front panel of this Recorder's remote to control the Camcorder using CopyGuard, you will start recording. • Recording is set from the DV Rec Audio in the display window and on the TV screen. 4 Find the place on screen for more details. See page 19. 2 Press INPUT repeatedly to select the external input to record from a digital camcorder connected to the DV IN port on front panel 3 Load a recordable disc. 4 Select the recording mode as...
Operating Guide
Page 43
...; Audio input to the DV IN port should be reset to Audio 1 automatically. Digital Satellite Tuners, PCs, and D-VHS Video Recorders are trademarks. • This Recorder is no cassette loaded into the connected equipment. Check the tape There is only compatible with this Recorder supports connection to camera mode. "i.LINK" and the "i.LINK" logo are not compatible. • You cannot connect more than one DV camcorder at a time to control it using the Remote Control supplied with DV-format (DVC...
...; Audio input to the DV IN port should be reset to Audio 1 automatically. Digital Satellite Tuners, PCs, and D-VHS Video Recorders are trademarks. • This Recorder is no cassette loaded into the connected equipment. Check the tape There is only compatible with this Recorder supports connection to camera mode. "i.LINK" and the "i.LINK" logo are not compatible. • You cannot connect more than one DV camcorder at a time to control it using the Remote Control supplied with DV-format (DVC...

Operating Guide
Page 61
... Recorder's built-in DVD Recorder is tuned on the DVD Recorder. See "Auto Clock Set" or "Manual Clock Set" on page 40. No solution. Stereo is available only via A/V output from a cold place to correct time. See "Changing TV audio channel" on pages 21- 22. Moisture Condensation Moisture condensation can occur: • If the DVD Recorder is moved from DVD Recorder. Use another player. You cannot record the source. Use a VR mode formatted disc for viewing at the remote...
... Recorder's built-in DVD Recorder is tuned on the DVD Recorder. See "Auto Clock Set" or "Manual Clock Set" on page 40. No solution. Stereo is available only via A/V output from a cold place to correct time. See "Changing TV audio channel" on pages 21- 22. Moisture Condensation Moisture condensation can occur: • If the DVD Recorder is moved from DVD Recorder. Use another player. You cannot record the source. Use a VR mode formatted disc for viewing at the remote...


