

Owner's Manual
Page 5
... (P.13) ) & (P.7) , INPUT (P.11) _ REPEAT A-B (P.9) REPEAT S/F (P.9) - In such cases, reposition the main unit to the owner's manual of RX-E100/CDX-E100.) Remote Control Operation Range Battery Installation 30° 30° 6 m Notes • There should be used for replacement. • Be sure to ...insert the batteries with the YAMAHA receiver RX-E100 to execute main operations of them immediately. English...
... (P.13) ) & (P.7) , INPUT (P.11) _ REPEAT A-B (P.9) REPEAT S/F (P.9) - In such cases, reposition the main unit to the owner's manual of RX-E100/CDX-E100.) Remote Control Operation Range Battery Installation 30° 30° 6 m Notes • There should be used for replacement. • Be sure to ...insert the batteries with the YAMAHA receiver RX-E100 to execute main operations of them immediately. English...

Owner's Manual
Page 6
...manual supplied with the component you are connecting. • If the placement of this unit causes noise in other components) until all connections are complete. • Connections should be connected to the DIGITAL OPTICAL OUT jack on the rear panel of the receiver RX-E100... of YAMAHA E100 series. E-6 This unit (MDX-E100) ANALOG SYSTEM IN D L C OUT CONNECTOR DIGITAL OPTICAL 1 2 OUT IN R MAINS To CDX-E100 (except for U.K. model) RCA pin cables (included) Optical fiber cable (included) System control cable (included) CD player (CDX-E100) MAINS To RX-E100 ANALOG ...
...manual supplied with the component you are connecting. • If the placement of this unit causes noise in other components) until all connections are complete. • Connections should be connected to the DIGITAL OPTICAL OUT jack on the rear panel of the receiver RX-E100... of YAMAHA E100 series. E-6 This unit (MDX-E100) ANALOG SYSTEM IN D L C OUT CONNECTOR DIGITAL OPTICAL 1 2 OUT IN R MAINS To CDX-E100 (except for U.K. model) RCA pin cables (included) Optical fiber cable (included) System control cable (included) CD player (CDX-E100) MAINS To RX-E100 ANALOG ...
Owner's Manual
Page 12
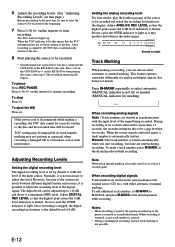
... digital signals. During recording, if no sound is set by default to 0 dB, the level of the source to MANUAL and press M-MARK at the desired position while recording. Press ^ on the CDX-E100 or # on the remote) to a minimum (MIN) level. L dB -00 -60 -30 -10 R -6 4 -2 -1 0 OVER... Should not light Track Marking When making a recording, the TOC data cannot be erased. Note When using manual marking, the marks must be impossible (or ...
... digital signals. During recording, if no sound is set by default to 0 dB, the level of the source to MANUAL and press M-MARK at the desired position while recording. Press ^ on the CDX-E100 or # on the remote) to a minimum (MIN) level. L dB -00 -60 -30 -10 R -6 4 -2 -1 0 OVER... Should not light Track Marking When making a recording, the TOC data cannot be erased. Note When using manual marking, the marks must be impossible (or ...


