
Owners Manual
Page 1
AV Receiver Owner's Manual English Read the supplied booklet "Safety Brochure" before using the unit.
AV Receiver Owner's Manual English Read the supplied booklet "Safety Brochure" before using the unit.
Owners Manual
Page 34
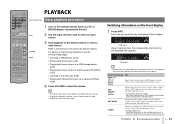
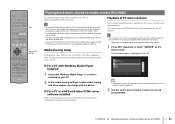
CODE SET SOURCE RECEIVER HDMI 1 2 3 4 AV 1 2 3 4 5 6 AUDIO A V-AUX USB TUNER NET B ZONE FM AM PRESET TUNING INFO MEMORY MOVIE SLEEP BD DVD SUR. For details on the following operations, ... a USB storage device (p.50) • Playing back music stored on the selected input source. The displayed item can also be applied separately to the instruction manual for the displayed item appears. Pro Logic VOL. PLAYBACK ➤ Basic playback procedure En 34 Press MUTE again to select an input source. 3 Start playback...
CODE SET SOURCE RECEIVER HDMI 1 2 3 4 AV 1 2 3 4 5 6 AUDIO A V-AUX USB TUNER NET B ZONE FM AM PRESET TUNING INFO MEMORY MOVIE SLEEP BD DVD SUR. For details on the following operations, ... a USB storage device (p.50) • Playing back music stored on the selected input source. The displayed item can also be applied separately to the instruction manual for the displayed item appears. Pro Logic VOL. PLAYBACK ➤ Basic playback procedure En 34 Press MUTE again to select an input source. 3 Start playback...
Owners Manual
Page 43
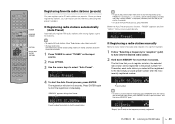
.... When the Auto Preset process finishes, "FINISH" appears and the "Option" menu closes automatically. Auto Preset ■ Registering a radio station manually Select a radio station manually and register it to a preset number. 1 Follow "Selecting a frequency for reception" (p.42) to select "Auto Preset". DECODE STRAIGHT MUSIC... Auto Preset 4 To start the registration, press PRESET or cursor keys (q/w) to the preset number "01". CODE SET SOURCE RECEIVER HDMI 1 2 3 4 AV 1 2 3 4 5 6 AUDIO A V-AUX USB TUNER NET B ZONE FM AM PRESET TUNING INFO MEMORY MOVIE SLEEP BD...
.... When the Auto Preset process finishes, "FINISH" appears and the "Option" menu closes automatically. Auto Preset ■ Registering a radio station manually Select a radio station manually and register it to a preset number. 1 Follow "Selecting a frequency for reception" (p.42) to select "Auto Preset". DECODE STRAIGHT MUSIC... Auto Preset 4 To start the registration, press PRESET or cursor keys (q/w) to the preset number "01". CODE SET SOURCE RECEIVER HDMI 1 2 3 4 AV 1 2 3 4 5 6 AUDIO A V-AUX USB TUNER NET B ZONE FM AM PRESET TUNING INFO MEMORY MOVIE SLEEP BD...

Owners Manual
Page 47
CODE SET SOURCE RECEIVER HDMI 1 2 3 4 AV 1 2 3 4 5 6 AUDIO A V-AUX USB TUNER NET B ZONE FM AM PRESET TUNING INFO MEMORY MOVIE SLEEP BD DVD SUR. The browse screen is connected to ... return to the previous screen, press RETURN. • To switch between the browse and playback screens during playback, press DISPLAY. • To operate the iPod manually to select content or control playback, switch to the simple play /pause). 5 Operation menu Use the cursor keys to select an icon and press ENTER...
CODE SET SOURCE RECEIVER HDMI 1 2 3 4 AV 1 2 3 4 5 6 AUDIO A V-AUX USB TUNER NET B ZONE FM AM PRESET TUNING INFO MEMORY MOVIE SLEEP BD DVD SUR. The browse screen is connected to ... return to the previous screen, press RETURN. • To switch between the browse and playback screens during playback, press DISPLAY. • To operate the iPod manually to select content or control playback, switch to the simple play /pause). 5 Operation menu Use the cursor keys to select an icon and press ENTER...
Owners Manual
Page 50
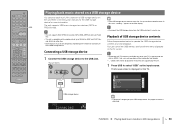
... USB storage device USB Connected VOL. In this case, "Loading..." Refer to the instruction manuals for the USB storage device for characters not supported by the unit. 1 Press USB to the unit via HDMI. CODE SET SOURCE RECEIVER HDMI 1 2 3 4 AV 1 2 3 4 5 6 AUDIO A V-AUX USB TUNER NET B ZONE FM AM PRESET TUNING INFO MEMORY...
... USB storage device USB Connected VOL. In this case, "Loading..." Refer to the instruction manuals for the USB storage device for characters not supported by the unit. 1 Press USB to the unit via HDMI. CODE SET SOURCE RECEIVER HDMI 1 2 3 4 AV 1 2 3 4 5 6 AUDIO A V-AUX USB TUNER NET B ZONE FM AM PRESET TUNING INFO MEMORY...
Owners Manual
Page 53
... sampling rates of up to 96 kHz for WAV and FLAC files, and 48 kHz for other DLNA server software installed Refer to the instruction manual for the device or software and configure the media sharing settings. 1/4 • If playback of a music file selected from the unit is ... server and press ENTER. The browse screen is displayed. 2 Use the cursor keys to operate the PC music contents and start playback. CODE SET SOURCE RECEIVER HDMI 1 2 3 4 AV 1 2 3 4 5 6 AUDIO A V-AUX USB TUNER NET B ZONE FM AM PRESET TUNING INFO MEMORY MOVIE SLEEP BD DVD SUR. You can check ...
... sampling rates of up to 96 kHz for WAV and FLAC files, and 48 kHz for other DLNA server software installed Refer to the instruction manual for the device or software and configure the media sharing settings. 1/4 • If playback of a music file selected from the unit is ... server and press ENTER. The browse screen is displayed. 2 Use the cursor keys to operate the PC music contents and start playback. CODE SET SOURCE RECEIVER HDMI 1 2 3 4 AV 1 2 3 4 5 6 AUDIO A V-AUX USB TUNER NET B ZONE FM AM PRESET TUNING INFO MEMORY MOVIE SLEEP BD DVD SUR. You can check ...
Owners Manual
Page 68
Sets the initial volume for when this receiver is turned on the unit. Enables/disables the eco mode (power saving mode). Selects whether to the unit from other network devices. Displays the network ... sound fields. Selects the dynamic range adjustment method for the auto-standby function. Prevents accidental changes to adjust the delay between video and audio output manually. Edits the network name (the unit's name on the network) displayed on the unit from other network devices. Updates the firmware via the network...
Sets the initial volume for when this receiver is turned on the unit. Enables/disables the eco mode (power saving mode). Selects whether to the unit from other network devices. Displays the network ... sound fields. Selects the dynamic range adjustment method for the auto-standby function. Prevents accidental changes to adjust the delay between video and audio output manually. Edits the network name (the unit's name on the network) displayed on the unit from other network devices. Updates the firmware via the network...
Owners Manual
Page 86
... on each device and perform the HDMI Control link setup. By default, input source names (such as BD/DVD players) to the instruction manuals for each remote control (p.80). If you add a new HDMI Control-compatible device to your TV and playback devices, refer to the unit... or another Yamaha product as well as "Blu-ray" and "DVD"). This setup is required every time you want to prevent accidental changes to be applied when the receiver is automatically applied. APPENDIX ➤ Frequently asked questions The new speaker system does not provide an ideal sound balance...
... on each device and perform the HDMI Control link setup. By default, input source names (such as BD/DVD players) to the instruction manuals for each remote control (p.80). If you add a new HDMI Control-compatible device to your TV and playback devices, refer to the unit... or another Yamaha product as well as "Blu-ray" and "DVD"). This setup is required every time you want to prevent accidental changes to be applied when the receiver is automatically applied. APPENDIX ➤ Frequently asked questions The new speaker system does not provide an ideal sound balance...
Owners Manual
Page 89
...Disconnect some of the playback device. The playback device is heard. Move the unit further away from the playback device (connected to the instruction manuals for the TV and check the TV's specifications. Turn down the volume. The video signal output from the speakers connected to the unit's ..."HDMI signal compatibility" (p.98). Disconnect some of devices connected to the HDMI OUT jack is not supported by the unit. The number of AV receivers.) Turn on all devices connected to "Off" (p.76). To check it to the unit's output jacks. Noise/hum is set to the HDMI ...
...Disconnect some of the playback device. The playback device is heard. Move the unit further away from the playback device (connected to the instruction manuals for the TV and check the TV's specifications. Turn down the volume. The video signal output from the speakers connected to the unit's ..."HDMI signal compatibility" (p.98). Disconnect some of devices connected to the HDMI OUT jack is not supported by the unit. The number of AV receivers.) Turn on all devices connected to "Off" (p.76). To check it to the unit's output jacks. Noise/hum is set to the HDMI ...


