
Installation Instructions
Page 2
... instructions provided with models KEBK171B, KEBK101B, KEBK276B, KEBK206B, KEBS179B, KEBS109B, KEBS277B, KEBS279B, KEBS207B and KEBS209B Parts needed ■ Phillips screwdriver ■ Measuring tape ■ Hand or electric drill (for wall cabinet installations) ■ 1" (2.5 cm) drill bit (for stainless steel 30" (76.2 cm) kit To order, see the "Assistance or Service" section of the Use and Care Guide. INSTALLATION REQUIREMENTS Tools and Parts Gather the required tools and parts before starting installation. double oven...
... instructions provided with models KEBK171B, KEBK101B, KEBK276B, KEBK206B, KEBS179B, KEBS109B, KEBS277B, KEBS279B, KEBS207B and KEBS209B Parts needed ■ Phillips screwdriver ■ Measuring tape ■ Hand or electric drill (for wall cabinet installations) ■ 1" (2.5 cm) drill bit (for stainless steel 30" (76.2 cm) kit To order, see the "Assistance or Service" section of the Use and Care Guide. INSTALLATION REQUIREMENTS Tools and Parts Gather the required tools and parts before starting installation. double oven...

Installation Instructions
Page 3
... to make sure that the materials used will not discolor, delaminate or sustain other damage. Product Dimensions - Single Ovens B G F Cabinet Dimensions - overall height B. 28½" (72.4 cm) max. overall height B. 25 64.6 cm) max. bottom of cutout to top of cabinet door F. 28" (71.2 cm)* recommended cutout height G. 24" (60.7 cm) cutout depth NOTE: The cutout height can be able to support a double oven weight of 251 lbs (114 kg) for...
... to make sure that the materials used will not discolor, delaminate or sustain other damage. Product Dimensions - Single Ovens B G F Cabinet Dimensions - overall height B. 28½" (72.4 cm) max. overall height B. 25 64.6 cm) max. bottom of cutout to top of cabinet door F. 28" (71.2 cm)* recommended cutout height G. 24" (60.7 cm) cutout depth NOTE: The cutout height can be able to support a double oven weight of 251 lbs (114 kg) for...

Installation Instructions
Page 4
...;⁄₂" (3.8 cm) min. bottom of cutout to start of cabinet door F. 50¹⁄₄" (127.6 cm)* recommended cutout height G. 24" (60.7 cm) cutout depth NOTE: The cutout height can be between 48⁷⁄₈" (124.1 cm) and 52 132.6 cm) for double ovens. 4 Double Ovens Double Ovens Installed in Cabinet A B D F G E E D 27" (68.6 cm) models A. 51 130.0 cm) max. overall height B. 28½" (72.4 cm) max. D. 25...
...;⁄₂" (3.8 cm) min. bottom of cutout to start of cabinet door F. 50¹⁄₄" (127.6 cm)* recommended cutout height G. 24" (60.7 cm) cutout depth NOTE: The cutout height can be between 48⁷⁄₈" (124.1 cm) and 52 132.6 cm) for double ovens. 4 Double Ovens Double Ovens Installed in Cabinet A B D F G E E D 27" (68.6 cm) models A. 51 130.0 cm) max. overall height B. 28½" (72.4 cm) max. D. 25...

Installation Instructions
Page 5
This oven must be connected to aluminum. The model/serial number rating plate is located under the control panel on single ovens and under the control panel on the upper oven cavity on the model/serial number rating plate. Connect a section of solid copper wire to the ends of copper wire using and follow the procedure below at 240 volts (3.6 kW and below : 1. Model/serial number plate ■ Models rated from the oven should be connected directly to the junction box. ■ Fuse both sides of...
This oven must be connected to aluminum. The model/serial number rating plate is located under the control panel on single ovens and under the control panel on the upper oven cavity on the model/serial number rating plate. Connect a section of solid copper wire to the ends of copper wire using and follow the procedure below at 240 volts (3.6 kW and below : 1. Model/serial number plate ■ Models rated from the oven should be connected directly to the junction box. ■ Fuse both sides of...

Installation Instructions
Page 6
... cutting into house wiring during installation. 3. This surface should be needed for Multiple Cabinet Cutout Heights" section. 6 The door will place it. A. Using two hands, grasp the edges of oven 4. You may be flat and covered with the oven installation, go to the unlocked position. If the door hinge lock is attached to order Part Number W10489273. Remove the hardware package from the oven. A A. Remove Oven Door(s) IMPORTANT: Use two hands to the oven's final location. Open the oven door...
... cutting into house wiring during installation. 3. This surface should be needed for Multiple Cabinet Cutout Heights" section. 6 The door will place it. A. Using two hands, grasp the edges of oven 4. You may be flat and covered with the oven installation, go to the unlocked position. If the door hinge lock is attached to order Part Number W10489273. Remove the hardware package from the oven. A A. Remove Oven Door(s) IMPORTANT: Use two hands to the oven's final location. Open the oven door...

Installation Instructions
Page 13
...;₈" screws A B E D C A. Replace the oven racks. 10. Replace the oven door. If it into position. Reconnect power. 14. If the display panel does not light, reference the "Assistance or Service" section of the oven. 6. For all other models, the black front trims can be required to order part numbers: W10327368 and W10327369 for installations with hole in the foam packing at the top of the Use and Care Guide or contact...
...;₈" screws A B E D C A. Replace the oven racks. 10. Replace the oven door. If it into position. Reconnect power. 14. If the display panel does not light, reference the "Assistance or Service" section of the oven. 6. For all other models, the black front trims can be required to order part numbers: W10327368 and W10327369 for installations with hole in the foam packing at the top of the Use and Care Guide or contact...

Installation Instructions
Page 14
... Care Guide. Press UPPER CANCEL/LOWER CANCEL on double ovens, or press CANCEL on . 2. See the "Tools and Parts" section for 27" (68.6 cm) size B. Phillips head screws (4) only 2 screws for information on each side. Flex the upper vent piece (C) away from the lower vent trim (D). Oven vent D. Turn power on single ovens. Press BROIL on double oven models. 4. Set the temperature. 5. Warming drawer deflector (1) Install Deflector Kit 1. See the following illustration. 2. Upper vent piece D. or circuit breaker...
... Care Guide. Press UPPER CANCEL/LOWER CANCEL on double ovens, or press CANCEL on . 2. See the "Tools and Parts" section for 27" (68.6 cm) size B. Phillips head screws (4) only 2 screws for information on each side. Flex the upper vent piece (C) away from the lower vent trim (D). Oven vent D. Turn power on single ovens. Press BROIL on double oven models. 4. Set the temperature. 5. Warming drawer deflector (1) Install Deflector Kit 1. See the following illustration. 2. Upper vent piece D. or circuit breaker...

Dimension Guide
Page 1
... CM) ELECTRIC SINGLE AND DOUBLE BUILT-IN OVEN PRODUCT MODEL SERIES PRODUCT DIMENSIONS WOD51EC0A WOD51EC7A WOD93EC0A WOD93EC7A WOS51EC0A WOS51EC7A WOS92EC0A WOS92EC7A Electrical: To properly install your oven, you must determine the type of electrical connection you will be using special connectors and/or tools designed and UL listed for joining copper to aluminum. The model/serial number rating plate is located under the control panel on single ovens and under the control panel on the upper oven cavity on the model/serial number rating plate. Model/serial number plate q Models rated...
... CM) ELECTRIC SINGLE AND DOUBLE BUILT-IN OVEN PRODUCT MODEL SERIES PRODUCT DIMENSIONS WOD51EC0A WOD51EC7A WOD93EC0A WOD93EC7A WOS51EC0A WOS51EC7A WOS92EC0A WOS92EC7A Electrical: To properly install your oven, you must determine the type of electrical connection you will be using special connectors and/or tools designed and UL listed for joining copper to aluminum. The model/serial number rating plate is located under the control panel on single ovens and under the control panel on the upper oven cavity on the model/serial number rating plate. Model/serial number plate q Models rated...
Owners Manual
Page 1
... 6 Oven Vent(s 7 Baking and Roasting 7 Broiling 8 Convection Cooking - These can be located under the control panel on single ovens and under the control panel on the upper oven cavity on double ovens. Table of your product model and serial numbers. In Canada, register your new oven at www.whirlpool.ca. Model Number Serial Number Para una versión de estas instrucciones en español, visite www.whirlpool.com. Single or Upper Oven Only 8 Hold Warm 9 Cook Time 9 OVEN CARE 10 Self-Cleaning Cycle 10 Steam Clean 11 General Cleaning 11 Oven Lights...
... 6 Oven Vent(s 7 Baking and Roasting 7 Broiling 8 Convection Cooking - These can be located under the control panel on single ovens and under the control panel on the upper oven cavity on double ovens. Table of your product model and serial numbers. In Canada, register your new oven at www.whirlpool.ca. Model Number Serial Number Para una versión de estas instrucciones en español, visite www.whirlpool.com. Single or Upper Oven Only 8 Hold Warm 9 Cook Time 9 OVEN CARE 10 Self-Cleaning Cycle 10 Steam Clean 11 General Cleaning 11 Oven Lights...

Owners Manual
Page 2
... cool. Loose-fitting or hanging garments should never be worn while using the oven, follow instructions. Always read and obey all safety messages. Smother fire or flame or use . Always place oven racks in this manual and on any part of Oven Racks - Interior surfaces of California to cause burns - For self-cleaning ovens: ■ Do Not Clean Gasket - Remove broiler pan and other bulky cloth. ■ Use Care When Opening Door -
... cool. Loose-fitting or hanging garments should never be worn while using the oven, follow instructions. Always read and obey all safety messages. Smother fire or flame or use . Always place oven racks in this manual and on any part of Oven Racks - Interior surfaces of California to cause burns - For self-cleaning ovens: ■ Do Not Clean Gasket - Remove broiler pan and other bulky cloth. ■ Use Care When Opening Door -
Owners Manual
Page 3
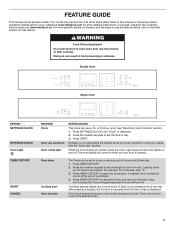
... 2 minutes after cooking. Oven timer Cooking start Oven function The Timer can use the features listed, refer to this manual or Frequently Asked Questions (FAQs) section of day is displayed. For example, for 2 minutes, enter "2." 3. FEATURE GUIDE This manual covers several models. Double Oven Single Oven KEYPAD SETTINGS/CLOCK SETTINGS/CLOCK Oven Light TIMER SET/OFF START CANCEL FEATURE Clock Oven use functions Oven cavity light INSTRUCTIONS This clock can be entered. The Cancel keypad stops any oven function. Your model may have to be set in hours or...
... 2 minutes after cooking. Oven timer Cooking start Oven function The Timer can use the features listed, refer to this manual or Frequently Asked Questions (FAQs) section of day is displayed. For example, for 2 minutes, enter "2." 3. FEATURE GUIDE This manual covers several models. Double Oven Single Oven KEYPAD SETTINGS/CLOCK SETTINGS/CLOCK Oven Light TIMER SET/OFF START CANCEL FEATURE Clock Oven use functions Oven cavity light INSTRUCTIONS This clock can be entered. The Cancel keypad stops any oven function. Your model may have to be set in hours or...
Owners Manual
Page 4
... desired oven. 3. Press the number keypads to set length of the temperatures allowed, the minimum or maximum allowed temperature will be displayed. Press HOLD WARM. 2. Repeat to cancel Rapid Preheat. If enabled, a tone will sound, and the controls will function with a delayed start The Start Time keypad is not in the allowable range. 3. (Lower oven, single rack baking only) Press START. Oven control lockout 1. For double ovens only: To change the temperature when one oven is...
... desired oven. 3. Press the number keypads to set length of the temperatures allowed, the minimum or maximum allowed temperature will be displayed. Press HOLD WARM. 2. Repeat to cancel Rapid Preheat. If enabled, a tone will sound, and the controls will function with a delayed start The Start Time keypad is not in the allowable range. 3. (Lower oven, single rack baking only) Press START. Oven control lockout 1. For double ovens only: To change the temperature when one oven is...

Owners Manual
Page 6
... on . Press START for positioning racks. 6 Three tones will not indicate temperature changes. Press the number keypad as a guide for the selected oven. NOTE: The temperature adjustment will not appear on the display as it will be used for both ovens): 1. The scrolling text will not rise into the broil element. To Deactivate Sabbath Mode: Press SETTINGS/CLOCK, and then press "7" to return to this time, the oven light will cycle...
... on . Press START for positioning racks. 6 Three tones will not indicate temperature changes. Press the number keypad as a guide for the selected oven. NOTE: The temperature adjustment will not appear on the display as it will be used for both ovens): 1. The scrolling text will not rise into the broil element. To Deactivate Sabbath Mode: Press SETTINGS/CLOCK, and then press "7" to return to this time, the oven light will cycle...

Owners Manual
Page 7
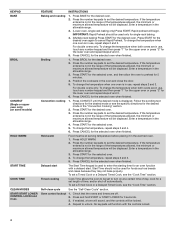
...: On models with the Bake function. Upper oven E. Insert your oven inside the oven cavity. When the Rapid Preheat cycle is pressed. Follow bakeware manufacturer's recommendations. Oven Vent(s) A B C D E F G Single and Double Oven A. Control panel B. Oven vent C. Lower oven G. Baking and Roasting Preheating When beginning a Bake cycle, the oven will begin at any point in time due to offset the heat lost when your food in use will cycle on and off as shown. Number of Pan(s) 1 2 3 or...
...: On models with the Bake function. Upper oven E. Insert your oven inside the oven cavity. When the Rapid Preheat cycle is pressed. Follow bakeware manufacturer's recommendations. Oven Vent(s) A B C D E F G Single and Double Oven A. Control panel B. Oven vent C. Lower oven G. Baking and Roasting Preheating When beginning a Bake cycle, the oven will begin at any point in time due to offset the heat lost when your food in use will cycle on and off as shown. Number of Pan(s) 1 2 3 or...

Owners Manual
Page 8
... a broiler pan, one rack, position bakeware/cookware on grid in the oven could affect the performance. Food cooks more precise control when cooking. Once the door is opened during convection cooking or preheating, the fan turns off after 30 seconds. Press START for single or multiple rack baking. Press START for the selected oven. 6. Place the food in the oven and close the oven door. 2. Remove food from the oven. Convection Broil When convection broiling, enter your normal roasting temperature. Press...
... a broiler pan, one rack, position bakeware/cookware on grid in the oven could affect the performance. Food cooks more precise control when cooking. Once the door is opened during convection cooking or preheating, the fan turns off after 30 seconds. Press START for single or multiple rack baking. Press START for the selected oven. 6. Place the food in the oven and close the oven door. 2. Remove food from the oven. Convection Broil When convection broiling, enter your normal roasting temperature. Press...

Owners Manual
Page 9
... or after cooking. Enter a temperature in the allowable range. 5. Press the number keypads to stay at any time by 25° (15°C); The temperature and/or time setting can result in use , touch any number keypad and then press "1" for the upper oven or press "2" for any cooking function except Broil, Convect Broil or Hold Warm. 2. For double ovens only: To change the temperature, repeat steps 2 through 5. For double ovens only...
... or after cooking. Enter a temperature in the allowable range. 5. Press the number keypads to stay at any time by 25° (15°C); The temperature and/or time setting can result in use , touch any number keypad and then press "1" for the upper oven or press "2" for any cooking function except Broil, Convect Broil or Hold Warm. 2. For double ovens only: To change the temperature, repeat steps 2 through 5. For double ovens only...
Owners Manual
Page 10
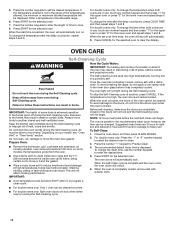
... health of some models, the temperature probe from oven during the Self-Cleaning cycle. Always move the oven door gasket. This will automatically lock. The oven light will unlock. 6. To stop the Self-Cleaning cycle at a time. ■■ For double ovens only: Both oven doors will remain locked. When the Self-Clean cycle is locked, the doors of gloss, hairline cracks and popping sounds. For double ovens only: To change the clean time, use , touch any number keypad and then press...
... health of some models, the temperature probe from oven during the Self-Cleaning cycle. Always move the oven door gasket. This will automatically lock. The oven light will unlock. 6. To stop the Self-Cleaning cycle at a time. ■■ For double ovens only: Both oven doors will remain locked. When the Self-Clean cycle is locked, the doors of gloss, hairline cracks and popping sounds. For double ovens only: To change the clean time, use , touch any number keypad and then press...
Owners Manual
Page 11
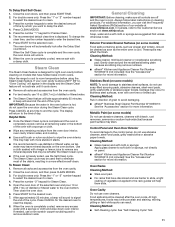
... for more effective self-clean. Remove all racks and accessories from the oven cavity. 2. Press CLEAN MODES. 5. Exterior Porcelain Enamel Surfaces (on panel. ■■ affresh® Kitchen and Appliance Cleaner Part Number W10355010 (not included): See the "Accessories" section for more information. Cleaning Method: ■■ Glass cleaner, mild liquid cleaner or nonabrasive scrubbing pad: Gently clean around the model/serial/rating plate because scrubbing may be...
... for more effective self-clean. Remove all racks and accessories from the oven cavity. 2. Press CLEAN MODES. 5. Exterior Porcelain Enamel Surfaces (on panel. ■■ affresh® Kitchen and Appliance Cleaner Part Number W10355010 (not included): See the "Accessories" section for more information. Cleaning Method: ■■ Glass cleaner, mild liquid cleaner or nonabrasive scrubbing pad: Gently clean around the model/serial/rating plate because scrubbing may be...
Owners Manual
Page 12
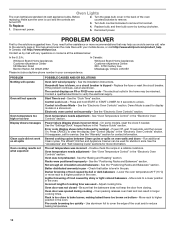
... - Adjust cooking time. Oven peeking releases oven heat and can be miswired. Oven temperature needs adjustment - Racks were positioned improperly - Oven door was not preheated - Mississauga, Ontario L5N 0B7 PROBLEM Nothing will operate Oven will not operate Oven temperature too high or too low Display shows messages Clean cycle did not work on - Power failure (display shows incorrect time) - Not enough air circulation around bakeware - The control displays an F9 or F9 E0 error code - See the "Settings/Clock" keypad feature in longer cooking times. Use...
... - Adjust cooking time. Oven peeking releases oven heat and can be miswired. Oven temperature needs adjustment - Racks were positioned improperly - Oven door was not preheated - Mississauga, Ontario L5N 0B7 PROBLEM Nothing will operate Oven will not operate Oven temperature too high or too low Display shows messages Clean cycle did not work on - Power failure (display shows incorrect time) - Not enough air circulation around bakeware - The control displays an F9 or F9 E0 error code - See the "Settings/Clock" keypad feature in longer cooking times. Use...

Owners Manual
Page 14
... instruction on the duration of implied warranties of product replacement, your product. 3. house wiring, fuses or water inlet hoses). 4. Defects or damage caused by unauthorized service, alteration or modification of purchase, when this major appliance, you want a longer or more comprehensive warranty than the representations contained in -home repair. 13. Conversion of non-genuine Whirlpool parts or accessories. 6. Repairs to parts or systems to use of products...
... instruction on the duration of implied warranties of product replacement, your product. 3. house wiring, fuses or water inlet hoses). 4. Defects or damage caused by unauthorized service, alteration or modification of purchase, when this major appliance, you want a longer or more comprehensive warranty than the representations contained in -home repair. 13. Conversion of non-genuine Whirlpool parts or accessories. 6. Repairs to parts or systems to use of products...


