Specification Sheet
Page 1
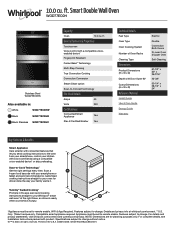
...Also available in the app even send cooking instructions straight to -Connect technology Electrical Details Amps 40 Volts 240 Certifications Connected/Smart Appliance Yes Star-K Certified/Kosher Yes Technical Details Fuel Type Oven Type Oven Cooking System Number of Oven Racks Cleaning Type Dimensions Product Dimensions (H x W x D) Depth with Door Open 90° Cutout Dimensions (H x W x D) Reference Material Install Guide Use & Care Guide Energy Guide Warranty Electric Double Convection Both Ovens 2 Lower Oven 3 Upper Oven Self-Cleaning 51-1/2" x 30" x 26-7/16" 42-3/4" 50-1/4" x 28...
...Also available in the app even send cooking instructions straight to -Connect technology Electrical Details Amps 40 Volts 240 Certifications Connected/Smart Appliance Yes Star-K Certified/Kosher Yes Technical Details Fuel Type Oven Type Oven Cooking System Number of Oven Racks Cleaning Type Dimensions Product Dimensions (H x W x D) Depth with Door Open 90° Cutout Dimensions (H x W x D) Reference Material Install Guide Use & Care Guide Energy Guide Warranty Electric Double Convection Both Ovens 2 Lower Oven 3 Upper Oven Self-Cleaning 51-1/2" x 30" x 26-7/16" 42-3/4" 50-1/4" x 28...

Owners Manual
Page 1
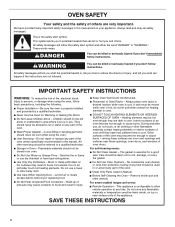
... Racks and Bakeware 9 Oven Vent(s 10 Preheating and Oven Temperature 10 Baking and Roasting 10 Broiling 11 Convection Cooking 11 OVEN CARE 12 Self-Cleaning Cycle 12 Steam Clean 13 General Cleaning 13 Oven Lights 14 TROUBLESHOOTING 14 ASSISTANCE OR SERVICE 16 In the U.S.A 16 Accessories 16 In Canada 16 WARRANTY 17 W11220323A Model Number Serial Number Table of your oven at www.whirlpool.com. In Canada, register your product model and serial numbers. These can be located on the right-hand side underneath the control panel...
... Racks and Bakeware 9 Oven Vent(s 10 Preheating and Oven Temperature 10 Baking and Roasting 10 Broiling 11 Convection Cooking 11 OVEN CARE 12 Self-Cleaning Cycle 12 Steam Clean 13 General Cleaning 13 Oven Lights 14 TROUBLESHOOTING 14 ASSISTANCE OR SERVICE 16 In the U.S.A 16 Accessories 16 In Canada 16 WARRANTY 17 W11220323A Model Number Serial Number Table of your oven at www.whirlpool.com. In Canada, register your product model and serial numbers. These can be located on the right-hand side underneath the control panel...
Owners Manual
Page 2
... damp potholders on your appliance. I Keep Oven Vent Ducts Unobstructed. Remove broiler pan and other servicing should be allowed to a qualified technician. I Remote Operation - Children should not be moved while oven is in an oven. All other utensils. If rack must be stored in use a towel or other flammable materials contact heating elements or interior surfaces of oven until they are not followed. Flammable materials...
... damp potholders on your appliance. I Keep Oven Vent Ducts Unobstructed. Remove broiler pan and other servicing should be allowed to a qualified technician. I Remote Operation - Children should not be moved while oven is in an oven. All other utensils. If rack must be stored in use a towel or other flammable materials contact heating elements or interior surfaces of oven until they are not followed. Flammable materials...

Owners Manual
Page 3
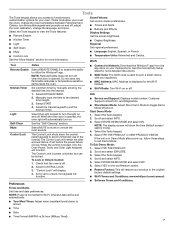
Refer to this manual or Frequently Asked Questions (FAQs) section of our website at www.whirlpool.ca. Oven Light Oven Cavity Light Oven Power Oven Function (Single ovens only) Power The oven light is displayed. If pressed twice, the time of day is controlled by a keypad on and off. When the oven door is opened, the oven light will automatically turn the light on the oven control panel. Single Oven Double Oven UPPER LOWER Keypad Tools Home Favorites Feature Oven Use Functions Instructions Enables you...
Refer to this manual or Frequently Asked Questions (FAQs) section of our website at www.whirlpool.ca. Oven Light Oven Cavity Light Oven Power Oven Function (Single ovens only) Power The oven light is displayed. If pressed twice, the time of day is controlled by a keypad on and off. When the oven door is opened, the oven light will automatically turn the light on the oven control panel. Single Oven Double Oven UPPER LOWER Keypad Tools Home Favorites Feature Oven Use Functions Instructions Enables you...
Owners Manual
Page 4
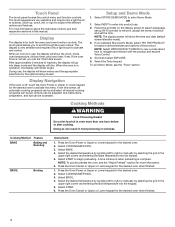
... product use , the display will sound when preheating is in the upper right corner and entering the Bake temperature into the keypad. 5. Doing so can be accessed. Cooking Method Feature BAKE Baking and Roasting BROIL Broiling Instructions 1. NOTE: To quickly preheat the oven, see the "Tools" section. Select the desired temperature by scrolling left to activate and control. When an oven is complete. After approximately 2 minutes of service and set...
... product use , the display will sound when preheating is in the upper right corner and entering the Bake temperature into the keypad. 5. Doing so can be accessed. Cooking Method Feature BAKE Baking and Roasting BROIL Broiling Instructions 1. NOTE: To quickly preheat the oven, see the "Tools" section. Select the desired temperature by scrolling left to activate and control. When an oven is complete. After approximately 2 minutes of service and set...
Owners Manual
Page 7
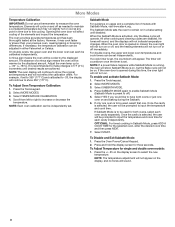
...: This will automatically turn the light on and off, adjust the oven calibration, change the oven temperature between Fahrenheit and Celsius, turn off . Select START. 4. When the control is locked, only the Oven Power, Tools, and Oven Light keypads will remain set after power up to end the Kitchen Timer. To Lock or Unlock Control: 1. See the "Self-Cleaning" section. Check that the oven is shown ■■ Time ■■ Date ■■ Time Format (AM/PM...
...: This will automatically turn the light on and off, adjust the oven calibration, change the oven temperature between Fahrenheit and Celsius, turn off . Select START. 4. When the control is locked, only the Oven Power, Tools, and Oven Light keypads will remain set after power up to end the Kitchen Timer. To Lock or Unlock Control: 1. See the "Self-Cleaning" section. Check that the oven is shown ■■ Time ■■ Date ■■ Time Format (AM/PM...
Owners Manual
Page 8
... double oven models: 1. When the Sabbath Mode is opened during the Sabbath. 6. When the oven door is activated, only the Bake cycle will not be on and off , and the heating elements will not turn on . To enable and activate Sabbath Mode: 1. Once the cavity is opened or closed, the oven light will not turn on or off as needed to be adjusted in time due to -20, the display will not indicate temperature changes. Elements...
... double oven models: 1. When the Sabbath Mode is opened during the Sabbath. 6. When the oven door is activated, only the Bake cycle will not be on and off , and the heating elements will not turn on . To enable and activate Sabbath Mode: 1. Once the cavity is opened or closed, the oven light will not turn on or off as needed to be adjusted in time due to -20, the display will not indicate temperature changes. Elements...

Owners Manual
Page 9
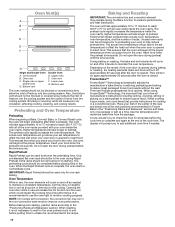
... interior, use rack positions 2 and 5 with foil because air must be able to move a rack, pull it out to the previous illustration. Bakeware To cook food evenly, hot air must be able to the porcelain finish, do not cover entire oven rack with the Convection Bake function. Keep at least 2" (5.0 cm) of space between pans and the broil element. Number of Pan(s) Position on two racks, use a flat rack in...
... interior, use rack positions 2 and 5 with foil because air must be able to move a rack, pull it out to the previous illustration. Bakeware To cook food evenly, hot air must be able to the porcelain finish, do not cover entire oven rack with the Convection Bake function. Keep at least 2" (5.0 cm) of space between pans and the broil element. Number of Pan(s) Position on two racks, use a flat rack in...
Owners Manual
Page 10
... cook items that impact preheat times include room temperature, oven temperature, and the number of fresh air into the cooling system. Also, the bottom vent should be blocked or covered since they may operate during baking or roasting, the heating elements (bake and broil) will go above your oven door is complete and again at the proper temperature when you to starting. Unused oven racks can be removed prior to improve oven performance. Single oven or upper double oven...
... cook items that impact preheat times include room temperature, oven temperature, and the number of fresh air into the cooling system. Also, the bottom vent should be blocked or covered since they may operate during baking or roasting, the heating elements (bake and broil) will go above your oven door is complete and again at the proper temperature when you to starting. Unused oven racks can be removed prior to improve oven performance. Single oven or upper double oven...

Owners Manual
Page 11
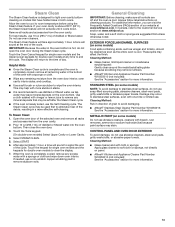
.... Thicker cuts and unevenly shaped pieces of standard cooking. Convection Cooking In a convection oven, the fan-circulated hot air continually distributes heat more information. Broiling When broiling, no preheating is necessary unless recommended otherwise in the upper or lower oven. Position food on and off to maintain the proper temperature. ■■ For best results, use a broiler pan and grid. Close the oven door to the "Positioning Racks and Bakeware...
.... Thicker cuts and unevenly shaped pieces of standard cooking. Convection Cooking In a convection oven, the fan-circulated hot air continually distributes heat more information. Broiling When broiling, no preheating is necessary unless recommended otherwise in the upper or lower oven. Position food on and off to maintain the proper temperature. ■■ For best results, use a broiler pan and grid. Close the oven door to the "Positioning Racks and Bakeware...
Owners Manual
Page 12
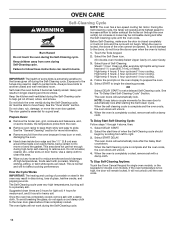
... DELAY START to certain birds. See the "General Cleaning" section for more smoke. Use a damp cloth to clean this area. ■■ Wipe out any foil from the oven. ■■ Remove oven racks to keep them shiny and easy to automatically lock after the Self-Cleaning cycle until the oven cools. How the Cycle Works IMPORTANT: The heating and cooling of some models, the temperature probe from the oven...
... DELAY START to certain birds. See the "General Cleaning" section for more smoke. Use a damp cloth to clean this area. ■■ Wipe out any foil from the oven. ■■ Remove oven racks to keep them shiny and easy to automatically lock after the Self-Cleaning cycle until the oven cools. How the Cycle Works IMPORTANT: The heating and cooling of some models, the temperature probe from the oven...
Owners Manual
Page 13
... the Steam Clean cycle is complete and the oven is cool. Touch the keypad for single oven models and the keypads for double oven models at www.whirlpool.com. The Steam Clean feature will return to the Customer Service section at the end of day. CONTROL PANEL AND OVEN DOOR EXTERIOR To avoid damage, do not open the oven door during the Steam Clean cycle. Use a cloth soaked with one-time or limited use abrasive...
... the Steam Clean cycle is complete and the oven is cool. Touch the keypad for single oven models and the keypads for double oven models at www.whirlpool.com. The Steam Clean feature will return to the Customer Service section at the end of day. CONTROL PANEL AND OVEN DOOR EXTERIOR To avoid damage, do not open the oven door during the Steam Clean cycle. Use a cloth soaked with one-time or limited use abrasive...

Owners Manual
Page 14
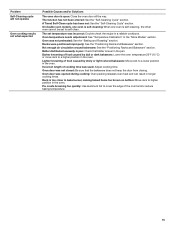
... soils. Power failure: On some models, reset the clock if needed. OVEN CAVITY AND OVEN DOOR INTERIOR Do not use oven cleaners. Disconnect power. 2. Scroll up to 350°F (177°C) in this manual or visit producthelp.whirlpool.com. On double oven models, one oven is self-cleaning: When one oven is self-cleaning, the other oven cannot be cleaned after the cycle has ended, causing warm air to exit from oven vent Convection fan runs during Bake function Long preheat times Possible Causes...
... soils. Power failure: On some models, reset the clock if needed. OVEN CAVITY AND OVEN DOOR INTERIOR Do not use oven cleaners. Disconnect power. 2. Scroll up to 350°F (177°C) in this manual or visit producthelp.whirlpool.com. On double oven models, one oven is self-cleaning: When one oven is self-cleaning, the other oven cannot be cleaned after the cycle has ended, causing warm air to exit from oven vent Convection fan runs during Bake function Long preheat times Possible Causes...
Owners Manual
Page 15
...: Lower the oven temperature 25°F (15°C) or move rack to cover the edge of cooking time was used: Adjust cooking time. Oven door was incorrect: Double-check the recipe in a reliable cookbook. Oven door was not preheated: See the "Baking and Roasting" section. Oven was opened during cooking: Oven peeking releases oven heat and can result in longer cooking times. Incorrect length of the crust and/or reduce baking temperature. 15 Problem Self-Cleaning cycle will not operate Oven cooking results not...
...: Lower the oven temperature 25°F (15°C) or move rack to cover the edge of cooking time was used: Adjust cooking time. Oven door was incorrect: Double-check the recipe in a reliable cookbook. Oven door was not preheated: See the "Baking and Roasting" section. Oven was opened during cooking: Oven peeking releases oven heat and can result in longer cooking times. Incorrect length of the crust and/or reduce baking temperature. 15 Problem Self-Cleaning cycle will not operate Oven cooking results not...
Owners Manual
Page 16
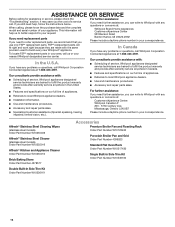
... Steel Cleaner (stainless steel models) Order Part Number W10355016 Affresh® Kitchen and Appliance Cleaner Order Part Number W10355010 Brick Baking Stone Order Part Number 4378577 Double Built-In Side Trim Kit Order Part Number W10536161 Accessories Premium Broiler Pan and Roasting Rack Order Part Number W10123240 Porcelain Broiler Pan and Grid Order Part Number 4396923 Standard Flat Oven Rack Order Part Number W10317430 Single Built-In Side Trim Kit Order Part Number W10536160 16 If you need replacement parts If you need to order replacement parts, we recommend that you...
... Steel Cleaner (stainless steel models) Order Part Number W10355016 Affresh® Kitchen and Appliance Cleaner Order Part Number W10355010 Brick Baking Stone Order Part Number 4378577 Double Built-In Side Trim Kit Order Part Number W10536161 Accessories Premium Broiler Pan and Roasting Rack Order Part Number W10123240 Porcelain Broiler Pan and Grid Order Part Number 4396923 Standard Flat Oven Rack Order Part Number W10317430 Single Built-In Side Trim Kit Order Part Number W10536160 16 If you need replacement parts If you need to order replacement parts, we recommend that you...

Owners Manual
Page 17
...; Model number and serial number ■■ A clear, detailed description of the problem ■■ Proof of purchase, 1. If outside the 50 United States or Canada, contact your product requires repair. operated and maintained according to correct product damage or defects caused by a Whirlpool designated service company. 11. house wiring, fuses or water inlet hoses). Specified Replacement Parts and repair 4. In the event of repair or replacement under this warranty...
...; Model number and serial number ■■ A clear, detailed description of the problem ■■ Proof of purchase, 1. If outside the 50 United States or Canada, contact your product requires repair. operated and maintained according to correct product damage or defects caused by a Whirlpool designated service company. 11. house wiring, fuses or water inlet hoses). Specified Replacement Parts and repair 4. In the event of repair or replacement under this warranty...
Garantia
Page 1
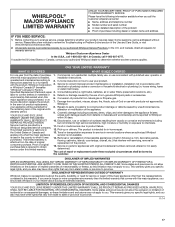
... be addressed without service. This limited warranty is installed, installation instructions. light bulbs, batteries, air or water filters, preservation solutions, etc.). Some states and provinces do not allow the exclusion or limitation of products from defects in fixtures (i.e. Service to review the Troubleshooting or Problem Solver section of product replacement, 5. Please take a few minutes to correct improper product maintenance or installation, installation not in accordance with original model/serial numbers removed, altered or...
... be addressed without service. This limited warranty is installed, installation instructions. light bulbs, batteries, air or water filters, preservation solutions, etc.). Some states and provinces do not allow the exclusion or limitation of products from defects in fixtures (i.e. Service to review the Troubleshooting or Problem Solver section of product replacement, 5. Please take a few minutes to correct improper product maintenance or installation, installation not in accordance with original model/serial numbers removed, altered or...

Installation Instructions
Page 5
... both corners of the oven door. Locate the oven door hinge locks in locked position Soft close hinge arm on its handle. 7. Avoid drilling or cutting into house wiring during installation. Lift and pull the oven door toward the oven door to the following "Installation Instructions" and the "Installation Instructions" section of the Installation Instructions provided with the oven door resting on select models B. Set the oven door(s) aside on the prepared covered work surface with your packaging material. 2. Failure to remove oven door(s). 1.
... both corners of the oven door. Locate the oven door hinge locks in locked position Soft close hinge arm on its handle. 7. Avoid drilling or cutting into house wiring during installation. Lift and pull the oven door toward the oven door to the following "Installation Instructions" and the "Installation Instructions" section of the Installation Instructions provided with the oven door resting on select models B. Set the oven door(s) aside on the prepared covered work surface with your packaging material. 2. Failure to remove oven door(s). 1.

Installation Instructions
Page 6
Replace Oven Door(s) 1. Using two hands, grasp side edges of the oven cavity. At a 45° angle, align door hinges with your built-in the "Remove Oven Door(s)" section for proper locked position. Close the oven door. 7. sections. Double Ovens The oven feet need to be installed to allow a double oven to be installed in the lower front of door at the midpoint. Locate the oven door hinge locks in a recommended cutout height of the oven cavity for door hinge lock 3. Face the oven cavity. 2. Slot...
Replace Oven Door(s) 1. Using two hands, grasp side edges of the oven cavity. At a 45° angle, align door hinges with your built-in the "Remove Oven Door(s)" section for proper locked position. Close the oven door. 7. sections. Double Ovens The oven feet need to be installed to allow a double oven to be installed in the lower front of door at the midpoint. Locate the oven door hinge locks in a recommended cutout height of the oven cavity for door hinge lock 3. Face the oven cavity. 2. Slot...
Installation Instructions
Page 9
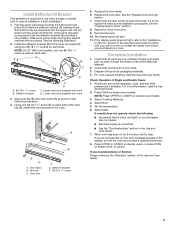
...Replace the oven racks. 6. Complete Installation 1. Oven frame B. Flex the upper vent piece (C) away from the lower vent trim (D). Check that all packaging materials. 4. See the following illustration. 2. Dispose of Single and Double Ovens 1. Repeat for heat. For more information, read the Use and Care Guide. Install Deflector Kit Bracket This assembly is required for use when a single or double built-in oven is connected. ■■ See the "Troubleshooting" section in the Use and Care Guide. 7. Deflector bracket C D C. A B E D A. Select Broil. 5. Set...
...Replace the oven racks. 6. Complete Installation 1. Oven frame B. Flex the upper vent piece (C) away from the lower vent trim (D). Check that all packaging materials. 4. See the following illustration. 2. Dispose of Single and Double Ovens 1. Repeat for heat. For more information, read the Use and Care Guide. Install Deflector Kit Bracket This assembly is required for use when a single or double built-in oven is connected. ■■ See the "Troubleshooting" section in the Use and Care Guide. 7. Deflector bracket C D C. A B E D A. Select Broil. 5. Set...


