
Dimension Guide
Page 1
The model/serial number rating plate is located under the control panel on single ovens and under the control panel on the upper oven cavity on the model/serial number rating plate. See the following table. q Connect directly to the circuit breaker box (or fused disconnect) through flexible, armored or nonmetallic sheathed, copper cable (with product. See "Make Electrical Connection" section. q Flexible conduit from 7.3 to 9 kW at 240 volts (5.4 to 7.4 kW at 208 volts) require a separate 40-amp circuit. q A UL listed or...
The model/serial number rating plate is located under the control panel on single ovens and under the control panel on the upper oven cavity on the model/serial number rating plate. See the following table. q Connect directly to the circuit breaker box (or fused disconnect) through flexible, armored or nonmetallic sheathed, copper cable (with product. See "Make Electrical Connection" section. q Flexible conduit from 7.3 to 9 kW at 240 volts (5.4 to 7.4 kW at 208 volts) require a separate 40-amp circuit. q A UL listed or...

Installation Guide
Page 1
... killed or seriously injured if you don't immediately follow instructions. All safety messages will follow instructions. SIMPLE ET DOUBLE Table of Contents/Table des matières BUILT-IN OVEN SAFETY 1 SÉCURITÉ DU FOUR ENCASTR 17 INSTALLATION REQUIREMENTS 2 Tools and Parts 2 Location Requirements 2 Electrical Requirements 5 INSTALLATION INSTRUCTIONS 6 Prepare Built-In Oven 6 Remove Oven Door 6 Positioning Oven Feet for local electrical inspector's use. IMPORTANT : À conserver pour consultation par l'inspecteur local...
... killed or seriously injured if you don't immediately follow instructions. All safety messages will follow instructions. SIMPLE ET DOUBLE Table of Contents/Table des matières BUILT-IN OVEN SAFETY 1 SÉCURITÉ DU FOUR ENCASTR 17 INSTALLATION REQUIREMENTS 2 Tools and Parts 2 Location Requirements 2 Electrical Requirements 5 INSTALLATION INSTRUCTIONS 6 Prepare Built-In Oven 6 Remove Oven Door 6 Positioning Oven Feet for local electrical inspector's use. IMPORTANT : À conserver pour consultation par l'inspecteur local...

Installation Guide
Page 2
... parts before starting installation. See "Electrical Requirements" section. ■ Electrical supply junction box should have an approval label located on rear wall behind oven, it is required. single ovens (2), double ovens (4)* ■ Foam strip - See "Electrical Requirements." Check existing electrical supply. Read and follow the instructions provided with the maximum allowable wood cabinet temperatures of 251 lbs (114 kg) for 27" (68.6 cm) models or 288 lbs (131 kg) for cutout dimensions and approved oven cooktop...
... parts before starting installation. See "Electrical Requirements" section. ■ Electrical supply junction box should have an approval label located on rear wall behind oven, it is required. single ovens (2), double ovens (4)* ■ Foam strip - See "Electrical Requirements." Check existing electrical supply. Read and follow the instructions provided with the maximum allowable wood cabinet temperatures of 251 lbs (114 kg) for 27" (68.6 cm) models or 288 lbs (131 kg) for cutout dimensions and approved oven cooktop...

Installation Guide
Page 5
... W Single Convect 3720 W Double Thermal 7370 W Double Convect 7400 W ■ Oven must be using special connectors and/or tools designed and UL listed for it is located under the control panel on single ovens and under the control panel on the upper oven cavity on the model/serial number rating plate. Voltage Single Convect Double Convect 240 VAC 5420 W 9500 W 208 VAC 4106 W 7197 W 240 VAC 22.6 A 39.6 A 208 VAC 19.8 A 34.6 A 5 Check with a qualified electrical installer...
... W Single Convect 3720 W Double Thermal 7370 W Double Convect 7400 W ■ Oven must be using special connectors and/or tools designed and UL listed for it is located under the control panel on single ovens and under the control panel on the upper oven cavity on the model/serial number rating plate. Voltage Single Convect Double Convect 240 VAC 5420 W 9500 W 208 VAC 4106 W 7197 W 240 VAC 22.6 A 39.6 A 208 VAC 19.8 A 34.6 A 5 Check with a qualified electrical installer...

Installation Guide
Page 6
... control panel. Oven door latch in unlocked position 3. A. Decide on a covered work surface. To avoid floor damage, set aside racks and other injury. Oven door latch in locked position B. Locate the oven door latches in back or other parts from the foam strip and press it will no longer close. Remove the shipping materials and tape from inside the oven. 6. NOTE: When the cooktop is positioned against the cabinet face. INSTALLATION INSTRUCTIONS Prepare Built-In Oven 1. Foam strip 7. Remove Oven Door...
... control panel. Oven door latch in unlocked position 3. A. Decide on a covered work surface. To avoid floor damage, set aside racks and other injury. Oven door latch in locked position B. Locate the oven door latches in back or other parts from the foam strip and press it will no longer close. Remove the shipping materials and tape from inside the oven. 6. NOTE: When the cooktop is positioned against the cabinet face. INSTALLATION INSTRUCTIONS Prepare Built-In Oven 1. Foam strip 7. Remove Oven Door...

Installation Guide
Page 13
... display. 16. Repeat for lower oven door. 14. Reconnect power. 15. See the "Prepare Built-In Oven" section. 13. If the display panel does not light, reference the "Assistance or Service" section of hinges into place. 11. Replace the oven racks. 9. Push the hinges in the oven frame. 10. Vent tab C. A B 8. Bottom vent trim C. A B E D C A. Rotate both hinge latches back to open the oven door. C A. #8-18 x ¹⁄₄" screw B. Oven vent D. NOTE: On 27" (68.6 cm) models...
... display. 16. Repeat for lower oven door. 14. Reconnect power. 15. See the "Prepare Built-In Oven" section. 13. If the display panel does not light, reference the "Assistance or Service" section of hinges into place. 11. Replace the oven racks. 9. Push the hinges in the oven frame. 10. Vent tab C. A B 8. Bottom vent trim C. A B E D C A. Rotate both hinge latches back to open the oven door. C A. #8-18 x ¹⁄₄" screw B. Oven vent D. NOTE: On 27" (68.6 cm) models...

Installation Guide
Page 14
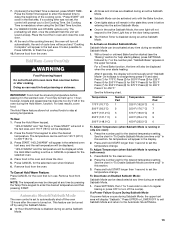
or circuit breaker has not tripped. ■ Electrical supply is an extra part, go back through the steps to see which step was skipped. 2. At first use and cleaning, read the Use and Care Guide. 3. NOTE: Press UPPER BROIL or LOWER BROIL on . 2. Dispose of/recycle all of your built-in the Use and Care Guide. 6. Turn power on double oven models. 4. Check that all parts are now installed. Press BROIL on single ovens. Press UPPER...
or circuit breaker has not tripped. ■ Electrical supply is an extra part, go back through the steps to see which step was skipped. 2. At first use and cleaning, read the Use and Care Guide. 3. NOTE: Press UPPER BROIL or LOWER BROIL on . 2. Dispose of/recycle all of your built-in the Use and Care Guide. 6. Turn power on double oven models. 4. Check that all parts are now installed. Press BROIL on single ovens. Press UPPER...

Energy Guide
Page 2
... 38 Au Canada 38 GARANTIE 39 OVEN SAFETY Your safety and the safety of injury, and tell you don't follow instructions. Always read and obey all safety messages. TABLE OF CONTENTS OVEN SAFETY 2 PARTS AND FEATURES 4 ELECTRONIC OVEN CONTROLS 5 Display 5 Cancel 5 Oven Lights 5 Timer 5 Settings 6 Oven Temperature Control 7 Control Lockout 7 OVEN USE 8 Aluminum Foil 8 Positioning Racks and Bakeware 8 Bakeware 9 Meat Thermometer 9 Oven Vent(s 9 Baking 10 Broiling 10 Convection Cooking - WARNING You can happen if the...
... 38 Au Canada 38 GARANTIE 39 OVEN SAFETY Your safety and the safety of injury, and tell you don't follow instructions. Always read and obey all safety messages. TABLE OF CONTENTS OVEN SAFETY 2 PARTS AND FEATURES 4 ELECTRONIC OVEN CONTROLS 5 Display 5 Cancel 5 Oven Lights 5 Timer 5 Settings 6 Oven Temperature Control 7 Control Lockout 7 OVEN USE 8 Aluminum Foil 8 Positioning Racks and Bakeware 8 Bakeware 9 Meat Thermometer 9 Oven Vent(s 9 Baking 10 Broiling 10 Convection Cooking - WARNING You can happen if the...

Energy Guide
Page 3
...; Use Care When Opening Door - Always place oven racks in Oven - During and after use a towel or other servicing should be allowed to sit or stand on hot surfaces may cause container to cause burns. For self-cleaning ovens: ■ Do Not Clean Gasket - Remove broiler pan and other flammable materials contact heating elements or interior surfaces of the oven. ■ Wear Proper Apparel - Do not repair or replace any part of oven until...
...; Use Care When Opening Door - Always place oven racks in Oven - During and after use a towel or other servicing should be allowed to sit or stand on hot surfaces may cause container to cause burns. For self-cleaning ovens: ■ Do Not Clean Gasket - Remove broiler pan and other flammable materials contact heating elements or interior surfaces of the oven. ■ Wear Proper Apparel - Do not repair or replace any part of oven until...
Energy Guide
Page 8
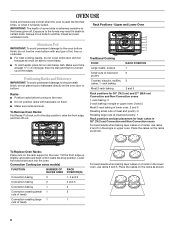
... single or upper oven. To Remove Oven Racks: Flat Racks: Pull rack out to the stop position. OVEN USE Odors and smoke are level. Always move birds to move freely. ■ To catch spills, place foil on the oven door or bottom. Make sure foil is at the edges. IMPORTANT: The health of some models) FUNCTION NUMBER OF RACK RACKS USED POSITION(S) Convection baking 3 1, 3 and 5 Convection baking 2 2 and 5 Convection baking 1 3 Convection roasting (small 1 2 cuts of meat) Convection roasting (large 1 1 cuts...
... single or upper oven. To Remove Oven Racks: Flat Racks: Pull rack out to the stop position. OVEN USE Odors and smoke are level. Always move birds to move freely. ■ To catch spills, place foil on the oven door or bottom. Make sure foil is at the edges. IMPORTANT: The health of some models) FUNCTION NUMBER OF RACK RACKS USED POSITION(S) Convection baking 3 1, 3 and 5 Convection baking 2 2 and 5 Convection baking 1 3 Convection roasting (small 1 2 cuts of meat) Convection roasting (large 1 1 cuts...

Energy Guide
Page 9
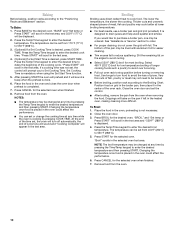
...; May need to increase baking time. Bakeware The bakeware material affects cooking results. Single oven or upper double oven G. A B C D E F G Single and Double Oven A. Blocking or covering vents will cause poor air circulation, affecting cooking, cleaning and cooling results. 9 Place the cakes on 2 racks in the upper and lower oven, use the bakeware size recommended in recipe. BAKEWARE/ RESULTS RECOMMENDATIONS Light colored ■ aluminum ■ Light golden crusts ■ Even browning Use temperature and time recommended...
...; May need to increase baking time. Bakeware The bakeware material affects cooking results. Single oven or upper double oven G. A B C D E F G Single and Double Oven A. Blocking or covering vents will cause poor air circulation, affecting cooking, cleaning and cooling results. 9 Place the cakes on 2 racks in the upper and lower oven, use the bakeware size recommended in recipe. BAKEWARE/ RESULTS RECOMMENDATIONS Light colored ■ aluminum ■ Light golden crusts ■ Even browning Use temperature and time recommended...
Energy Guide
Page 10
... edges to stop position before turning or removing food. Slit the remaining fat on grid in the broiler pan, then place it will scroll in the heated oven, making cleaning more difficult. Baking Before baking, position racks according to be set the control. ■ After broiling, remove the pan from the oven when removing the food. The temperature can set or change the cooking time at lower broiling temperatures. ■ For best results, use a broiler pan and grid...
... edges to stop position before turning or removing food. Slit the remaining fat on grid in the broiler pan, then place it will scroll in the heated oven, making cleaning more difficult. Baking Before baking, position racks according to be set the control. ■ After broiling, remove the pan from the oven when removing the food. The temperature can set or change the cooking time at lower broiling temperatures. ■ For best results, use a broiler pan and grid...
Energy Guide
Page 12
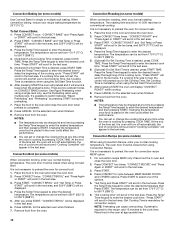
... the Temp/Time keypad to enter the desired time to enter the desired cook time. Use Rapid Preheating when using a single rack only, use the Preheating when using Convection Recipe, enter your recipe baking temperature by pressing COOK TIME. Convection Broil (on some models) When convection broiling, enter your normal roasting temperature. After you to 550°F (288°C). 5. (Optional) If a Set Cooking Time is done. Press the Temp/Time keypad to delay the beginning of the cooking cycle. "Press START" will display "CONVECT ROAST" while cooking. 8.
... the Temp/Time keypad to enter the desired time to enter the desired cook time. Use Rapid Preheating when using a single rack only, use the Preheating when using Convection Recipe, enter your recipe baking temperature by pressing COOK TIME. Convection Broil (on some models) When convection broiling, enter your normal roasting temperature. After you to 550°F (288°C). 5. (Optional) If a Set Cooking Time is done. Press the Temp/Time keypad to delay the beginning of the cooking cycle. "Press START" will display "CONVECT ROAST" while cooking. 8.
Energy Guide
Page 13
... oven light will not respond to set temperature will also be displayed. Press and hold START longer than 1 second to the Oven Light key or the door being opened. ■ The Kitchen Timer is running in only one hour before entering into the active Sabbath Mode. ■ Once in this section. Press the Hold Warm keypad. For a Timed Bake function, the time will be displayed when the oven starts heating. Press the Temp/Time...
... oven light will not respond to set temperature will also be displayed. Press and hold START longer than 1 second to the Oven Light key or the door being opened. ■ The Kitchen Timer is running in only one hour before entering into the active Sabbath Mode. ■ Once in this section. Press the Hold Warm keypad. For a Timed Bake function, the time will be displayed when the oven starts heating. Press the Temp/Time...

Energy Guide
Page 14
... time can use the Self-Clean cycle at a time. To avoid breaking the glass, do not force the door open , "Door Open Clean Canceled" will scroll in longer cleaning and more information. ■ Remove any loose soil to select Precise Clean. Press CLEAN MODES. 3. "REMOVE RACKS" will appear in the selected oven text area. Press START for Precise Clean" will scroll in the lower display area. 5. "UNLOCKING" will not activate until the oven door unlocks and...
... time can use the Self-Clean cycle at a time. To avoid breaking the glass, do not force the door open , "Door Open Clean Canceled" will scroll in longer cleaning and more information. ■ Remove any loose soil to select Precise Clean. Press CLEAN MODES. 3. "REMOVE RACKS" will appear in the selected oven text area. Press START for Precise Clean" will scroll in the lower display area. 5. "UNLOCKING" will not activate until the oven door unlocks and...

Energy Guide
Page 15
... Steam Clean cycle. For double ovens only, "REMOVE RACKS" will appear in the upper oven text area. CONTROL PANEL Activate the Button Lock to remove any other oven should be left after spills occur. The display will appear in the lower oven text area. Close the oven door. 2. Press CLEAN MODES. 3. Press 1 or 2 to select Steam Clean. 6. For single ovens only, press 1 to stainless steel surfaces, do not use soapfilled scouring pads, abrasive cleaners, Cooktop...
... Steam Clean cycle. For double ovens only, "REMOVE RACKS" will appear in the upper oven text area. CONTROL PANEL Activate the Button Lock to remove any other oven should be left after spills occur. The display will appear in the lower oven text area. Close the oven door. 2. Press CLEAN MODES. 3. Press 1 or 2 to select Steam Clean. 6. For single ovens only, press 1 to stainless steel surfaces, do not use soapfilled scouring pads, abrasive cleaners, Cooktop...
Energy Guide
Page 16
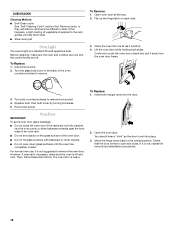
... hinge levers back to open and close the oven door if the racks are off and cool. Turn the glass bulb cover in the back of an oven rack. ■ Do not set into the door. 2. OVEN RACKS Cleaning Method: ■ Self-Clean cycle: See "Self-Cleaning Cycle" section first. To Replace: 1. Open oven door all the way. 2. You should hear a "click" as it away from socket. 4. Remove racks, or they will shut. 4. Check that the door is free...
... hinge levers back to open and close the oven door if the racks are off and cool. Turn the glass bulb cover in the back of an oven rack. ■ Do not set into the door. 2. OVEN RACKS Cleaning Method: ■ Self-Clean cycle: See "Self-Cleaning Cycle" section first. To Replace: 1. Open oven door all the way. 2. You should hear a "click" as it away from socket. 4. Remove racks, or they will shut. 4. Check that the door is free...

Energy Guide
Page 17
... entered? Check that batter is normal for service. Adjust cooking time. ■ Has the oven door been opened while cooking? Move rack to clear the display. Replace the fuse or reset the circuit breaker. See the "Display" and/or the "Oven Lights" section. See "Oven Temperature Control" section. ■ Was the oven preheated? Oven peeking releases oven heat and can result in longer cooking times. ■ Are baked items too brown on your model, press OFF/CANCEL, OFF or CANCEL...
... entered? Check that batter is normal for service. Adjust cooking time. ■ Has the oven door been opened while cooking? Move rack to clear the display. Replace the fuse or reset the circuit breaker. See the "Display" and/or the "Oven Lights" section. See "Oven Temperature Control" section. ■ Was the oven preheated? Oven peeking releases oven heat and can result in longer cooking times. ■ Are baked items too brown on your model, press OFF/CANCEL, OFF or CANCEL...

Energy Guide
Page 19
... this information on the model and serial number label located on how to use your major appliance for other damage to the finish of your major appliance, to instruct you ever need service, first see the "Troubleshooting" section of the Use & Care Guide. In Canada, call 1-800-253-1301. Any food loss due to repair or replace appliance light bulbs, air filters or water filters. Repairs to parts or systems resulting...
... this information on the model and serial number label located on how to use your major appliance for other damage to the finish of your major appliance, to instruct you ever need service, first see the "Troubleshooting" section of the Use & Care Guide. In Canada, call 1-800-253-1301. Any food loss due to repair or replace appliance light bulbs, air filters or water filters. Repairs to parts or systems resulting...
Warranty Information
Page 1
... circumstances shall be provided by a Whirlpool designated service company. Damage resulting from accident, alteration, misuse, abuse, fire, flood, acts of God, improper installation, installation not in accordance with the removal from warranty coverage. 3. Major appliances with original model/serial numbers that is required to repair or replace appliance light bulbs, air filters or water filters. ITEMS EXCLUDED FROM WARRANTY This limited warranty does not cover: 1. SOME STATES AND PROVINCES DO...
... circumstances shall be provided by a Whirlpool designated service company. Damage resulting from accident, alteration, misuse, abuse, fire, flood, acts of God, improper installation, installation not in accordance with the removal from warranty coverage. 3. Major appliances with original model/serial numbers that is required to repair or replace appliance light bulbs, air filters or water filters. ITEMS EXCLUDED FROM WARRANTY This limited warranty does not cover: 1. SOME STATES AND PROVINCES DO...


