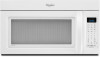
Whirlpool WMH53520AW Support and Manuals
Get Help and Manuals for this Whirlpool item
View All Support Options Below
Free Whirlpool WMH53520AW manuals!
Problems with Whirlpool WMH53520AW?
Ask a Question
Free Whirlpool WMH53520AW manuals!
Problems with Whirlpool WMH53520AW?
Ask a Question
Popular Whirlpool WMH53520AW Manual Pages
Installation Instructions - Page 1

... Install Damper Assembly 9 Install the Microwave Oven 9 Complete Installation 10 VENTING DESIGN SPECIFICATIONS 11 ASSISTANCE 12 Replacement Parts 12 Accessories 12
MICROWAVE HOOD COMBINATION SAFETY
Your safety and the safety of your particular model may differ slightly from the illustration in this manual and on your appliance.
These installation instructions cover different models...
Installation Instructions - Page 2

... Transition" illustration in "Venting Design Specifications" section.
2
INSTALLATION REQUIREMENTS
Tools and Parts
Tools Needed
Gather the required tools and parts before starting installation. Read and follow the instructions provided with your builder or cabinet supplier to it during
the "Mark Rear Wall" part of 150 lbs (68 kg), which includes microwave oven and items placed inside...
Installation Instructions - Page 4

...top of microwave oven with 2 screws removed in Step 1.
4
Exhaust port
6. Damper plate B. Damper plate tabs D. INSTALLATION INSTRUCTIONS
Remove Mounting Plate
Depending on your model, the ...microwave oven is attached to back of the microwave oven. Remove any remaining contents from the microwave oven cavity.
2. NOTE: To avoid damage to top of the microwave oven, remove it and set...
Installation Instructions - Page 7

.... With the support tabs facing forward... in "Possible Wall Stud Configurations" in "Locate Wall Stud(s)" section.
7 Set the mounting plate aside. Following are ideal hole locations.
7. Drill 3/4" (... Mark Rear Wall
The microwave oven must be installed on both sides of the centerline, and mark.
10. Rear wall B. Cardboard template C. Wall Venting Installation Only
Upper cabinet bottom
&#...
Installation Instructions - Page 9

... keyhole saw, cut out the rectangular area. Handle the microwave oven gently. 1.
Damper assembly C. Support tabs
4. With front of microwave oven still tilted, thread power supply cord through the wall...assembly with 2 sheet metal screws. Rotate microwave oven up toward upper cabinet. NOTE: If upper cabinet is for wall venting only)
1. Install Damper Assembly
(for the power supply cord....
Installation Instructions - Page 10

...Damper assembly C.
Plug microwave oven into a grounded 3 prong outlet. Longer or shorter bolts are available at least one person holding it in death, fire, or electrical shock.
2. Connect vent to damper assembly. Install filters. Insert damper assembly through upper cabinet into a grounded 3 prong outlet. ■ See the User Instructions for troubleshooting information. Then secure...
Installation Instructions - Page 12

...You will need your dealer to be replaced, call us at our toll free number listed in the User Instructions.
When you will need the microwave oven model number and serial number. All rights...or service center. Replacement Parts
If any of the vent system including straight vent, elbow(s), transitions and wall or roof caps must be used. The total length of the installation ...
Dimension Guide - Page 1

...Instructions packed with a fuse or circuit breaker. Specifications subject to round transition
piece = 5 ft (1.5 m) D. 2 ft (0.6 m) + 6 ft (1.8 m)
straight = 8 ft (2.4 m)
D
3 " x 10" (8.3 x 25.4 cm) vent system = 73 ft (22.2 m) total
A
B
6 ft (1.8 m)
A. 2" x 4" wall stud B. Microwave Hood Combination
PRODUCT MODEL...Whirlpool... are for 66" (167.6 cm) installation height. Wall cap: 3 " x ...
Warranty Information - Page 1

... in accordance with the product, Whirlpool Corporation or Whirlpool Canada LP (hereafter "Whirlpool") will pay for Factory Specified Parts and repair labor to correct house wiring or plumbing.
2. This warranty is not installed in a remote area where service by Whirlpool.
5. WHIRLPOOL SHALL NOT BE LIABLE FOR INCIDENTAL OR CONSEQUENTIAL DAMAGES.
Have your model number and serial number on...
Use & Care Guide - Page 1

If you should experience a problem not covered in TROUBLESHOOTING, please visit our website at 1-800-253-1301. Microwave Hood Combination Safety
Your safety and the safety of burns, electric shock, fire,
injury to persons, or exposure to excessive microwave energy:
■ Install or locate the microwave oven only in accordance with the provided Installation Instructions.
■ Read all ...
Use & Care Guide - Page 2

... shut off the pad and touch electrical parts involving a risk of the oven with the safety interlocks.
(b) Do not place any other than manufacturer's recommended accessories, in this microwave oven outdoors. Call an authorized service company for examination, repair, or adjustment.
■ See door surface cleaning instructions in the "Microwave Oven Care" section.
■ To reduce...
Use & Care Guide - Page 4

...models): To keep the microwave oven from the range or cooktop below the microwave oven gets too hot. This is active in the display.
Dynamic Fan Sensing (on and off after replacing and/or cleaning the filters. Light Timer
Set the cooktop light to set...submenu, then follow the prompts to soil buildup, clean rack supports often. Scroll Speed
Scroll speed of -function signals) may ...
Use & Care Guide - Page 6

... on some models): To avoid damage to reset filter status.
■ Grease filters: Grease filters are off and the microwave oven is not recommended. Clean with mild soap, water and a soft cloth or sponge, or as prompted by filter status indicator. Replace bulb, close bulb cover, and secure with screws.
6
See "Settings" section to...
Use & Care Guide - Page 7

... reference FAQs (Frequently Asked Questions) to the cover for 5 minutes or more without the microwave oven being used. Replacement Parts and Cleaning Supplies
Following is an error indicator. Please refer to possibly avoid the cost of the cycle. www.whirlpool.com
Microwave oven will not operate
Check the following :
■ Soil buildup
Soil buildup on during...
Use & Care Guide - Page 8

... the microwave oven opening, behind the door.
For assistance or service, call 1-800-253-1301.
W10451742A SP PN W10458699A
© 2012 Whirlpool Corporation.
Service calls to correct the installation of your major appliance, to instruct you can find your model number and serial number on the label located on how to use your major appliance, to replace or repair...
Whirlpool WMH53520AW Reviews
We have not received any reviews for Whirlpool yet.