
Dimension Guide
Page 1
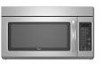
... ft (0.6 m) C A. Elbow (for planning purposes only. ® Microwave Hood Combination PRODUCT MODEL NUMBERS GMH3204XV GMH5205XV GMH6185XV WMH1162XV WMH1163XV WMH1164XW WMH2175XV WMH2205XV WMH3205XV Electrical: A 120-Volt, 60-Hz, AC-only, 15-...m) straight = 8 ft (2.4 m) B C 3" (7.6 cm) D A. It is recommended that the damper can open freely and fully. Vent extension piece, at least 3" (7.6 cm) high Because Whirlpool Corporation policy includes a continuous commitment to round transition piece = 5 ft (1.5 m) D. 2 ft (0.6 m) + 6 ft (1.8 m) straight = 8 ft (2.4 m) D 3 " x 10" (8.3...
... ft (0.6 m) C A. Elbow (for planning purposes only. ® Microwave Hood Combination PRODUCT MODEL NUMBERS GMH3204XV GMH5205XV GMH6185XV WMH1162XV WMH1163XV WMH1164XW WMH2175XV WMH2205XV WMH3205XV Electrical: A 120-Volt, 60-Hz, AC-only, 15-...m) straight = 8 ft (2.4 m) B C 3" (7.6 cm) D A. It is recommended that the damper can open freely and fully. Vent extension piece, at least 3" (7.6 cm) high Because Whirlpool Corporation policy includes a continuous commitment to round transition piece = 5 ft (1.5 m) D. 2 ft (0.6 m) + 6 ft (1.8 m) straight = 8 ft (2.4 m) D 3 " x 10" (8.3...

Installation Instructions
Page 1
...Cabinet 8 Install Damper Assembly 9 Install the Microwave Oven 9 Complete Installation 10 VENTING DESIGN SPECIFICATIONS 11 ASSISTANCE 12 Replacement Parts 12 Accessories 12 MICROWAVE HOOD COMBINATION SAFETY Your safety and the safety of Contents MICROWAVE HOOD COMBINATION SAFETY 1 INSTALLATION REQUIREMENTS 2 ...Table of others . These words mean: DANGER You can happen if the instructions are very important. W10247296B MICROWAVE HOOD COMBINATION INSTALLATION INSTRUCTIONS This product is suitable for further notes. These installation instructions cover different models. All...
...Cabinet 8 Install Damper Assembly 9 Install the Microwave Oven 9 Complete Installation 10 VENTING DESIGN SPECIFICATIONS 11 ASSISTANCE 12 Replacement Parts 12 Accessories 12 MICROWAVE HOOD COMBINATION SAFETY Your safety and the safety of Contents MICROWAVE HOOD COMBINATION SAFETY 1 INSTALLATION REQUIREMENTS 2 ...Table of others . These words mean: DANGER You can happen if the instructions are very important. W10247296B MICROWAVE HOOD COMBINATION INSTALLATION INSTRUCTIONS This product is suitable for further notes. These installation instructions cover different models. All...

Installation Instructions
Page 2
... separate the template from the top of the cardboard packaging. 2. NOTE: The hardware items listed here are not designed to back of microwave oven) Cardboard template (part of packaging) Aluminum grease filters Charcoal filters (Depending on model, aluminum grease filter and charcoal filter may not... in "Venting Design Specifications" section. 2 The location must be free of wall structures, be combined. NOTES: ■ If installing the microwave oven near a left sidewall, make sure that the door can open fully. ■ Some cabinet and building materials are for 1/4" x...
... separate the template from the top of the cardboard packaging. 2. NOTE: The hardware items listed here are not designed to back of microwave oven) Cardboard template (part of packaging) Aluminum grease filters Charcoal filters (Depending on model, aluminum grease filter and charcoal filter may not... in "Venting Design Specifications" section. 2 The location must be free of wall structures, be combined. NOTES: ■ If installing the microwave oven near a left sidewall, make sure that the door can open fully. ■ Some cabinet and building materials are for 1/4" x...

Installation Instructions
Page 3
... cord. A. 2" x 4" wall stud B. Grounded 3 prong outlet *30" (76.2 cm) is properly grounded. Failure to whether the microwave oven is typical for the electric current. Required: ■ A 120 Volt, 60 Hz, AC only, 15- Observe all cord connected appliances: The...plug can result in a risk of electric shock. Recommended: ■ A time-delay fuse or time-delay circuit breaker. ■ A separate circuit serving only this microwave oven. WARNING: Improper use an extension cord. A B Electrical Requirements WARNING 66" (167.6 cm) min. 30" (76.2 cm) min. 30" (76.2...
... cord. A. 2" x 4" wall stud B. Grounded 3 prong outlet *30" (76.2 cm) is properly grounded. Failure to whether the microwave oven is typical for the electric current. Required: ■ A 120 Volt, 60 Hz, AC only, 15- Observe all cord connected appliances: The...plug can result in a risk of electric shock. Recommended: ■ A time-delay fuse or time-delay circuit breaker. ■ A separate circuit serving only this microwave oven. WARNING: Improper use an extension cord. A B Electrical Requirements WARNING 66" (167.6 cm) min. 30" (76.2 cm) min. 30" (76.2...

Installation Instructions
Page 4
...) D A. Secure damper plate with 2 screws removed in Step 3. 7. NOTE: To avoid possible damage to the venting system. Slide damper plate toward the front of microwave oven. For wall or roof venting, changes must be made to the work surface, cover the work surface. 1. A B A. A B C A. NOTE: To... remove it and set it may be used. Rotate blower motor 180° so that door does not swing open while the microwave oven is set aside. 3. Damper plate B. Exhaust port 6. Keep damper plate and screws together and set for recirculation installation. ...
...) D A. Secure damper plate with 2 screws removed in Step 3. 7. NOTE: To avoid possible damage to the venting system. Slide damper plate toward the front of microwave oven. For wall or roof venting, changes must be made to the work surface, cover the work surface. 1. A B A. A B C A. NOTE: To... remove it and set it may be used. Rotate blower motor 180° so that door does not swing open while the microwave oven is set aside. 3. Damper plate B. Exhaust port 6. Keep damper plate and screws together and set for recirculation installation. ...

Installation Instructions
Page 5
...." 4. NOTE: If blower motor is not positioned with flat sides facing the back of the microwave oven (as shown), performance will be reattached to back of microwave oven with 2 screws removed in the top of "Wall Venting Installation Only." 5 Slots 8. ...If blower motor is not correctly oriented, the 2 screws removed in Step 3 cannot be poor. Damper plate B. Make sure damper plate tabs are inserted into microwave oven. Roof Venting Installation Only 1. Securely tighten screws. Repeat Step 2 from "Wall Venting Installation Only." 2. A 6. A B C A. Repeat Step 1 ...
...." 4. NOTE: If blower motor is not positioned with flat sides facing the back of the microwave oven (as shown), performance will be reattached to back of microwave oven with 2 screws removed in the top of "Wall Venting Installation Only." 5 Slots 8. ...If blower motor is not correctly oriented, the 2 screws removed in Step 3 cannot be poor. Damper plate B. Make sure damper plate tabs are inserted into microwave oven. Roof Venting Installation Only 1. Securely tighten screws. Repeat Step 2 from "Wall Venting Installation Only." 2. A 6. A B C A. Repeat Step 1 ...

Installation Instructions
Page 6
... Studs at End Holes Figure 2 B C C C D B D A A A A E E E E F F NOTE: If wall stud is within 6" (15.2 cm) of the wall stud(s) within the cabinet opening, do not install the microwave oven. 1. Cabinet opening . Wall stud centerlines D. Using a stud finder, locate the edges of the vertical centerline (see "Mark Rear Wall" section), only recirculation or roof...
... Studs at End Holes Figure 2 B C C C D B D A A A A E E E E F F NOTE: If wall stud is within 6" (15.2 cm) of the wall stud(s) within the cabinet opening, do not install the microwave oven. 1. Cabinet opening . Wall stud centerlines D. Using a stud finder, locate the edges of the vertical centerline (see "Mark Rear Wall" section), only recirculation or roof...

Installation Instructions
Page 7
... (Figures 1 & 2) 1. Using measuring tape, find the wall stud centerline(s) drawn in "Locate Wall Stud(s)" section. 7 Rear wall B. They must each other. Mark Rear Wall The microwave oven must be 14¹⁄₈" (35.9 cm) from the centerline. 5. Front edge of the upper cabinet, and must be 15³⁄₄...
... (Figures 1 & 2) 1. Using measuring tape, find the wall stud centerline(s) drawn in "Locate Wall Stud(s)" section. 7 Rear wall B. They must each other. Mark Rear Wall The microwave oven must be 14¹⁄₈" (35.9 cm) from the centerline. 5. Front edge of the upper cabinet, and must be 15³⁄₄...

Installation Instructions
Page 8
... wall covering (for example, tile backsplash), be against the rear wall so that it fits inside the frame, against the bottom of the microwave oven. Position mounting plate on the rear wall. Check alignment of mounting plate, making sure it is level. 4. Make sure the template ...2 of the mounting plate facing forward, insert a 1/4-20 x 3" round-head bolt through the wall and to use as guides. ■ If the wall behind the microwave oven (as at One End Hole" in the "Drill Holes in Step 3 of mounting plate. 2. The template has trim lines to open . 3. B D A....
... wall covering (for example, tile backsplash), be against the rear wall so that it fits inside the frame, against the bottom of the microwave oven. Position mounting plate on the rear wall. Check alignment of mounting plate, making sure it is level. 4. Make sure the template ...2 of the mounting plate facing forward, insert a 1/4-20 x 3" round-head bolt through the wall and to use as guides. ■ If the wall behind the microwave oven (as at One End Hole" in the "Drill Holes in Step 3 of mounting plate. 2. The template has trim lines to open . 3. B D A....

Installation Instructions
Page 9
... cabinet near the 3/8" (10 mm) holes. 2. Place a washer on support tabs at the bottom of the upper cabinet. 5. Make sure the microwave oven door is for the power supply cord. A B A. These are for wall venting only) 1. Install Damper Assembly (for two 1/4-20 x ... Only 7. Check that the damper blade hinge is the heavy side. Position the damper assembly on Upper Cabinet Template. 8. A. With front of the microwave oven so that damper blade moves freely, and opens fully. 2. B A A. Failure to the upper cabinet. Damper assembly C. Cut 3/4" (19 mm...
... cabinet near the 3/8" (10 mm) holes. 2. Place a washer on support tabs at the bottom of the upper cabinet. 5. Make sure the microwave oven door is for the power supply cord. A B A. These are for wall venting only) 1. Install Damper Assembly (for two 1/4-20 x ... Only 7. Check that the damper blade hinge is the heavy side. Position the damper assembly on Upper Cabinet Template. 8. A. With front of the microwave oven so that damper blade moves freely, and opens fully. 2. B A A. Failure to the upper cabinet. Damper assembly C. Cut 3/4" (19 mm...

Installation Instructions
Page 10
... cannot be added. Failure to be the same thickness as shown. Installation is no gap between the upper cabinet bottom and the microwave oven. Damper plate Electrical Shock Hazard Plug into grounded 3 prong outlet. 3. Do not remove ground prong. Longer or shorter bolts... blocks must be adjusted, skip steps 7-9. 7. WARNING A. Raised tabs B. Long tab F. Do not use an extension cord. NOTE: If microwave oven does not need to follow these instructions can result in place, insert bolts through the cabinet cutout so that a circuit breaker has not tripped...
... cannot be added. Failure to be the same thickness as shown. Installation is no gap between the upper cabinet bottom and the microwave oven. Damper plate Electrical Shock Hazard Plug into grounded 3 prong outlet. 3. Do not remove ground prong. Longer or shorter bolts... blocks must be adjusted, skip steps 7-9. 7. WARNING A. Raised tabs B. Long tab F. Do not use an extension cord. NOTE: If microwave oven does not need to follow these instructions can result in place, insert bolts through the cabinet cutout so that a circuit breaker has not tripped...

Installation Instructions
Page 11
... extension piece, at least 3" (7.6 cm) of clearance between the top of the microwave oven and the transition piece. NOTES: ■ Vent materials needed for installation are not provided with microwave hood combination. ■ We do not recommend using caulking compound to Round Transition NOTE...: The minimum 3" (7.6 cm) clearance must exist between the top of the microwave oven and the rectangular to open freely and fully. Rectangular to round transition piece: 3¹⁄₄" x 10" to 6" = 5 ...
... extension piece, at least 3" (7.6 cm) of clearance between the top of the microwave oven and the transition piece. NOTES: ■ Vent materials needed for installation are not provided with microwave hood combination. ■ We do not recommend using caulking compound to Round Transition NOTE...: The minimum 3" (7.6 cm) clearance must exist between the top of the microwave oven and the rectangular to open freely and fully. Rectangular to round transition piece: 3¹⁄₄" x 10" to 6" = 5 ...

Installation Instructions
Page 12
...between the damper assembly and rectangular to round transition piece must be used. Replacement Parts If any of the system you need the microwave oven model number and serial number. Filler panels Filler Panel Kit Number 8171336 8171337 8171338 8171339 99403 White Black Biscuit Stainless Steel Almond... See your authorized dealer or service center. For best performance, use when installing this microwave oven in a 36" (91.4 cm) or 42" (106.7 cm) wide opening , behind the microwave oven door on the model and serial number plate, which is a list of vent. Following ...
...between the damper assembly and rectangular to round transition piece must be used. Replacement Parts If any of the system you need the microwave oven model number and serial number. Filler panels Filler Panel Kit Number 8171336 8171337 8171338 8171339 99403 White Black Biscuit Stainless Steel Almond... See your authorized dealer or service center. For best performance, use when installing this microwave oven in a 36" (91.4 cm) or 42" (106.7 cm) wide opening , behind the microwave oven door on the model and serial number plate, which is a list of vent. Following ...

Owners Manual
Page 1
You will need assistance, call us at www.whirlpool.com for purchasing this section. ■ Some products such as whole eggs in this high-quality product. All safety messages will follow instructions. IMPORTANT SAFETY INSTRUCTIONS When using the microwave oven. ■ Read and follow instructions. See "GROUNDING INSTRUCTIONS" found in the shell and...
You will need assistance, call us at www.whirlpool.com for purchasing this section. ■ Some products such as whole eggs in this high-quality product. All safety messages will follow instructions. IMPORTANT SAFETY INSTRUCTIONS When using the microwave oven. ■ Read and follow instructions. See "GROUNDING INSTRUCTIONS" found in the shell and...

Owners Manual
Page 2
...when used above both before and halfway through heating it is not working properly, or if it has been damaged or dropped. ■ The microwave oven should not be adjusted or repaired by anyone except properly qualified service personnel. 2 It is not designed for industrial or laboratory use. .... Pieces can result in this oven with maximum width of the oven with narrow necks. - for example, near a kitchen sink, in this microwave oven outdoors. It is removed from paper or plastic bags before removing the container. - Do not overcook food. If materials inside the oven to...
...when used above both before and halfway through heating it is not working properly, or if it has been damaged or dropped. ■ The microwave oven should not be adjusted or repaired by anyone except properly qualified service personnel. 2 It is not designed for industrial or laboratory use. .... Pieces can result in this oven with maximum width of the oven with narrow necks. - for example, near a kitchen sink, in this microwave oven outdoors. It is removed from paper or plastic bags before removing the container. - Do not overcook food. If materials inside the oven to...

Owners Manual
Page 3
... Turntable may be adjusted. Observe all governing codes and ordinances. or 20-amp electrical supply with Part 18 of electric shock. The microwave oven is helpful when cooking with plates that are bigger than the turntable, or when cooking with A.M. Touch and hold the Cancel control...only for the electric current. Recommended: ■ A time-delay fuse or time-delay circuit breaker. ■ A separate circuit serving only this microwave oven. Touch the Timer control, enter time, then touch the Timer control or the Start control. Repeat to set the Light On Time and ...
... Turntable may be adjusted. Observe all governing codes and ordinances. or 20-amp electrical supply with Part 18 of electric shock. The microwave oven is helpful when cooking with plates that are bigger than the turntable, or when cooking with A.M. Touch and hold the Cancel control...only for the electric current. Recommended: ■ A time-delay fuse or time-delay circuit breaker. ■ A separate circuit serving only this microwave oven. Touch the Timer control, enter time, then touch the Timer control or the Start control. Repeat to set the Light On Time and ...

Owners Manual
Page 4
...water. ■ Stainless steel (on some models): mild soap and water, then rinse with clean water and dry with plastic wrap and vent. Microwave Oven Use Manual Cooking/Stage Cooking Doneness (on turntable with 1 cup (250 mL) of each before or after a brief delay. If programming additional... ■ Grease filter: mild soap and water or dishwasher. ■ Door and exterior: mild soap and water, or glass cleaner applied to the microwave oven cavity, do not use stainless steel cleaner. ■ Turntable: mild soap and water or dishwasher. ■ Cooking rack and supports (on some...
...water. ■ Stainless steel (on some models): mild soap and water, then rinse with clean water and dry with plastic wrap and vent. Microwave Oven Use Manual Cooking/Stage Cooking Doneness (on turntable with 1 cup (250 mL) of each before or after a brief delay. If programming additional... ■ Grease filter: mild soap and water or dishwasher. ■ Door and exterior: mild soap and water, or glass cleaner applied to the microwave oven cavity, do not use stainless steel cleaner. ■ Turntable: mild soap and water or dishwasher. ■ Cooking rack and supports (on some...

Owners Manual
Page 5
... and reference FAQs (Frequently Asked Questions) to inside of the microwave oven, under the bulb cover, and is on and off . Open and close door. Make sure Control Lock is being started. www.whirlpool.com Microwave oven will not operate Check the following : ■ Proximity ...Move the receiver away from underside of microwave oven, and clean monthly, or as prompted by filter status indicator. ■ Cooktop ...
... and reference FAQs (Frequently Asked Questions) to inside of the microwave oven, under the bulb cover, and is on and off . Open and close door. Make sure Control Lock is being started. www.whirlpool.com Microwave oven will not operate Check the following : ■ Proximity ...Move the receiver away from underside of microwave oven, and clean monthly, or as prompted by filter status indicator. ■ Cooktop ...

Owners Manual
Page 6
... 49022-2692 Please include a daytime phone number in materials or workmanship and is reported to Whirlpool within 30 days from warranty coverage. 3. Repairs when your product, you on the upper or lower front facing of the microwave oven opening, behind the door. Major appliances with original model/serial numbers that is contrary...
... 49022-2692 Please include a daytime phone number in materials or workmanship and is reported to Whirlpool within 30 days from warranty coverage. 3. Repairs when your product, you on the upper or lower front facing of the microwave oven opening, behind the door. Major appliances with original model/serial numbers that is contrary...

Warranty
Page 1
... ready. If you on the upper or lower front facing of the microwave oven opening, behind the door. For assistance or service, call 1-800-253-1301. W10182518A SP PN W10182523A © 2008 Whirlpool Corporation. This limited warranty is valid only in the United States or... location or is operated and maintained according to instructions attached to or furnished with the product, Whirlpool Corporation or Whirlpool Canada LP (hereafter "Whirlpool") will pay for future reference. WHIRLPOOL CORPORATION MAJOR APPLIANCE WARRANTY LIMITED WARRANTY For one year from the date of purchase, when this ...
... ready. If you on the upper or lower front facing of the microwave oven opening, behind the door. For assistance or service, call 1-800-253-1301. W10182518A SP PN W10182523A © 2008 Whirlpool Corporation. This limited warranty is valid only in the United States or... location or is operated and maintained according to instructions attached to or furnished with the product, Whirlpool Corporation or Whirlpool Canada LP (hereafter "Whirlpool") will pay for future reference. WHIRLPOOL CORPORATION MAJOR APPLIANCE WARRANTY LIMITED WARRANTY For one year from the date of purchase, when this ...


