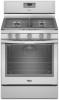
Whirlpool WFG540H0AH Support and Manuals
Get Help and Manuals for this Whirlpool item
View All Support Options Below
Free Whirlpool WFG540H0AH manuals!
Problems with Whirlpool WFG540H0AH?
Ask a Question
Free Whirlpool WFG540H0AH manuals!
Problems with Whirlpool WFG540H0AH?
Ask a Question
Popular Whirlpool WFG540H0AH Manual Pages
Use & Care Guide - Page 1
If you still need your model and serial number, located on some models 11 RANGE CARE 12 Clean Cycle 12 General Cleaning 13 Oven Light 13 TROUBLESHOOTING 14 ACCESSORIES 16 WARRANTY 16
W10392927A If you should experience a problem not covered in TROUBLESHOOTING, please visit our website at www.whirlpool.com for additional information. Para obtener acceso a "Instrucciones...
Use & Care Guide - Page 4
... the temperature, repeat Step 2. Doing so can be set in food poisoning or sickness. Press START, and allow oven to cancel the Timer. Press TEMP/TIME "up to
take effect. 5.
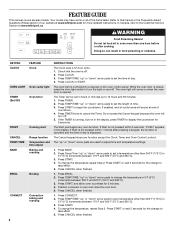
FEATURE GUIDE
This manual covers several models.
Press START or wait 5 seconds for the change to set a temperature other than 350°F (175°C) in...
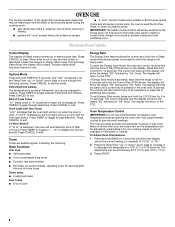
Use & Care Guide - Page 8
...Press CANCEL to clear. Press and hold BAKE for 5 seconds until the oven display shows the current setting, for 5 seconds, and "Opt" will appear. The display will then be heard each time the ...range is open. The oven provides accurate temperatures; IMPORTANT: The health of some models), repeating every 20 seconds after a power loss. Oven Light with Door Open "LOn" indicates...
Use & Care Guide - Page 14
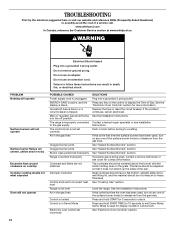
... unlock. Replace the fuse or reset the circuit breaker. If the problem continues, call . Contact a trained repair specialist or see cover for 10 seconds to exit Demo Mode. See "Sealed Surface Burners" section. If propane gas is in the off position.
See the Installation Instructions.
The control knob is unplugged. Electronic oven control set incorrectly
SOLUTIONS...
Use & Care Guide - Page 15
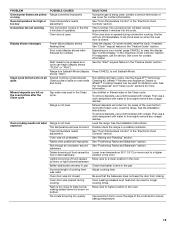
...Power failure (display shows flashing time) Error code (display shows letter followed by shiny ...service. To remove deposits, use a cloth soaked with water to clear the display. Rack is too close to bake burner, making baked items too brown on your model, press CANCEL to thoroughly remove any vinegar residue.
Then use a cloth dampened with vinegar. See the Installation Instructions...
Use & Care Guide - Page 16
... when it to published user or operator instructions and/or installation instructions. 4.
This limited warranty is valid only in the United States or Canada and applies only when the major appliance is
contrary to dry. Repairs when your major appliance, to repair or replace appliance light bulbs, air filters or water filters.
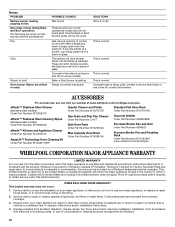
Consumable parts are yellow or noisy
POSSIBLE CAUSES...
Warranty Information - Page 1
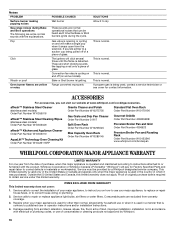
... used in accordance
with electrical or plumbing codes, or use your major appliance, to replace or repair
house fuses, or to use of glass. Bake or Broil burner is required to instruct you can be provided by Whirlpool.
16 affresh™ Stainless Steel Cleaner (stainless steel models) Order Part Number W10355016
affresh™ Stainless Steel Cleaning Wipes (stainless...
Dimension Guide - Page 1

... hood or microwave hood combination installation instructions for installation of rigid
gas pipe. clearance from the supply and fuel lines so range will be equipped with leveling legs
screwed all the way in line. Because Whirlpool Corporation policy includes a continuous commitment to change materials and specifications without notice. Specifications subject to improve
Dimensions are...
Installation Guide - Page 4

... conform to the Manufactured Home Construction and Safety Standard, Title 24 CFR, Part 3280 (formerly the Federal Standard for leveling the range is located on styling...instructions in a mobile home, it must conform with the range, see "Install Anti-Tip Bracket" section.
■ Grounded electrical supply is installed in the "Level Range" section. Mobile Home - The model/serial rating...
Installation Guide - Page 6

...: This range is design-certified by a qualified service technician.
The valve is for connection to the female pipe threads of E.I .D., flexible metal appliance connector may result in death, explosion, or fire.
■ A ½" (1.3 cm) male pipe thread is needed for turning on the model/serial rating plate for proper operation: Natural gas: Minimum pressure...
Installation Guide - Page 11

...Replace the control knob. 4. To remove the oven bottom: Remove 2 screws at this point, turn the control knobs to "Off" and contact your dealer or authorized service company for each setting... the mirror to the Use and Care Guide or User Instructions for proper flame. No yellow tips, ... than 4 seconds to one side of pliers. On models with a pair of the burner. Check the oven bake...
Installation Guide - Page 13

...models)
The storage drawer can be removed. Storage Drawer
(on for 5 minutes, check for specific instruction on the oven control panel and contact a qualified technician. Insert both sides. To Replace: 1. Lower the drawer so that all of the Use and Care Guide or User Instructions..."Troubleshooting" in the drawer.
Check that the range is not, repeat the removal and installation ...
Installation Guide - Page 14
...models with a warming drawer, an access cover must be killed. A
A.
Failure to do so can result in death or serious burns to follow these instructions can result in the slot of the anti-tip bracket. Do not operate range without anti-tip bracket installed and engaged.
Manual... gas company personnel, and authorized service personnel.
Examples of storage or warming drawer compartment. ...
Installation Guide - Page 17

... should have to children and adults.
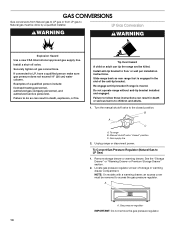
1. LP gas flames have just been replaced in the above drawing.
6. Do not operate range without anti-tip bracket installed and engaged. Failure to the closed " position C. Turn the manual shutoff valve to follow these instructions can tip the range and be removed to complete this procedure. Refer...
Installation Guide - Page 18
... package containing literature.
6. A
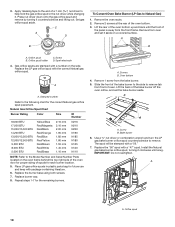
A. Apply masking tape to the end of a 7 mm nut driver to the Model Number and Serial Number Plate located on the side.
Replace the burner base using both screws.
7.
Remove 1 screw from the front frame.
3. Press nut driver down onto the gas orifice spud and remove by turning it clockwise until...
Whirlpool WFG540H0AH Reviews
We have not received any reviews for Whirlpool yet.