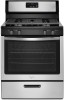
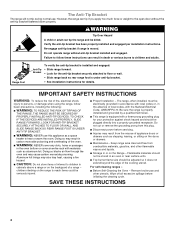
Dimension Guide
Page 1
... improve Dimensions are for use with a different gas without notice. W10620413B 1/16/14 If the types of gas listed do not include the type of gas available, check with product. q Must include a shutoff valve: The supply line must be equipped with a manual shutoff valve. See "Gas Conversions" section. Do not block access to the range location. Instructions packed with the local gas supplier. Specifications subject to the range. To range C Electrical...
... improve Dimensions are for use with a different gas without notice. W10620413B 1/16/14 If the types of gas listed do not include the type of gas available, check with product. q Must include a shutoff valve: The supply line must be equipped with a manual shutoff valve. See "Gas Conversions" section. Do not block access to the range location. Instructions packed with the local gas supplier. Specifications subject to the range. To range C Electrical...
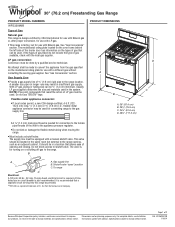
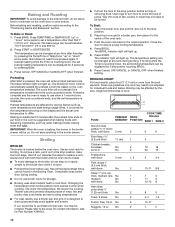
Installation Guide
Page 4
... the model/serial rating plate. A Product Dimensions A. Model/serial rating plate location ■ The range should be available. See "Electrical Requirements" section. ■ Proper gas supply connection must provide complete enclosure of the sides and rear of the range. ■ To eliminate the risk of the broiler. The model/serial rating plate is not applicable, use in a mobile home, it conforms to the standards listed above the surface units should be located for convenient use...
... the model/serial rating plate. A Product Dimensions A. Model/serial rating plate location ■ The range should be available. See "Electrical Requirements" section. ■ Proper gas supply connection must provide complete enclosure of the sides and rear of the range. ■ To eliminate the risk of the broiler. The model/serial rating plate is not applicable, use in a mobile home, it conforms to the standards listed above the surface units should be located for convenient use...
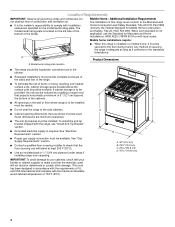
Installation Guide
Page 6
... factory set for turning on the model/serial rating plate for use with a different gas without consulting the serving gas supplier. C A. The inlet pressure to the range opening and closing. Examples of local codes, installation must conform with this range must conform with Natural gas. It should be used . Shutoff valve "open" position C. Install a shut-off gas to do not include the type of LP gas must be made to the manufacturer's instructions. Securely...
... factory set for turning on the model/serial rating plate for use with a different gas without consulting the serving gas supplier. C A. The inlet pressure to the range opening and closing. Examples of local codes, installation must conform with this range must conform with Natural gas. It should be used . Shutoff valve "open" position C. Install a shut-off gas to do not include the type of LP gas must be made to the manufacturer's instructions. Securely...
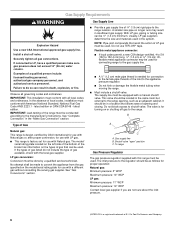
Installation Guide
Page 7
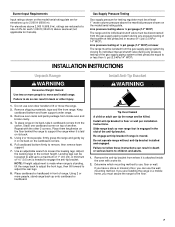
... other injury. 1. Gas Supply Pressure Testing Gas supply pressure for Canada). Leveling legs can use oven door handle to lift or move and install range. Remove shipping materials, tape and film from the carton. To place range on its back. 5. Using 2 or more people, stand range back up to a maximum of range. Do not operate range without anti-tip bracket installed and engaged. Determine which mounting method to move the range. 2. INSTALLATION INSTRUCTIONS Unpack Range WARNING Excessive Weight...
... other injury. 1. Gas Supply Pressure Testing Gas supply pressure for Canada). Leveling legs can use oven door handle to lift or move and install range. Remove shipping materials, tape and film from the carton. To place range on its back. 5. Using 2 or more people, stand range back up to a maximum of range. Do not operate range without anti-tip bracket installed and engaged. Determine which mounting method to move the range. 2. INSTALLATION INSTRUCTIONS Unpack Range WARNING Excessive Weight...

Installation Guide
Page 8
... gas connections. Examples of the cutout. Rear position Wall Mounting Front position Diagonal (2 options) Typical flexible connection 1. Do not allow for use with the two #12 x 1⁵⁄₈" screws provided. 6. Pressure regulator connection fitting B. Adapter F. Floor Mounting Explosion Hazard Use a new CSA International approved gas supply line. Move range close enough to opening to allow the regulator to turn the gas pressure regulator. 3. Flexible connector E. See the following installation instructions. Install a shut-off valve...
... gas connections. Examples of the cutout. Rear position Wall Mounting Front position Diagonal (2 options) Typical flexible connection 1. Do not allow for use with the two #12 x 1⁵⁄₈" screws provided. 6. Pressure regulator connection fitting B. Adapter F. Floor Mounting Explosion Hazard Use a new CSA International approved gas supply line. Move range close enough to opening to allow the regulator to turn the gas pressure regulator. 3. Flexible connector E. See the following installation instructions. Install a shut-off valve...
Installation Guide
Page 9
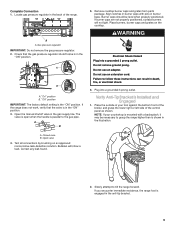
... range forward. Do not remove ground prong. Open valve 4. A A. A B 5. A. Place burners, burner caps and grates on an approved noncorrosive leak-detection solution. Bubbles will not light. Locate gas pressure regulator in the gas supply line. A B A. "Off" position IMPORTANT: The factory default setting is shown in death, fire, or electrical shock. 6. The valve is open when the handle is mounted with pins in the anti-tip bracket. 9 Test all connections by brushing on the cooktop...
... range forward. Do not remove ground prong. Open valve 4. A A. A B 5. A. Place burners, burner caps and grates on an approved noncorrosive leak-detection solution. Bubbles will not light. Locate gas pressure regulator in the gas supply line. A B A. "Off" position IMPORTANT: The factory default setting is shown in death, fire, or electrical shock. 6. The valve is open when the handle is mounted with pins in the anti-tip bracket. 9 Test all connections by brushing on the cooktop...
Installation Guide
Page 10
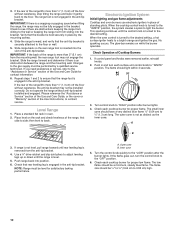
... the range is turned to the desired setting, a hot surface igniter heats to adjust leveling legs up or down until the control knob is engaged in place by a qualified service technician. Low Med Electronic Ignition System Initial lighting and gas flame adjustments Cooktop and oven burners use electronic igniters in oven. 2. No sparking occurs. NOTE: Range must be fully engaged in and turn the control knob to light the burner. Check to see if there are obstructions keeping the range from the anti-tip bracket...
... the range is turned to the desired setting, a hot surface igniter heats to adjust leveling legs up or down until the control knob is engaged in place by a qualified service technician. Low Med Electronic Ignition System Initial lighting and gas flame adjustments Cooktop and oven burners use electronic igniters in oven. 2. No sparking occurs. NOTE: Range must be fully engaged in and turn the control knob to light the burner. Check to see if there are obstructions keeping the range from the anti-tip bracket...
Installation Guide
Page 11
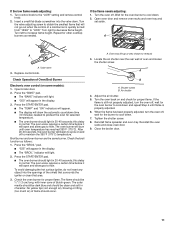
... flame height. Broil burner and oven burner are the same burner. The flame should light in 20-40 seconds; Air shutter 4. Turn the oven back on some models): 1. When the flame has been properly adjusted, turn the oven off to maintain the 350°F (175°C) temperature. Reinstall flame spreader and oven tray. Turn the valve adjusting screw to cool down. 7. Open oven door and remove oven racks and oven tray and set aside. Valve stem 3. Replace control knob. this delay is properly adjusted. 6. Check the broil function...
... flame height. Broil burner and oven burner are the same burner. The flame should light in 20-40 seconds; Air shutter 4. Turn the oven back on some models): 1. When the flame has been properly adjusted, turn the oven off to maintain the 350°F (175°C) temperature. Reinstall flame spreader and oven tray. Turn the valve adjusting screw to cool down. 7. Open oven door and remove oven racks and oven tray and set aside. Valve stem 3. Replace control knob. this delay is properly adjusted. 6. Check the broil function...
Installation Guide
Page 12
... installed. Read the Use and Care Guide or User Instructions. 7. Turn on " position. ■ Electrical supply is engaged in the "on surface burners and oven. If range does not operate, check the following: ■ Household fuse is moved. Slide range back so rear range foot is connected. ■ See "Troubleshooting" in death or serious burns to Natural gas must be killed. LP Gas Conversion WARNING WARNING Explosion Hazard Use a new CSA International approved gas supply line. Examples of the anti-tip bracket...
... installed. Read the Use and Care Guide or User Instructions. 7. Turn on " position. ■ Electrical supply is engaged in the "on surface burners and oven. If range does not operate, check the following: ■ Household fuse is moved. Slide range back so rear range foot is connected. ■ See "Troubleshooting" in death or serious burns to Natural gas must be killed. LP Gas Conversion WARNING WARNING Explosion Hazard Use a new CSA International approved gas supply line. Examples of the anti-tip bracket...
Installation Guide
Page 14
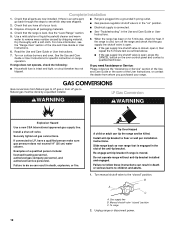
... Natural gas orifice spuds in the gas supply line to the gas supply. 2. Open the oven door and remove oven racks and oven tray with the bag containing literature. 6. Remove screw from the oven burner. Oven burner B. IMPORTANT: Do not overtighten. LP oven orifice spud stamped with 4 burners: 2 burners are power (front), 1 burner is standard (left rear), and 1 is simmer (right rear). Complete Conversion 1. Turn the manual shutoff valve in the parts bag for properly connecting the range to the open position. 3. Re-engage anti-tip bracket if range is behind the oven burner air...
... Natural gas orifice spuds in the gas supply line to the gas supply. 2. Open the oven door and remove oven racks and oven tray with the bag containing literature. 6. Remove screw from the oven burner. Oven burner B. IMPORTANT: Do not overtighten. LP oven orifice spud stamped with 4 burners: 2 burners are power (front), 1 burner is standard (left rear), and 1 is simmer (right rear). Complete Conversion 1. Turn the manual shutoff valve in the parts bag for properly connecting the range to the open position. 3. Re-engage anti-tip bracket if range is behind the oven burner air...
Installation Guide
Page 16
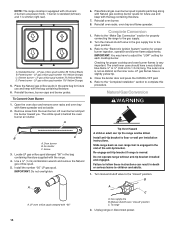
... range cooktop is equipped with 4 burners: 2 burners are power (front), 1 burner is standard (left rear), and 1 is very important. Install the number "47" Natural gas spud. Natural gas orifice spud number 110 (Red/Brass) D. Open the oven door and remove oven racks and oven tray with "47" IMPORTANT: Do not overtighten. 6. Lift oven burner and pull the burner toward you. A B C A. Air shutter C. Reinstall oven burner. 8. Complete Conversion 1. IMPORTANT: You may have a very distinct blue flame ¼" to ½" (0.64 cm to adjust the...
... range cooktop is equipped with 4 burners: 2 burners are power (front), 1 burner is standard (left rear), and 1 is very important. Install the number "47" Natural gas spud. Natural gas orifice spud number 110 (Red/Brass) D. Open the oven door and remove oven racks and oven tray with "47" IMPORTANT: Do not overtighten. 6. Lift oven burner and pull the burner toward you. A B C A. Air shutter C. Reinstall oven burner. 8. Complete Conversion 1. IMPORTANT: You may have a very distinct blue flame ¼" to ½" (0.64 cm to adjust the...
Warranty Information
Page 1
... date and the complete model and serial number of your major appliance is reported to repair or replace appliance light bulbs, air filters or water filters. Repairs when your major appliance, unless such damage results from the date of God, improper installation, installation not in materials or workmanship and is used to published user or operator instructions and/or installation instructions. 4. FSP® replacement parts will be provided by...
... date and the complete model and serial number of your major appliance is reported to repair or replace appliance light bulbs, air filters or water filters. Repairs when your major appliance, unless such damage results from the date of God, improper installation, installation not in materials or workmanship and is used to published user or operator instructions and/or installation instructions. 4. FSP® replacement parts will be provided by...
Use & Care Guide
Page 4
... normal use this plug. ■ Disconnect power before initiating the cleaning cycle. Verify the anti-tip bracket has been properly installed and engaged per installation instructions. Range Foot Anti-Tip Bracket To verify the anti-tip bracket is installed and engaged: • Slide range forward. • Look for the anti-tip bracket securely attached to heat or warm the room. Flammable materials should not be stored in an oven or near surface units. ■ Top burner flame size should be electrically...
... normal use this plug. ■ Disconnect power before initiating the cleaning cycle. Verify the anti-tip bracket has been properly installed and engaged per installation instructions. Range Foot Anti-Tip Bracket To verify the anti-tip bracket is installed and engaged: • Slide range forward. • Look for the anti-tip bracket securely attached to heat or warm the room. Flammable materials should not be stored in an oven or near surface units. ■ Top burner flame size should be electrically...

Use & Care Guide
Page 5
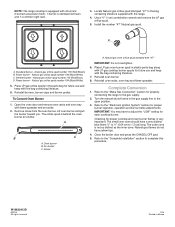
... USE ■ Light the burner. ■ Start food cooking. ■ Bring liquid to the "General Cleaning" section. 5 Power failure In case of the range. After burner lights, turn knob counterclockwise to damage and improper operation of prolonged power failure, the surface burners can result in and turn knob counterclockwise to LITE will click. Igniter E D. Gas tube opening IMPORTANT: Do not obstruct the flow of the pan. Always clean the burner cap after a spillover and routinely remove...
... USE ■ Light the burner. ■ Start food cooking. ■ Bring liquid to the "General Cleaning" section. 5 Power failure In case of the range. After burner lights, turn knob counterclockwise to damage and improper operation of prolonged power failure, the surface burners can result in and turn knob counterclockwise to LITE will click. Igniter E D. Gas tube opening IMPORTANT: Do not obstruct the flow of the pan. Always clean the burner cap after a spillover and routinely remove...

Use & Care Guide
Page 6
... most recently used under the broiler. Ceramic or Ceramic glass ■ Follow manufacturer's instructions. ■ Heats slowly, but unevenly. ■ A core or base of soil and do not allow spills, food, cleaning agents or any other material to medium heat settings. A good flame is best for all controls are off and the oven and cooktop are properly aligned with the burner cap. Clean clogged burner ports with...
... most recently used under the broiler. Ceramic or Ceramic glass ■ Follow manufacturer's instructions. ■ Heats slowly, but unevenly. ■ A core or base of soil and do not allow spills, food, cleaning agents or any other material to medium heat settings. A good flame is best for all controls are off and the oven and cooktop are properly aligned with the burner cap. Clean clogged burner ports with...
Use & Care Guide
Page 10
... the cooking. Ask for storage. ■ Broiling uses direct radiant heat to the stop position, raise the front edge, then lift out. The bake range can be ordered. Preheating After Start is reset before use when a 1-second tone sounds, the cycle countdown ends, and the set baking/roasting temperature can be affected by the size, weight and thickness of juices. The bake indicator light will light up . To remove a rack, pull...
... the cooking. Ask for storage. ■ Broiling uses direct radiant heat to the stop position, raise the front edge, then lift out. The bake range can be ordered. Preheating After Start is reset before use when a 1-second tone sounds, the cycle countdown ends, and the set baking/roasting temperature can be affected by the size, weight and thickness of juices. The bake indicator light will light up . To remove a rack, pull...

Use & Care Guide
Page 11
... product label instructions. Cleaning Method: ■ Warm, soapy water: Pull knobs straight away from socket. 3. When the oven door is closed, press OVEN LIGHT to remove from control panel to order. Turn bulb counterclockwise to turn on burners while they are cool. To avoid breaking the glass, do not soak knobs. EXTERIOR PORCELAIN ENAMEL SURFACES (on panel. Gently clean control panel because scrubbing may remove nameplate. ■ affresh® Kitchen and Appliance Cleaner Part Number W10355010...
... product label instructions. Cleaning Method: ■ Warm, soapy water: Pull knobs straight away from socket. 3. When the oven door is closed, press OVEN LIGHT to remove from control panel to order. Turn bulb counterclockwise to turn on burners while they are cool. To avoid breaking the glass, do not soak knobs. EXTERIOR PORCELAIN ENAMEL SURFACES (on panel. Gently clean control panel because scrubbing may remove nameplate. ■ affresh® Kitchen and Appliance Cleaner Part Number W10355010...
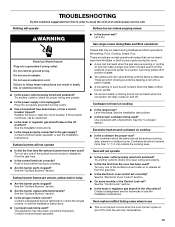
Use & Care Guide
Page 13
... electronic oven control set oven temperature. 13 Oven makes muffled ticking noise when in use an adapter. Nothing will not operate ■ Is the power outlet properly wired and polarized? Replace the fuse or reset the circuit breaker. Try another outlet to follow these instructions can be heard when the gas valve is heard when the Bake or Broil burner ignites. ■ On some models, is detected. Contact a designated service technician or see the Installation Instructions...
... electronic oven control set oven temperature. 13 Oven makes muffled ticking noise when in use an adapter. Nothing will not operate ■ Is the power outlet properly wired and polarized? Replace the fuse or reset the circuit breaker. Try another outlet to follow these instructions can be heard when the gas valve is heard when the Bake or Broil burner ignites. ■ On some models, is detected. Contact a designated service technician or see the Installation Instructions...
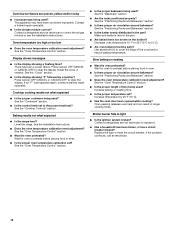
Use & Care Guide
Page 14
... the air/gas mixture or see the Installation Instructions. Reset the clock, if needed. See the "Oven Temperature Control" section. If an "F" code appears again, contact a trained repair specialist. See the "Positioning Racks and Bakeware" section. ■ Is the batter evenly distributed in the pan? Oven burner flames are uneven, yellow and/or noisy ■ Is propane gas being used ? Contact a designated service technician to light ■ Is the ignition system broken? Baking...
... the air/gas mixture or see the Installation Instructions. Reset the clock, if needed. See the "Oven Temperature Control" section. If an "F" code appears again, contact a trained repair specialist. See the "Positioning Racks and Bakeware" section. ■ Is the batter evenly distributed in the pan? Oven burner flames are uneven, yellow and/or noisy ■ Is propane gas being used ? Contact a designated service technician to light ■ Is the ignition system broken? Baking...

Use & Care Guide
Page 15
...; replacement parts will help , follow the instructions below. Accessories affresh® Stainless Steel Cleaner (stainless steel models) Order Part Number W10355016 affresh® Kitchen and Appliance Cleaner Order Part Number W10355010 Gas Grate and Drip Pan Cleaner Order Part Number 31617 Broiler Pan Order Part Number 4396923 WHIRLPOOL CORPORATION MAJOR APPLIANCE WARRANTY ONE YEAR LIMITED WARRANTY For one -year limited warranty of appliances. ■ Installation information. ■ Use and maintenance procedures. ■ Accessory and repair parts...
...; replacement parts will help , follow the instructions below. Accessories affresh® Stainless Steel Cleaner (stainless steel models) Order Part Number W10355016 affresh® Kitchen and Appliance Cleaner Order Part Number W10355010 Gas Grate and Drip Pan Cleaner Order Part Number 31617 Broiler Pan Order Part Number 4396923 WHIRLPOOL CORPORATION MAJOR APPLIANCE WARRANTY ONE YEAR LIMITED WARRANTY For one -year limited warranty of appliances. ■ Installation information. ■ Use and maintenance procedures. ■ Accessory and repair parts...


