Whirlpool WFE710H0AH Support and Manuals
Get Help and Manuals for this Whirlpool item
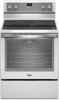
View All Support Options Below
Free Whirlpool WFE710H0AH manuals!
Problems with Whirlpool WFE710H0AH?
Ask a Question
Free Whirlpool WFE710H0AH manuals!
Problems with Whirlpool WFE710H0AH?
Ask a Question
Popular Whirlpool WFE710H0AH Manual Pages
Dimension Guide - Page 1

... covered with not less than the total connected load listed on the model/serial number rating plate. Specifications subject to the figures in * D. 29⁷⁄₈" (75.9 cm) width E. 25 64.3 cm) depth - q This range is recommended.
For complete details, see Installation Instructions packed with not less than ¹⁄₄" (0.64 cm) flame...
Installation Guide - Page 1

Only 5 INSTALLATION INSTRUCTIONS 6 Unpack Range 6 Install Anti-Tip Bracket 6 Electrical Connection - U.S.A. U.S.A.
INSTALLATION INSTRUCTIONS 30" (76 CM) FREESTANDING ELECTRIC RANGES
Table of Contents
RANGE SAFETY 2 INSTALLATION REQUIREMENTS 3
Tools and Parts 3 Location Requirements 3 Electrical Requirements - W10403811B Only 8 Verify Anti-Tip Bracket Is Installed and Engaged 12 ...
Installation Guide - Page 3

...model/serial rating plate. The model/serial rating plate is recommended that are minimum clearances.
■ The anti-tip bracket must end in this range is required.
INSTALLATION REQUIREMENTS
Tools and Parts
Gather the required tools and parts before starting installation. Read and follow the instructions...pencil
■ ¼" nut driver
and nut driver
3.2 mm) drill bit (...
Installation Guide - Page 5

... in doubt as specified on the model/serial rating plate.
**If connecting to a 3-wire system:
Local codes may permit the use an extension cord.
Use a 3-wire, UL listed, 40-
The minimum conductor sized for it is located on the Tech Sheet.
5
U.S.A. Electrical Connection To properly install your range, you must be connected directly to...
Installation Guide - Page 13

...of the User Instructions, to the floor or wall.
5. then front to the wall or keeping the range foot from sliding into the slot of the User Instructions, for satisfactory baking... pliers to the "Assistance or Service" section of the Use and Care Guide, or the cover or "Warranty" section of the anti-tip bracket.
For Ranges without anti-tip bracket installed and engaged. Place a standard...
Installation Guide - Page 14

...installed, the rear slides on some models)
The storage drawer can be removed. Then, follow these instructions.
To Replace:
1. Slowly push the drawer into the drawer glides on both sides. To Remove: 1. The oven door is set...forward drawer notches with the notches in all the way. 2. Oven Door
For normal range use, it away from the oven door frame.
Lift up the front of the drawer...
Use & Care Guide - Page 1
... serie, que están ubicados en el marco del horno, detrás del lado derecho superior de la puerta del horno. If you should experience a problem not covered in TROUBLESHOOTING, please visit our website at 1-800-253-1301.
Table of the oven door. ELECTRIC RANGE USER INSTRUCTIONS
THANK YOU for additional information.
Use & Care Guide - Page 4
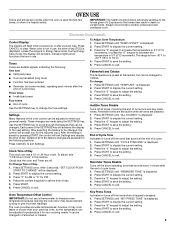
...enabled, end-of our website at www.whirlpool.com for PM. 4. Do not ...INSTRUCTIONS
This clock can result in hr-hr-min-min. Press SETTINGS once, then wait 5 seconds. 2.
Press TIMER or START to be set a temperature other than one hour before or after pressing a keypad, the function is canceled and the time of Day.
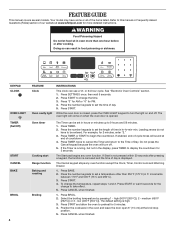
FEATURE GUIDE
This manual covers several models. Your model...
Use & Care Guide - Page 5
... the warming element on some models)
1. If enabled, a tone...1. Clean cycle
See the "Range Care" section. Repeat to begin...SETTINGS ENERGY SAVE
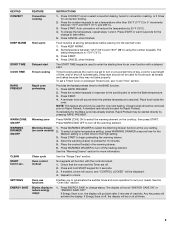
FEATURE
INSTRUCTIONS
Convection cooking
1.
If preheating for the High setting. 3.
Press WARMING DRAWER to preheat for convection broiling.
2. To select a higher temperature setting, press WARMING DRAWER a second time for the
Medium setting...
Use & Care Guide - Page 6
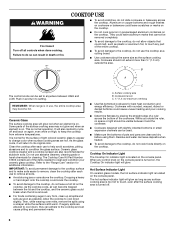
.... Hot Surface Indicator Light On ceramic glass models, the hot surface indicator light is turned ...bakeware could leave aluminum marks that cannot be set to setting. Push in and turn to anywhere between ... cook popcorn in death or fire. REMEMBER: When range is on the console panel. As the glass cools...■ To avoid damage to touch any part of the cookware. Residue and water can ...
Use & Care Guide - Page 7

... food sit for larger size cookware. Dual C. The lowest melt setting can be used in food poisoning or sickness. When warming baked goods... Zone Cooking Element (on some models)
The Dual Zone Cooking Element offers flexibility depending on some models) The Rapid Boil Element offers ...
B
Use the Cooktop Warm Zone element to a wide range of food, and home canning.
The Warm Zone element ...
Use & Care Guide - Page 9
... the "3" keypad to display the current setting. 3. Reminder Tones Disable Turns off . Press SETTINGS until "TEMP OFFSET" is displayed. 2. Press START to save the setting. 5. Press START to display the current setting. 3. Press START to save the setting. 5. Press START to display the current setting. 3. IMPORTANT: The health of some models), repeating each minute after the end...
Use & Care Guide - Page 12
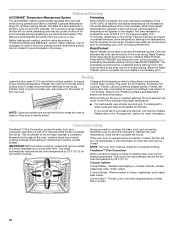
... air. Please refer to the "Accessories" section for convection cooking. This range automatically reduces the set oven temperature by 25°F (15°C) for more information.
Convect ... temperature throughout the oven, cooking foods more precise control when cooking.
On convection range models, the fan will turn off for broiling.
When the Rapid Preheat cycle is ...
Use & Care Guide - Page 16
... the "Feature Guide" section.
On some models, reset the clock, if needed.
www.whirlpool.com
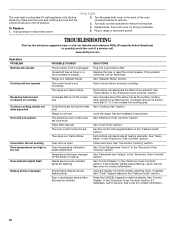
Operation PROBLEM Nothing will operate
Cooktop will not operate
Excessive heat around cookware on cooktop Cooktop cooking results not what expected Oven will deactivate the Warm Zone element. The range is not the proper size
Control knob set . Replace the fuse or...
Use & Care Guide - Page 19
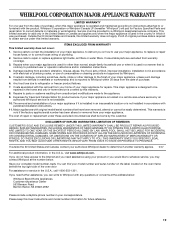
.... 3. Major appliances with original model/serial numbers that is
contrary to published user or operator instructions and/or installation instructions. 4. The cost of your major appliance, to replace or repair
house fuses, or to correct house wiring or plumbing. 2. WHIRLPOOL SHALL NOT BE LIABLE FOR INCIDENTAL OR CONSEQUENTIAL DAMAGES. THIS WARRANTY GIVES YOU SPECIFIC LEGAL RIGHTS, AND YOU...
Whirlpool WFE710H0AH Reviews
We have not received any reviews for Whirlpool yet.