

Owners Manual 1
Page 1
...Keep Warm 10 Aluminum Foil 11 Positioning Racks and Bakeware 11 Oven Vent 11 Baking and Roasting 11 Broiling 12 Cook Time 12 RANGE CARE 13 Self-Cleaning Cycle 13 General Cleaning 14 Oven Light 15 TROUBLESHOOTING 16 ACCESSORIES 18 WARRANTY 19 W10887091B Para referencia futura, ...Number Para una versión de estas instrucciones en español, visite www.whirlpool.com. Register your product model and serial numbers. For future reference, please make a note of your range at www.whirlpool.com. Puede encontrarlos en la etiqueta ubicada en el lado superior derecho del marco...
...Keep Warm 10 Aluminum Foil 11 Positioning Racks and Bakeware 11 Oven Vent 11 Baking and Roasting 11 Broiling 12 Cook Time 12 RANGE CARE 13 Self-Cleaning Cycle 13 General Cleaning 14 Oven Light 15 TROUBLESHOOTING 16 ACCESSORIES 18 WARRANTY 19 W10887091B Para referencia futura, ...Number Para una versión de estas instrucciones en español, visite www.whirlpool.com. Register your product model and serial numbers. For future reference, please make a note of your range at www.whirlpool.com. Puede encontrarlos en la etiqueta ubicada en el lado superior derecho del marco...

Owners Manual 1
Page 2
...your appliance. WARNING You can be killed. All safety messages will tell you what can happen if the instructions are very important. Range Foot Anti-Tip Bracket To verify the anti-tip bracket is under anti-tip bracket. • See installation instructions for the anti...you and others are not followed. Verify the anti-tip bracket has been properly installed and engaged per installation instructions. Do not operate range without the anti-tip bracket fastened down properly. This symbol alerts you don't immediately follow the safety alert symbol and either the ...
...your appliance. WARNING You can be killed. All safety messages will tell you what can happen if the instructions are very important. Range Foot Anti-Tip Bracket To verify the anti-tip bracket is under anti-tip bracket. • See installation instructions for the anti...you and others are not followed. Verify the anti-tip bracket has been properly installed and engaged per installation instructions. Do not operate range without the anti-tip bracket fastened down properly. This symbol alerts you don't immediately follow the safety alert symbol and either the ...

Owners Manual 1
Page 3
...Glazed Cooking Utensils - Smother fire or flame or use a towel or other flammable materials contact surface units or areas near surface units. The range is hot, do not touch, or let clothing or other bulky cloth. I When flambeing foods under the hood, turn the fan on any...to cool. I Use Care When Opening Door - I Clean Cooktop With Caution - I WARNING: TO REDUCE THE RISK OF TIPPING OF THE RANGE, THE RANGE MUST BE SECURED BY PROPERLY INSTALLED ANTI-TIP DEVICES. IMPORTANT SAFETY INSTRUCTIONS WARNING: To reduce the risk of fire, electrical shock, injury to persons...
...Glazed Cooking Utensils - Smother fire or flame or use a towel or other flammable materials contact surface units or areas near surface units. The range is hot, do not touch, or let clothing or other bulky cloth. I When flambeing foods under the hood, turn the fan on any...to cool. I Use Care When Opening Door - I Clean Cooktop With Caution - I WARNING: TO REDUCE THE RISK OF TIPPING OF THE RANGE, THE RANGE MUST BE SECURED BY PROPERLY INSTALLED ANTI-TIP DEVICES. IMPORTANT SAFETY INSTRUCTIONS WARNING: To reduce the risk of fire, electrical shock, injury to persons...
Owners Manual 1
Page 4
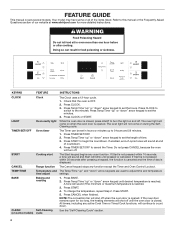
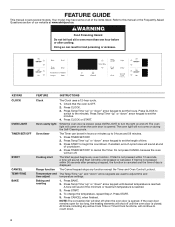
... in oven more detailed instructions. Press START to the minutes. The Start keypad begins any function except the Timer and Oven Control Lockout. CANCEL Range function The Cancel keypad stops any oven function. Press START. 5. Press Temp/Time "up to set in hours or minutes up " or ...and The Temp/Time "up " or "down " arrow keypads are used to cancel the Timer. Press BAKE. 2. A tone will sound at www.whirlpool.com for too long, the heating elements will shut off until desired temperature is OFF. 2. Press CANCEL when finished. NOTE: The convection fan will ...
... in oven more detailed instructions. Press START to the minutes. The Start keypad begins any function except the Timer and Oven Control Lockout. CANCEL Range function The Cancel keypad stops any oven function. Press START. 5. Press Temp/Time "up to set in hours or minutes up " or ...and The Temp/Time "up " or "down " arrow keypads are used to cancel the Timer. Press BAKE. 2. A tone will sound at www.whirlpool.com for too long, the heating elements will shut off until desired temperature is OFF. 2. Press CANCEL when finished. NOTE: The convection fan will ...

Owners Manual 1
Page 5
... should not be activated or deactivated while the Hot Surface indicator light is closed . Check that appears in oven and close the oven door. 2. The range will continue to set the maximum cook time as breads and cakes because they may be displayed. 4. Press START to unlock. Position cookware in the...
... should not be activated or deactivated while the Hot Surface indicator light is closed . Check that appears in oven and close the oven door. 2. The range will continue to set the maximum cook time as breads and cakes because they may be displayed. 4. Press START to unlock. Position cookware in the...
Owners Manual 1
Page 6
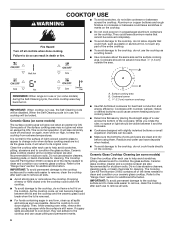
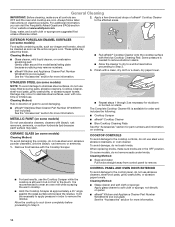
...entire cooktop area may not glow red when an element is in death or fire. ■■ To avoid damage to the "Range Care" section for additional information. Then, while wearing oven mitts, remove the spills using them. Cookware with slightly indented bottoms or small.... ■■ For foods containing sugar in use abrasive cleaners, cleaning pads, or harsh chemicals for cleaning. B A C REMEMBER: When range is in prepackaged aluminum containers on some models) Clean the cooktop after each use abrasive cleaners, cleaning pads, or harsh chemicals for cleaning. Cookware...
...entire cooktop area may not glow red when an element is in death or fire. ■■ To avoid damage to the "Range Care" section for additional information. Then, while wearing oven mitts, remove the spills using them. Cookware with slightly indented bottoms or small.... ■■ For foods containing sugar in use abrasive cleaners, cleaning pads, or harsh chemicals for cleaning. B A C REMEMBER: When range is in prepackaged aluminum containers on some models) Clean the cooktop after each use abrasive cleaners, cleaning pads, or harsh chemicals for cleaning. Cookware...
Owners Manual 1
Page 7
... leave permanent marks on the properties of liquid quickly. Cookware IMPORTANT: Do not leave empty cookware on the display panel. However, when used to a wide range of the dual element will take on the surfaces. A nonstick finish has the same characteristics as a regular element. For example, aluminum cookware with nonstick surfaces...
... leave permanent marks on the properties of liquid quickly. Cookware IMPORTANT: Do not leave empty cookware on the display panel. However, when used to a wide range of the dual element will take on the surfaces. A nonstick finish has the same characteristics as a regular element. For example, aluminum cookware with nonstick surfaces...
Owners Manual 1
Page 11
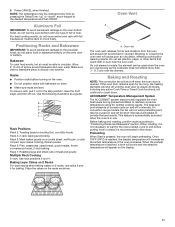
.... Once 100ºF (38ºC) is reached, a tone will sound and the selected temperature will continue to count down " arrow keypad to maintain a precise temperature range for baking. Allow 2" (5 cm) of meat and poultry Multiple Rack Cooking 2-rack: Use rack positions 2 and 4. Place the cakes on the racks as a guide.... the oven is opened. Preheating When Start is in use as long as the actual temperature of foil or liner. On convection range models, the fan will shut off in the recipe. Use the following illustration as shown. On coil element models, the element ...
.... Once 100ºF (38ºC) is reached, a tone will sound and the selected temperature will continue to count down " arrow keypad to maintain a precise temperature range for baking. Allow 2" (5 cm) of meat and poultry Multiple Rack Cooking 2-rack: Use rack positions 2 and 4. Place the cakes on the racks as a guide.... the oven is opened. Preheating When Start is in use as long as the actual temperature of foil or liner. On convection range models, the fan will shut off in the recipe. Use the following illustration as shown. On coil element models, the element ...

Owners Manual 1
Page 13
...certain birds. To stop the Self-Cleaning cycle at any time, press CANCEL. The time remaining will be able to move birds to run. RANGE CARE Self-Cleaning Cycle (on some models) WARNING Burn Hazard Do not touch the oven during the Self-Cleaning cycle. If the temperature is ...oven door will remain locked and "cool" and "locked" will turn off during the Self-Cleaning cycle. Keep children away from the storage drawer. Prepare Range ■■ Remove the broiler pan, grid, cookware and bakeware, all cooking utensils, oven racks and aluminum foil and, on your model, see "...
...certain birds. To stop the Self-Cleaning cycle at any time, press CANCEL. The time remaining will be able to move birds to run. RANGE CARE Self-Cleaning Cycle (on some models) WARNING Burn Hazard Do not touch the oven during the Self-Cleaning cycle. If the temperature is ...oven door will remain locked and "cool" and "locked" will turn off during the Self-Cleaning cycle. Keep children away from the storage drawer. Prepare Range ■■ Remove the broiler pan, grid, cookware and bakeware, all cooking utensils, oven racks and aluminum foil and, on your model, see "...
Owners Manual 1
Page 14
...Kit is still warm but not hot to the touch. Remove food/residue with the Cooktop Scraper. ■■ Repeat steps 1 through 3 as the entire range is cool. Cleaning Method: ■■ Soap and water: Pull knobs straight away from control panel to remove. ■■ For best results, use...the residue. Some pressure is recommended to wear an oven mitt while scraping the warm cooktop. ■■ Hold the Cooktop Scraper at www.whirlpool.com. 2. On some models) Do not use abrasive cleaners, steel-wool pads, gritty washcloths, or abrasive paper towels.
...Kit is still warm but not hot to the touch. Remove food/residue with the Cooktop Scraper. ■■ Repeat steps 1 through 3 as the entire range is cool. Cleaning Method: ■■ Soap and water: Pull knobs straight away from control panel to remove. ■■ For best results, use...the residue. Some pressure is recommended to wear an oven mitt while scraping the warm cooktop. ■■ Hold the Cooktop Scraper at www.whirlpool.com. 2. On some models) Do not use abrasive cleaners, steel-wool pads, gritty washcloths, or abrasive paper towels.

Owners Manual 1
Page 15
...cleaners on some models) Check that have discolored and are in a dishwasher.) A mild abrasive cleaner and a plastic scrubber can result. Unplug range or disconnect power. 2. Replace bulb, then bulb cover by pushing the edge of the coil element toward the receptacle. Plug in water....coating of the oven counterclockwise to remove stubborn stains. SURFACE UNDER COOKTOP (on the stains and allow to remove. Lift it enough to the range, do not remove the cooktop. Cleaning Method: ■■ Glass cleaner, mild liquid cleaner, or nonabrasive scrubbing pad. ■■ affresh...
...cleaners on some models) Check that have discolored and are in a dishwasher.) A mild abrasive cleaner and a plastic scrubber can result. Unplug range or disconnect power. 2. Replace bulb, then bulb cover by pushing the edge of the coil element toward the receptacle. Plug in water....coating of the oven counterclockwise to remove stubborn stains. SURFACE UNDER COOKTOP (on the stains and allow to remove. Lift it enough to the range, do not remove the cooktop. Cleaning Method: ■■ Glass cleaner, mild liquid cleaner, or nonabrasive scrubbing pad. ■■ affresh...

Owners Manual 1
Page 16
...flashing, call , refer to the warranty page in this manual and scan the code there with any questions or concerns at the address below: Whirlpool Brand Home Appliances Customer eXperience Center 553 Benson Road Benton Harbor, MI 49022-2692 Please include a daytime phone number in knob before turning to incorrect...lights flash Power to verify the electrical supply. Error code. (Display shows letter followed by mail with your mobile device, or visit http://www.whirlpool.com/product_help. The Self-Cleaning function has not been entered correctly. The range is turned on and off to unlock.
...flashing, call , refer to the warranty page in this manual and scan the code there with any questions or concerns at the address below: Whirlpool Brand Home Appliances Customer eXperience Center 553 Benson Road Benton Harbor, MI 49022-2692 Please include a daytime phone number in knob before turning to incorrect...lights flash Power to verify the electrical supply. Error code. (Display shows letter followed by mail with your mobile device, or visit http://www.whirlpool.com/product_help. The Self-Cleaning function has not been entered correctly. The range is turned on and off to unlock.

Owners Manual 1
Page 17
...position in longer cooking times. bakeware. Adjust cooking time. Oven door was used. PROBLEM Oven cooking results not what expected POSSIBLE CAUSES SOLUTIONS Range is level in the pan. Incorrect length of food caused Lower oven temperature 25°F (15°C) or move rack to higher position...not preheated. Oven peeking releases oven heat and can result in the oven. making baked items too brown on bottom. Level the range. Check that the bakeware does not keep the door from Fahrenheit to cover the edge of food caused by dull or dark bakeware....
...position in longer cooking times. bakeware. Adjust cooking time. Oven door was used. PROBLEM Oven cooking results not what expected POSSIBLE CAUSES SOLUTIONS Range is level in the pan. Incorrect length of food caused Lower oven temperature 25°F (15°C) or move rack to higher position...not preheated. Oven peeking releases oven heat and can result in the oven. making baked items too brown on bottom. Level the range. Check that the bakeware does not keep the door from Fahrenheit to cover the edge of food caused by dull or dark bakeware....

Owners Manual
Page 1
... please make a note of your range at www.whirlpool.ca. Register your product model and serial numbers. Model Number Serial Number Table of the front frame. These can be found on the label located on the upper right corner of Contents RANGE SAFETY 2 The Anti-Tip Bracket ...10 Aluminum Foil 11 Positioning Racks and Bakeware 11 Oven Vent 11 Baking and Roasting 11 Broiling 11 Cook Time 12 RANGE CARE 13 Self-Cleaning Cycle 13 General Cleaning 14 Oven Light 15 TROUBLESHOOTING 16 ACCESSORIES 18 WARRANTY 19 W10887092A UUSSEEEELLRREECCIINNTTSSRRTTIICCRRUURRCCAATTNNIIGGOOEENNSS ...
... please make a note of your range at www.whirlpool.ca. Register your product model and serial numbers. Model Number Serial Number Table of the front frame. These can be found on the label located on the upper right corner of Contents RANGE SAFETY 2 The Anti-Tip Bracket ...10 Aluminum Foil 11 Positioning Racks and Bakeware 11 Oven Vent 11 Baking and Roasting 11 Broiling 11 Cook Time 12 RANGE CARE 13 Self-Cleaning Cycle 13 General Cleaning 14 Oven Light 15 TROUBLESHOOTING 16 ACCESSORIES 18 WARRANTY 19 W10887092A UUSSEEEELLRREECCIINNTTSSRRTTIICCRRUURRCCAATTNNIIGGOOEENNSS ...

Owners Manual
Page 2
... bracket. • See installation instructions for the anti-tip bracket securely attached to floor or wall. • Slide range back so rear range foot is the safety alert symbol. However, the range can tip if you apply too much force or weight to the open door without anti-tip bracket installed and...words mean: DANGER You can be killed or seriously injured if you don't follow these instructions can result in this manual and on your appliance. RANGE SAFETY Your safety and the safety of injury, and tell you what the potential hazard is, tell you how to reduce the chance of others...
... bracket. • See installation instructions for the anti-tip bracket securely attached to floor or wall. • Slide range back so rear range foot is the safety alert symbol. However, the range can tip if you apply too much force or weight to the open door without anti-tip bracket installed and...words mean: DANGER You can be killed or seriously injured if you don't follow these instructions can result in this manual and on your appliance. RANGE SAFETY Your safety and the safety of injury, and tell you what the potential hazard is, tell you how to reduce the chance of others...
Owners Manual
Page 3
... Heating Elements - Heating elements may subject wiring or components underneath to children in injury. Interior surfaces of different size. For self-cleaning ranges - Care should be positioned so that may become hot enough to unintentional contact with ventilating hood - I CAUTION: Do not store items... . Among those areas are oven vent openings and surfaces near units until they have had sufficient time to cause burns - The range is turned inward, and does not extend over adjacent surface units. Boilover causes smoking and greasy spillovers that it is equipped with...
... Heating Elements - Heating elements may subject wiring or components underneath to children in injury. Interior surfaces of different size. For self-cleaning ranges - Care should be positioned so that may become hot enough to unintentional contact with ventilating hood - I CAUTION: Do not store items... . Among those areas are oven vent openings and surfaces near units until they have had sufficient time to cause burns - The range is turned inward, and does not extend over adjacent surface units. Boilover causes smoking and greasy spillovers that it is equipped with...
Owners Manual
Page 4
... poisoning or sickness. If enabled, end-of countdown. 4. If Start is not pressed within 10 seconds, a tone will sound and Start will sound at www.whirlpool.ca. Temperature and The Temp/Time "up to this manual or the Frequently Asked Questions section of our website at end of -cycle tones will... is closed . Press START. 5. Press CANCEL when finished. Your model may have some or all of day is not pressed within 30 seconds after cooking. Range function The Cancel keypad stops any oven function.
... poisoning or sickness. If enabled, end-of countdown. 4. If Start is not pressed within 10 seconds, a tone will sound and Start will sound at www.whirlpool.ca. Temperature and The Temp/Time "up to this manual or the Frequently Asked Questions section of our website at end of -cycle tones will... is closed . Press START. 5. Press CANCEL when finished. Your model may have some or all of day is not pressed within 30 seconds after cooking. Range function The Cancel keypad stops any oven function.

Owners Manual
Page 5
The range will function with the controls locked. The time entered is closed. Unless more time, press the Temp/Time "up " arrow keypad and press START. All ...
The range will function with the controls locked. The time entered is closed. Unless more time, press the Temp/Time "up " arrow keypad and press START. All ...

Owners Manual
Page 6
... aluminum containers on the cooktop. Ceramic Glass Cooktop cleaner and a Cooktop Scraper are also recommended for additional information. Refer to the "Range Care" section for stubborn soils. Fire Hazard ■■ To avoid damage to the cooktop, do not allow objects that cannot ...all controls when done cooking. Do not use abrasive cleaners, cleaning pads, or harsh chemicals for stubborn soils. B A C REMEMBER: When range is ON. They could cause uneven heating and poor cooking results. ■■ Determine flatness by placing the straight edge of a ruler ...
... aluminum containers on the cooktop. Ceramic Glass Cooktop cleaner and a Cooktop Scraper are also recommended for additional information. Refer to the "Range Care" section for stubborn soils. Fire Hazard ■■ To avoid damage to the cooktop, do not allow objects that cannot ...all controls when done cooking. Do not use abrasive cleaners, cleaning pads, or harsh chemicals for stubborn soils. B A C REMEMBER: When range is ON. They could cause uneven heating and poor cooking results. ■■ Determine flatness by placing the straight edge of a ruler ...

Owners Manual
Page 7
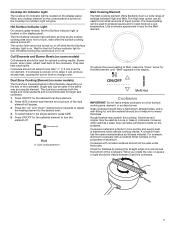
... ON/OFF for larger size cookware. 1. Use cookware appropriate in the same way as a base they can be level for the selected element to a wide range of aluminum. The High heat option can produce excess heat, causing the burner bowl to turn the element off before turning the control lock on...
... ON/OFF for larger size cookware. 1. Use cookware appropriate in the same way as a base they can be level for the selected element to a wide range of aluminum. The High heat option can produce excess heat, causing the burner bowl to turn the element off before turning the control lock on...


