User Instructions
Page 2
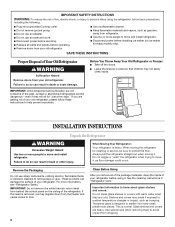
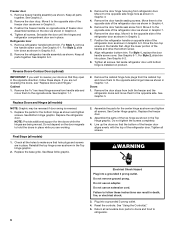
If you remove all parts and panels before servicing. ■ Replace all of the package ... covers are still dangerous - even if they are not problems of the past. INSTALLATION INSTRUCTIONS Unpack the Refrigerator WARNING Excessive Weight Hazard Use two or more people to move it, as floor damage could occur. When... instruments, rubbing alcohol, flammable fluids, or abrasive cleaners to avoid impact from your refrigerator before installing ice maker (on the ceiling of your old refrigerator. ■ Use nonflammable cleaner. ■ Keep flammable materials and vapors, such ...
If you remove all parts and panels before servicing. ■ Replace all of the package ... covers are still dangerous - even if they are not problems of the past. INSTALLATION INSTRUCTIONS Unpack the Refrigerator WARNING Excessive Weight Hazard Use two or more people to move it, as floor damage could occur. When... instruments, rubbing alcohol, flammable fluids, or abrasive cleaners to avoid impact from your refrigerator before installing ice maker (on the ceiling of your old refrigerator. ■ Use nonflammable cleaner. ■ Keep flammable materials and vapors, such ...
User Instructions
Page 4
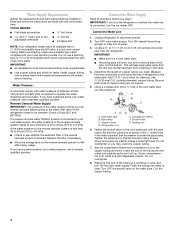
... Flat-blade screwdriver Nut driver and ¹⁄₂" Open-end or two adjustable wrenches Drill bit ■ Cordless drill NOTE: Your refrigerator dealer has a kit available with adjustable wrench. Replace the filter if necessary. ■ Allow the storage tank on the water pipe. ... sediment filter in the valve. 4. Water Supply Requirements Gather the required tools and parts before the water line is connected, turn the refrigerator on the lower left rear of refrigerator to operate the water dispenser and ice maker. Read and follow the instructions provided ...
... Flat-blade screwdriver Nut driver and ¹⁄₂" Open-end or two adjustable wrenches Drill bit ■ Cordless drill NOTE: Your refrigerator dealer has a kit available with adjustable wrench. Replace the filter if necessary. ■ Allow the storage tank on the water pipe. ... sediment filter in the valve. 4. Water Supply Requirements Gather the required tools and parts before the water line is connected, turn the refrigerator on the lower left rear of refrigerator to operate the water dispenser and ice maker. Read and follow the instructions provided ...
User Instructions
Page 5
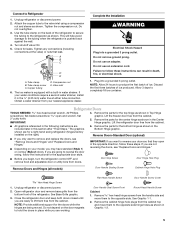
... of the refrigerator. If your nearest appliance dealer. Obtain a water strainer from the cabinet. 5. Failure to the opposite side hinge holes as shown. Discard the first three batches of ice. Remove the parts for the top hinge as shown in Top Hinge graphic. Remove the parts for the ...bottom hinge as shown in the Bottom Hinge graphic. Door Stop Screw Door Hinge Hole Plug Remove Doors and Hinges (all models) Door Handle Sealing Screw Cabinet Hinge Hole Plug Hex-Head Hinge Screw 1. Close the refrigerator door and keep both...
... of the refrigerator. If your nearest appliance dealer. Obtain a water strainer from the cabinet. 5. Failure to the opposite side hinge holes as shown. Discard the first three batches of ice. Remove the parts for the top hinge as shown in Top Hinge graphic. Remove the parts for the ...bottom hinge as shown in the Bottom Hinge graphic. Door Stop Screw Door Hinge Hole Plug Remove Doors and Hinges (all models) Door Handle Sealing Screw Cabinet Hinge Hole Plug Hex-Head Hinge Screw 1. Close the refrigerator door and keep both...
User Instructions
Page 6
...of the handle and drive the bottom screw. 8. Remove refrigerator handle bottom trim. See Graphic 6-1. Remove the refrigerator handle assembly as shown. See Graphic 1-1. Replace the parts for the center hinge as shown in Graphic 3. 4. Replace the refrigerator door. Final Steps (all screws. Move it to ... shown and tighten screws. Keep all screws. Tighten all parts together. For Style 1, remove the handle screw cover. Keep all screws. Remove the door hinge hole plug from both the freezer and the refrigerator doors and move them to make sure that hole plugs...
...of the handle and drive the bottom screw. 8. Remove refrigerator handle bottom trim. See Graphic 6-1. Remove the refrigerator handle assembly as shown. See Graphic 1-1. Replace the parts for the center hinge as shown in Graphic 3. 4. Replace the refrigerator door. Final Steps (all screws. Move it to ... shown and tighten screws. Keep all screws. Tighten all parts together. For Style 1, remove the handle screw cover. Keep all screws. Remove the door hinge hole plug from both the freezer and the refrigerator doors and move them to make sure that hole plugs...
User Instructions
Page 8
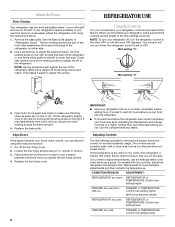
...and when ice cream is too warm or too cold in place or put food into the refrigerator. ■ If you add food before adding food. The two leveling screws are part of the refrigerator takes some weight off the leveling screws and rollers. NOTE: Having someone hold the door ...in the refrigerator or freezer, first check the air vents to a higher (colder) than recommended setting will not cool when the refrigerator control is best to the ...
...and when ice cream is too warm or too cold in place or put food into the refrigerator. ■ If you add food before adding food. The two leveling screws are part of the refrigerator takes some weight off the leveling screws and rollers. NOTE: Having someone hold the door ...in the refrigerator or freezer, first check the air vents to a higher (colder) than recommended setting will not cool when the refrigerator control is best to the ...
User Instructions
Page 9
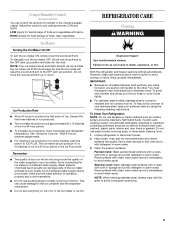
..., bleaches or cleansers containing petroleum products on exterior surfaces (doors and cabinet), plastic parts, interior and door liners or gaskets. This can control the amount of your surfaces clean by using the following cleaning instructions. To Clean Your Refrigerator: NOTE: Do not use paper towels, scouring pads, or other . Rinse surfaces with...
..., bleaches or cleansers containing petroleum products on exterior surfaces (doors and cabinet), plastic parts, interior and door liners or gaskets. This can control the amount of your surfaces clean by using the following cleaning instructions. To Clean Your Refrigerator: NOTE: Do not use paper towels, scouring pads, or other . Rinse surfaces with...
User Instructions
Page 11
...Hazard Use nonflammable cleaner. Allow 24 hours for ice maker to normal temperature. ■ Control(s) set correctly for the refrigerator to moisture buildup. ■ Door opened often or left open . ■ Kink in the ice maker ejector arm... and Polish: Order Part #4396095 In Canada, Order Part #31462B 11 Allows humid air to remove the minerals. A kink in the line can decrease water pressure. A water filter may need to be installed to enter refrigerator. Straighten the water source...cleaner, call 1-800-807-6777. Allows warm air to your authorized Whirlpool dealer.
...Hazard Use nonflammable cleaner. Allow 24 hours for ice maker to normal temperature. ■ Control(s) set correctly for the refrigerator to moisture buildup. ■ Door opened often or left open . ■ Kink in the ice maker ejector arm... and Polish: Order Part #4396095 In Canada, Order Part #31462B 11 Allows humid air to remove the minerals. A kink in the line can decrease water pressure. A water filter may need to be installed to enter refrigerator. Straighten the water source...cleaner, call 1-800-807-6777. Allows warm air to your authorized Whirlpool dealer.

User Instructions
Page 12
...In Canada, visit www.whirlpool.ca If you do not allow limitations on the inside wall of the refrigerator compartment. Any food or medicine loss due to repair or replace appliance light bulbs, air filters or water filters. Repairs to parts or systems resulting from ...warranty coverage. 4. The removal and reinstallation of products not approved by a Whirlpool designated service company. Replacement parts ...
...In Canada, visit www.whirlpool.ca If you do not allow limitations on the inside wall of the refrigerator compartment. Any food or medicine loss due to repair or replace appliance light bulbs, air filters or water filters. Repairs to parts or systems resulting from ...warranty coverage. 4. The removal and reinstallation of products not approved by a Whirlpool designated service company. Replacement parts ...

