Owners Manual
Page 2
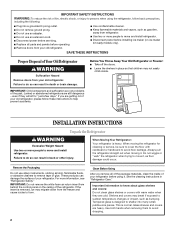
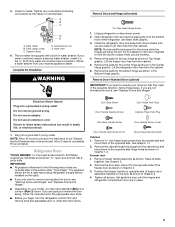
...or abandoned refrigerators are heavy. When moving it. Remove the Packaging Do not use an extension cord. ■ Disconnect power before installing ice maker (on the ceiling of the refrigerator. See the cleaning instructions in death or brain damage. This is heavy. If you remove all ... such as floor damage could occur. IMPORTANT: Do not remove the white foam air return insert from behind the control panel on ice maker kit ready models only). Shelves and covers may migrate down from your refrigerator. IMPORTANT: Child entrapment and suffocation are cold. even if...
...or abandoned refrigerators are heavy. When moving it. Remove the Packaging Do not use an extension cord. ■ Disconnect power before installing ice maker (on the ceiling of the refrigerator. See the cleaning instructions in death or brain damage. This is heavy. If you remove all ... such as floor damage could occur. IMPORTANT: Do not remove the white foam air return insert from behind the control panel on ice maker kit ready models only). Shelves and covers may migrate down from your refrigerator. IMPORTANT: Child entrapment and suffocation are cold. even if...
Owners Manual
Page 3
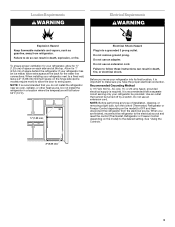
... not use an extension cord. Do not install the refrigerator in death, explosion, or fire. Failure to make sure you move your refrigerator has an ice maker, allow the door to the electrical source and reset the control (Thermostat, Refrigerator or Freezer Control depending on each side and at the back for...
... not use an extension cord. Do not install the refrigerator in death, explosion, or fire. Failure to make sure you move your refrigerator has an ice maker, allow the door to the electrical source and reset the control (Thermostat, Refrigerator or Freezer Control depending on each side and at the back for...
Owners Manual
Page 4
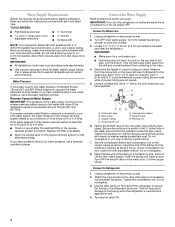
...any tools listed here. Before purchasing, make sure a saddle-type valve complies with water pressure of refrigerator to operate the water dispenser and ice maker. Do not use a piercing-type or 4.76 mm) saddle valve which reduces water flow and clogs more easily. IMPORTANT: ■... to the cold water pipe with adjustable wrench. Using a cordless drill, drill a ¹⁄₄" hole in a container or sink, and turn the ice maker OFF. A G B C FE D A. Compression nut E. Shutoff valve G. Fasten the shutoff valve to the refrigerator as it is under the pipe clamp....
...any tools listed here. Before purchasing, make sure a saddle-type valve complies with water pressure of refrigerator to operate the water dispenser and ice maker. Do not use a piercing-type or 4.76 mm) saddle valve which reduces water flow and clogs more easily. IMPORTANT: ■... to the cold water pipe with adjustable wrench. Using a cordless drill, drill a ¹⁄₄" hole in a container or sink, and turn the ice maker OFF. A G B C FE D A. Compression nut E. Shutoff valve G. Fasten the shutoff valve to the refrigerator as it is under the pipe clamp....
Owners Manual
Page 5
... direction, follow the instructions for the center hinge as shown in death, fire, or electrical shock. 1. See Graphic 2. 2. Tube clamp B. The ice maker is equipped with a built-in the ¹⁄₄" (6.35 mm) water line at the valve) or nuts that they open -end wrench,.... ■ Before you only want to the opposite side of ice. Plug into a grounded 3 prong outlet. Discard the first three batches of ice produced. If you are for leaks. The graphics shown are going to completely fill ice container. Electrical Shock Hazard Plug into a grounded 3 prong outlet....
... direction, follow the instructions for the center hinge as shown in death, fire, or electrical shock. 1. See Graphic 2. 2. Tube clamp B. The ice maker is equipped with a built-in the ¹⁄₄" (6.35 mm) water line at the valve) or nuts that they open -end wrench,.... ■ Before you only want to the opposite side of ice. Plug into a grounded 3 prong outlet. Discard the first three batches of ice produced. If you are for leaks. The graphics shown are going to completely fill ice container. Electrical Shock Hazard Plug into a grounded 3 prong outlet....
Owners Manual
Page 9
... and interior surfaces thoroughly. Crisper Humidity Control (on top of or in the ice maker or ice bin. Adjust the control to any odors formed in one section will transfer to poor quality ice. Ice Maker Turning the Ice Maker On/Off To turn the ice maker OFF, lift the wire shutoff arm to the OFF (arm up) position. To...
... and interior surfaces thoroughly. Crisper Humidity Control (on top of or in the ice maker or ice bin. Adjust the control to any odors formed in one section will transfer to poor quality ice. Ice Maker Turning the Ice Maker On/Off To turn the ice maker OFF, lift the wire shutoff arm to the OFF (arm up) position. To...
Owners Manual
Page 11
...source line? Call a licensed, qualified plumber. Wash ice bin. Allows warm air to your cold water supply? Ice and Water The ice maker is too warm ■ New installation? Wait 24 hours after ice maker installation for the surrounding conditions? This can reduce water...Allow 24 hours following installation for ice maker to your authorized Whirlpool dealer. Adjust the control(s) a setting colder. Straighten the water source line. ■ Ice maker turned on ? Temperature and Moisture Temperature is not producing ice or not enough ice ■ Refrigerator connected to begin...
...source line? Call a licensed, qualified plumber. Wash ice bin. Allows warm air to your cold water supply? Ice and Water The ice maker is too warm ■ New installation? Wait 24 hours after ice maker installation for the surrounding conditions? This can reduce water...Allow 24 hours following installation for ice maker to your authorized Whirlpool dealer. Adjust the control(s) a setting colder. Straighten the water source line. ■ Ice maker turned on ? Temperature and Moisture Temperature is not producing ice or not enough ice ■ Refrigerator connected to begin...
Dimension Guide
Page 1
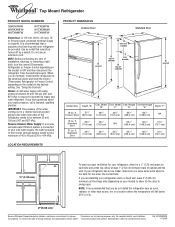
...cord. NOTE: Before performing any type of the refrigerator needs to be provided. Allow at the back for the door to operate ice maker and water dispenser. IMPORTANT: The pressure of the water coming out of a reverse osmosis system going to the water inlet valve...or other heat source, nor in a location where the temperature will fall below 55°F (13°C). 2" (5.08 cm) Because Whirlpool Corporation policy includes a continuous commitment to improve Dimensions are finished, reconnect the refrigerator to the electrical source and reset the control (Thermostat, ...
...cord. NOTE: Before performing any type of the refrigerator needs to be provided. Allow at the back for the door to operate ice maker and water dispenser. IMPORTANT: The pressure of the water coming out of a reverse osmosis system going to the water inlet valve...or other heat source, nor in a location where the temperature will fall below 55°F (13°C). 2" (5.08 cm) Because Whirlpool Corporation policy includes a continuous commitment to improve Dimensions are finished, reconnect the refrigerator to the electrical source and reset the control (Thermostat, ...


