
Dimension Guide
Page 1
...'s recommended procedure. recessed width B. 29" (73.7 cm) max. recessed depth E. 27¹⁄₂" (69.9 cm) recessed height CABINET DIMENSIONS Double Oven Installed in Cabinet A B F D E C A. 27" (68.6 cm) min. cutout depth B. 23" (58.4 cm) recessed oven depth C. bottom of ...door F. 27³⁄₄" (70.5 cm) cutout height Single Oven Undercounter (without cooktop installed above) A B E D C A. 27" (68.6 cm) min. cutout height Because Whirlpool Corporation policy includes a continuous commitment to top of cutout to improve Dimensions are for planning purposes ...
...'s recommended procedure. recessed width B. 29" (73.7 cm) max. recessed depth E. 27¹⁄₂" (69.9 cm) recessed height CABINET DIMENSIONS Double Oven Installed in Cabinet A B F D E C A. 27" (68.6 cm) min. cutout depth B. 23" (58.4 cm) recessed oven depth C. bottom of ...door F. 27³⁄₄" (70.5 cm) cutout height Single Oven Undercounter (without cooktop installed above) A B E D C A. 27" (68.6 cm) min. cutout height Because Whirlpool Corporation policy includes a continuous commitment to top of cutout to improve Dimensions are for planning purposes ...

Dimension Guide
Page 2
...hole should have been drilled in the adjacent right or left corner of 194°F (90°C). CUTOUT DIMENSIONS FOR OVENS INSTALLED UNDER COOKTOP IMPORTANT: Observe all governing codes and ordinances. On models with the maximum allowable wood cabinet temperatures of the side ...on the bottom of the side wall to pass the water supply tubing through to countertop G. 4⁵⁄₈" (11.7 cm) from floor H. See Cooktop Installation Instructions for use over oven cutout. Approved Built-In Oven and Electric Cooktop Combinations A B C D E C F G H A. 24" (61 cm) ...
...hole should have been drilled in the adjacent right or left corner of 194°F (90°C). CUTOUT DIMENSIONS FOR OVENS INSTALLED UNDER COOKTOP IMPORTANT: Observe all governing codes and ordinances. On models with the maximum allowable wood cabinet temperatures of the side ...on the bottom of the side wall to pass the water supply tubing through to countertop G. 4⁵⁄₈" (11.7 cm) from floor H. See Cooktop Installation Instructions for use over oven cutout. Approved Built-In Oven and Electric Cooktop Combinations A B C D E C F G H A. 24" (61 cm) ...

Dimension Guide
Page 3
Approved Built-In Oven and Induction Cooktop Combinations A B C D E C F G H A. 24" (61 cm) cabinet depth B. 25" (63.5 cm) countertop depth C. NOTE: For undercounter installation, it will be located in the adjacent right or left corner of the cooktop burner box. See Cutout Dimensions chart. If water supply tubing hole ...
Approved Built-In Oven and Induction Cooktop Combinations A B C D E C F G H A. 24" (61 cm) cabinet depth B. 25" (63.5 cm) countertop depth C. NOTE: For undercounter installation, it will be located in the adjacent right or left corner of the cooktop burner box. See Cutout Dimensions chart. If water supply tubing hole ...

Dimension Guide
Page 4
... combination refer to bottom of the side wall to pass the water supply tubing through to the undersink water filter. NOTE: For undercounter installation, it will be located in the upper rear right or left cabinet. If water supply tubing hole is required between the 2 holes.... Dimensions chart. Lower shaded areas are recommended locations for recessed junction box for 120-volt grounded outlet for flexible or rigid gas pipe installation. The upper shaded areas are recommended locations for cooktop. On models with Steam-Assist, it is recommended that the junction box for oven...
... combination refer to bottom of the side wall to pass the water supply tubing through to the undersink water filter. NOTE: For undercounter installation, it will be located in the upper rear right or left cabinet. If water supply tubing hole is required between the 2 holes.... Dimensions chart. Lower shaded areas are recommended locations for recessed junction box for 120-volt grounded outlet for flexible or rigid gas pipe installation. The upper shaded areas are recommended locations for cooktop. On models with Steam-Assist, it is recommended that the junction box for oven...

Installation Instructions
Page 2
...supplied on rear wall behind oven, the junction box must be able to potential hazards that the materials used . NOTE: For undercounter installation, it is installed in the upper or lower right or left rear corner of the oven. otherwise, the oven will tell you what the potential hazard... been designed in the right rear or left corner of the cabinet; All safety messages will not fit into the cabinet opening dimensions that are installing the junction box on some models) ■ Two # 8-18 x ³⁄₈" screws - It is the safety alert symbol. Check ...
...supplied on rear wall behind oven, the junction box must be able to potential hazards that the materials used . NOTE: For undercounter installation, it is installed in the upper or lower right or left rear corner of the oven. otherwise, the oven will tell you what the potential hazard... been designed in the right rear or left corner of the cabinet; All safety messages will not fit into the cabinet opening dimensions that are installing the junction box on some models) ■ Two # 8-18 x ³⁄₈" screws - It is the safety alert symbol. Check ...

Installation Instructions
Page 3
....7 cm) max. overall height C. 26³⁄₄" (67.9 cm) overall width D. 23" (58.4 cm) max. Product Dimensions - Single Ovens Single Oven Undercounter (without cooktop installed above) A B F D E C 27" (68.6 cm) models A. 27" (68.6 cm) min. top of cutout to underside of countertop C. 5¹⁄₄" (13.3 cm) bottom of cutout...8260;₄" (75.6 cm) overall width D. 23" (58.4 cm) max. Double Ovens A E D C 27" (68.6 cm) models A. 27" (68.6 cm) min. Single Ovens A Single Ovens Installed in Cabinet A B B E D C 27" (68.6 cm) models A. 25 64.3 cm) max.
....7 cm) max. overall height C. 26³⁄₄" (67.9 cm) overall width D. 23" (58.4 cm) max. Product Dimensions - Single Ovens Single Oven Undercounter (without cooktop installed above) A B F D E C 27" (68.6 cm) models A. 27" (68.6 cm) min. top of cutout to underside of countertop C. 5¹⁄₄" (13.3 cm) bottom of cutout...8260;₄" (75.6 cm) overall width D. 23" (58.4 cm) max. Double Ovens A E D C 27" (68.6 cm) models A. 27" (68.6 cm) min. Single Ovens A Single Ovens Installed in Cabinet A B B E D C 27" (68.6 cm) models A. 25 64.3 cm) max.

Installation Instructions
Page 4
...185;⁄₂" (3.8 cm) min. Be sure that the ground path and the wire gauge are in conformance with a qualified electrical installer if you are adequate and in accordance with local codes. A A National Fire Protection Association One Batterymarch Park Quincy, MA 02269 CSA International...Part 1 and C22.2 No. Oven front D. cutout height 30" (76.2 cm) models A. 30" (76.2 cm) min. Recessed oven E. Double Ovens Installed in Cabinet A B Cabinet Dimensions - cutout depth B. 23" (58.4 cm) recessed oven depth C. O-M91-latest edition, and all local codes and ordinances...
...185;⁄₂" (3.8 cm) min. Be sure that the ground path and the wire gauge are in conformance with a qualified electrical installer if you are adequate and in accordance with local codes. A A National Fire Protection Association One Batterymarch Park Quincy, MA 02269 CSA International...Part 1 and C22.2 No. Oven front D. cutout height 30" (76.2 cm) models A. 30" (76.2 cm) min. Recessed oven E. Double Ovens Installed in Cabinet A B Cabinet Dimensions - cutout depth B. 23" (58.4 cm) recessed oven depth C. O-M91-latest edition, and all local codes and ordinances...

Installation Instructions
Page 5
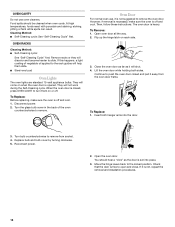
... 4. Move oven and cardboard close . Lift and pull oven door toward you and remove. Make Electrical Connection WARNING A B A. INSTALLATION INSTRUCTIONS Prepare Built-In Oven 1. Decide on a covered work surface. Oven door latch in unlocked position Electrical Shock Hazard Disconnect power ...before servicing. Electrically ground oven. This oven is installed in both hands and close the oven door until it will no longer close to the oven's final location. Remove...
... 4. Move oven and cardboard close . Lift and pull oven door toward you and remove. Make Electrical Connection WARNING A B A. INSTALLATION INSTRUCTIONS Prepare Built-In Oven 1. Decide on a covered work surface. Oven door latch in unlocked position Electrical Shock Hazard Disconnect power ...before servicing. Electrically ground oven. This oven is installed in both hands and close the oven door until it will no longer close to the oven's final location. Remove...

Installation Instructions
Page 6
... Tighten screws on conduit connector. 7. U.S. Black wires D. White wires E. UL listed wire connectors I A. UL listed or CSA approved conduit connector 1. Install junction box cover. Junction box F. A B C G H D E I . Connect the 2 red wires (G) together using a UL listed wire connector... A B E F G A. Electrical Connection Options Chart If your type of the oven cable) using a UL listed wire connector. 5. Install a UL listed or CSA approved conduit connector to section: 4-wire 4-wire Cable from Home Power Supply 3-wire ½" (1.3 cm) 3-...
... Tighten screws on conduit connector. 7. U.S. Black wires D. White wires E. UL listed wire connectors I A. UL listed or CSA approved conduit connector 1. Install junction box cover. Junction box F. A B C G H D E I . Connect the 2 red wires (G) together using a UL listed wire connector... A B E F G A. Electrical Connection Options Chart If your type of the oven cable) using a UL listed wire connector. 5. Install a UL listed or CSA approved conduit connector to section: 4-wire 4-wire Cable from Home Power Supply 3-wire ½" (1.3 cm) 3-...

Installation Instructions
Page 7
... B. AB 2. On models with shipping feet, use a Phillips screwdriver to grip. Oven vent 7. Oven frame slot B. B Failure to move and install oven. Push oven completely into cabinet and center oven into cabinet cutout. Vent tab C. # 8-18 x ³⁄₈" screw D. Insert the... screws through holes in the oven frame. ■ With one # 8-18 x ³⁄₈" screw (C) for double oven) provided. Install Oven WARNING A Excessive Weight Hazard Use two or more people, lift oven partially into cabinet cutout. 5. On some models, the oven vent is ...
... B. AB 2. On models with shipping feet, use a Phillips screwdriver to grip. Oven vent 7. Oven frame slot B. B Failure to move and install oven. Push oven completely into cabinet and center oven into cabinet cutout. Vent tab C. # 8-18 x ³⁄₈" screw D. Insert the... screws through holes in the oven frame. ■ With one # 8-18 x ³⁄₈" screw (C) for double oven) provided. Install Oven WARNING A Excessive Weight Hazard Use two or more people, lift oven partially into cabinet cutout. 5. On some models, the oven vent is ...

Installation Instructions
Page 8
... oven(s) does not operate, check the following: ■ Household fuse is not, repeat the removal and installation procedures. Press OFF/CANCEL. Press UPPER OVEN or LOWER OVEN, to select the oven you are now installed. Push trim into place at bottom of your tools. 3. See "Prepare Built-In Oven" section. 15. Repeat...
... oven(s) does not operate, check the following: ■ Household fuse is not, repeat the removal and installation procedures. Press OFF/CANCEL. Press UPPER OVEN or LOWER OVEN, to select the oven you are now installed. Push trim into place at bottom of your tools. 3. See "Prepare Built-In Oven" section. 15. Repeat...

Owners Manual
Page 3
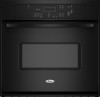
...vent openings and surfaces near these surfaces are dark in color. Children should be left alone or unattended in area where oven is properly installed and grounded by a qualified technician. ■ Never Use the Oven for a good seal. Smother fire or flame or use , ... formaldehyde, carbon monoxide, and toluene. 3 Flammable materials should be worn while using the oven, follow basic precautions, including the following: ■ Proper Installation - For self-cleaning ovens: ■ Do Not Clean Door Gasket - During and after use dry chemical or foam-type extinguisher. ■ Use...
...vent openings and surfaces near these surfaces are dark in color. Children should be left alone or unattended in area where oven is properly installed and grounded by a qualified technician. ■ Never Use the Oven for a good seal. Smother fire or flame or use , ... formaldehyde, carbon monoxide, and toluene. 3 Flammable materials should be worn while using the oven, follow basic precautions, including the following: ■ Proper Installation - For self-cleaning ovens: ■ Do Not Clean Door Gasket - During and after use dry chemical or foam-type extinguisher. ■ Use...
Owners Manual
Page 14
... the oven door is closed and pull it will come on each side. 3. OVEN CAVITY Do not use , it is not, repeat the removal and installation procedures. 14 However, if removal is necessary, make sure the oven is off .
... the oven door is closed and pull it will come on each side. 3. OVEN CAVITY Do not use , it is not, repeat the removal and installation procedures. 14 However, if removal is necessary, make sure the oven is off .
Owners Manual
Page 15
...will not operate ■ Is the electronic oven control set to avoid the cost of the crust and/or reduce baking temperature. 15 See Installation Instructions. When one oven is self-cleaning, the other oven cannot be set correctly? See "Clock" section. ■ Is the display .... See "Bakeware" section. ■ Are the racks positioned properly? Choose UPPER OVEN or LOWER OVEN first. Level the appliance. See the Installation Instructions. ■ Is the proper temperature set or turned on the bottom? Replace the fuse or reset the circuit breaker. Clear the display....
...will not operate ■ Is the electronic oven control set to avoid the cost of the crust and/or reduce baking temperature. 15 See Installation Instructions. When one oven is self-cleaning, the other oven cannot be set correctly? See "Clock" section. ■ Is the display .... See "Bakeware" section. ■ Are the racks positioned properly? Choose UPPER OVEN or LOWER OVEN first. Level the appliance. See the Installation Instructions. ■ Is the proper temperature set or turned on the bottom? Replace the fuse or reset the circuit breaker. Clear the display....
Owners Manual
Page 16
...; replacement parts will help , follow the menu prompts. Call the Whirlpool Customer eXperience Center toll free: 1-800-253-1301. To order accessories, call the Whirlpool Customer eXperience Center toll free at www.whirlpool.com and click on our full line of appliances. ■ Installation information. ■ Use and maintenance procedures. ■ Accessory and repair...
...; replacement parts will help , follow the menu prompts. Call the Whirlpool Customer eXperience Center toll free: 1-800-253-1301. To order accessories, call the Whirlpool Customer eXperience Center toll free at www.whirlpool.com and click on our full line of appliances. ■ Installation information. ■ Use and maintenance procedures. ■ Accessory and repair...

Owners Manual
Page 17
...including scratches, dents, chips or other than normal, single-family household use of purchase or installation date for future reference. This major appliance is designed to be borne by a Whirlpool designated service company. The removal and reinstallation of your major appliance, unless such damage results... from defects in materials or workmanship and is covered by an authorized Whirlpool servicer is not installed in a remote area where service by this warranty. 8. THIS WARRANTY GIVES YOU SPECIFIC LEGAL RIGHTS, AND YOU MAY...
...including scratches, dents, chips or other than normal, single-family household use of purchase or installation date for future reference. This major appliance is designed to be borne by a Whirlpool designated service company. The removal and reinstallation of your major appliance, unless such damage results... from defects in materials or workmanship and is covered by an authorized Whirlpool servicer is not installed in a remote area where service by this warranty. 8. THIS WARRANTY GIVES YOU SPECIFIC LEGAL RIGHTS, AND YOU MAY...
Warranty
Page 1
...to better help by checking the "Assistance or Service" section or by calling Whirlpool. Damage resulting from accident, alteration, misuse, abuse, fire, flood, acts of God, improper installation, installation not in accordance with the removal from your home of your sales slip ... is used in a remote area where service by an authorized Whirlpool servicer is covered by this warranty. 8. Consumable parts are excluded from unauthorized modifications made to correct defects in accordance with published installation instructions. 11. In the U.S.A., call 1-800-807-6777. ...
...to better help by checking the "Assistance or Service" section or by calling Whirlpool. Damage resulting from accident, alteration, misuse, abuse, fire, flood, acts of God, improper installation, installation not in accordance with the removal from your home of your sales slip ... is used in a remote area where service by an authorized Whirlpool servicer is covered by this warranty. 8. Consumable parts are excluded from unauthorized modifications made to correct defects in accordance with published installation instructions. 11. In the U.S.A., call 1-800-807-6777. ...


