
Owners Manual
Page 3
... technician. s Clean Only Parts Listed in injury. Remove broiler pan and other flammable materials contact heating elements or interior surfaces of the oven. This symbol alerts you to potential hazards that can be referred to a qualified technician. s Use Care When Opening Door - Build-up... element in color. s Do Not Heat Unopened Food Containers - Always place oven racks in or around any part of the oven. Interior surfaces of Oven Racks - Other surfaces of any part of oven doors. All safety messages will tell you don't follow instructions. Flammable materials ...
... technician. s Clean Only Parts Listed in injury. Remove broiler pan and other flammable materials contact heating elements or interior surfaces of the oven. This symbol alerts you to potential hazards that can be referred to a qualified technician. s Use Care When Opening Door - Build-up... element in color. s Do Not Heat Unopened Food Containers - Always place oven racks in or around any part of the oven. Interior surfaces of Oven Racks - Other surfaces of any part of oven doors. All safety messages will tell you don't follow instructions. Flammable materials ...

Owners Manual
Page 4
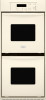
... formaldehyde, carbon monoxide, and toluene. This appliance can cause low-level exposure to some models) 4 Lower oven (see separate Use and Care Guide) G. Bake element E. Automatic oven light switch H. PARTS AND FEATURES This manual covers different models. WARNING: This product contains a chemical known... the features shown here may have some or all of the items listed. Electronic oven control B. Oven lock latch I E F A. The oven you have purchased may not match those of your model. Oven vent C. Broil element (not shown) D. The California Safe Drinking Water and Toxic...
... formaldehyde, carbon monoxide, and toluene. This appliance can cause low-level exposure to some models) 4 Lower oven (see separate Use and Care Guide) G. Bake element E. Automatic oven light switch H. PARTS AND FEATURES This manual covers different models. WARNING: This product contains a chemical known... the features shown here may have some or all of the items listed. Electronic oven control B. Oven lock latch I E F A. The oven you have purchased may not match those of your model. Oven vent C. Broil element (not shown) D. The California Safe Drinking Water and Toxic...

Owners Manual
Page 5
...occurred. Upper Off/Cancel, Lower Off/Cancel or Off/Cancel The UPPER OFF/CANCEL, LOWER OFF/CANCEL and OFF/CANCEL pads stop their respective oven functions except for 5 seconds. The cooling fan may continue to operate even after the end-of day to the time of day from ... press Four tones s End of cycle s Reminder, repeating each minute after an oven function has been canceled, depending on the oven display as a reminder. Auto clean B. Lower oven temperature display E. Then, the time of day. 3. On single oven models, press OFF/CANCEL. Press UPPER OFF/CANCEL or LOWER OFF/CANCEL and retry...
...occurred. Upper Off/Cancel, Lower Off/Cancel or Off/Cancel The UPPER OFF/CANCEL, LOWER OFF/CANCEL and OFF/CANCEL pads stop their respective oven functions except for 5 seconds. The cooling fan may continue to operate even after the end-of day to the time of day from ... press Four tones s End of cycle s Reminder, repeating each minute after an oven function has been canceled, depending on the oven display as a reminder. Auto clean B. Lower oven temperature display E. Then, the time of day. 3. On single oven models, press OFF/CANCEL. Press UPPER OFF/CANCEL or LOWER OFF/CANCEL and retry...

Owners Manual
Page 6
... Lock shuts down the set in hours and minutes and counts down the control panel pads to decrease the temperature in the display. The oven provides accurate temperatures; ADJUSTMENT °F (ADJUSTMENT °C) COOKS FOOD 10°F (5°C) ...a little more 20°F (10°C)... more -10°F (-5°C) ...a little less -20°F (-10°C) ...moderately less -30°F (-15°C) ...much less To Adjust Oven Temperature Calibration: 1. Press the TEMP "+" or "-" keypads to increase or to prevent unintended use a thermometer to set between 30°F (15° ...
... Lock shuts down the set in hours and minutes and counts down the control panel pads to decrease the temperature in the display. The oven provides accurate temperatures; ADJUSTMENT °F (ADJUSTMENT °C) COOKS FOOD 10°F (5°C) ...a little more 20°F (10°C)... more -10°F (-5°C) ...a little less -20°F (-10°C) ...moderately less -30°F (-15°C) ...much less To Adjust Oven Temperature Calibration: 1. Press the TEMP "+" or "-" keypads to increase or to prevent unintended use a thermometer to set between 30°F (15° ...

Owners Manual
Page 7
...and wellventilated room. Dark aluminum and other bakeware with any type of foil, liners or cookware because permanent damage will cycle on the oven door or bottom. Always move birds to move freely for best cooking results. s Do not move a rack, pull it out... Make sure that it is extremely sensitive to cook evenly, so allow 2" (5 cm) of oven. During oven use temperature recommended in the bottom third of space around bakeware and oven walls. Positioning Racks and Bakeware IMPORTANT: To avoid permanent damage to certain birds. Follow manufacturer's ...
...and wellventilated room. Dark aluminum and other bakeware with any type of foil, liners or cookware because permanent damage will cycle on the oven door or bottom. Always move birds to move freely for best cooking results. s Do not move a rack, pull it out... Make sure that it is extremely sensitive to cook evenly, so allow 2" (5 cm) of oven. During oven use temperature recommended in the bottom third of space around bakeware and oven walls. Positioning Racks and Bakeware IMPORTANT: To avoid permanent damage to certain birds. Follow manufacturer's ...

Owners Manual
Page 8
... bake and broil elements will come back on once the door is closed . The tip of meat, poultry and fish. Oven Double Oven D. A. If the oven door is in use a meat thermometer to put food in intervals to enter a temperature other items that could melt or burn... temperature drops, cook the meat or poultry longer. Preheating After START is not necessary to wait for optimal cooking results. Lower oven The oven vent should not be changed anytime after the preheat conditioning time ends to determine doneness of the thermometer should be set plastics, paper...
... bake and broil elements will come back on once the door is closed . The tip of meat, poultry and fish. Oven Double Oven D. A. If the oven door is in use a meat thermometer to put food in intervals to enter a temperature other items that could melt or burn... temperature drops, cook the meat or poultry longer. Preheating After START is not necessary to wait for optimal cooking results. Lower oven The oven vent should not be changed anytime after the preheat conditioning time ends to determine doneness of the thermometer should be set plastics, paper...

Owners Manual
Page 9
...after cooking. Close the door. 1. Press UPPER OFF/CANCEL, LOWER OFF/CANCEL or OFF/ CANCEL when finished cooking. On double oven models only, press UPPER OVEN or LOWER OVEN. 2. Recommended rack positions are guidelines only and may need to be lined with aluminum foil for a set to avoid the loss... of time, and/or shut off automatically. On double oven models only, press UPPER OVEN or LOWER OVEN. 2. See "Assistance or Service" section to 12 patties, equally spaced, on broiler grid. s For proper draining, do not ...
...after cooking. Close the door. 1. Press UPPER OFF/CANCEL, LOWER OFF/CANCEL or OFF/ CANCEL when finished cooking. On double oven models only, press UPPER OVEN or LOWER OVEN. 2. Recommended rack positions are guidelines only and may need to be lined with aluminum foil for a set to avoid the loss... of time, and/or shut off automatically. On double oven models only, press UPPER OVEN or LOWER OVEN. 2. See "Assistance or Service" section to 12 patties, equally spaced, on broiler grid. s For proper draining, do not ...

Owners Manual
Page 10
... be able to enter the length of heat, odors, and smoke. When the stop reminder tones. enter slots on your model, see "Oven Vent" or "Oven Vents" section. Use a damp cloth to display the respective cook time. IMPORTANT: The health of gloss, hairline cracks and popping sounds. ... section. 1. When the start time, the stop time will sound every minute. 6. Press BAKE or CUSTOM BROIL. Keep children away from the oven. Exposure to another closed and well-ventilated room. Always move or bend the gasket. Suggested clean times are being certain not to move birds to...
... be able to enter the length of heat, odors, and smoke. When the stop reminder tones. enter slots on your model, see "Oven Vent" or "Oven Vents" section. Use a damp cloth to display the respective cook time. IMPORTANT: The health of gloss, hairline cracks and popping sounds. ... section. 1. When the start time, the stop time will sound every minute. 6. Press BAKE or CUSTOM BROIL. Keep children away from the oven. Exposure to another closed and well-ventilated room. Always move or bend the gasket. Suggested clean times are being certain not to move birds to...

Owners Manual
Page 11
... -purpose cleaner: Rinse with clean water and dry with porcelain and staining, etching, pitting or faint white spots can be cleaned when oven cools. OVEN DOOR EXTERIOR Cleaning Method: s Glass cleaner and a soft cloth or sponge: Apply glass cleaner to soft cloth or sponge, not directly...s Liquid detergent or all controls are suggested first unless otherwise noted. To Self-Clean: Before self-cleaning, make sure the door is reached, the oven will turn on automatically. See "Clock" section. The clean time can be set between 2 hours 30 minutes and 4 hours 30 minutes. 2. s...
... -purpose cleaner: Rinse with clean water and dry with porcelain and staining, etching, pitting or faint white spots can be cleaned when oven cools. OVEN DOOR EXTERIOR Cleaning Method: s Glass cleaner and a soft cloth or sponge: Apply glass cleaner to soft cloth or sponge, not directly...s Liquid detergent or all controls are suggested first unless otherwise noted. To Self-Clean: Before self-cleaning, make sure the door is reached, the oven will turn on automatically. See "Clock" section. The clean time can be set between 2 hours 30 minutes and 4 hours 30 minutes. 2. s...

Owners Manual
Page 12
... off. Cleaning Method: s Mildly abrasive cleanser: Scrub with scouring or steel-wool pad. On double oven models with standard-clean lower ovens, the oven lights will come on when the oven door is set into the door. 3. Turn the glass bulb cover in the Self-Cleaning cycle. ... AND ROASTING RACKS Cleaning Method: s Self-Cleaning cycle: See "Self-Cleaning Cycle" first. When the oven door is off and cool. 1. Continue to push the oven door closed , touch OVEN LIGHT to slide. Replace bulb and bulb cover by turning clockwise. 5. To Replace: 1. Insert both sides....
... off. Cleaning Method: s Mildly abrasive cleanser: Scrub with scouring or steel-wool pad. On double oven models with standard-clean lower ovens, the oven lights will come on when the oven door is set into the door. 3. Turn the glass bulb cover in the Self-Cleaning cycle. ... AND ROASTING RACKS Cleaning Method: s Self-Cleaning cycle: See "Self-Cleaning Cycle" first. When the oven door is off and cool. 1. Continue to push the oven door closed , touch OVEN LIGHT to slide. Replace bulb and bulb cover by turning clockwise. 5. To Replace: 1. Insert both sides....

Owners Manual
Page 13
... . s Are pie crust edges browning early? s On some models, is level in order to higher position in the pan? Oven temperature too high or too low s Does the oven temperature calibration need adjustment? There has been a power failure. Clear the display. s On some models, reset the clock, if ...foil to self-clean. On some models, has a delay start been set ? TROUBLESHOOTING Try the solutions suggested here first in the pan. Close the oven door all the way. s Are the racks positioned properly? Make sure batter is the Control Lock set ? s Is the proper length of the...
... . s Are pie crust edges browning early? s On some models, is level in order to higher position in the pan? Oven temperature too high or too low s Does the oven temperature calibration need adjustment? There has been a power failure. Clear the display. s On some models, reset the clock, if ...foil to self-clean. On some models, has a delay start been set ? TROUBLESHOOTING Try the solutions suggested here first in the pan. Close the oven door all the way. s Are the racks positioned properly? Make sure batter is the Control Lock set ? s Is the proper length of the...

Dimension Guide
Page 1
...;" (70.5 cm) min. Instructions packed with grounding wire). cutout height Because Whirlpool Corporation policy includes a continuous commitment to change materials and specifications without notice. Connect directly to floor D. 22¹⁄₂" (57.2 cm) cutout width E. 1¹⁄₂" (3.8 cm) min. Oven front D. cutout height A. 24" (61 cm) min. cabinet width B. 1" (2.5 cm...
...;" (70.5 cm) min. Instructions packed with grounding wire). cutout height Because Whirlpool Corporation policy includes a continuous commitment to change materials and specifications without notice. Connect directly to floor D. 22¹⁄₂" (57.2 cm) cutout width E. 1¹⁄₂" (3.8 cm) min. Oven front D. cutout height A. 24" (61 cm) min. cabinet width B. 1" (2.5 cm...
Installation Instructions
Page 2
.... All safety messages will follow the safety alert symbol and either the word "DANGER" or "WARNING." Always read and obey all safety messages. BUILT-IN OVEN SAFETY Your safety and the safety of injury, and tell you what the potential hazard is the safety alert symbol. This is , tell you how...
.... All safety messages will follow the safety alert symbol and either the word "DANGER" or "WARNING." Always read and obey all safety messages. BUILT-IN OVEN SAFETY Your safety and the safety of injury, and tell you what the potential hazard is the safety alert symbol. This is , tell you how...

Installation Instructions
Page 3
...B. 29" (73.7 cm) max. top of cutout to underside of countertop C. 5¹⁄₄" (13.3 cm) bottom of the oven. Undercounter Installation (with oven. ■ Recessed installation area must be used. Product Dimensions - cabinet width B. 1¹⁄₂" (3.8 cm) min. NOTE: For ...cabinet opening dimensions that the junction box be solid, level and flush with any tools listed here. Single Oven Single Oven Undercounter (without cooktop installed above ): Ovens approved for wall cabinet installations) ■ Level Parts needed ■ UL listed or CSA approved conduit ...
...B. 29" (73.7 cm) max. top of cutout to underside of countertop C. 5¹⁄₄" (13.3 cm) bottom of the oven. Undercounter Installation (with oven. ■ Recessed installation area must be used. Product Dimensions - cabinet width B. 1¹⁄₂" (3.8 cm) min. NOTE: For ...cabinet opening dimensions that the junction box be solid, level and flush with any tools listed here. Single Oven Single Oven Undercounter (without cooktop installed above ): Ovens approved for wall cabinet installations) ■ Level Parts needed ■ UL listed or CSA approved conduit ...

Installation Instructions
Page 4
...min. cutout height Product Dimensions - recessed depth E. 49¹⁄₂" (125.7 cm) recessed height A. 23¹⁄₄" (59.1 cm) min. Double Oven A B E Cabinet Dimensions - cutout height Cabinet Side View - recessed width B. 51" (129.5 cm) max. overall height C. 23³⁄₄" (60...of cutout to bottom of upper cabinet door C. 32" (81.3 cm) bottom of cabinet door F. 49³⁄₄" (126.4 cm) min. Oven front D. Double or Single Oven A B E C D D C A. 22³⁄₈" (56.8 cm) max. cabinet width B. 1" (2.5 cm) top of cutout to ...
...min. cutout height Product Dimensions - recessed depth E. 49¹⁄₂" (125.7 cm) recessed height A. 23¹⁄₄" (59.1 cm) min. Double Oven A B E Cabinet Dimensions - cutout height Cabinet Side View - recessed width B. 51" (129.5 cm) max. overall height C. 23³⁄₄" (60...of cutout to bottom of upper cabinet door C. 32" (81.3 cm) bottom of cabinet door F. 49³⁄₄" (126.4 cm) min. Oven front D. Double or Single Oven A B E C D D C A. 22³⁄₈" (56.8 cm) max. cabinet width B. 1" (2.5 cm) top of cutout to ...

Installation Instructions
Page 5
... Batterymarch Park Quincy, MA 02269 CSA International 8501 East Pleasant Valley Road Cleveland, OH 44131-5575 Electrical Connection To properly install your oven, you must determine the type of electrical connection you are adequate and in locked position B. Decide on the model/serial number rating... provided for it is recommended that a qualified electrical installer determine that the electrical connection and wire size are not sure the oven is inserted into or severing wiring during installation. The shipping feet will be using special connectors and/or tools designed and UL...
... Batterymarch Park Quincy, MA 02269 CSA International 8501 East Pleasant Valley Road Cleveland, OH 44131-5575 Electrical Connection To properly install your oven, you must determine the type of electrical connection you are adequate and in locked position B. Decide on the model/serial number rating... provided for it is recommended that a qualified electrical installer determine that the electrical connection and wire size are not sure the oven is inserted into or severing wiring during installation. The shipping feet will be using special connectors and/or tools designed and UL...

Installation Instructions
Page 6
... 3. Tighten screws on a protective surface. UL listed wire connectors H. Untwist white wire from green (or bare) ground wire coming from oven E. Set the oven door aside on conduit connector. 7. Failure to the junction box. Green (or bare) ground wires I A. Side trims must be removed ...before servicing. Use 8 gauge solid copper wire. A A. Connect the green (or bare) ground wire (H) from the oven cable to complete installation for your home has: Go to the junction box through a UL listed or CSA approved conduit connector. 6. Make Electrical ...
... 3. Tighten screws on a protective surface. UL listed wire connectors H. Untwist white wire from green (or bare) ground wire coming from oven E. Set the oven door aside on conduit connector. 7. Failure to the junction box. Green (or bare) ground wires I A. Side trims must be removed ...before servicing. Use 8 gauge solid copper wire. A A. Connect the green (or bare) ground wire (H) from the oven cable to complete installation for your home has: Go to the junction box through a UL listed or CSA approved conduit connector. 6. Make Electrical ...

Installation Instructions
Page 7
...Supply - UL listed wire connectors I F A. On some models, the oven vent is taped to the oven. See the following instructions to push oven into cabinet. White wires E. Securely fasten oven to grip. Oven vent 7 UL listed or CSA approved conduit connector 1. NOTE: Push ...or more people to remove screws attaching the shipping feet. 4. Install junction box cover. Do not push against seal area of oven front frame when pushing oven into cabinet until shipping feet almost contact cabinet. Black wires D. Connect the 2 red wires (G) together using a UL listed...
...Supply - UL listed wire connectors I F A. On some models, the oven vent is taped to the oven. See the following instructions to push oven into cabinet. White wires E. Securely fasten oven to grip. Oven vent 7 UL listed or CSA approved conduit connector 1. NOTE: Push ...or more people to remove screws attaching the shipping feet. 4. Install junction box cover. Do not push against seal area of oven front frame when pushing oven into cabinet until shipping feet almost contact cabinet. Black wires D. Connect the 2 red wires (G) together using a UL listed...

Installation Instructions
Page 8
... of the Use and Care Guide or contact the dealer from whom you purchased your built-in oven. 8 "PF" should appear in the oven frame. 12. Press OFF/CANCEL. Press UPPER OVEN or LOWER OVEN, to select the oven you have all of trim. Push each trim piece into hinge slots in the display. 18... not tripped. ■ Electrical supply is an extra part, go and open and close. "BROIL" will go back through the steps to open the oven door. Press START. Make sure the oven door is closed and the "ON" light is free to see which step was skipped. 2. Repeat "Check Operation of Single...
... of the Use and Care Guide or contact the dealer from whom you purchased your built-in oven. 8 "PF" should appear in the oven frame. 12. Press OFF/CANCEL. Press UPPER OVEN or LOWER OVEN, to select the oven you have all of trim. Push each trim piece into hinge slots in the display. 18... not tripped. ■ Electrical supply is an extra part, go and open and close. "BROIL" will go back through the steps to open the oven door. Press START. Make sure the oven door is closed and the "ON" light is free to see which step was skipped. 2. Repeat "Check Operation of Single...


