
Use and Care Manual
Page 4
... filter. [] Do not use paper products when appliance is operated in the "PAN BROWN" mode (on models with this oven with a grounding plug. Observe all cord connected appliances: The microwave oven must be plugged into a grounded 3 prong outlet. Do not use an adapter. This will cause ...of 36" (91.44 cm). [] Use care when cleaning the vent-hood filter. SAVE THESE INSTRUCTIONS PRECAUTIONS TO AVOID POSSIBLE EXPOSURE TO EXCESSIVE MICROWAVE ENERGY (a) Do not attempt to operate this feature). [] Do not store any materials, other part of the FCC Rules. GROUNDING INSTRUCTIONS [] For...
... filter. [] Do not use paper products when appliance is operated in the "PAN BROWN" mode (on models with this oven with a grounding plug. Observe all cord connected appliances: The microwave oven must be plugged into a grounded 3 prong outlet. Do not use an adapter. This will cause ...of 36" (91.44 cm). [] Use care when cleaning the vent-hood filter. SAVE THESE INSTRUCTIONS PRECAUTIONS TO AVOID POSSIBLE EXPOSURE TO EXCESSIVE MICROWAVE ENERGY (a) Do not attempt to operate this feature). [] Do not store any materials, other part of the FCC Rules. GROUNDING INSTRUCTIONS [] For...
Use and Care Manual
Page 5
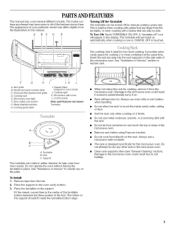
... See "Assistance or Service" to reorder any other rack in either direction to soil buildup. Place the turntable on . Damage to the microwave oven could result due to help cook food more containers at the same time. Always use oven mitts or pot holders when handling. A .... Hub C. To Install: 1. Cooktop light K. PARTSANDFEATURES This manual may have some or all of the microwave oven. The model you have purchased may cover several different models. Clean rack supports often (see "General Cleaning" section). Insert the rack securely into the rack supports on ...
... See "Assistance or Service" to reorder any other rack in either direction to soil buildup. Place the turntable on . Damage to the microwave oven could result due to help cook food more containers at the same time. Always use oven mitts or pot holders when handling. A .... Hub C. To Install: 1. Cooktop light K. PARTSANDFEATURES This manual may have some or all of the microwave oven. The model you have purchased may cover several different models. Clean rack supports often (see "General Cleaning" section). Insert the rack securely into the rack supports on ...

Use and Care Manual
Page 9
...gold, silver, pewter, nonapproved meat thermometers, skewers, twist ties, foil liners such as a general guide for microwave oven use cookware or dinnerware if it . 2. i._.__s_--.__:I J_ CookwaarenddinnerwamreusftitontheturntableA.lwayusse ovenmittsorpotholderws henhandlinbgecausaenydishmay becomheotfromheatransferrefrdomthefood.Donotuse ...becomes hot and the water stays cool. Aluminum foil and some models), aluminum foil for microwave cooking specify which cooking power to the microwave oven. Many recipes for shielding, and approved meat thermometers may ...
...gold, silver, pewter, nonapproved meat thermometers, skewers, twist ties, foil liners such as a general guide for microwave oven use cookware or dinnerware if it . 2. i._.__s_--.__:I J_ CookwaarenddinnerwamreusftitontheturntableA.lwayusse ovenmittsorpotholderws henhandlinbgecausaenydishmay becomheotfromheatransferrefrdomthefood.Donotuse ...becomes hot and the water stays cool. Aluminum foil and some models), aluminum foil for microwave cooking specify which cooking power to the microwave oven. Many recipes for shielding, and approved meat thermometers may ...
Use and Care Manual
Page 14
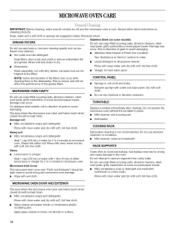
.... COOKING RACK Heavy soil • Mild, nonabrasive soaps and detergents: Heat 1 cup (250 mL) of grain to 5 minutes in microwave oven. TURNTABLE On stainless steel models, rub in direction of water for 2 to avoid damaging. Do not attempt to dry. Steam will not affect the performance of the grease filters. • ...
.... COOKING RACK Heavy soil • Mild, nonabrasive soaps and detergents: Heat 1 cup (250 mL) of grain to 5 minutes in microwave oven. TURNTABLE On stainless steel models, rub in direction of water for 2 to avoid damaging. Do not attempt to dry. Steam will not affect the performance of the grease filters. • ...
Use and Care Manual
Page 16
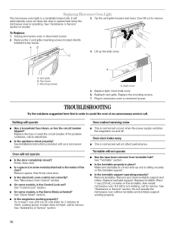
...an electrician. • Is the appliance wired properly? Remove turntable. Close bulb cover. 6. On some models, is the Control Lock set correctly? Mounting screws A. Plug in microwave oven or reconnect power. Oven makes humming noise • This is a candelabra base bulb. Do ...not operate the microwave oven without turntable and turntable support working properly? The microwave oven light is normal and occurs when the power supply switches the magnetron on some models) attached to the inside of the door? To Replace...
...an electrician. • Is the appliance wired properly? Remove turntable. Close bulb cover. 6. On some models, is the Control Lock set correctly? Mounting screws A. Plug in microwave oven or reconnect power. Oven makes humming noise • This is a candelabra base bulb. Do ...not operate the microwave oven without turntable and turntable support working properly? The microwave oven light is normal and occurs when the power supply switches the magnetron on some models) attached to the inside of the door? To Replace...
Use and Care Manual
Page 17
If it on to cool the microwave oven. See "Timer" section. • On some models, is the Demo Mode in use ? ...Tones are clean. See "Tones" section. The fan comes on during cooktop usage • This is normal. Is the incoming voltage less than usual • Has the oven been stored in use ? Is the radio or TV receiver near the microwave...the receiver away from the vent grille • Some steam is normal. Make sure these items during microwave cooking • This is normal. Is the cordless phone frequency 2.4 GHz? Use a corded phone,...
If it on to cool the microwave oven. See "Timer" section. • On some models, is the Demo Mode in use ? ...Tones are clean. See "Tones" section. The fan comes on during cooktop usage • This is normal. Is the incoming voltage less than usual • Has the oven been stored in use ? Is the radio or TV receiver near the microwave...the receiver away from the vent grille • Some steam is normal. Make sure these items during microwave cooking • This is normal. Is the cordless phone frequency 2.4 GHz? Use a corded phone,...
Use and Care Manual
Page 18
When calling, please know the purchase date and the complete model and serial number of your request. If you need replacement parts If you need to build every new WHIRLPOOL ® appliance. FSP ° replacement parts will help , follow the instructions below. Our consultants provide ...8205039 Rack Support Part Number 8206118 Grease Filters Part Number 8206229 Charcoal Filter Part Number 8206230 Cooktop Light Bulb Part Number 8206232 Microwave Oven Light Bulb Part Number 4393681 Cleaning Supplies Heavy Duty Degreaser Part Number 31552 All-Purpose Appliance Cleaner Part Number 31662 ...
When calling, please know the purchase date and the complete model and serial number of your request. If you need replacement parts If you need to build every new WHIRLPOOL ® appliance. FSP ° replacement parts will help , follow the instructions below. Our consultants provide ...8205039 Rack Support Part Number 8206118 Grease Filters Part Number 8206229 Charcoal Filter Part Number 8206230 Cooktop Light Bulb Part Number 8206232 Microwave Oven Light Bulb Part Number 4393681 Cleaning Supplies Heavy Duty Degreaser Part Number 31552 All-Purpose Appliance Cleaner Part Number 31662 ...
Installation Instructions
Page 1
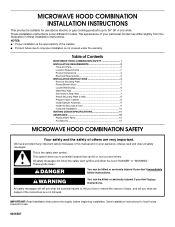
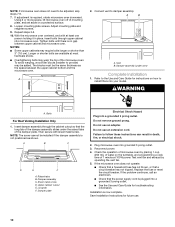
...in this manual and on your particular model may differ slightly from the illustration in Rear Wall 7 Attach Mounting Plate to Wall 8 Prepare Upper Cabinet 8 Install Damper Assembly 9 Install the Microwave Oven 9 Complete Installation 10 VENTING ...9632; Product failure due to improper installation is the safety alert symbol. NOTES: ■ Proper installation is the responsibility of Contents MICROWAVE HOOD COMBINATION SAFETY 1 INSTALLATION REQUIREMENTS 2 Tools and Parts 2 Location Requirements 2 Product Dimensions 3 Electrical Requirements 3 INSTALLATION INSTRUCTIONS 4 Remove...
...in this manual and on your particular model may differ slightly from the illustration in Rear Wall 7 Attach Mounting Plate to Wall 8 Prepare Upper Cabinet 8 Install Damper Assembly 9 Install the Microwave Oven 9 Complete Installation 10 VENTING ...9632; Product failure due to improper installation is the safety alert symbol. NOTES: ■ Proper installation is the responsibility of Contents MICROWAVE HOOD COMBINATION SAFETY 1 INSTALLATION REQUIREMENTS 2 Tools and Parts 2 Location Requirements 2 Product Dimensions 3 Electrical Requirements 3 INSTALLATION INSTRUCTIONS 4 Remove...
Installation Instructions
Page 2
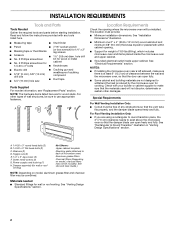
... (9.5 mm) thickness drywall or plaster/lath within cabinet opening where the microwave oven will not discolor, delaminate or sustain other types of microwave oven) Aluminum grease filters Charcoal filters (Depending on model, aluminum grease filter and charcoal filter may not be sure to back ...3 Phillips screwdriver for wall or roof venting. See Use and Care Guide.) NOTE: Depending on model, charcoal filters may be combined. See "Rectangular to withstand the heat produced by the microwave oven for weight of any tools listed here. ■ Measuring tape ■ Stud finder &#...
... (9.5 mm) thickness drywall or plaster/lath within cabinet opening where the microwave oven will not discolor, delaminate or sustain other types of microwave oven) Aluminum grease filters Charcoal filters (Depending on model, aluminum grease filter and charcoal filter may not be sure to back ...3 Phillips screwdriver for wall or roof venting. See Use and Care Guide.) NOTE: Depending on model, charcoal filters may be combined. See "Rectangular to withstand the heat produced by the microwave oven for weight of any tools listed here. ■ Measuring tape ■ Stud finder &#...
Installation Instructions
Page 10
... household fuse has not blown, or that the long tab of mounting plate, and set aside on how to install filters into your model. Loosen mounting plate screws. Connect vent to follow these instructions can result in place, insert bolts through the cabinet cutout so that ...surface. 8. Do not remove ground prong. Replace the fuse or reset the circuit breaker. Repeat steps 3-6. 10. Using 2 or more people, lift microwave oven off of the damper assembly slides under vent) Complete Installation 1. Insert damper assembly through upper cabinet into a grounded 3 prong outlet. ■ See...
... household fuse has not blown, or that the long tab of mounting plate, and set aside on how to install filters into your model. Loosen mounting plate screws. Connect vent to follow these instructions can result in place, insert bolts through the cabinet cutout so that ...surface. 8. Do not remove ground prong. Replace the fuse or reset the circuit breaker. Repeat steps 3-6. 10. Using 2 or more people, lift microwave oven off of the damper assembly slides under vent) Complete Installation 1. Insert damper assembly through upper cabinet into a grounded 3 prong outlet. ■ See...
Installation Instructions
Page 12
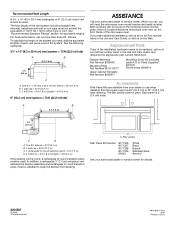
... B 6 ft (1.8 m) 2 ft (0.6 m) C A. When you call, you need additional assistance, call us on the front frame of the system you need the microwave oven model number and serial number. Both numbers can be installed to keep the damper from your dealer to round transition piece must be found on the... model and serial number plate, which is located behind the microwave oven door on the Web. Damper Assembly Part Number 8206442 Mounting Plate Part Number W10110277 Upper Cabinet ...
... B 6 ft (1.8 m) 2 ft (0.6 m) C A. When you call, you need additional assistance, call us on the front frame of the system you need the microwave oven model number and serial number. Both numbers can be installed to keep the damper from your dealer to round transition piece must be found on the... model and serial number plate, which is located behind the microwave oven door on the Web. Damper Assembly Part Number 8206442 Mounting Plate Part Number W10110277 Upper Cabinet ...


