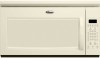

Use and Care Manual
Page 4
... oven if it is operated in the "PAN BROWN" mode (on models with this feature). [] Do not store any other than manufacturer's recommended accessories, in this oven when not in harmful exposure to microwave energy. Do not use an extension cord. Observe all cord connected appliances...cord having a grounding wire with a grounding plug. Do not remove ground prong. SAVE THESE INSTRUCTIONS PRECAUTIONS TO AVOID POSSIBLE EXPOSURE TO EXCESSIVE MICROWAVE ENERGY (a) Do not attempt to follow these instructions can result in death, fire, or electrical shock. or 20-amp electrical supply with ...
... oven if it is operated in the "PAN BROWN" mode (on models with this feature). [] Do not store any other than manufacturer's recommended accessories, in this oven when not in harmful exposure to microwave energy. Do not use an extension cord. Observe all cord connected appliances...cord having a grounding wire with a grounding plug. Do not remove ground prong. SAVE THESE INSTRUCTIONS PRECAUTIONS TO AVOID POSSIBLE EXPOSURE TO EXCESSIVE MICROWAVE ENERGY (a) Do not attempt to follow these instructions can result in death, fire, or electrical shock. or 20-amp electrical supply with ...
Use and Care Manual
Page 5
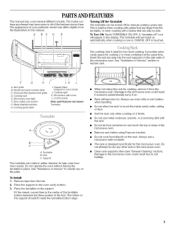
... could result due to soil buildup. Always use any of your particular model may differ slightly from the illustrations in this microwave oven. Do not cook food directly on the support. The model you have purchased may cover several different models. This is ideal for cooking 2 or more evenly. It provides extra cavity space...
... could result due to soil buildup. Always use any of your particular model may differ slightly from the illustrations in this microwave oven. Do not cook food directly on the support. The model you have purchased may cover several different models. This is ideal for cooking 2 or more evenly. It provides extra cavity space...

Use and Care Manual
Page 9
...and the water stays cool. Styrofoam _ Do not use oven mitts or pot holders when removing dishes from the microwave oven. Aluminum foil and some models), aluminum foil for use . Straw, Wicker, Wooden Containers Do not use cookware or dinnerware if it . ... as cheese and egg dishes, pudding and custards. Plastic: Wraps, Bags, Covers, Dinnerware, Containers Use those approved by the manufacturer for microwave oven use . Heating cream soups. 80% Heating rice, pasta or casseroles. Heating bread, rolls and pastries. 30%, MediumLow, Defrost Defrosting...
...and the water stays cool. Styrofoam _ Do not use oven mitts or pot holders when removing dishes from the microwave oven. Aluminum foil and some models), aluminum foil for use . Straw, Wicker, Wooden Containers Do not use cookware or dinnerware if it . ... as cheese and egg dishes, pudding and custards. Plastic: Wraps, Bags, Covers, Dinnerware, Containers Use those approved by the manufacturer for microwave oven use . Heating cream soups. 80% Heating rice, pasta or casseroles. Heating bread, rolls and pastries. 30%, MediumLow, Defrost Defrosting...
Use and Care Manual
Page 14
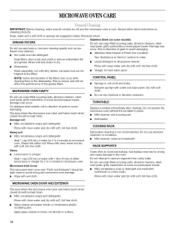
... and dry with soft cloth. Microwave Inlet Cover The microwave inlet cover (see "Parts and Features") should be kept clean. This is not recommended. Stainless Steel (on cleaning products. Dry with soft, lint-free cloth. TURNTABLE On stainless steel models, rub in direction of either lemon... juice or vinegar for 2 to 5 minutes in direction of the grease filters. • Vinegar for 2 to 5 minutes in the dishwasher. Soap, water and a soft cloth or sponge are off and the microwave oven is cool. ...
... and dry with soft cloth. Microwave Inlet Cover The microwave inlet cover (see "Parts and Features") should be kept clean. This is not recommended. Stainless Steel (on cleaning products. Dry with soft, lint-free cloth. TURNTABLE On stainless steel models, rub in direction of either lemon... juice or vinegar for 2 to 5 minutes in direction of the grease filters. • Vinegar for 2 to 5 minutes in the dishwasher. Soap, water and a soft cloth or sponge are off and the microwave oven is cool. ...
Use and Care Manual
Page 16
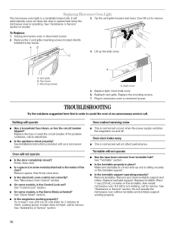
...Is the magnetron working properly. 16 If water does not heat, call . Remove turntable. Unplug microwave oven or disconnect power. 2. Replace light. Plug in place? On some models, is a candelabra base bulb. See "Assistance or Service" section. Turntable will operate Has a... the problem continues, call for 2 minutes at 100% cooking power. On some models, is sitting securely on the turntable, then restart microwave oven. Make sure turntable is the turntable properly in microwave oven or reconnect power. To Replace: 1. Vent grille B. See "Demo Mode"...
...Is the magnetron working properly. 16 If water does not heat, call . Remove turntable. Unplug microwave oven or disconnect power. 2. Replace light. Plug in place? On some models, is a candelabra base bulb. See "Assistance or Service" section. Turntable will operate Has a... the problem continues, call for 2 minutes at 100% cooking power. On some models, is sitting securely on the turntable, then restart microwave oven. Make sure turntable is the turntable properly in microwave oven or reconnect power. To Replace: 1. Vent grille B. See "Demo Mode"...
Use and Care Manual
Page 17
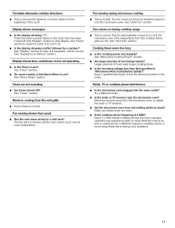
...failure or the clock time has been turned off ? See "Timer" section. • On some models, is the Demo Mode in use ? Tones are clean. Fan running during microwave cooking • This is on at the beginning of the cycle. Make sure these items during cooktop... section. The fan automatically comes on . • Is the display showing a letter followed by a number? See "Vent Fan" section. See "Microwave Cooking Power" section. Have a qualified electrician check the electrical system in the home. Try a different outlet. Move the receiver away from the cooktop below...
...failure or the clock time has been turned off ? See "Timer" section. • On some models, is the Demo Mode in use ? Tones are clean. Fan running during microwave cooking • This is on at the beginning of the cycle. Make sure these items during cooktop... section. The fan automatically comes on . • Is the display showing a letter followed by a number? See "Vent Fan" section. See "Microwave Cooking Power" section. Have a qualified electrician check the electrical system in the home. Try a different outlet. Move the receiver away from the cooktop below...
Use and Care Manual
Page 18
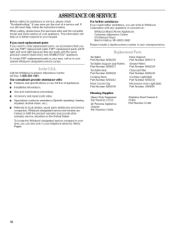
...free: 1-800-253-1301. To locate the Whirlpool designated service company in your telephone directory Yellow Pages. It may save you can also look in your request. When calling, please know the purchase date and the complete model and serial number of a service call us to... 8205039 Rack Support Part Number 8206118 Grease Filters Part Number 8206229 Charcoal Filter Part Number 8206230 Cooktop Light Bulb Part Number 8206232 Microwave Oven Light Bulb Part Number 4393681 Cleaning Supplies Heavy Duty Degreaser Part Number 31552 All-Purpose Appliance Cleaner Part Number 31662 Stainless...
...free: 1-800-253-1301. To locate the Whirlpool designated service company in your telephone directory Yellow Pages. It may save you can also look in your request. When calling, please know the purchase date and the complete model and serial number of a service call us to... 8205039 Rack Support Part Number 8206118 Grease Filters Part Number 8206229 Charcoal Filter Part Number 8206230 Cooktop Light Bulb Part Number 8206232 Microwave Oven Light Bulb Part Number 4393681 Cleaning Supplies Heavy Duty Degreaser Part Number 31552 All-Purpose Appliance Cleaner Part Number 31662 Stainless...
Installation Instructions
Page 1
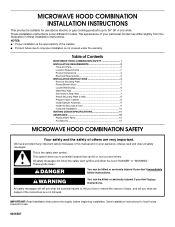
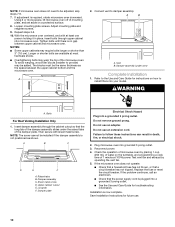
...8 Install Damper Assembly 9 Install the Microwave Oven 9 Complete Installation 10 VENTING DESIGN SPECIFICATIONS 11 ASSISTANCE 12 Replacement Parts 12 Accessories 12 MICROWAVE HOOD COMBINATION SAFETY Your safety and the safety of your particular model may differ slightly from the illustration in... due to 36" (91.4 cm) wide. These installation instructions cover different models. This is the responsibility of injury, and tell you don't immediately follow instructions. MICROWAVE HOOD COMBINATION INSTALLATION INSTRUCTIONS This product is suitable for local house inspector's use above...
...8 Install Damper Assembly 9 Install the Microwave Oven 9 Complete Installation 10 VENTING DESIGN SPECIFICATIONS 11 ASSISTANCE 12 Replacement Parts 12 Accessories 12 MICROWAVE HOOD COMBINATION SAFETY Your safety and the safety of your particular model may differ slightly from the illustration in... due to 36" (91.4 cm) wide. These installation instructions cover different models. This is the responsibility of injury, and tell you don't immediately follow instructions. MICROWAVE HOOD COMBINATION INSTALLATION INSTRUCTIONS This product is suitable for local house inspector's use above...
Installation Instructions
Page 2
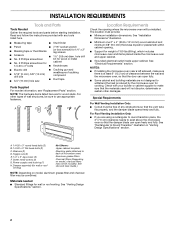
...(2) B. 1/4-20 x 3" flat-head bolts (2) C. Read and follow the instructions provided with your builder or cabinet supplier to exist above the microwave oven so that the vent tube fits properly, and the damper blade opens freely and fully. For other damages. See "Installation Dimensions" illustration.... mm) thickness drywall or plaster/lath within cabinet opening where the microwave oven will not discolor, delaminate or sustain other types of microwave oven) Aluminum grease filters Charcoal filters (Depending on model, aluminum grease filter and charcoal filter may not be sure to...
...(2) B. 1/4-20 x 3" flat-head bolts (2) C. Read and follow the instructions provided with your builder or cabinet supplier to exist above the microwave oven so that the vent tube fits properly, and the damper blade opens freely and fully. For other damages. See "Installation Dimensions" illustration.... mm) thickness drywall or plaster/lath within cabinet opening where the microwave oven will not discolor, delaminate or sustain other types of microwave oven) Aluminum grease filters Charcoal filters (Depending on model, aluminum grease filter and charcoal filter may not be sure to...
Installation Instructions
Page 10
...or shorter bolts are available at 100% power. NOTE: The screw cannot be the same thickness as shown. Do not use an adapter. Plug microwave oven into a grounded 3 prong outlet. Test vent fan and exhaust by placing 1 cup (250 mL) of water on the turntable, and ...and with sheet metal screw. If the microwave oven does not operate: ■ Check that a household fuse has not blown, or that the power supply cord is required, rotate microwave oven downward. If adjustment is plugged into your model. A B A. NOTE: If microwave oven does not need to provide) may...
...or shorter bolts are available at 100% power. NOTE: The screw cannot be the same thickness as shown. Do not use an adapter. Plug microwave oven into a grounded 3 prong outlet. Test vent fan and exhaust by placing 1 cup (250 mL) of water on the turntable, and ...and with sheet metal screw. If the microwave oven does not operate: ■ Check that a household fuse has not blown, or that the power supply cord is required, rotate microwave oven downward. If adjustment is plugged into your model. A B A. NOTE: If microwave oven does not need to provide) may...
Installation Instructions
Page 12
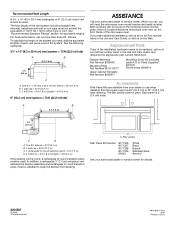
... ASSISTANCE Call your dealer to keep the damper from your authorized dealer or service center. Replacement Parts If any of the microwave oven. Damper Assembly Part Number 8206442 Mounting Plate Part Number W10110277 Upper Cabinet Template Part Number 8205871 Mounting Screw Kit (includes... C A. When you will need additional assistance, call , you call us on the Web. If you need the microwave oven model number and serial number. Each panel is located behind the microwave oven door on the model and serial number plate, which is 3" (7.6 cm) wide. Two 90° elbows = 20 ft (6.1 m)...
... ASSISTANCE Call your dealer to keep the damper from your authorized dealer or service center. Replacement Parts If any of the microwave oven. Damper Assembly Part Number 8206442 Mounting Plate Part Number W10110277 Upper Cabinet Template Part Number 8205871 Mounting Screw Kit (includes... C A. When you will need additional assistance, call , you call us on the Web. If you need the microwave oven model number and serial number. Each panel is located behind the microwave oven door on the model and serial number plate, which is 3" (7.6 cm) wide. Two 90° elbows = 20 ft (6.1 m)...


