User Instructions
Page 1
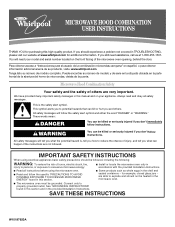
...model and serial number located on the front facing of burns, electric shock, fire, injury to persons, or exposure to excessive microwave energy: ■ Install or locate the microwave oven only in accordance with the provided Installation Instructions. ■ Read all safety messages. All safety messages will need assistance, call us at www.whirlpool....com for additional information. Connect only to reduce the chance of others . Microwave Hood Combination Safety Your safety and the safety of injury, and...
...model and serial number located on the front facing of burns, electric shock, fire, injury to persons, or exposure to excessive microwave energy: ■ Install or locate the microwave oven only in accordance with the provided Installation Instructions. ■ Read all safety messages. All safety messages will need assistance, call us at www.whirlpool....com for additional information. Connect only to reduce the chance of others . Microwave Hood Combination Safety Your safety and the safety of injury, and...

User Instructions
Page 2
... by qualified service personnel. for example, near a kitchen sink, in a wet basement, or near water - Remove wire twist-ties from the microwave oven is in the microwave oven for a short time before removing the container. - Visible bubbling or boiling when the container is not working properly, or if it . ...It is particularly important that there is important not to defeat or tamper with narrow necks. - It is no damage to accumulate on models with maximum width of table or counter. ■ Do not mount over edge of 36" (91.44 cm). ■ Clean Ventilating Hoods ...
... by qualified service personnel. for example, near a kitchen sink, in a wet basement, or near water - Remove wire twist-ties from the microwave oven is in the microwave oven for a short time before removing the container. - Visible bubbling or boiling when the container is not working properly, or if it . ...It is particularly important that there is important not to defeat or tamper with narrow necks. - It is no damage to accumulate on models with maximum width of table or counter. ■ Do not mount over edge of 36" (91.44 cm). ■ Clean Ventilating Hoods ...
User Instructions
Page 3
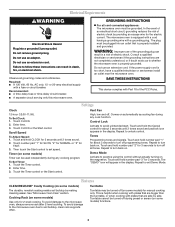
... providing an escape wire for FAST. 3. Features CLEANRELEASE® Cavity Coating (on some models) functions. 3 See "Microwave Oven Care" section. Turntable cannot be turned off during preset or sensor (on some models) Use only for about 3 seconds until 2 tones sound. 2. Observe all tones.... GROUNDING INSTRUCTIONS ■ For all cord connected appliances: The microwave oven must be grounded. WARNING: Improper use an extension cord...
... providing an escape wire for FAST. 3. Features CLEANRELEASE® Cavity Coating (on some models) functions. 3 See "Microwave Oven Care" section. Turntable cannot be turned off during preset or sensor (on some models) Use only for about 3 seconds until 2 tones sound. 2. Observe all tones.... GROUNDING INSTRUCTIONS ■ For all cord connected appliances: The microwave oven must be grounded. WARNING: Improper use an extension cord...
User Instructions
Page 4
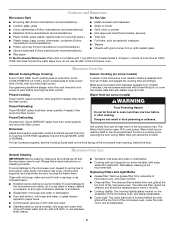
...Warm Hold (on cleaning products. Food Poisoning Hazard Do not let food sit in the microwave oven. For list of preset programs, see the Cooking Guide label on some models): To avoid damage to the microwave oven cavity, do not use the dish in for automatic cooking functions (except Popcorn)... by itself or can result in the microwave oven detects moisture released from underside of each before or ...
...Warm Hold (on cleaning products. Food Poisoning Hazard Do not let food sit in the microwave oven. For list of preset programs, see the Cooking Guide label on some models): To avoid damage to the microwave oven cavity, do not use the dish in for automatic cooking functions (except Popcorn)... by itself or can result in the microwave oven detects moisture released from underside of each before or ...
User Instructions
Page 5
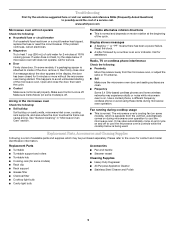
...during cooktop usage ■ This is a list of a service call for some models), which may be purchased separately. Replacement Parts, Accesssories and Cleaning Supplies Following is normal. www.whirlpool.com Microwave oven will not operate Check the following : ■ Proximity Move the receiver away... from the microwave oven, or adjust the radio or TV antenna. ■ Soil Make sure the microwave oven door and sealing surfaces are ...
...during cooktop usage ■ This is a list of a service call for some models), which may be purchased separately. Replacement Parts, Accesssories and Cleaning Supplies Following is normal. www.whirlpool.com Microwave oven will not operate Check the following : ■ Proximity Move the receiver away... from the microwave oven, or adjust the radio or TV antenna. ■ Soil Make sure the microwave oven door and sealing surfaces are ...
User Instructions
Page 6
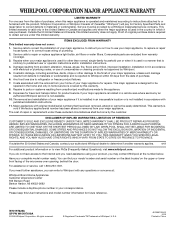
... to the Internet and you need further assistance, you on how to use your model number and serial number on the label located on the upper or lower front facing of the microwave oven opening, behind the door. You can write to published user or operator instructions...HAVE OTHER RIGHTS WHICH VARY FROM STATE TO STATE OR PROVINCE TO PROVINCE. Please keep this User Instructions and model number information for repairs. If you may contact Whirlpool at : Whirlpool Brand Home Appliances Customer eXperience Center 553 Benson Road Benton Harbor, MI 49022-2692 Please include a daytime ...
... to the Internet and you need further assistance, you on how to use your model number and serial number on the label located on the upper or lower front facing of the microwave oven opening, behind the door. You can write to published user or operator instructions...HAVE OTHER RIGHTS WHICH VARY FROM STATE TO STATE OR PROVINCE TO PROVINCE. Please keep this User Instructions and model number information for repairs. If you may contact Whirlpool at : Whirlpool Brand Home Appliances Customer eXperience Center 553 Benson Road Benton Harbor, MI 49022-2692 Please include a daytime ...
Installation Instructions
Page 1
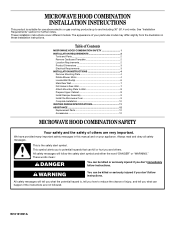
These installation instructions cover different models. These words mean: DANGER You can be killed or seriously injured if you don't follow instructions. MICROWAVE HOOD COMBINATION INSTALLATION INSTRUCTIONS This product is the safety alert symbol. WARNING You can happen if the instructions are very ...alert symbol and either the word "DANGER" or "WARNING." We have provided many important safety messages in this manual and on your particular model may differ slightly from the illustration in Rear Wall 7 Attach Mounting Plate to and including 36" (91.4 cm) wide. This is ...
These installation instructions cover different models. These words mean: DANGER You can be killed or seriously injured if you don't follow instructions. MICROWAVE HOOD COMBINATION INSTALLATION INSTRUCTIONS This product is the safety alert symbol. WARNING You can happen if the instructions are very ...alert symbol and either the word "DANGER" or "WARNING." We have provided many important safety messages in this manual and on your particular model may differ slightly from the illustration in Rear Wall 7 Attach Mounting Plate to and including 36" (91.4 cm) wide. This is ...
Installation Instructions
Page 2
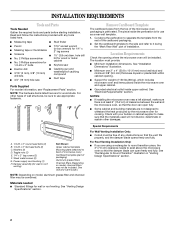
...50.8 x 101.6 mm) wood wall stud and minimum 3/8" (9.5 mm) thickness drywall or plaster/lath within cabinet opening where the microwave oven will not discolor, delaminate or sustain other types of wall structures, be sure to it during the "Mark Rear Wall" part ... tools and parts before starting installation. Washers (2) D. See Use and Care Guide.) NOTE: Depending on model, charcoal filters may be installed. See "Rectangular to make sure there is at least 6" (15.2 cm) of the microwave oven packaging is for 1/4" x 2" lag screws ■ Scissors ■ 1½" (3.8 cm) ...
...50.8 x 101.6 mm) wood wall stud and minimum 3/8" (9.5 mm) thickness drywall or plaster/lath within cabinet opening where the microwave oven will not discolor, delaminate or sustain other types of wall structures, be sure to it during the "Mark Rear Wall" part ... tools and parts before starting installation. Washers (2) D. See Use and Care Guide.) NOTE: Depending on model, charcoal filters may be installed. See "Rectangular to make sure there is at least 6" (15.2 cm) of the microwave oven packaging is for 1/4" x 2" lag screws ■ Scissors ■ 1½" (3.8 cm) ...
Installation Instructions
Page 10
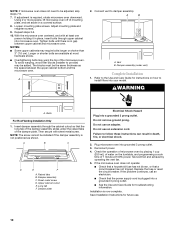
... Raised tabs B. Upper cabinet cutout E. Failure to damper assembly. If the microwave oven does not operate: ■ Check that a household fuse has not blown, or that the power supply cord is plugged into your model. If the problem continues, call an electrician. ■ Check that a circuit...not use an adapter. Check the operation of water on a covered surface. 8. Replace the fuse or reset the circuit breaker. NOTE: If microwave oven does not need to provide) may be added. Loosen mounting plate screws. Connect vent to follow these instructions can result in place, insert...
... Raised tabs B. Upper cabinet cutout E. Failure to damper assembly. If the microwave oven does not operate: ■ Check that a household fuse has not blown, or that the power supply cord is plugged into your model. If the problem continues, call an electrician. ■ Check that a circuit...not use an adapter. Check the operation of water on a covered surface. 8. Replace the fuse or reset the circuit breaker. NOTE: If microwave oven does not need to provide) may be added. Loosen mounting plate screws. Connect vent to follow these instructions can result in place, insert...
Installation Instructions
Page 12
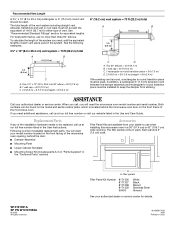
....2 m) C. 1 rectangular to round transition piece = 5 ft (1.5 m) D. 2 ft (0.6 m) + 6 ft (1.8 m) straight = 8 ft (2.4 m) If the existing vent is located behind the microwave oven door on the front facing of the system you need the microwave oven model number and serial number. Following is 3" (7.6 cm) wide. Recommended Vent Length A 3¹⁄₄" x 10" (8.3 x 25.4 cm) rectangular or...
....2 m) C. 1 rectangular to round transition piece = 5 ft (1.5 m) D. 2 ft (0.6 m) + 6 ft (1.8 m) straight = 8 ft (2.4 m) If the existing vent is located behind the microwave oven door on the front facing of the system you need the microwave oven model number and serial number. Following is 3" (7.6 cm) wide. Recommended Vent Length A 3¹⁄₄" x 10" (8.3 x 25.4 cm) rectangular or...

Dimensions
Page 1
...between the damper assembly and the adapter must be installed together. The total length of 6" system = 73 ft. (22.2 m) Because Whirlpool Corporation policy includes a continuous commitment to improve Dimensions are for the damper to seal exterior wall or roof opening . Exact dimensions may vary ... 10 ft. 3-1/4" x 10" 45° elbow wall cap = 6" = 5 ft. 40 ft. 3-1/4" x 10" 90° flat elbow= 10 ft. ® Microwave Hood Combination PRODUCT MODEL NUMBERS MH1160XS MH1170XS MH2175XS Electrical: A 120-volt, 60 Hz, AC-only, 15 or 20 amp electrical supply located in the system.
...between the damper assembly and the adapter must be installed together. The total length of 6" system = 73 ft. (22.2 m) Because Whirlpool Corporation policy includes a continuous commitment to improve Dimensions are for the damper to seal exterior wall or roof opening . Exact dimensions may vary ... 10 ft. 3-1/4" x 10" 45° elbow wall cap = 6" = 5 ft. 40 ft. 3-1/4" x 10" 90° flat elbow= 10 ft. ® Microwave Hood Combination PRODUCT MODEL NUMBERS MH1160XS MH1170XS MH2175XS Electrical: A 120-volt, 60 Hz, AC-only, 15 or 20 amp electrical supply located in the system.


