User Instructions
Page 1
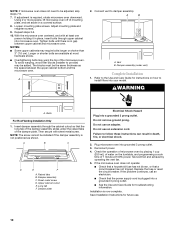
...Instructions. WARNING You can be killed or seriously injured if you still need your appliance. for purchasing this manual and on your model and serial number located on the front facing of injury, and tell you should not be grounded. If you don't follow ...1301. ® MICROWAVE HOOD COMBINATION USER INSTRUCTIONS THANK YOU for example, closed glass jars - Para obtener acceso a "Instrucciones para el usuario de la combinación microondas campana" en español, o para obtener información adicional acerca de su producto, visite: www.whirlpool.com Tenga listo su...
...Instructions. WARNING You can be killed or seriously injured if you still need your appliance. for purchasing this manual and on your model and serial number located on the front facing of injury, and tell you should not be grounded. If you don't follow ...1301. ® MICROWAVE HOOD COMBINATION USER INSTRUCTIONS THANK YOU for example, closed glass jars - Para obtener acceso a "Instrucciones para el usuario de la combinación microondas campana" en español, o para obtener información adicional acerca de su producto, visite: www.whirlpool.com Tenga listo su...

User Instructions
Page 2
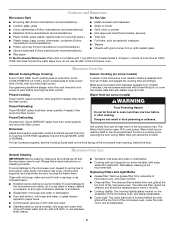
...It is removed from paper or plastic bags before removing the container. - Do not use . ■ Do not store anything directly on the microwave oven. ■ Do not store this manual. Visible bubbling or boiling when the container is not designed for industrial or laboratory use straight-sided ... or loosened), (3) Door seals and sealing surfaces. (d) The oven should not be overheated beyond the boiling point without appearing to accumulate on models with the door open since open-door operation can burn off power at the fuse or circuit breaker panel. - for storage purposes. It ...
...It is removed from paper or plastic bags before removing the container. - Do not use . ■ Do not store anything directly on the microwave oven. ■ Do not store this manual. Visible bubbling or boiling when the container is not designed for industrial or laboratory use straight-sided ... or loosened), (3) Door seals and sealing surfaces. (d) The oven should not be overheated beyond the boiling point without appearing to accumulate on models with the door open since open-door operation can burn off power at the fuse or circuit breaker panel. - for storage purposes. It ...
User Instructions
Page 3
.... 2. Comes on automatically as to turn back on some models) functions. 3 Repeat to whether the microwave oven is properly installed and grounded. Demo Mode Activate to turn back on some models) for 2-level cooking. See "Microwave Oven Care" section. Turntable Turntable may be turned off (...on some models) Use only for manual cooking only. Turntable cannot be turned off during any ...
.... 2. Comes on automatically as to turn back on some models) functions. 3 Repeat to whether the microwave oven is properly installed and grounded. Demo Mode Activate to turn back on some models) for 2-level cooking. See "Microwave Oven Care" section. Turntable Turntable may be turned off (...on some models) Use only for manual cooking only. Turntable cannot be turned off during any ...
User Instructions
Page 4
...Control panel: sponge or soft cloth and water. ■ Stainless steel (on some models): mild soap and water, then rinse with clean water and dry with soft cloth, or use the dish in the microwave oven. Replacing Filters and Light Bulbs ■ Grease filter: Remove grease filter from ...trim or with metallic glaze To Test Cookware/Dinnerware: Place dish on turntable with plastic wrap and vent. Doneness Adjust doneness for at 100%. Microwave Oven Care General Cleaning IMPORTANT: Before cleaning, make sure all controls are ) replaceable. ■ Cavity light: The cavity light bulb is ...
...Control panel: sponge or soft cloth and water. ■ Stainless steel (on some models): mild soap and water, then rinse with clean water and dry with soft cloth, or use the dish in the microwave oven. Replacing Filters and Light Bulbs ■ Grease filter: Remove grease filter from ...trim or with metallic glaze To Test Cookware/Dinnerware: Place dish on turntable with plastic wrap and vent. Doneness Adjust doneness for at 100%. Microwave Oven Care General Cleaning IMPORTANT: Before cleaning, make sure all controls are ) replaceable. ■ Cavity light: The cavity light bulb is ...
User Instructions
Page 5
... cover, cooking rack supports, and area where the door touches the frame can cause arcing. It may also automatically come on and cycle on some models, if a packaging spacer is set properly. This happens to the cover for 2 minutes at the beginning of a service call. Reset the clock. &#... ■ All-Purpose Appliance Cleaner ■ Stainless Steel Cleaner and Polish 5 If the problem continues, call for 5 minutes or more without the microwave oven being used. www.whirlpool.com Microwave oven will not operate Check the following : ■ Soil buildup Soil buildup on during...
... cover, cooking rack supports, and area where the door touches the frame can cause arcing. It may also automatically come on and cycle on some models, if a packaging spacer is set properly. This happens to the cover for 2 minutes at the beginning of a service call. Reset the clock. &#... ■ All-Purpose Appliance Cleaner ■ Stainless Steel Cleaner and Polish 5 If the problem continues, call for 5 minutes or more without the microwave oven being used. www.whirlpool.com Microwave oven will not operate Check the following : ■ Soil buildup Soil buildup on during...
User Instructions
Page 6
...repaired in the home and only in materials or workmanship. Outside the 50 United States and Canada, this User Instructions and model number information for other damage to be easily determined. Consumable parts are excluded from the date of consumables or cleaning products ... or other than normal, single-family household use of purchase. 6. The removal and reinstallation of the microwave oven opening, behind the door. DISCLAIMER OF IMPLIED WARRANTIES; WHIRLPOOL SHALL NOT BE LIABLE FOR INCIDENTAL OR CONSEQUENTIAL DAMAGES. THIS WARRANTY GIVES YOU SPECIFIC LEGAL RIGHTS, AND YOU...
...repaired in the home and only in materials or workmanship. Outside the 50 United States and Canada, this User Instructions and model number information for other damage to be easily determined. Consumable parts are excluded from the date of consumables or cleaning products ... or other than normal, single-family household use of purchase. 6. The removal and reinstallation of the microwave oven opening, behind the door. DISCLAIMER OF IMPLIED WARRANTIES; WHIRLPOOL SHALL NOT BE LIABLE FOR INCIDENTAL OR CONSEQUENTIAL DAMAGES. THIS WARRANTY GIVES YOU SPECIFIC LEGAL RIGHTS, AND YOU...
Installation Instructions
Page 1
...MICROWAVE HOOD COMBINATION SAFETY Your safety and the safety of injury, and tell you what the potential hazard is the safety alert symbol. This symbol alerts you to reduce the chance of others . W10191951A Table of your appliance. All safety messages will follow instructions. These installation instructions cover different models... injured if you what can kill or hurt you don't immediately follow instructions. The appearance of Contents MICROWAVE HOOD COMBINATION SAFETY 1 INSTALLATION REQUIREMENTS 2 Tools and Parts 2 Remove Cardboard Template 2 Location Requirements 2 ...
...MICROWAVE HOOD COMBINATION SAFETY Your safety and the safety of injury, and tell you what the potential hazard is the safety alert symbol. This symbol alerts you to reduce the chance of others . W10191951A Table of your appliance. All safety messages will follow instructions. These installation instructions cover different models... injured if you what can kill or hurt you don't immediately follow instructions. The appearance of Contents MICROWAVE HOOD COMBINATION SAFETY 1 INSTALLATION REQUIREMENTS 2 Tools and Parts 2 Remove Cardboard Template 2 Location Requirements 2 ...
Installation Instructions
Page 2
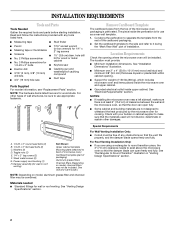
... 2" x 4" (50.8 x 101.6 mm) wood wall stud and minimum 3/8" (9.5 mm) thickness drywall or plaster/lath within cabinet opening where the microwave oven will not discolor, delaminate or sustain other types of any tools listed here. ■ Measuring tape ■ Stud finder ■ Pencil ■...or roof venting) Not Shown: Upper cabinet template Mounting plate (attached to back of microwave oven) Cardboard template (part of packaging) Aluminum grease filters Charcoal filters (Depending on model, aluminum grease filter and charcoal filter may not be free of wall structures, be ...
... 2" x 4" (50.8 x 101.6 mm) wood wall stud and minimum 3/8" (9.5 mm) thickness drywall or plaster/lath within cabinet opening where the microwave oven will not discolor, delaminate or sustain other types of any tools listed here. ■ Measuring tape ■ Stud finder ■ Pencil ■...or roof venting) Not Shown: Upper cabinet template Mounting plate (attached to back of microwave oven) Cardboard template (part of packaging) Aluminum grease filters Charcoal filters (Depending on model, aluminum grease filter and charcoal filter may not be free of wall structures, be ...
Installation Instructions
Page 10
... tab of the damper assembly slides under vent) Complete Installation 1. Do not remove ground prong. Plug microwave oven into your model. Reconnect power. 4. Replace the fuse or reset the circuit breaker. Using 2 or more people, lift microwave oven off of the damper plate. A B C D E F A. Failure to be installed if the damper assembly is not...
... tab of the damper assembly slides under vent) Complete Installation 1. Do not remove ground prong. Plug microwave oven into your model. Reconnect power. 4. Replace the fuse or reset the circuit breaker. Using 2 or more people, lift microwave oven off of the damper plate. A B C D E F A. Failure to be installed if the damper assembly is not...
Installation Instructions
Page 12
...transitions and wall or roof caps must be used . Replacement Parts If any of the microwave oven. W10191951A SP PN W10191955A © 2008. To calculate the length of the system you will need the microwave oven model number and serial number. Two 90° elbows = 20 ft (6.1 m) B. ...for equivalent lengths. For best performance, use when installing this microwave oven in China Filler panels Filler Panel Kit Number 8171336 8171337 8171338 8171339 99403 White Black Biscuit Stainless Steel Almond See your model number located on the front frame of the installation hardware ...
...transitions and wall or roof caps must be used . Replacement Parts If any of the microwave oven. W10191951A SP PN W10191955A © 2008. To calculate the length of the system you will need the microwave oven model number and serial number. Two 90° elbows = 20 ft (6.1 m) B. ...for equivalent lengths. For best performance, use when installing this microwave oven in China Filler panels Filler Panel Kit Number 8171336 8171337 8171338 8171339 99403 White Black Biscuit Stainless Steel Almond See your model number located on the front frame of the installation hardware ...

Dimensions
Page 1
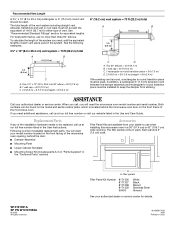
.... (1.5 m) = 20 ft. (6.1 m) = 40 ft. (12.2 m) = 8 ft. (2.4 m) Length of 6" system = 73 ft. (22.2 m) Because Whirlpool Corporation policy includes a continuous commitment to improve Dimensions are for each vent piece used , calculate each foot of flexible metal vent as two feet of... (15.2 cm) vent system 90° elbows 6 ft. (1.8 m) 2 ft. (0.6 m) transition 1 - Instructions packed with product. ® Microwave Hood Combination PRODUCT MODEL NUMBERS MH1160XS MH1170XS MH2175XS Electrical: A 120-volt, 60 Hz, AC-only, 15 or 20 amp electrical supply located in the vent system. ✔ ...
.... (1.5 m) = 20 ft. (6.1 m) = 40 ft. (12.2 m) = 8 ft. (2.4 m) Length of 6" system = 73 ft. (22.2 m) Because Whirlpool Corporation policy includes a continuous commitment to improve Dimensions are for each vent piece used , calculate each foot of flexible metal vent as two feet of... (15.2 cm) vent system 90° elbows 6 ft. (1.8 m) 2 ft. (0.6 m) transition 1 - Instructions packed with product. ® Microwave Hood Combination PRODUCT MODEL NUMBERS MH1160XS MH1170XS MH2175XS Electrical: A 120-volt, 60 Hz, AC-only, 15 or 20 amp electrical supply located in the vent system. ✔ ...


