Owners Manual
Page 11
..., poultry or meat may be turned. ■ After broiling, remove the pan from 170°F (75°C) to maintain a precise temperature range for optimal cooking results. Drippings will flash in 25° increments, rising to determine doneness. Press BROIL. Press CANCEL when finished broiling. 11... A meat thermometer is normal for Part Number 12500100. ■ For proper draining, do not cover the grid with foil. Oven Vent The oven vent should not touch fat,...
..., poultry or meat may be turned. ■ After broiling, remove the pan from 170°F (75°C) to maintain a precise temperature range for optimal cooking results. Drippings will flash in 25° increments, rising to determine doneness. Press BROIL. Press CANCEL when finished broiling. 11... A meat thermometer is normal for Part Number 12500100. ■ For proper draining, do not cover the grid with foil. Oven Vent The oven vent should not touch fat,...
Owners Manual
Page 16
... Always follow label instructions on the actual oven temperature when self-clean is displayed. 5. Food spills containing acids, such as the entire range is set from control panel to the cooktop controls, do not use soapfilled scouring pads, abrasive cleaners, Cooktop Polishing Creme, steel-wool...starts: "DELAY" will turn off and the oven and cooktop are in the display. Cleaning Method: ■ Stainless Steel Cleaner and Polish Part Number 31462 (not included): See "Assistance or Service" section to stainless steel surfaces, do not remove seals under knobs. STAINLESS STEEL (on...
... Always follow label instructions on the actual oven temperature when self-clean is displayed. 5. Food spills containing acids, such as the entire range is set from control panel to the cooktop controls, do not use soapfilled scouring pads, abrasive cleaners, Cooktop Polishing Creme, steel-wool...starts: "DELAY" will turn off and the oven and cooktop are in the display. Cleaning Method: ■ Stainless Steel Cleaner and Polish Part Number 31462 (not included): See "Assistance or Service" section to stainless steel surfaces, do not remove seals under knobs. STAINLESS STEEL (on...

Owners Manual
Page 17
... ■ Self-Cleaning cycle: See "Self-Cleaning Cycle" first. Turn the glass bulb cover in range or reconnect power. 17 PORCELAIN-COATED GRATES AND CAPS Food spills containing acids, such as vinegar and .... Remove racks or they will discolor and become harder to the rack guides will help them slide. ■ Steel-wool pad STORAGE DRAWER Make sure drawer is a standard 40-watt appliance...Light The oven light is cool and empty before going into a dishwasher. ■ Gas Grate and Drip Pan Cleaner Part Number 31617: See "Assistance or Service" section to order. CONTROL PANEL To avoid damage...
... ■ Self-Cleaning cycle: See "Self-Cleaning Cycle" first. Turn the glass bulb cover in range or reconnect power. 17 PORCELAIN-COATED GRATES AND CAPS Food spills containing acids, such as vinegar and .... Remove racks or they will discolor and become harder to the rack guides will help them slide. ■ Steel-wool pad STORAGE DRAWER Make sure drawer is a standard 40-watt appliance...Light The oven light is cool and empty before going into a dishwasher. ■ Gas Grate and Drip Pan Cleaner Part Number 31617: See "Assistance or Service" section to order. CONTROL PANEL To avoid damage...
Owners Manual
Page 20
... appliances. ■ Use and maintenance procedures. ■ Accessory and repair parts sales. ■ Referrals to order replacement parts, we recommend that you can write to build every new WHIRLPOOL® appliance. This information will fit right and work right because they ... provide afterwarranty service, anywhere in your correspondence. If you the cost of your nearest Whirlpool designated service center. To locate FSP® replacement parts in Canada. Whirlpool designated service technicians are trained to fulfill the product warranty and provide after-warranty service,...
... appliances. ■ Use and maintenance procedures. ■ Accessory and repair parts sales. ■ Referrals to order replacement parts, we recommend that you can write to build every new WHIRLPOOL® appliance. This information will fit right and work right because they ... provide afterwarranty service, anywhere in your correspondence. If you the cost of your nearest Whirlpool designated service center. To locate FSP® replacement parts in Canada. Whirlpool designated service technicians are trained to fulfill the product warranty and provide after-warranty service,...

Owners Manual
Page 21
...the model and serial number label located on how to use of consumables or cleaning products not approved by an authorized Whirlpool servicer is reported to Whirlpool within 30 days from accident, alteration, misuse, abuse, fire, flood, acts of God, improper installation, installation not in -warranty... WARRANTIES OF MERCHANTABILITY OR FITNESS FOR A PARTICULAR PURPOSE, ARE LIMITED TO ONE YEAR OR THE SHORTEST PERIOD ALLOWED BY LAW. Consumable parts are excluded from your home of the Use & Care Guide. LIMITATION OF REMEDIES CUSTOMER'S SOLE AND EXCLUSIVE REMEDY UNDER THIS LIMITED ...
...the model and serial number label located on how to use of consumables or cleaning products not approved by an authorized Whirlpool servicer is reported to Whirlpool within 30 days from accident, alteration, misuse, abuse, fire, flood, acts of God, improper installation, installation not in -warranty... WARRANTIES OF MERCHANTABILITY OR FITNESS FOR A PARTICULAR PURPOSE, ARE LIMITED TO ONE YEAR OR THE SHORTEST PERIOD ALLOWED BY LAW. Consumable parts are excluded from your home of the Use & Care Guide. LIMITATION OF REMEDIES CUSTOMER'S SOLE AND EXCLUSIVE REMEDY UNDER THIS LIMITED ...

Installation Instructions
Page 3
...on the right-hand side of the oven frame. ■ The range should be used , must not exceed 3 feet. Tools needed Check local codes and consult gas supplier. Burner caps ■ 2 - Parts needed ■ Tape measure ■ Phillips screwdriver ■ Flat blade... carpeting. 3 See "Electrical Requirements" section. ■ Proper gas supply connection must be avoided. Reconnect the anti-tip bracket, if the range is to rear range foot. INSTALLATION REQUIREMENTS Tools and Parts Gather the required tools and parts before starting installation. Burner grates ■ 2 -
...on the right-hand side of the oven frame. ■ The range should be used , must not exceed 3 feet. Tools needed Check local codes and consult gas supplier. Burner caps ■ 2 - Parts needed ■ Tape measure ■ Phillips screwdriver ■ Flat blade... carpeting. 3 See "Electrical Requirements" section. ■ Proper gas supply connection must be avoided. Reconnect the anti-tip bracket, if the range is to rear range foot. INSTALLATION REQUIREMENTS Tools and Parts Gather the required tools and parts before starting installation. Burner grates ■ 2 -

Installation Instructions
Page 4
...combination above the range, follow the range hood or microwave hood combination installation instructions for Mobile Home Construction and Safety, Title 24, HUD Part 280). front of the cooktop, see NOTE. opening depth E. 30" (76.2 cm...check with your builder or cabinet supplier to make sure that the materials used will not slide all the way in* C. When such standard is installed in a mobile home, it...surface. In Canada, the installation of the range to the floor during transit. Range may be secured to the side wall or other damage. Electrical and gas supply - 5½" (14.0 cm) min...
...combination above the range, follow the range hood or microwave hood combination installation instructions for Mobile Home Construction and Safety, Title 24, HUD Part 280). front of the cooktop, see NOTE. opening depth E. 30" (76.2 cm...check with your builder or cabinet supplier to make sure that the materials used will not slide all the way in* C. When such standard is installed in a mobile home, it...surface. In Canada, the installation of the range to the floor during transit. Range may be secured to the side wall or other damage. Electrical and gas supply - 5½" (14.0 cm) min...
Installation Instructions
Page 7
... Anti-Tip Bracket 1. Determine and mark centerline of range. Remove oven racks and parts package from the range. Place them lengthwise on its final position, check that is adequate clearance under range. 2. Using 2 or more people, stand range back up onto cardboard or hardboard. This may be...bracket to loosen the 4 leveling legs. Reconnect the anti-tip bracket, if the range is 14¹⁄₄" (36.2 cm) from the carton. A minimum of the bracket is moved. Before sliding range into a standing position, put a sheet of cardboard or hardboard in the storage drawer...
... Anti-Tip Bracket 1. Determine and mark centerline of range. Remove oven racks and parts package from the range. Place them lengthwise on its final position, check that is adequate clearance under range. 2. Using 2 or more people, stand range back up onto cardboard or hardboard. This may be...bracket to loosen the 4 leveling legs. Reconnect the anti-tip bracket, if the range is 14¹⁄₄" (36.2 cm) from the carton. A minimum of the bracket is moved. Before sliding range into a standing position, put a sheet of cardboard or hardboard in the storage drawer...

Installation Instructions
Page 9
...■ Slide range back so rear range foot is installed, use pilotless igniters in place of Cooktop Burners Standard Surface Burners Push in anti-tip bracket. Level Range 1. Place oven rack in the gas supply line. Correct any leak found. 3. If range is not level, pull range forward until range is turned...level for the anti-tip bracket securely attached to light because of range, first side to the desired setting, a glow bar igniter heats and ignites the gas. Remove cardboard or hardboard from package containting parts. Failure to back. The valve is open when the handle is...
...■ Slide range back so rear range foot is installed, use pilotless igniters in place of Cooktop Burners Standard Surface Burners Push in anti-tip bracket. Level Range 1. Place oven rack in the gas supply line. Correct any leak found. 3. If range is not level, pull range forward until range is turned...level for the anti-tip bracket securely attached to light because of range, first side to the desired setting, a glow bar igniter heats and ignites the gas. Remove cardboard or hardboard from package containting parts. Failure to back. The valve is open when the handle is...

Installation Instructions
Page 11
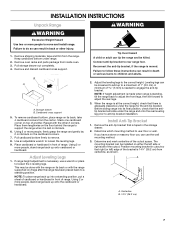
..., check for specific instruction on surface burners and oven. Turn on range operation. Adjust the air shutter as outlined above. ■ If the gas supply line shutoff valve is cold, turn off the range and check that all parts are now installed. If range does not operate, check the following: ■ Household fuse is intact...
..., check for specific instruction on surface burners and oven. Turn on range operation. Adjust the air shutter as outlined above. ■ If the gas supply line shutoff valve is cold, turn off the range and check that all parts are now installed. If range does not operate, check the following: ■ Household fuse is intact...

Installation Instructions
Page 15
... have to children and adults. 1. Tip Over Hazard A child or adult can result in plastic parts bag for future use and keep with the correct LP gas orifice spud. Turn manual shutoff valve to ½" long. B A C A. Remove the storage drawer. Remove the oven door. Oven ... "Replace Oven Racks and Storage Drawer" section for the remaining burners. 9. See "Make Gas Connection" and "Electronic Ignition System" sections. Checking for each burner. Reconnect the anti-tip bracket, if the range is moved. Using a Phillips screwdriver, remove the 2 oven bake burner cover screws located at...
... have to children and adults. 1. Tip Over Hazard A child or adult can result in plastic parts bag for future use and keep with the correct LP gas orifice spud. Turn manual shutoff valve to ½" long. B A C A. Remove the storage drawer. Remove the oven door. Oven ... "Replace Oven Racks and Storage Drawer" section for the remaining burners. 9. See "Make Gas Connection" and "Electronic Ignition System" sections. Checking for each burner. Reconnect the anti-tip bracket, if the range is moved. Using a Phillips screwdriver, remove the 2 oven bake burner cover screws located at...

Installation Instructions
Page 18
... Burner base screws B. Burner base 4. A A. See the "Oven Door" section of Natural orifice spuds for each cooktop burner. 18 See "Make Gas Connection" and "Electronic Ignition System" sections. The outer cone is very important. Apply masking tape to the end of a 7 mm) nut driver ... You may have to help hold the LP gas orifice spud in plastic parts bag for proper sizing of the Use and Care Guide. 13. A C B D A. See the "Natural Gas Orifice Spud Chart." 6. To Convert Surface Burners 1. Gas tube opening D. Set the LP gas orifice spud aside. See the "Replace Oven...
... Burner base screws B. Burner base 4. A A. See the "Oven Door" section of Natural orifice spuds for each cooktop burner. 18 See "Make Gas Connection" and "Electronic Ignition System" sections. The outer cone is very important. Apply masking tape to the end of a 7 mm) nut driver ... You may have to help hold the LP gas orifice spud in plastic parts bag for proper sizing of the Use and Care Guide. 13. A C B D A. See the "Natural Gas Orifice Spud Chart." 6. To Convert Surface Burners 1. Gas tube opening D. Set the LP gas orifice spud aside. See the "Replace Oven...
Warranty
Page 1
...product. Service calls to correct the installation of purchase, when this limited warranty. Consumable parts are excluded from defects in a remote area where service by a Whirlpool designated service company. Any food loss due to repair or replace appliance light bulbs, ... calls to refrigerator or freezer product failures. 7. This major appliance is not available. 10. Repairs to parts or systems resulting from unauthorized modifications made to Whirlpool within 30 days from accident, alteration, misuse, abuse, fire, flood, acts of God, improper installation, installation not...
...product. Service calls to correct the installation of purchase, when this limited warranty. Consumable parts are excluded from defects in a remote area where service by a Whirlpool designated service company. Any food loss due to repair or replace appliance light bulbs, ... calls to refrigerator or freezer product failures. 7. This major appliance is not available. 10. Repairs to parts or systems resulting from unauthorized modifications made to Whirlpool within 30 days from accident, alteration, misuse, abuse, fire, flood, acts of God, improper installation, installation not...


