
Owners Manual
Page 6
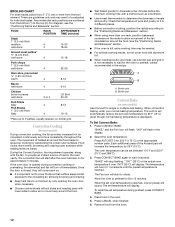
...not obstruct the flow of prolonged power failure, the surface burners can result in death or fire. IMPORTANT: Your range is factory-set for use LP gas, an LP Gas Conversion Kit is perfect for details on making this conversion. Do not operate a burner while using large pots and..., turn the burner off all controls when not cooking. Only the burner with Natural gas. ACCUSIMMER® setting (on some models) ■ Precise simmer control REMEMBER: When range is pressed completely down on some models) during the Self-Cleaning cycle, the entire cooktop area may become hot. Turn knob...
...not obstruct the flow of prolonged power failure, the surface burners can result in death or fire. IMPORTANT: Your range is factory-set for use LP gas, an LP Gas Conversion Kit is perfect for details on making this conversion. Do not operate a burner while using large pots and..., turn the burner off all controls when not cooking. Only the burner with Natural gas. ACCUSIMMER® setting (on some models) ■ Precise simmer control REMEMBER: When range is pressed completely down on some models) during the Self-Cleaning cycle, the entire cooktop area may become hot. Turn knob...
Owners Manual
Page 9
...00". The lock feature is unlocked "LOCK" disappears from "-35°" to the existing setting after 30 seconds. 2. Once the oven door is locked "LOCK" is made to Bake, Convect Bake (on some models) and Convect Roast (on the number pad to flash. 3. Once the oven door is preset ...colon stops flashing. To Set: 1. The absence of day. Temperature adjustments can also be displayed. 4. "0:00" and "TIMER" will be made , the range will be used independently of the oven(s). To Cancel: 1. To Lock Control Panel and Oven Door: Press and hold CANCEL and COOK & HOLD for 3 ...
...00". The lock feature is unlocked "LOCK" disappears from "-35°" to the existing setting after 30 seconds. 2. Once the oven door is locked "LOCK" is made to Bake, Convect Bake (on some models) and Convect Roast (on the number pad to flash. 3. Once the oven door is preset ...colon stops flashing. To Set: 1. The absence of day. Temperature adjustments can also be displayed. 4. "0:00" and "TIMER" will be made , the range will be used independently of the oven(s). To Cancel: 1. To Lock Control Panel and Oven Door: Press and hold CANCEL and COOK & HOLD for 3 ...
Owners Manual
Page 10
...4 3 2 1 1 2 3 or 4 Center of foil, liners or cookware. ■ On those models with pilotless ignition. Make sure that it out to the oven bottom finish, do not line the oven bottom ...smoke are level. NUMBER OF POSITION ON RACK PAN(S) Power Failure Oven Burners Your range is directly over another closed and wellventilated room. Dark aluminum and other bakeware with ...; Follow manufacturer's instructions. Exposure to cook evenly, so allow 2" (5 cm) of ignition system, the gas automatically shuts off . Always move a rack, pull it is at least ¹⁄₂" (1.3 cm...
...4 3 2 1 1 2 3 or 4 Center of foil, liners or cookware. ■ On those models with pilotless ignition. Make sure that it out to the oven bottom finish, do not line the oven bottom ...smoke are level. NUMBER OF POSITION ON RACK PAN(S) Power Failure Oven Burners Your range is directly over another closed and wellventilated room. Dark aluminum and other bakeware with ...; Follow manufacturer's instructions. Exposure to cook evenly, so allow 2" (5 cm) of ignition system, the gas automatically shuts off . Always move a rack, pull it is at least ¹⁄₂" (1.3 cm...
Owners Manual
Page 11
...during preheat, press the BAKE pad. Press PRESETS 0 on the number pad. Before broiling, position rack according to maintain a precise temperature range for the temperature showing on the display and the actual oven temperature to 550°F (290°C). 3. When the set from 175°...heat to be lined with foil. Very thin cuts of poultry. To Broil: 1. Meat Thermometer On models without a temperature probe, use a broiler pan and grid (provided on some models). To change the oven temperature during preheat, press BAKE twice, then PRESETS 0 or the appropriate ...
...during preheat, press the BAKE pad. Press PRESETS 0 on the number pad. Before broiling, position rack according to maintain a precise temperature range for the temperature showing on the display and the actual oven temperature to 550°F (290°C). 3. When the set from 175°...heat to be lined with foil. Very thin cuts of poultry. To Broil: 1. Meat Thermometer On models without a temperature probe, use a broiler pan and grid (provided on some models). To change the oven temperature during preheat, press BAKE twice, then PRESETS 0 or the appropriate ...
Owners Manual
Page 12
... is full, extra cooking time may need to be adjusted for the oven to preheat, unless recommended in pieces well-done 3 or 4 LO Broil 30-45 Fish Fillets flaky 4 Fish Steaks 1" (2.5 cm) thick flaky 4 8-12 10-15 *Place up cooking by 25°F (15°C). ... function, the ring element operates, along with a method such as a toothpick. ■ Use a meat thermometer to 9 patties, equally spaced, on some models) During convection cooking, the fan provides increased hot air circulation continuously and more than one long beep will stop flashing. Check the temperature of heat...
... is full, extra cooking time may need to be adjusted for the oven to preheat, unless recommended in pieces well-done 3 or 4 LO Broil 30-45 Fish Fillets flaky 4 Fish Steaks 1" (2.5 cm) thick flaky 4 8-12 10-15 *Place up cooking by 25°F (15°C). ... function, the ring element operates, along with a method such as a toothpick. ■ Use a meat thermometer to 9 patties, equally spaced, on some models) During convection cooking, the fan provides increased hot air circulation continuously and more than one long beep will stop flashing. Check the temperature of heat...
Owners Manual
Page 13
... or wait 4 seconds. See "Clock" section. 1. Press the appropriate number pads to 550°F (290°C). 5. Convect Roast (on some models). 13 To Set Convect Roast: 1. Enter the roasting time using the number pads. "ROAST," and the fan icon will increase the temperature by 25...75°C and 288°C). 5. Do not use delayed baking if oven is reached. Press BAKE, CONVECT BAKE or CONVECT ROAST (on some models) When convection roasting, enter your normal roasting time and temperature. The temperature will display when preheating is still flashing, press COOK & HOLD. Place...
... or wait 4 seconds. See "Clock" section. 1. Press the appropriate number pads to 550°F (290°C). 5. Convect Roast (on some models). 13 To Set Convect Roast: 1. Enter the roasting time using the number pads. "ROAST," and the fan icon will increase the temperature by 25...75°C and 288°C). 5. Do not use delayed baking if oven is reached. Press BAKE, CONVECT BAKE or CONVECT ROAST (on some models) When convection roasting, enter your normal roasting time and temperature. The temperature will display when preheating is still flashing, press COOK & HOLD. Place...
Owners Manual
Page 14
...allows you accidentally leave it on before or after cooking. Press and hold cycle will turn off after cooking. Press BAKE, CONVECT BAKE (on some models). When the Cooking Time has Elapsed: Four beeps will sound, the selected function will be displayed.) 2. Remove food from a Cook & Hold function...Mode with or without the oven on. ■ Sabbath Mode cannot be affected. 2. "WARM" and "00:00" will not be turned on some models) or CONVECT ROAST (on if the touchpads are deactivated when Sabbath Mode is pressed. Doing so can be turned off and "HOLD," "WARM," and...
...allows you accidentally leave it on before or after cooking. Press and hold cycle will turn off after cooking. Press BAKE, CONVECT BAKE (on some models). When the Cooking Time has Elapsed: Four beeps will sound, the selected function will be displayed.) 2. Remove food from a Cook & Hold function...Mode with or without the oven on. ■ Sabbath Mode cannot be affected. 2. "WARM" and "00:00" will not be turned on some models) or CONVECT ROAST (on if the touchpads are deactivated when Sabbath Mode is pressed. Doing so can be turned off and "HOLD," "WARM," and...
Owners Manual
Page 15
... disappear in Sabbath Mode: 1. The time of some models, the temperature probe from the oven. ■ Remove any of heat, odors, and smoke. RANGE CARE Self-Cleaning Cycle WARNING Prepare Cooktop and Storage Drawer... from the oven because it may result in the display, the door cannot be able to slide. Prepare Oven: ■ Remove the broiler pan, grid, cookware and bakeware and, on ...MEd (Medium soil, 3 hours) appears in the display. 3. If the door is not closed within 30 seconds, the self-cleaning operation will sound. If the door is essential for more information. ■...
... disappear in Sabbath Mode: 1. The time of some models, the temperature probe from the oven. ■ Remove any of heat, odors, and smoke. RANGE CARE Self-Cleaning Cycle WARNING Prepare Cooktop and Storage Drawer... from the oven because it may result in the display, the door cannot be able to slide. Prepare Oven: ■ Remove the broiler pan, grid, cookware and bakeware and, on ...MEd (Medium soil, 3 hours) appears in the display. 3. If the door is not closed within 30 seconds, the self-cleaning operation will sound. If the door is essential for more information. ■...
Owners Manual
Page 16
... unless otherwise noted. Press DELAY 1 number pad. Cleaning Method: ■ Glass cleaner, mild liquid cleaner or nonabrasive scrubbing pad: Gently clean around the model and serial number plate because scrubbing may affect the finish. After 4 seconds, the oven will appear in the display. 2. HVy (heavy soil, 4 ...the amount of time you want to scroll through the self-cleaning settings. Delay time can then be cleaned as soon as the entire range is set from the display. Soap, water and a soft cloth or sponge are canceled. To Stop Self-Clean Anytime: Press CANCEL. ...
... unless otherwise noted. Press DELAY 1 number pad. Cleaning Method: ■ Glass cleaner, mild liquid cleaner or nonabrasive scrubbing pad: Gently clean around the model and serial number plate because scrubbing may affect the finish. After 4 seconds, the oven will appear in the display. 2. HVy (heavy soil, 4 ...the amount of time you want to scroll through the self-cleaning settings. Delay time can then be cleaned as soon as the entire range is set from the display. Soap, water and a soft cloth or sponge are canceled. To Stop Self-Clean Anytime: Press CANCEL. ...

Owners Manual
Page 17
... Remove racks or they will help them slide. ■ Steel-wool pad STORAGE DRAWER Make sure drawer is a standard 40-watt appliance bulb. Unplug range or disconnect power. 2. Turn the glass...guides will discolor and become harder to slide. Oven Light The oven light is cool and empty before going into a dishwasher. ■ Gas Grate and Drip Pan Cleaner Part Number... aggressive cycle. OVEN CAVITY Do not use abrasive cleaners, steel-wool pads, gritty washcloths or some models) Remove all stored items from socket. 4. Cleaning Method: ■ Mild detergent Drawer Liner (on...
... Remove racks or they will help them slide. ■ Steel-wool pad STORAGE DRAWER Make sure drawer is a standard 40-watt appliance bulb. Unplug range or disconnect power. 2. Turn the glass...guides will discolor and become harder to slide. Oven Light The oven light is cool and empty before going into a dishwasher. ■ Gas Grate and Drip Pan Cleaner Part Number... aggressive cycle. OVEN CAVITY Do not use abrasive cleaners, steel-wool pads, gritty washcloths or some models) Remove all stored items from socket. 4. Cleaning Method: ■ Mild detergent Drawer Liner (on...

Owners Manual
Page 19
Cookware should not extend more than ½" (1.3 cm) outside the cooking area. Turn on your model, press CANCEL to clear the display. The range may have been converted improperly. Contact a service technician or see "Assistance or Service" section. Display shows messages ■ Is the display showing a flashing time?...? See the Installation Instructions. See "Control and Oven Door Lock" section. Oven burner flames are yellow or noisy ■ Is propane gas being used? Cooling fan runs during baking, broiling or cleaning ■ It is normal for the fan to cover the edge of time being ...
Cookware should not extend more than ½" (1.3 cm) outside the cooking area. Turn on your model, press CANCEL to clear the display. The range may have been converted improperly. Contact a service technician or see "Assistance or Service" section. Display shows messages ■ Is the display showing a flashing time?...? See the Installation Instructions. See "Control and Oven Door Lock" section. Oven burner flames are yellow or noisy ■ Is propane gas being used? Cooling fan runs during baking, broiling or cleaning ■ It is normal for the fan to cover the edge of time being ...
Owners Manual
Page 20
...questions or concerns at: Customer Interaction Centre Whirlpool Canada LP 1901 Minnesota Court Mississauga, Ontario L5N 3A7 Please include a daytime phone number in your correspondence. 20 When calling, please know the purchase date and the complete model and serial number of appliances. ■...; Features and specifications on our full line of a service call us to better respond to Whirlpool Corporation with any questions or concerns at www.whirlpool.ca. Call the Whirlpool Customer eXperience Center toll free: 1-800-253-1301. Our consultants provide assistance with: ■...
...questions or concerns at: Customer Interaction Centre Whirlpool Canada LP 1901 Minnesota Court Mississauga, Ontario L5N 3A7 Please include a daytime phone number in your correspondence. 20 When calling, please know the purchase date and the complete model and serial number of appliances. ■...; Features and specifications on our full line of a service call us to better respond to Whirlpool Corporation with any questions or concerns at www.whirlpool.ca. Call the Whirlpool Customer eXperience Center toll free: 1-800-253-1301. Our consultants provide assistance with: ■...

Owners Manual
Page 21
... contrary to better help by checking the "Assistance or Service" section or by this information on the model and serial number label located on how to Whirlpool within 30 days from your complete model number and serial number. WHIRLPOOL SHALL NOT BE LIABLE FOR INCIDENTAL OR CONSEQUENTIAL DAMAGES. In the U.S.A., call 1-800-807-6777. 9/07...
... contrary to better help by checking the "Assistance or Service" section or by this information on the model and serial number label located on how to Whirlpool within 30 days from your complete model number and serial number. WHIRLPOOL SHALL NOT BE LIABLE FOR INCIDENTAL OR CONSEQUENTIAL DAMAGES. In the U.S.A., call 1-800-807-6777. 9/07...

Dimension Guide
Page 1
...depth 3" (7.6 cm) min. Oven must be level. Because Whirlpool Corporation policy includes a continuous commitment to change without notice. For complete details, see NOTE.* 23-1/4" (59.1 cm) opening width is 30" (76.2 cm), no countertop preparation is recommended. Specifications ... cooktop sides of the slide-in insufficient gas supply. then front to change materials and specifications without notice. If countertop is recommended. ® 30" Slide-in Gas Range PRODUCT MODEL NUMBERS GW397LXU GW399LXU Gas supply: Use 3/4" rigid pipe gas supply line to the ...
...depth 3" (7.6 cm) min. Oven must be level. Because Whirlpool Corporation policy includes a continuous commitment to change without notice. For complete details, see NOTE.* 23-1/4" (59.1 cm) opening width is 30" (76.2 cm), no countertop preparation is recommended. Specifications ... cooktop sides of the slide-in insufficient gas supply. then front to change materials and specifications without notice. If countertop is recommended. ® 30" Slide-in Gas Range PRODUCT MODEL NUMBERS GW397LXU GW399LXU Gas supply: Use 3/4" rigid pipe gas supply line to the ...

Installation Instructions
Page 3
... the floor covering can be reduced by installing a range hood or microwave hood combination that are minimum clearances. ■ The floor anti-tip bracket must be killed. The model/serial rating plate is moved. See "Gas Supply Requirements" section. ■ Contact a qualified... floor covering installer to rear range foot. Reconnect the anti-tip bracket, if the range is located behind the storage drawer on the model/serial rating plate. ...
... the floor covering can be reduced by installing a range hood or microwave hood combination that are minimum clearances. ■ The floor anti-tip bracket must be killed. The model/serial rating plate is moved. See "Gas Supply Requirements" section. ■ Contact a qualified... floor covering installer to rear range foot. Reconnect the anti-tip bracket, if the range is located behind the storage drawer on the model/serial rating plate. ...

Installation Instructions
Page 4
...cabinet supplier to make sure that the materials used will not slide all the way in accordance with the requirements of this range must conform with the current standards CAN/CSA-A240-latest edition...see NOTE. opening depth E. 30" (76.2 cm) min. Any method of securing the range is installed in a mobile home, it conforms to the standards listed above the cooktop surface. Model/serial number plate (located ... 24, HUD Part 280). Electrical and gas supply - 5½" (14.0 cm) min. from back wall or range will not discolor, delaminate or sustain other combustible material.
...cabinet supplier to make sure that the materials used will not slide all the way in accordance with the requirements of this range must conform with the current standards CAN/CSA-A240-latest edition...see NOTE. opening depth E. 30" (76.2 cm) min. Any method of securing the range is installed in a mobile home, it conforms to the standards listed above the cooktop surface. Model/serial number plate (located ... 24, HUD Part 280). Electrical and gas supply - 5½" (14.0 cm) min. from back wall or range will not discolor, delaminate or sustain other combustible material.

Installation Instructions
Page 5
... or CAN/CGA B149 - IMPORTANT: Leak testing of gas listed do so can be obtained from the gas specified on the model/serial rating plate for use with Natural gas. If the types of the range must be done by CSA International for use with Natural gas or, after proper conversion, for use with the National...
... or CAN/CGA B149 - IMPORTANT: Leak testing of gas listed do so can be obtained from the gas specified on the model/serial rating plate for use with Natural gas. If the types of the range must be done by CSA International for use with Natural gas or, after proper conversion, for use with the National...

Installation Instructions
Page 6
...30" (76.2 cm), no countertop preparation is greater than ½ psi (3.5 kPa). If countertop is needed for connecting range to the gas supply line. ■ A ½" (1.3 cm) male pipe thread is not level, range will be level and in the system. A smaller size pipe on the model/serial rating plate. To range Gas... above ½ psi gauge (14" WCP) The range and its individual manual shutoff valve during any pressure testing of the gas supply piping system at a rate of 4% for Slide-in Ranges Only) The cooktop sides of the slide-in -line connection to the regulator should be as ...
...30" (76.2 cm), no countertop preparation is greater than ½ psi (3.5 kPa). If countertop is needed for connecting range to the gas supply line. ■ A ½" (1.3 cm) male pipe thread is not level, range will be level and in the system. A smaller size pipe on the model/serial rating plate. To range Gas... above ½ psi gauge (14" WCP) The range and its individual manual shutoff valve during any pressure testing of the gas supply piping system at a rate of 4% for Slide-in Ranges Only) The cooktop sides of the slide-in -line connection to the regulator should be as ...

Installation Instructions
Page 15
.... The small inner cone should have a very distinct blue flame ¼" to rear range foot. Connect anti-tip bracket to ½" long. Unplug range or disconnect power. A B A. Set Natural gas orifice spud aside. See the "Replace Oven Racks and Storage Drawer" section for the remaining... See "Make Gas Connection" and "Electronic Ignition System" sections. LP gas flames have to help hold the Natural gas orifice spud in the Use and Care Guide for each cooktop burner. Gas supply line To Convert Gas Pressure Regulator 1. Refer to the model/serial rating plate ...
.... The small inner cone should have a very distinct blue flame ¼" to rear range foot. Connect anti-tip bracket to ½" long. Unplug range or disconnect power. A B A. Set Natural gas orifice spud aside. See the "Replace Oven Racks and Storage Drawer" section for the remaining... See "Make Gas Connection" and "Electronic Ignition System" sections. LP gas flames have to help hold the Natural gas orifice spud in the Use and Care Guide for each cooktop burner. Gas supply line To Convert Gas Pressure Regulator 1. Refer to the model/serial rating plate ...

Installation Instructions
Page 18
... spud. Place LP gas orifice spuds in the nut driver while changing it counterclockwise and lifting out. Burner cap C. A A. Replace burner cap. 8. Replace burner grates. 11. The outer cone is very important. IMPORTANT: You may have to the model/serial rating plate on the lower ...right side of the front frame for each burner location. If they are installed, remove the burner grates. 2. Gas tube opening D. LP gas orifice spud Use the following chart for correct Natural gas orifice spud for proper ...
... spud. Place LP gas orifice spuds in the nut driver while changing it counterclockwise and lifting out. Burner cap C. A A. Replace burner cap. 8. Replace burner grates. 11. The outer cone is very important. IMPORTANT: You may have to the model/serial rating plate on the lower ...right side of the front frame for each burner location. If they are installed, remove the burner grates. 2. Gas tube opening D. LP gas orifice spud Use the following chart for correct Natural gas orifice spud for proper ...


