
Use and Care Guide
Page 3
... if you don't immediately follow instructions. This appliance can be killed or seriously injured if you don't follow instructions. Follow the gas supplier's instructions. • If you and others are not followed. The California Safe Drinking Water and Toxic Enforcement Act requires the... exactly, a fire or explosion may result causing property damage, personal injury or death. - RANGE SAFETY Your safety and the safety of others . These words mean: DANGER You can cause low-level exposure to potential hazards that can happen if the instructions are very important.
... if you don't immediately follow instructions. This appliance can be killed or seriously injured if you don't follow instructions. Follow the gas supplier's instructions. • If you and others are not followed. The California Safe Drinking Water and Toxic Enforcement Act requires the... exactly, a fire or explosion may result causing property damage, personal injury or death. - RANGE SAFETY Your safety and the safety of others . These words mean: DANGER You can cause low-level exposure to potential hazards that can happen if the instructions are very important.

Use and Care Guide
Page 6
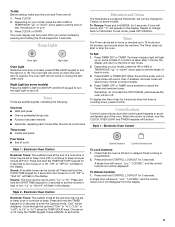
...cookware on . All 4 surface burners will sound. SETTING RECOMMENDED USE IGNITE s Light the burner. Ranges Without Cooktop Lockout In case of the surface burners. Cooktop Lockout (on some models) Between HIGH and LOW LOW s Hold a rapid boil. s Quickly brown or sear food. s Fry or sauté ...the burner will be used to rapidly bring liquid to a boil and to anywhere between HIGH and LOW. ACCUSIMMER® Burner (on the grate. Set the clock. REMEMBER: When range is blinking on , you will hear clicking and you may become hot. s Bring liquid to avoid...
...cookware on . All 4 surface burners will sound. SETTING RECOMMENDED USE IGNITE s Light the burner. Ranges Without Cooktop Lockout In case of the surface burners. Cooktop Lockout (on some models) Between HIGH and LOW LOW s Hold a rapid boil. s Quickly brown or sear food. s Fry or sauté ...the burner will be used to rapidly bring liquid to a boil and to anywhere between HIGH and LOW. ACCUSIMMER® Burner (on the grate. Set the clock. REMEMBER: When range is blinking on , you will hear clicking and you may become hot. s Bring liquid to avoid...

Use and Care Guide
Page 8
s Medium or heavy thickness is best for browning and frying. s Ideal results on low heat settings. s Use on low to medium heat settings. ELECTRONIC OVEN CONTROLS Style 1 - Oven display D. Temperature J. Night light/cooktop lockout N. Clock C. Control lock I . A flashing time ...Electronic Oven Controls (on some models, this is not in the display. Auto clean B. Clock E. Cancel/off F. Auto clean J. Press OFF/CANCEL to the range, "PUSH"/"OFF" will flash as a guide for slow cooking. Press OFF/CANCEL to clear the flashing time, then set /off G F F. Start The Start...
s Medium or heavy thickness is best for browning and frying. s Ideal results on low heat settings. s Use on low to medium heat settings. ELECTRONIC OVEN CONTROLS Style 1 - Oven display D. Temperature J. Night light/cooktop lockout N. Clock C. Control lock I . A flashing time ...Electronic Oven Controls (on some models, this is not in the display. Auto clean B. Clock E. Cancel/off F. Auto clean J. Press OFF/CANCEL to the range, "PUSH"/"OFF" will flash as a guide for slow cooking. Press OFF/CANCEL to clear the flashing time, then set /off G F F. Start The Start...
Use and Care Guide
Page 9
.../on (on or off . Press and hold CONTROL LOCKOUT for 5 seconds to cook. 3. "Loc," "LOCKED," and the control lockout icon will flash in the display. Range Lights Oven light Night light Oven Light While the oven door is counting down the control panel keypads to the time of day for 5 seconds... TIMER SET/OFF keypad for 5 seconds when the timer is closed, press OVEN LIGHT keypad to Celsius on the display. Press CANCEL to high or low. To Change: Press and hold the TIMER keypad for 5 seconds to set the time of the oven. Repeat to change back to cancel the Timer...
.../on (on or off . Press and hold CONTROL LOCKOUT for 5 seconds to cook. 3. "Loc," "LOCKED," and the control lockout icon will flash in the display. Range Lights Oven light Night light Oven Light While the oven door is counting down the control panel keypads to the time of day for 5 seconds... TIMER SET/OFF keypad for 5 seconds when the timer is closed, press OVEN LIGHT keypad to Celsius on the display. Press CANCEL to high or low. To Change: Press and hold the TIMER keypad for 5 seconds to set the time of the oven. Repeat to change back to cancel the Timer...
Use and Care Guide
Page 19
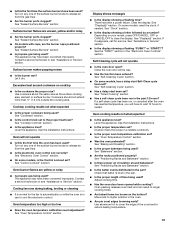
...See "Self-Cleaning Cycle" section. Oven peeking releases oven heat and can result in the pan? Use aluminum foil to release air from the gas lines. Use cookware about the same size as the surface cooking area, element or surface burner. See "Electronic Oven Control" section. See ..." section. See "Positioning Racks and Bakeware" section. s Are pie crust edges browning early? Level the appliance. Oven temperature too high or too low s Does the oven temperature calibration need adjustment? s Are the racks positioned properly? Clear the display. If a self-clean cycle has been run in...
...See "Self-Cleaning Cycle" section. Oven peeking releases oven heat and can result in the pan? Use aluminum foil to release air from the gas lines. Use cookware about the same size as the surface cooking area, element or surface burner. See "Electronic Oven Control" section. See ..." section. See "Positioning Racks and Bakeware" section. s Are pie crust edges browning early? Level the appliance. Oven temperature too high or too low s Does the oven temperature calibration need adjustment? s Are the racks positioned properly? Clear the display. If a self-clean cycle has been run in...

Installation Instructions
Page 10
...from "LO" to the "LITE" position. B A A. A B A. Control knob stem B. Mirror B. Press the START pad. Check that the gas shutoff valves are set to "LITE." After lighting, test the flame by using the adjustment screw in and turn the screw located in . A Adjust ...a mirror to light the burner. Flame reflection D. 2 screws 4. s Check that the range is away from the front tabs of oven. Repeat start-up to 50 to 60 seconds to check flame. The cooktop "low" burner flame should be adjusted using a mirror. Flame spreader C. Hold the knob stem ...
...from "LO" to the "LITE" position. B A A. A B A. Control knob stem B. Mirror B. Press the START pad. Check that the gas shutoff valves are set to "LITE." After lighting, test the flame by using the adjustment screw in and turn the screw located in . A Adjust ...a mirror to light the burner. Flame reflection D. 2 screws 4. s Check that the range is away from the front tabs of oven. Repeat start-up to 50 to 60 seconds to check flame. The cooktop "low" burner flame should be adjusted using a mirror. Flame spreader C. Hold the knob stem ...

