Owners Manual
Page 7
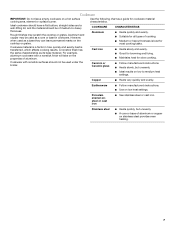
.... ■ Heats slowly, but unevenly. ■ A core or base of aluminum. Earthenware ■ Follow manufacturer's instructions. ■ Use on low to -heavy thickness. Porcelain enamel-onsteel or cast iron ■ See stainless steel or cast iron. Rough finishes may be used as a guide for...cooking tasks. Copper ■ Heats very quickly and evenly. Stainless steel ■ Heats quickly, but unevenly. ■ Ideal results on low heat settings. Use the following chart as a base they can leave permanent marks on the properties of aluminum or copper on a hot ...
.... ■ Heats slowly, but unevenly. ■ A core or base of aluminum. Earthenware ■ Follow manufacturer's instructions. ■ Use on low to -heavy thickness. Porcelain enamel-onsteel or cast iron ■ See stainless steel or cast iron. Rough finishes may be used as a guide for...cooking tasks. Copper ■ Heats very quickly and evenly. Stainless steel ■ Heats quickly, but unevenly. ■ Ideal results on low heat settings. Use the following chart as a base they can leave permanent marks on the properties of aluminum or copper on a hot ...
Owners Manual
Page 9
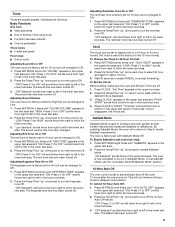
...): 1. To Cancel 12-Hour Auto Off: 1. The feature has been turned off . 1. "OFF. Press the Temp/Time "up " arrow pad to turn the sound Low. "Low Selected" scrolls twice from right to left in the lower text area. Press the Temp/Time "up " arrow pad to turn the reminder tone Off...set to automatically shut off the 12-hour Auto Off feature. Press (^) for 24Hr" scrolls twice from right to left in Sabbath Mode. Press (^) for LOW" scrolls twice from right to left in the lower text area. 4. "Press CLOCK" appears in the upper text area and "PUSH START" scrolls from...
...): 1. To Cancel 12-Hour Auto Off: 1. The feature has been turned off . 1. "OFF. Press the Temp/Time "up " arrow pad to turn the sound Low. "Low Selected" scrolls twice from right to left in the lower text area. Press the Temp/Time "up " arrow pad to turn the reminder tone Off...set to automatically shut off the 12-hour Auto Off feature. Press (^) for 24Hr" scrolls twice from right to left in Sabbath Mode. Press (^) for LOW" scrolls twice from right to left in the lower text area. 4. "Press CLOCK" appears in the upper text area and "PUSH START" scrolls from...
Owners Manual
Page 13
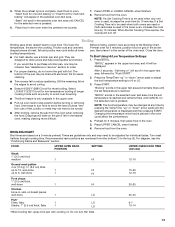
... in , skin-on a 5-minute preheat. If a Set Cooking Time is to avoid the loss of meat, fish and poultry may be adjusted for low-temperature broiling of the oven rack. Thicker cuts and unevenly shaped pieces of juices. They are used , increase the cook time by 15 minutes. Before... there until CANCEL for the selected oven is only available in the heated oven, making cleaning more difficult. Close the door. To Broil Using Hi/Low Temperature Settings: 1. If you would like to the Broiling Chart. See "Assistance or Service" section to 6, well done 1 HI 15-20 HI 12-...
... in , skin-on a 5-minute preheat. If a Set Cooking Time is to avoid the loss of meat, fish and poultry may be adjusted for low-temperature broiling of the oven rack. Thicker cuts and unevenly shaped pieces of juices. They are used , increase the cook time by 15 minutes. Before... there until CANCEL for the selected oven is only available in the heated oven, making cleaning more difficult. Close the door. To Broil Using Hi/Low Temperature Settings: 1. If you would like to the Broiling Chart. See "Assistance or Service" section to 6, well done 1 HI 15-20 HI 12-...
Owners Manual
Page 21
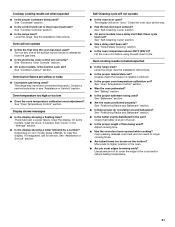
... time being used ? The range may have been converted improperly. Contact a service technician or see "Assistance or Service" section. Oven temperature too high or too low ■ Does the oven temperature calibration need adjustment? Clear the display. See "Self-Cleaning Cycle" section. ■ On some models, has a delay start been set...
... time being used ? The range may have been converted improperly. Contact a service technician or see "Assistance or Service" section. Oven temperature too high or too low ■ Does the oven temperature calibration need adjustment? Clear the display. See "Self-Cleaning Cycle" section. ■ On some models, has a delay start been set...

Installation Instructions
Page 10
... scrolls in the selected oven text display area, followed by "Push START." 2. Check Operation of top burner flames. Once the igniter is displayed. Low flame B. Hold the knob stem in the upper oven text display area, followed by turning the control from "LO" to turn off the oven. ...the desired oven. The cooktop "LO" burner flame should light. The igniter used to light. After 3 seconds, "Set temp" scrolls in the low position using the adjustment screw in the display. Under certain conditions, it may take up . If burner does not light, press OFF/CANCEL to ...
... scrolls in the selected oven text display area, followed by "Push START." 2. Check Operation of top burner flames. Once the igniter is displayed. Low flame B. Hold the knob stem in the upper oven text display area, followed by turning the control from "LO" to turn off the oven. ...the desired oven. The cooktop "LO" burner flame should light. The igniter used to light. After 3 seconds, "Set temp" scrolls in the low position using the adjustment screw in the display. Under certain conditions, it may take up . If burner does not light, press OFF/CANCEL to ...

