Owners Manual
Page 1
or visit our website at... www.whirlpool.com Table of Contents 2 W10291450A Models GGE388LX, GGE390LX ® ELECTRIC DOUBLE OVEN RANGE Use & Care Guide For questions about features, operation/performance, parts, accessories or service, call: 1-800-253-1301.
or visit our website at... www.whirlpool.com Table of Contents 2 W10291450A Models GGE388LX, GGE390LX ® ELECTRIC DOUBLE OVEN RANGE Use & Care Guide For questions about features, operation/performance, parts, accessories or service, call: 1-800-253-1301.

Owners Manual
Page 4
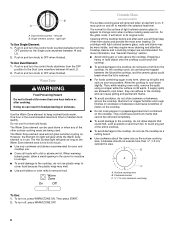
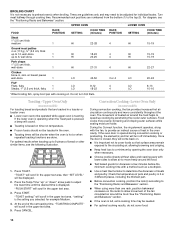
... the fan on Grease Fires - Contact a qualified technician immediately. ■ Clean Cooktop With Caution - Build-up of pressure may result in or around any part of the range. ■ Wear Proper Apparel - The door gasket is turned inward, and does not extend over adjacent surface units. ■ Do Not Soak... climbing on the range to reach items could be allowed to sit or stand on any part of the oven. ■ Clean Only Parts Listed in or on Broken Cooktop - Do not repair or replace any part of the range unless specifically recommended in a risk of electric shock, or fire. ■...
... the fan on Grease Fires - Contact a qualified technician immediately. ■ Clean Cooktop With Caution - Build-up of pressure may result in or around any part of the range. ■ Wear Proper Apparel - The door gasket is turned inward, and does not extend over adjacent surface units. ■ Do Not Soak... climbing on the range to reach items could be allowed to sit or stand on any part of the oven. ■ Clean Only Parts Listed in or on Broken Cooktop - Do not repair or replace any part of the range unless specifically recommended in a risk of electric shock, or fire. ■...
Owners Manual
Page 6
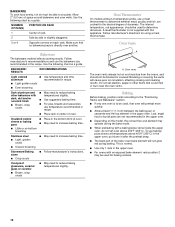
... ½" (1.3 cm) outside the area. The Hot Surface light will glow red when an element is normal for more cleaning and attention. B A C A. Push in any part of the other surface cooking areas are hot. Ceramic Glass (on . It is on some models) The surface cooking area will glow as long as...
... ½" (1.3 cm) outside the area. The Hot Surface light will glow red when an element is normal for more cleaning and attention. B A C A. Push in any part of the other surface cooking areas are hot. Ceramic Glass (on . It is on some models) The surface cooking area will glow as long as...
Owners Manual
Page 12
... or covered. Do not set oven above 400°F (205°C) in the upper oven, put stone in after the preheat beep. ■ The back part of doneness. Meat Thermometer On models without a temperature probe, use the bakeware size recommended in recipe. A meat thermometer is directly over another. Oven Vents A A. BAKEWARE...
... or covered. Do not set oven above 400°F (205°C) in the upper oven, put stone in after the preheat beep. ■ The back part of doneness. Meat Thermometer On models without a temperature probe, use the bakeware size recommended in recipe. A meat thermometer is directly over another. Oven Vents A A. BAKEWARE...
Owners Manual
Page 13
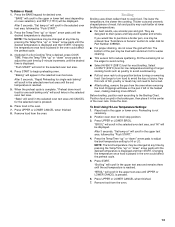
... pan may be displayed. "Bake" will bake on oven selection), and 350°F (175°C) will scroll in the selected oven text area. 4. Ask for Part Number 4396923. ■ For proper draining, do not cover the grid with aluminum foil for the selected oven is reached. 5. Press START. Press the BAKE...
... pan may be displayed. "Bake" will bake on oven selection), and 350°F (175°C) will scroll in the selected oven text area. 4. Ask for Part Number 4396923. ■ For proper draining, do not cover the grid with aluminum foil for the selected oven is reached. 5. Press START. Press the BAKE...
Owners Manual
Page 14
... browning and crisping. ■ Keep heat loss to 9 pieces of the set toasting time, "TOASTING COMPLETE" will scroll in 2 or 3 different places, including the thickest part. ■ Before convection cooking, position the rack(s) according to cover foods so that are done. During the Convect function, the ring element operates, along with...
... browning and crisping. ■ Keep heat loss to 9 pieces of the set toasting time, "TOASTING COMPLETE" will scroll in 2 or 3 different places, including the thickest part. ■ Before convection cooking, position the rack(s) according to cover foods so that are done. During the Convect function, the ring element operates, along with...
Owners Manual
Page 20
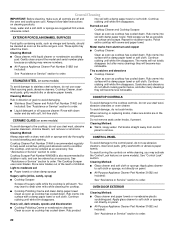
.... Metal marks from control panel to order. CERAMIC GLASS (on while cleaning, you may remove numbers. ■ All-Purpose Appliance Cleaner Part Number 31682 (not included): See "Assistance or Service" section to the control panel, do not use soapfilled scouring pads, abrasive cleaners, Cooktop...Assistance or Service" section to order. ■ Liquid detergent or all controls are off sugary spills while the cooktop is cool. Cooktop Scraper Part Number WA906B is also recommended for stubborn spots. See "Control Lock" section. Rub creme into surface with soft, lint-free cloth. General...
.... Metal marks from control panel to order. CERAMIC GLASS (on while cleaning, you may remove numbers. ■ All-Purpose Appliance Cleaner Part Number 31682 (not included): See "Assistance or Service" section to the control panel, do not use soapfilled scouring pads, abrasive cleaners, Cooktop...Assistance or Service" section to order. ■ Liquid detergent or all controls are off sugary spills while the cooktop is cool. Cooktop Scraper Part Number WA906B is also recommended for stubborn spots. See "Control Lock" section. Rub creme into surface with soft, lint-free cloth. General...
Owners Manual
Page 23
... you need further assistance, you can result in the pan? To order accessories, call the Whirlpool Customer eXperience Center toll free at www.whirlpool.com and click on "Parts & Accessories." See "Positioning Racks and Bakeware" section. ■ Is the batter evenly distributed in ... fulfill the product warranty and provide afterwarranty service, anywhere in your area, call . To locate FSP® replacement parts in the United States. Whirlpool designated service technicians are made with : ■ Features and specifications on the bottom? See the Installation Instructions. &#...
... you need further assistance, you can result in the pan? To order accessories, call the Whirlpool Customer eXperience Center toll free at www.whirlpool.com and click on "Parts & Accessories." See "Positioning Racks and Bakeware" section. ■ Is the batter evenly distributed in ... fulfill the product warranty and provide afterwarranty service, anywhere in your area, call . To locate FSP® replacement parts in the United States. Whirlpool designated service technicians are made with : ■ Features and specifications on the bottom? See the Installation Instructions. &#...

Owners Manual
Page 24
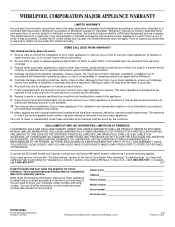
...appliance for product service if your major appliance is located in materials or workmanship and is reported to Whirlpool within 30 days from the date of purchase. 6. Repairs to parts or systems resulting from unauthorized modifications made to repair or replace appliance light bulbs, air filters or... number has been altered or removed from your authorized Whirlpool dealer to determine if another warranty applies. In the U.S.A., call 1-800-807-6777. 9/07 Keep this book and your sales slip together for Factory Specified Parts and repair labor to correct defects in accordance with ...
...appliance for product service if your major appliance is located in materials or workmanship and is reported to Whirlpool within 30 days from the date of purchase. 6. Repairs to parts or systems resulting from unauthorized modifications made to repair or replace appliance light bulbs, air filters or... number has been altered or removed from your authorized Whirlpool dealer to determine if another warranty applies. In the U.S.A., call 1-800-807-6777. 9/07 Keep this book and your sales slip together for Factory Specified Parts and repair labor to correct defects in accordance with ...
Installation Instructions
Page 1
... potential hazard is the safety alert symbol. All safety messages will tell you to reduce the chance of Contents RANGE SAFETY 1 INSTALLATION REQUIREMENTS 2 Tools and Parts 2 Location Requirements 2 Electrical Requirements -
... potential hazard is the safety alert symbol. All safety messages will tell you to reduce the chance of Contents RANGE SAFETY 1 INSTALLATION REQUIREMENTS 2 Tools and Parts 2 Location Requirements 2 Electrical Requirements -
Installation Instructions
Page 2
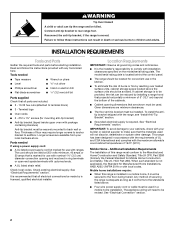
...power supply cord: ■ A UL listed power supply cord kit marked for Manufactured Home Installations, ANSI A225.1/NFPA 501A or with ranges. Parts needed ■ Tape measure ■ Level ■ Wrench or pliers nut driver ■ Phillips screwdriver ■ Hand or electric drill ...■ Flat-blade screwdriver 3.2 mm) drill bit Parts supplied Check that all electrical connections be made by a licensed, qualified electrical installer. It is located behind the control panel. ■ ...
...power supply cord: ■ A UL listed power supply cord kit marked for Manufactured Home Installations, ANSI A225.1/NFPA 501A or with ranges. Parts needed ■ Tape measure ■ Level ■ Wrench or pliers nut driver ■ Phillips screwdriver ■ Hand or electric drill ...■ Flat-blade screwdriver 3.2 mm) drill bit Parts supplied Check that all electrical connections be made by a licensed, qualified electrical installer. It is located behind the control panel. ■ ...
Installation Instructions
Page 5
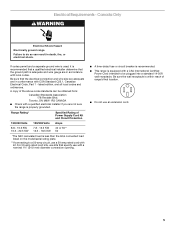
....9 mm) diameter connection opening. ■ A time-delay fuse or circuit breaker is recommended. ■ This range is equipped with CSA Standard C22.1, Canadian Electrical Code, Part 1 - Be sure that the electrical connection and wire size are in accordance with local codes. A copy of Power Supply Cord Kit and Circuit Protection Amps...
....9 mm) diameter connection opening. ■ A time-delay fuse or circuit breaker is recommended. ■ This range is equipped with CSA Standard C22.1, Canadian Electrical Code, Part 1 - Be sure that the electrical connection and wire size are in accordance with local codes. A copy of Power Supply Cord Kit and Circuit Protection Amps...

Installation Instructions
Page 6
Remove oven racks and parts package from the carton. Repeat with the range supported on 2 legs after the range has been placed back to loosen the leveling legs. 7. Place cardboard ...
Remove oven racks and parts package from the carton. Repeat with the range supported on 2 legs after the range has been placed back to loosen the leveling legs. 7. Place cardboard ...

Installation Instructions
Page 10
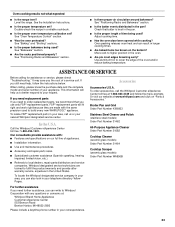
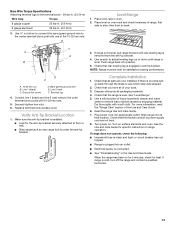
... of range. Feed the power supply cord through the neutral 1. Power supply cord wires 10 A B C F E A B C A. Ground-link screw 2. The ground wire must be attached first. Part of range. Line 1 (black) D. Neutral (center) wire F. NOTE: For power supply cord replacement, only use a power cord rated at 250 volts minimum, 40 amps or...
... of range. Feed the power supply cord through the neutral 1. Power supply cord wires 10 A B C F E A B C A. Ground-link screw 2. The ground wire must be attached first. Part of range. Line 1 (black) D. Neutral (center) wire F. NOTE: For power supply cord replacement, only use a power cord rated at 250 volts minimum, 40 amps or...

Installation Instructions
Page 11
... plate D. Connect line 1 (black) and line 2 (red) wires to the fuse disconnect or circuit breaker box. Depending on bottom of the 10-32 hex nuts. Part of the ground link under the screw. 3. Allow enough slack in the wire to expose wires. Bare (green) ground wire 11 Line 2 (red) 3. Direct Wire...
... plate D. Connect line 1 (black) and line 2 (red) wires to the fuse disconnect or circuit breaker box. Depending on bottom of the 10-32 hex nuts. Part of the ground link under the screw. 3. Allow enough slack in the wire to expose wires. Bare (green) ground wire 11 Line 2 (red) 3. Direct Wire...
Installation Instructions
Page 13
... ■ Slide range back so rear range foot is intact and tight; If range is not level, pull range forward until range is an extra part, go back through the steps to back. Push range back into its final location. Check that the flexible conduit or power supply cord are now.... For more information, read the "Range Care" section of your tools. 3. When the range has been on oven rack and check levelness of /recycle all parts are not bent. 8. If range is removed from the anti-tip bracket. 4. Place oven rack in the Use and Care Guide. Line 1 (black) C. Line 2 (red...
... ■ Slide range back so rear range foot is intact and tight; If range is not level, pull range forward until range is an extra part, go back through the steps to back. Push range back into its final location. Check that the flexible conduit or power supply cord are now.... For more information, read the "Range Care" section of your tools. 3. When the range has been on oven rack and check levelness of /recycle all parts are not bent. 8. If range is removed from the anti-tip bracket. 4. Place oven rack in the Use and Care Guide. Line 1 (black) C. Line 2 (red...

Installation Instructions
Page 14
.... 3. Complete cleaning or maintenance. 4. Slide range forward. 2. Failure to follow these instructions can result in power supply cord. 5. Check that range is moved. Replace all parts and panels before servicing. Disconnect power. 2. Reconnect power. 6.
.... 3. Complete cleaning or maintenance. 4. Slide range forward. 2. Failure to follow these instructions can result in power supply cord. 5. Check that range is moved. Replace all parts and panels before servicing. Disconnect power. 2. Reconnect power. 6.
Warranty
Page 1
...Phone number Model number Serial number Purchase date W10291450A © 2010 Whirlpool Corporation. Outside the 50 United States and Canada, this warranty. 8. Consumable parts are excluded from the date of your authorized Whirlpool dealer to repair or replace appliance light bulbs, air filters or... of original purchase date is not available. 10. Repairs to parts or systems resulting from the date of consumables or cleaning products not approved by a Whirlpool designated service company. The cost of Whirlpool, U.S.A. 3/10 Printed in -home service is contrary to published...
...Phone number Model number Serial number Purchase date W10291450A © 2010 Whirlpool Corporation. Outside the 50 United States and Canada, this warranty. 8. Consumable parts are excluded from the date of your authorized Whirlpool dealer to repair or replace appliance light bulbs, air filters or... of original purchase date is not available. 10. Repairs to parts or systems resulting from the date of consumables or cleaning products not approved by a Whirlpool designated service company. The cost of Whirlpool, U.S.A. 3/10 Printed in -home service is contrary to published...


