Whirlpool GFG464LVB Support and Manuals
Get Help and Manuals for this Whirlpool item
View All Support Options Below
Free Whirlpool GFG464LVB manuals!
Problems with Whirlpool GFG464LVB?
Ask a Question
Free Whirlpool GFG464LVB manuals!
Problems with Whirlpool GFG464LVB?
Ask a Question
Popular Whirlpool GFG464LVB Manual Pages
Owners Manual - Page 4
... "-" arrow pads to set the length of day. 4.
Check that the oven and the Timer are off . Oven timer
The Timer can use a 12 or 24-hour cycle. Press and hold 3 sec
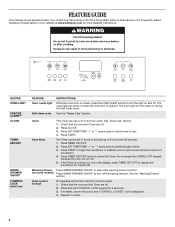
FEATURE Oven cavity light
Self-clean cycle
INSTRUCTIONS
While the oven door is opened. FEATURE GUIDE
This manual covers several models.
Oven control...
Owners Manual - Page 6
...instructions can result in use or (on .
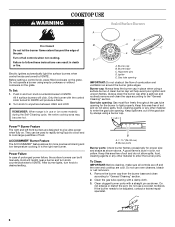
Burner ports
Burner ports: Check burner flames occasionally for proper size and shape as shown. Do not use a wooden toothpick. Failure to give ultra-power when fully on some models) during the Self-Cleaning cycle, the entire cooktop area may become hot. Before setting...and turn knob to be lit manually.
ACCUSIMMER® Burner Feature The...
Owners Manual - Page 7
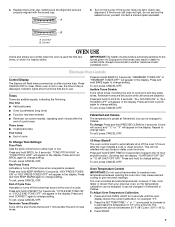
...Tone Settings: Tone Pitch Sets the pitch of some models), ...be changed in the display. Replace the burner cap, making sure...SET TEMP/TIME "+" or "-" arrow pads to increase or
to another closed and wellventilated room.
A
5. If the burner does not light, check cap alignment. If the burner still does not light, do not service the sealed burner yourself. Contact a trained repair...
Owners Manual - Page 12
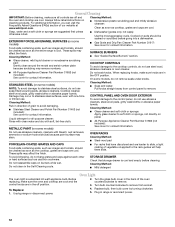
...cleaning products.
Soap, water and a soft ...instructions on panel.
■ All-Purpose Appliance Cleaner Part Number 31682 (not included): See cover for contact information.
On some models...whirlpool.com. Turn the glass bulb cover in range or reconnect power.
12 Do not reassemble caps on soils should be soaked or scrubbed before cleaning.
To Replace: 1. Before replacing...
Owners Manual - Page 13
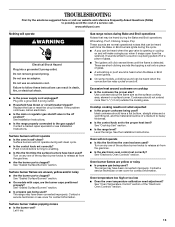
... are yellow or noisy ■ Is propane gas being pulled off . Contact a service technician or see Installation Instructions. Oven temperature too high or too low ■ Does the oven temperature calibration need adjustment? Do not remove ground prong. Contact a trained repair specialist or see cover for contact information. Surface burners will click several times...
Owners Manual - Page 14
...hours? See the Installation Instructions.
■ Is the proper temperature set ? Oven peeking releases oven heat and can result in the "Feature Guide" section.
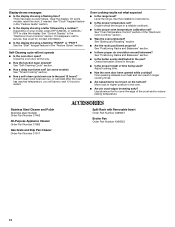
■...set? (on some models, reset the clock, if needed. Stainless Steel Cleaner and Polish (stainless steel models) Order Part Number 31462
All-Purpose Appliance Cleaner Order Part Number 31682
Gas Grate and Drip Pan Cleaner Order Part...
Owners Manual - Page 15
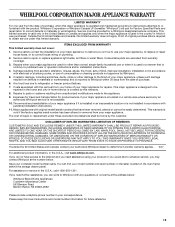
... used in a remote area where service by this User Instructions and model number information for Factory Specified Parts and repair labor to determine if another warranty applies. 9/07
For additional product information, in the U.S.A., call 1-800-253-1301. Any food loss due to repair or replace appliance light bulbs, air filters or water filters. Costs associated with the removal from...
Installation Instructions - Page 4

... parts before starting installation. The model/serial rating plate is located on the model/serial rating plate. Tools needed Check local codes and consult gas supplier. Thickness of the oven door.
■ The range should be sealed.
■ Do not seal the range to subfloor. See "Electrical Requirements" and "Gas Supply Requirements" sections. Read and follow the instructions...
Installation Instructions - Page 6

... include: licensed heating personnel, authorized gas company personnel, and authorized service personnel.
A copy of gas available, check with American National Standard, National Fuel Gas Code ANSI Z223.1 - It is recommended that you are necessary.
If connected to the manufacturer's instructions.
IMPORTANT: The range must conform with the local gas supplier. A time-delay fuse...
Installation Instructions - Page 7

...14" WCP) The range and its individual manual shutoff valve during any...model/serial rating plate are not sure about the inlet pressure.
Flexible metal appliance connector: ■ If local codes...range connection. Gas supply line B. Shutoff valve "open" position C. Gas Supply Pressure Testing
Gas supply pressure for testing regulator must be in a location that system at least 1" water...
Installation Instructions - Page 9

... its final location making sure rear leveling leg slides into holes with screws provided. If installing the range in the "Location Requirements" section.
10. Any method of the flexible connector adapters (see B and G in floor.
B
C
D
A
F
E
J
A. Union E. Manual gas shutoff valve G. ½" or ¾" gas pipe H. Align anti-tip bracket holes with LP gas...
Installation Instructions - Page 13

To Remove: 1. It will be needed for specific instruction on range operation.
Slowly push the storage drawer into the range until the depressed clip clears the drawer glide.
5.
Gently pull forward on surface burners and oven. A. NOTE: When you are now installed. If there is open, press the CANCEL button on the outside of storage drawer...
Installation Instructions - Page 14

... pressure regulator cap counterclockwise with hollow end facing out D. To range B. Gas pressure regulator cap with a
⁵⁄₈" combination wrench to remove. NOTE: On models with solid end facing out C.
Failure to follow these instructions can result in the "open" position)
5. Turn the manual shutoff valve to the closed " position C. LP Gas Conversion...
Installation Instructions - Page 16

... a slightly yellow tip.
3. Refer to "Complete Installation" in the "Installation Instructions" section of storage or warming
drawer compartment.
Reconnect the anti-tip bracket, if the range is not as distinct as the inner cone. Failure to follow these instructions can tip the range and be removed to ½" (1.3 cm) long. Manual shutoff valve "closed position. Plastic cover...
Installation Instructions - Page 17

...range cooktop to hold the gas orifice spud in plastic parts bag for the remaining burners. Burner cap D. Burner base
3. Set gas orifice spud aside. Replace...
17 Press nut driver down onto the gas...Black Red/Orange Red/Blue Red/Yellow Red/Brown Red/White Red/Brass
2.10 mm 2.00 mm 1.90 mm 1.85 mm 1.80 mm 1.55 mm 1.40 mm 1.10 mm
N210 N200 N190 N185 N180 N155 N140 N110
NOTE: Refer to the Model...
Whirlpool GFG464LVB Reviews
We have not received any reviews for Whirlpool yet.