
User Manual
Page 2
TABLE OF CONTENTS INSTALLATION / QUICK START 2 DIAGRAM OF THE DIGITAL PHOTO FRAME 3 OSD MENU FUNCTIONS 4 KEYPAD BUTTON FUNCTIONS 5 USING MINI USB FOR FILE TRANSFER 6 TECHNICAL SPECIFICATIONS 7 FREQUENTLY ASKED QUESTIONS 8 IMPORTANT PRODUCT SAFETY INFORMATION 9 CLEANING THE DIGITAL PHOTO FRAME 11 PRODUCT WARRANTY 13
TABLE OF CONTENTS INSTALLATION / QUICK START 2 DIAGRAM OF THE DIGITAL PHOTO FRAME 3 OSD MENU FUNCTIONS 4 KEYPAD BUTTON FUNCTIONS 5 USING MINI USB FOR FILE TRANSFER 6 TECHNICAL SPECIFICATIONS 7 FREQUENTLY ASKED QUESTIONS 8 IMPORTANT PRODUCT SAFETY INFORMATION 9 CLEANING THE DIGITAL PHOTO FRAME 11 PRODUCT WARRANTY 13
User Manual
Page 7
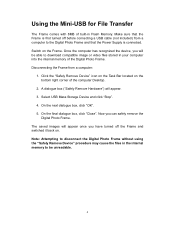
... off the Frame and switched it back on the Frame. Disconnecting the Frame from a computer to disconnect the Digital Photo Frame without using the "Safely Remove Device" procedure may cause the files in your computer into the internal memory of the Digital Photo Frame. Select USB Mass Storage ...click "OK". 5. Now you have turned off before connecting a USB cable (not included) from a computer: 1. Note: Attempting to the Digital Photo Frame and that the Frame is connected. Using the Mini-USB for File Transfer The Frame comes with 8MB of the computer Desktop. 2. Switch on . ...
... off the Frame and switched it back on the Frame. Disconnecting the Frame from a computer to disconnect the Digital Photo Frame without using the "Safely Remove Device" procedure may cause the files in your computer into the internal memory of the Digital Photo Frame. Select USB Mass Storage ...click "OK". 5. Now you have turned off before connecting a USB cable (not included) from a computer: 1. Note: Attempting to the Digital Photo Frame and that the Frame is connected. Using the Mini-USB for File Transfer The Frame comes with 8MB of the computer Desktop. 2. Switch on . ...


