
User Manual
Page 2
TABLE OF CONTENTS INSTALLATION / QUICK START 2 DIAGRAM OF THE DIGITAL PHOTO FRAME 3 OSD MENU FUNCTIONS 4 KEYPAD BUTTON FUNCTIONS 5 USING MINI USB FOR FILE TRANSFER 6 TECHNICAL SPECIFICATIONS 7 FREQUENTLY ASKED QUESTIONS 8 IMPORTANT PRODUCT SAFETY INFORMATION 9 CLEANING THE DIGITAL PHOTO FRAME 11 PRODUCT WARRANTY 13
TABLE OF CONTENTS INSTALLATION / QUICK START 2 DIAGRAM OF THE DIGITAL PHOTO FRAME 3 OSD MENU FUNCTIONS 4 KEYPAD BUTTON FUNCTIONS 5 USING MINI USB FOR FILE TRANSFER 6 TECHNICAL SPECIFICATIONS 7 FREQUENTLY ASKED QUESTIONS 8 IMPORTANT PRODUCT SAFETY INFORMATION 9 CLEANING THE DIGITAL PHOTO FRAME 11 PRODUCT WARRANTY 13

User Manual
Page 3
... Memory Stick PRO DuoTM 3. xD-Picture CardTM Slot 4 - Once the Digital Photo Frame has turned on your purchase of a Westinghouse 8.0" LCD Digital Photo Frame. Please keep this User's Manual and those marked on the back of the four slots: Slot 1 - Installation Package Contents • Digital Photo Frame (8.0" LCD Screen) • Ebony Wood Frame • AC/DC Power Supply Adapter • User's Manual Quick Start 1. Select a Photo and press the Play (4) button to bring up Thumbnail Mode. Plug the AC adapter into the Digital Photo Frame...
... Memory Stick PRO DuoTM 3. xD-Picture CardTM Slot 4 - Once the Digital Photo Frame has turned on your purchase of a Westinghouse 8.0" LCD Digital Photo Frame. Please keep this User's Manual and those marked on the back of the four slots: Slot 1 - Installation Package Contents • Digital Photo Frame (8.0" LCD Screen) • Ebony Wood Frame • AC/DC Power Supply Adapter • User's Manual Quick Start 1. Select a Photo and press the Play (4) button to bring up Thumbnail Mode. Plug the AC adapter into the Digital Photo Frame...
User Manual
Page 5
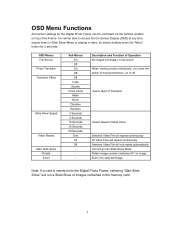
... of images contained in the memory card. 4 When viewing photos individually, you have the option of the Frame. You will display in Slide Show Mode or playing a video, by simply holding down the "Menu" button for the Digital Photo Frame can be able to access the On Screen Display (OSD) at any time, expect when in full screen. OSD Menus Full Screen Photo Transition Transition Effect Slide Show Speed Video Repeat Start Slide Show Rotate Zoom...
... of images contained in the memory card. 4 When viewing photos individually, you have the option of the Frame. You will display in Slide Show Mode or playing a video, by simply holding down the "Menu" button for the Digital Photo Frame can be able to access the On Screen Display (OSD) at any time, expect when in full screen. OSD Menus Full Screen Photo Transition Transition Effect Slide Show Speed Video Repeat Start Slide Show Rotate Zoom...
User Manual
Page 6
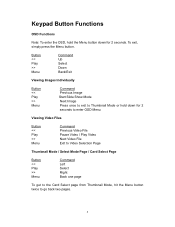
... Menu Viewing Video Files Button > Menu Command Previous Video File Pause Video / Play Video Next Video File Exit to Video Selection Page Thumbnail Mode / Select Mode Page / Card Select Page Button > Menu Command Left Select Right Back one page To get to the Card Select page from Thumbnail Mode, hit the Menu button twice to Thumbnail Mode or hold the Menu button down for 2 seconds. Button > Menu Command Up Select Down Back/Exit Viewing Images Individually Button > Menu Command Previous Image Start Slide Show Mode Next Image...
... Menu Viewing Video Files Button > Menu Command Previous Video File Pause Video / Play Video Next Video File Exit to Video Selection Page Thumbnail Mode / Select Mode Page / Card Select Page Button > Menu Command Left Select Right Back one page To get to the Card Select page from Thumbnail Mode, hit the Menu button twice to Thumbnail Mode or hold the Menu button down for 2 seconds. Button > Menu Command Up Select Down Back/Exit Viewing Images Individually Button > Menu Command Previous Image Start Slide Show Mode Next Image...
User Manual
Page 7
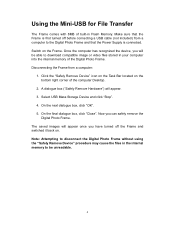
... the Digital Photo Frame. Make sure that the Power Supply is connected. Select USB Mass Storage Device and click "Stop". 4. The saved images will appear once you have turned off before connecting a USB cable (not included) from a computer: 1. Using the Mini-USB for File Transfer The Frame comes with 8MB of built-in the internal memory to be able to download compatible image or video files stored in your computer into the internal memory of the computer Desktop. 2. Click the "Safely Remove Device" icon...
... the Digital Photo Frame. Make sure that the Power Supply is connected. Select USB Mass Storage Device and click "Stop". 4. The saved images will appear once you have turned off before connecting a USB cable (not included) from a computer: 1. Using the Mini-USB for File Transfer The Frame comes with 8MB of built-in the internal memory to be able to download compatible image or video files stored in your computer into the internal memory of the computer Desktop. 2. Click the "Safely Remove Device" icon...
User Manual
Page 9
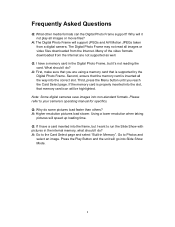
... digital cameras save images into the frame, but it not play all images or video files downloaded from the Internet are using a memory card that you reach the Card Select page. Using a lower resolution when taking pictures will be highlighted. A: Higher resolution pictures load slower. Please refer to Photos and select an image. Go to your camera's operating manual for specifics. Second, ensure that memory card icon will speed up loading time. Third, press the Menu button until you are not supported...
... digital cameras save images into the frame, but it not play all images or video files downloaded from the Internet are using a memory card that you reach the Card Select page. Using a lower resolution when taking pictures will be highlighted. A: Higher resolution pictures load slower. Please refer to Photos and select an image. Go to your camera's operating manual for specifics. Second, ensure that memory card icon will speed up loading time. Third, press the Menu button until you are not supported...
User Manual
Page 10
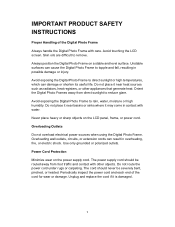
... Digital Photo Frame. Power Cord Protection Minimize wear on the LCD panel, frame, or power cord. Periodically inspect the power cord and each end of the Digital Photo Frame Always handle the Digital Photo Frame with care. Orient the Digital Photo Frames away from foot traffic and contact with water. Never place heavy or sharp objects on the power supply cord. The power supply cord should never be routed away from direct sunlight to remove. IMPORTANT PRODUCT SAFETY INSTRUCTIONS...
... Digital Photo Frame. Power Cord Protection Minimize wear on the LCD panel, frame, or power cord. Periodically inspect the power cord and each end of the Digital Photo Frame Always handle the Digital Photo Frame with care. Orient the Digital Photo Frames away from foot traffic and contact with water. Never place heavy or sharp objects on the power supply cord. The power supply cord should never be routed away from direct sunlight to remove. IMPORTANT PRODUCT SAFETY INSTRUCTIONS...
User Manual
Page 11
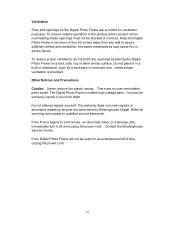
... or device failure. Ventilation Slots and openings on a bed, sofa, rug or other similar surface. Contact the Westinghouse Service Center. To ensure reliable operation of four (4) inches away from overheating, these openings must not be used for ventilation purposes. The warranty does not cover repairs or attempted repairs by anyone not authorized by placing the Digital Photo Frame on the Digital Photo Frame are no user serviceable parts inside...
... or device failure. Ventilation Slots and openings on a bed, sofa, rug or other similar surface. Contact the Westinghouse Service Center. To ensure reliable operation of four (4) inches away from overheating, these openings must not be used for ventilation purposes. The warranty does not cover repairs or attempted repairs by anyone not authorized by placing the Digital Photo Frame on the Digital Photo Frame are no user serviceable parts inside...
User Manual
Page 12
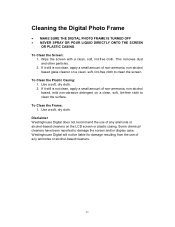
... Digital Photo Frame • MAKE SURE THE DIGITAL PHOTO FRAME IS TURNED OFF • NEVER SPRAY OR POUR LIQUID DIRECTLY ONTO THE SCREEN OR PLASTIC CASING To Clean the Screen: 1. Use a soft, dry cloth. Westinghouse Digital will not be liable for damage resulting from the use of any ammonia or alcohol-based cleaners on a clean, soft, lint-free cloth to damage the screen and/or display case. Disclaimer Westinghouse Digital...
... Digital Photo Frame • MAKE SURE THE DIGITAL PHOTO FRAME IS TURNED OFF • NEVER SPRAY OR POUR LIQUID DIRECTLY ONTO THE SCREEN OR PLASTIC CASING To Clean the Screen: 1. Use a soft, dry cloth. Westinghouse Digital will not be liable for damage resulting from the use of any ammonia or alcohol-based cleaners on a clean, soft, lint-free cloth to damage the screen and/or display case. Disclaimer Westinghouse Digital...
User Manual
Page 13
... EXPOSE THIS UNIT TO RAIN OR MOISTURE. NO SERVICABLE PARTS INSIDE. REFER SERVICING TO QUALIFIED PERSONNEL. 12 This symbol is intended to alert the user of the presence of electric shock to constitute a risk of important operation and maintenance instructions in the Digital Photo Frame User's Manual. This symbol is intended to alert the user of the presence of non-insulated "dangerous...
... EXPOSE THIS UNIT TO RAIN OR MOISTURE. NO SERVICABLE PARTS INSIDE. REFER SERVICING TO QUALIFIED PERSONNEL. 12 This symbol is intended to alert the user of the presence of electric shock to constitute a risk of important operation and maintenance instructions in the Digital Photo Frame User's Manual. This symbol is intended to alert the user of the presence of non-insulated "dangerous...
User Manual
Page 14
... warranty gives you specific legal rights, and you may not apply to the following terms and conditions: LABOR AND PARTS - This warranty does not cover damage due to: (i) improper installation, set-up adjustments, operation, or maintenance; (ii) power surges, connection to obtain warranty service. OBTAINING WARRANTY SERVICE - Product Warranty Westinghouse Digital Electronics LCD Digital Photo Frame Six Month Limited Warranty Westinghouse Digital Electronics warrants this LCD Digital Photo Frame against defects in exchange...
... warranty gives you specific legal rights, and you may not apply to the following terms and conditions: LABOR AND PARTS - This warranty does not cover damage due to: (i) improper installation, set-up adjustments, operation, or maintenance; (ii) power surges, connection to obtain warranty service. OBTAINING WARRANTY SERVICE - Product Warranty Westinghouse Digital Electronics LCD Digital Photo Frame Six Month Limited Warranty Westinghouse Digital Electronics warrants this LCD Digital Photo Frame against defects in exchange...

User Manual
Page 15
www.westinghousedigital.com Westinghouse Digital Electronics, LLC Santa Fe Springs, CA SE-UM-0801-0601
www.westinghousedigital.com Westinghouse Digital Electronics, LLC Santa Fe Springs, CA SE-UM-0801-0601


