

User Manual
Page 1
Write the serial number in this manual befVore using this manual for future reference. As a manufacturer, we are missing or damaged parts, we will provide immediate assistance, free of charge. CUSTOMER HOT LINE: 1-877-992-5999 Mon.-Fri., 6 a.m.-6 p.m. Serial Number Decal (under seat) QUESTIONS? The trained technicians ...
Write the serial number in this manual befVore using this manual for future reference. As a manufacturer, we are missing or damaged parts, we will provide immediate assistance, free of charge. CUSTOMER HOT LINE: 1-877-992-5999 Mon.-Fri., 6 a.m.-6 p.m. Serial Number Decal (under seat) QUESTIONS? The trained technicians ...
User Manual
Page 2
Remove the PART IDENTIFICATION CHART and PART LIST/EXPLODED DRAWING before beginning assembly. WEIDER is a registered trademark of this manual. TABLE OF CONTENTS WARNING DECAL PLACEMENT 3 IMPORTANT PRECAUTIONS 4 BEFORE YOU BEGIN 5 ASSEMBLY 6 UPPER CABLE ADJUSTMENT 14 ADJUSTMENTS 15 CABLE DIAGRAM 18 TROUBLESHOOTING 19 EXERCISE GUIDELINES 20 ORDERING REPLACEMENT PARTS Back Cover LIMITED WARRANTY Back Cover Note: A PART IDENTIFICATION CHART and a PART LIST/EXPLODED DRAWING are attached in the center of ICON Health & Fitness, Inc. 2
Remove the PART IDENTIFICATION CHART and PART LIST/EXPLODED DRAWING before beginning assembly. WEIDER is a registered trademark of this manual. TABLE OF CONTENTS WARNING DECAL PLACEMENT 3 IMPORTANT PRECAUTIONS 4 BEFORE YOU BEGIN 5 ASSEMBLY 6 UPPER CABLE ADJUSTMENT 14 ADJUSTMENTS 15 CABLE DIAGRAM 18 TROUBLESHOOTING 19 EXERCISE GUIDELINES 20 ORDERING REPLACEMENT PARTS Back Cover LIMITED WARRANTY Back Cover Note: A PART IDENTIFICATION CHART and a PART LIST/EXPLODED DRAWING are attached in the center of ICON Health & Fitness, Inc. 2
User Manual
Page 4
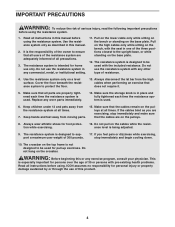
... resistance system is designed to the upright base, or while standing on the base plate. 12. Do not use of this or any worn parts immediately. 14. Pull on the lower cable only while sitting on the bench or standing on the crossbar. stop immediately and make sure that ... all users of the resistance system are on the top frame is used . Read all parts are exercising, stop immediately and begin cooling down. 10. Keep children under 12 and pets away from moving parts. 15. Use the resistance system only on the bench, with the included resistance. Always wear...
... resistance system is designed to the upright base, or while standing on the base plate. 12. Do not use of this or any worn parts immediately. 14. Pull on the lower cable only while sitting on the bench or standing on the crossbar. stop immediately and make sure that ... all users of the resistance system are on the top frame is used . Read all parts are exercising, stop immediately and begin cooling down. 10. Keep children under 12 and pets away from moving parts. 15. Use the resistance system only on the bench, with the included resistance. Always wear...

User Manual
Page 5
... achieve the specific results you , please note the product model number and serial number before using the resistance system. If you for selecting the innovative WEIDER® PLATINUM 600 resistance system. BEFORE YOU BEGIN Thank you have questions Before reading further, please review the drawing below and familiarize yourself with the...
... achieve the specific results you , please note the product model number and serial number before using the resistance system. If you for selecting the innovative WEIDER® PLATINUM 600 resistance system. BEFORE YOU BEGIN Thank you have questions Before reading further, please review the drawing below and familiarize yourself with the...

User Manual
Page 6
... a set of time, assembly will take time. Before beginning assembly, make sure that 1 you assemble the resistance system, make sure all parts as grease or petroleum jelly, and soapy water. Attach two Plastic Feet (19) and two Large Plastic Feet (20) to the Base ...will go smoothly. ASSEMBLY Make Things Easier for shipping. Do not overtighten the Locknut; However, it has been pre-attached. • Tighten all parts are required for assembly: • Two adjustable wrenches • One rubber mallet • One standard screwdriver • One Phillips screwdriver •...
... a set of time, assembly will take time. Before beginning assembly, make sure that 1 you assemble the resistance system, make sure all parts as grease or petroleum jelly, and soapy water. Attach two Plastic Feet (19) and two Large Plastic Feet (20) to the Base ...will go smoothly. ASSEMBLY Make Things Easier for shipping. Do not overtighten the Locknut; However, it has been pre-attached. • Tighten all parts are required for assembly: • Two adjustable wrenches • One rubber mallet • One standard screwdriver • One Phillips screwdriver •...

User Manual
Page 13
... Leg (31). Make sure the Pulley is used. Before using the resistance system, pull the long cable a few times to the bottom of the remaining parts will be explained in UPPER CABLE ADJUSTMENT on page 15. IMPORTANT: If the cables are the same length and a third end that is longer. Make... Leg Lever Cable (62). Locate the Leg Lever Cable (62), which has two ends that are not properly installed, they may be sure that all parts have been properly tightened. Slide two Foam Pads (28) onto the tube on page 18 for proper cable routing. 13 Press two 19mm Round Inner...
... Leg (31). Make sure the Pulley is used. Before using the resistance system, pull the long cable a few times to the bottom of the remaining parts will be explained in UPPER CABLE ADJUSTMENT on page 15. IMPORTANT: If the cables are the same length and a third end that is longer. Make... Leg Lever Cable (62). Locate the Leg Lever Cable (62), which has two ends that are not properly installed, they may be sure that all parts have been properly tightened. Slide two Foam Pads (28) onto the tube on page 18 for proper cable routing. 13 Press two 19mm Round Inner...

User Manual
Page 15
...same manner. ATTACHING THE HIGH PULLEYS To use solvents. Also, refer to the accompanying exercise guide to engage the Seat Knob. Replace worn parts immediately. The resistance bar can be cleaned with a vinyl and rubber protectant, available at the end of the "L"-shaped slot (see ATTACHING...) can be secured in order to see ADJUSTING THE BACKREST on the High Pulley Housing (52) onto the Eyebolt (51). Make sure all parts are properly tightened each exercise. The resistance system can be cleaned with a Cable Clip (64). First, remove the Backrest (40) from your...
...same manner. ATTACHING THE HIGH PULLEYS To use solvents. Also, refer to the accompanying exercise guide to engage the Seat Knob. Replace worn parts immediately. The resistance bar can be cleaned with a vinyl and rubber protectant, available at the end of the "L"-shaped slot (see ATTACHING...) can be secured in order to see ADJUSTING THE BACKREST on the High Pulley Housing (52) onto the Eyebolt (51). Make sure all parts are properly tightened each exercise. The resistance system can be cleaned with a Cable Clip (64). First, remove the Backrest (40) from your...

User Manual
Page 20
You can adjust the intensity level of an individual exercise in each exercise, and moving only the appropriate parts of the body. Complete as many sets of 15 to 20 repetitions as one day of rest. It is important to avoid overdoing it . You ... and strengthen your body, plus develop your heart and lungs. Begin with it during the return stroke. An example of a balanced program is an essential part of 30 seconds between sets. WARMING UP Begin each repetition and inhale during the first few months of your body time to regenerate. Select exercises...
You can adjust the intensity level of an individual exercise in each exercise, and moving only the appropriate parts of the body. Complete as many sets of 15 to 20 repetitions as one day of rest. It is important to avoid overdoing it . You ... and strengthen your body, plus develop your heart and lungs. Begin with it during the return stroke. An example of a balanced program is an essential part of 30 seconds between sets. WARMING UP Begin each repetition and inhale during the first few months of your body time to regenerate. Select exercises...

User Manual
Page 21
Plan to spend the first couple of weeks familiarizing yourself with 5 to make exercise a regular and enjoyable part of your workouts. STAYING MOTIVATED For motivation, keep a record of each workout with the equipment and learning the proper form for a weight loss workout. Pectoralis ...
Plan to spend the first couple of weeks familiarizing yourself with 5 to make exercise a regular and enjoyable part of your workouts. STAYING MOTIVATED For motivation, keep a record of each workout with the equipment and learning the proper form for a weight loss workout. Pectoralis ...

User Manual
Page 24
... the key number of the part, from the PART LIST in the center of this manual. PART IDENTIFICATION CHART Refer to the drawings below to identify small parts used in the parts bag, check to see if it has been pre-attached. 1/2" Nylon Jamnut (78) M6 Nylon M10 Nylon Locknut (71) Locknut (69) M12 x 62mm... Button Bolt (90) M8 x 114mm Axle (102) M10 x 152mm Bolt (83) The number in parentheses by each drawing is not in assembly. Note: Some small parts may have been pre-attached.
... the key number of the part, from the PART LIST in the center of this manual. PART IDENTIFICATION CHART Refer to the drawings below to identify small parts used in the parts bag, check to see if it has been pre-attached. 1/2" Nylon Jamnut (78) M6 Nylon M10 Nylon Locknut (71) Locknut (69) M12 x 62mm... Button Bolt (90) M8 x 114mm Axle (102) M10 x 152mm Bolt (83) The number in parentheses by each drawing is not in assembly. Note: Some small parts may have been pre-attached.

User Manual
Page 25
Specifications are subject to change without notice. See the back cover of the user's manual for information about ordering replacement parts. WESY68630 R0204B Key No. Description Key No. Description 1 1 Base 2 1 Base Plate 3 1 Upright 4 1 Foot Plate 5 1 Lat Tower 6 1 Mech Assembly 7 1 Front Mech Cover 8 1 Back Mech Cover 9 1 ... 3/8" x 38mm Tension Screw Tension Gauge Tension Gauge w/magnet User's Manual Exercise Guide Exercise Decal Large Allen Wrench Small Allen Wrench Note: "#" indicates a non-illustrated part. Qty. PART LIST-Model No. Qty.
Specifications are subject to change without notice. See the back cover of the user's manual for information about ordering replacement parts. WESY68630 R0204B Key No. Description Key No. Description 1 1 Base 2 1 Base Plate 3 1 Upright 4 1 Foot Plate 5 1 Lat Tower 6 1 Mech Assembly 7 1 Front Mech Cover 8 1 Back Mech Cover 9 1 ... 3/8" x 38mm Tension Screw Tension Gauge Tension Gauge w/magnet User's Manual Exercise Guide Exercise Decal Large Allen Wrench Small Allen Wrench Note: "#" indicates a non-illustrated part. Qty. PART LIST-Model No. Qty.

User Manual
Page 27
...information: • The MODEL NUMBER of the product (WESY68630) • The NAME of the product (WEIDER® PLATINUM 600 resistance system) • The SERIAL NUMBER of the product (see the PART LIST and EXPLODED DRAWING in connection with the use or performance of the product or damages with respect ...lasts. The warranty extended hereunder is limited to the original purchaser. ICON HEALTH & FITNESS, INC., 1500 S. 1000 W., LOGAN, UT 84321-9813 Part No. 208307 R0204B Printed in lieu of any product or damage to a product caused by or attributable to be pre-authorized by an ICON ...
...information: • The MODEL NUMBER of the product (WESY68630) • The NAME of the product (WEIDER® PLATINUM 600 resistance system) • The SERIAL NUMBER of the product (see the PART LIST and EXPLODED DRAWING in connection with the use or performance of the product or damages with respect ...lasts. The warranty extended hereunder is limited to the original purchaser. ICON HEALTH & FITNESS, INC., 1500 S. 1000 W., LOGAN, UT 84321-9813 Part No. 208307 R0204B Printed in lieu of any product or damage to a product caused by or attributable to be pre-authorized by an ICON ...


