
QuickStart Guide
Page 2
...Rear Panel 2 Using the USB Power Feature 23 Turning the Power Indicator On or Off 23 Help Topics 35 Wall-mounting the TV 4 Using the Remote 5 Completing the First-Time Setup 6 Using the On-Screen Menu 7 Navigating the On-Screen Menu 7 Changing the Input Source 7 Adjusting the ...Soft Power Cycle 25 Restoring the TV to Factory Default Settings 25 Store Demo 25 Viewing Data 26 Managing Advertising Settings 26 View VIZIO Privacy Policy 26 Using the Info Window 27 Specifications 37 Regulatory Information 39 Limited Warranty 40 Legal Information 42 Adjusting the Network ...
...Rear Panel 2 Using the USB Power Feature 23 Turning the Power Indicator On or Off 23 Help Topics 35 Wall-mounting the TV 4 Using the Remote 5 Completing the First-Time Setup 6 Using the On-Screen Menu 7 Navigating the On-Screen Menu 7 Changing the Input Source 7 Adjusting the ...Soft Power Cycle 25 Restoring the TV to Factory Default Settings 25 Store Demo 25 Viewing Data 26 Managing Advertising Settings 26 View VIZIO Privacy Policy 26 Using the Info Window 27 Specifications 37 Regulatory Information 39 Limited Warranty 40 Legal Information 42 Adjusting the Network ...

QuickStart Guide
Page 4
... simple precautions such as sunshine, fire or the like. • When unplugging your TV to hang onto the product. • Store the accessories (remote, batteries, etc.) in a location safely out of the reach of electric shock, do so. • WARNING - Ensure that my result in permanent... location. • NEVER place the television set and supporting furniture. This will not be of sufficient magnitude to loud sounds can damage the remote control or injure the operator. If water penetrates into your TV. − Your TV is not overhanging the edge of the supporting furniture....
... simple precautions such as sunshine, fire or the like. • When unplugging your TV to hang onto the product. • Store the accessories (remote, batteries, etc.) in a location safely out of the reach of electric shock, do so. • WARNING - Ensure that my result in permanent... location. • NEVER place the television set and supporting furniture. This will not be of sufficient magnitude to loud sounds can damage the remote control or injure the operator. If water penetrates into your TV. − Your TV is not overhanging the edge of the supporting furniture....

QuickStart Guide
Page 7
Getting to Know Your TV 1 FRONT PANEL Remote Sensor and Power Indicator When using the remote, aim it directly at this sensor. To keep the power indicator on, see Turning the Power Indicator On or Off on , then goes out after several seconds. The power indicator flashes on when the TV turns on page 23. 1
Getting to Know Your TV 1 FRONT PANEL Remote Sensor and Power Indicator When using the remote, aim it directly at this sensor. To keep the power indicator on, see Turning the Power Indicator On or Off on , then goes out after several seconds. The power indicator flashes on when the TV turns on page 23. 1

QuickStart Guide
Page 11
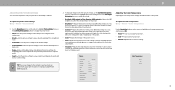
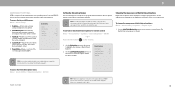
... household waste. For more information please visit: www.vizio.com/environment WARNING: Keep the remote control batteries away from children. It may cause choking and/or lead to close captions Long press to open . 2. Replace only with the ...laws and/or regulations where you properly dispose of your batteries consistent with batteries of batteries in Canada) Navigation Buttons - Insert two batteries into the remote control. Please ensure you live. Left / Right Navigate the on the batteries match the (+) and (-) symbols inside the battery compartment. 3. Replace the ...
... household waste. For more information please visit: www.vizio.com/environment WARNING: Keep the remote control batteries away from children. It may cause choking and/or lead to close captions Long press to open . 2. Replace only with the ...laws and/or regulations where you properly dispose of your batteries consistent with batteries of batteries in Canada) Navigation Buttons - Insert two batteries into the remote control. Please ensure you live. Left / Right Navigate the on the batteries match the (+) and (-) symbols inside the battery compartment. 3. Replace the ...

QuickStart Guide
Page 13
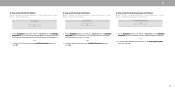
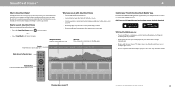
...option, and press the OK button to view. To use on -screen menu: 1. Use the Navigation buttons or the INPUT button on the remote to make your TV. The corresponding inputs are named on the Input menu to highlight the input you can be connected to your devices easy...back of these devices with your TV, you can change the input sources: 1. Press the MENU button on the remote. TIP: While navigating the on the remote. Press the INPUT button on the remote. 2. The selected input is displayed. 2. The input menu is displayed. Change Input SMARTCAST WatchFree HDMI-1 HDMI-2 ...
...option, and press the OK button to view. To use on -screen menu: 1. Use the Navigation buttons or the INPUT button on the remote to make your TV. The corresponding inputs are named on the Input menu to highlight the input you can be connected to your devices easy...back of these devices with your TV, you can change the input sources: 1. Press the MENU button on the remote. TIP: While navigating the on the remote. Press the INPUT button on the remote. 2. The selected input is displayed. 2. The input menu is displayed. Change Input SMARTCAST WatchFree HDMI-1 HDMI-2 ...
QuickStart Guide
Page 14
...flesh appears too orange, reduce the level of the picture. To adjust the color temperature: Menu > Picture > Color Temperature Use the Navigation buttons on the remote to the default settings. • Calibrated Dark - Produces a blue-hued picture. • Normal - Use the Navigation buttons on the... remote to highlight Picture Mode, then use the Up/Down Navigation buttons on page 12. 2. Sets the picture settings to affect the overall brilliance of the...
...flesh appears too orange, reduce the level of the picture. To adjust the color temperature: Menu > Picture > Color Temperature Use the Navigation buttons on the remote to the default settings. • Calibrated Dark - Produces a blue-hued picture. • Normal - Use the Navigation buttons on the... remote to highlight Picture Mode, then use the Up/Down Navigation buttons on page 12. 2. Sets the picture settings to affect the overall brilliance of the...

QuickStart Guide
Page 16
...ramp, and uniformity analyzer test patterns. To adjust the color management system/20 point white balance settings: 1. Use the Navigation buttons on the remote to highlight the Hue, Saturation, Brightness, Offset, or Gain of the color you are finished press the OK button to adjust. Use ...the Navigation buttons on the remote to adjust. Use the Left/Right Navigation buttons to show or hide the SMPTE Test Pattern: Menu > Picture > Advanced Picture > Color Calibration...
...ramp, and uniformity analyzer test patterns. To adjust the color management system/20 point white balance settings: 1. Use the Navigation buttons on the remote to highlight the Hue, Saturation, Brightness, Offset, or Gain of the color you are finished press the OK button to adjust. Use ...the Navigation buttons on the remote to adjust. Use the Left/Right Navigation buttons to show or hide the SMPTE Test Pattern: Menu > Picture > Advanced Picture > Color Calibration...
QuickStart Guide
Page 17
...brightness for the ramp test pattern. Use the Left/Right Navigation buttons to select Off. 1. Use the Navigation buttons on the remote to select the color for the flat test pattern. Use the Left/Right Navigation buttons to highlight Off. Selecting a percentage ... the flat pattern at that color ramp. -or- 2. Selecting a color immediately shows that brightness. -or- 2. Use the Navigation buttons on the remote to show or hide the Uniformity Analyzer Test Pattern: Menu > Picture > Advanced Picture > Color Calibration > Color Tuner > Uniformity Analyzer Test Pattern Uniformity...
...brightness for the ramp test pattern. Use the Left/Right Navigation buttons to select Off. 1. Use the Navigation buttons on the remote to select the color for the flat test pattern. Use the Left/Right Navigation buttons to highlight Off. Selecting a percentage ... the flat pattern at that color ramp. -or- 2. Selecting a color immediately shows that brightness. -or- 2. Use the Navigation buttons on the remote to show or hide the Uniformity Analyzer Test Pattern: Menu > Picture > Advanced Picture > Color Calibration > Color Tuner > Uniformity Analyzer Test Pattern Uniformity...

QuickStart Guide
Page 20
... using HDMI 1. Boosts or attenuates loudness at different frequencies. Built-in standard Dolby Audio, DTS Digital Surround, or PCM. Synchronize the display image with the remote. If enabled and the signal source includes Dolby 5.1 AC-4 audio then clarity of dialogue is uncompressed. TIP: Your connected sound bar or audio receiver must...
... using HDMI 1. Boosts or attenuates loudness at different frequencies. Built-in standard Dolby Audio, DTS Digital Surround, or PCM. Synchronize the display image with the remote. If enabled and the signal source includes Dolby 5.1 AC-4 audio then clarity of dialogue is uncompressed. TIP: Your connected sound bar or audio receiver must...

QuickStart Guide
Page 21
... Test Connection Changing the Manual Setup Settings Advanced users can fine-tune the network settings using the Manual Setup feature. The security settings on the remote to enter the TV's MAC address. Your alternate domain name server address. Connecting to a Hidden Network To connect to your network with an Ethernet cable...
... Test Connection Changing the Manual Setup Settings Advanced users can fine-tune the network settings using the Manual Setup feature. The security settings on the remote to enter the TV's MAC address. Your alternate domain name server address. Connecting to a Hidden Network To connect to your network with an Ethernet cable...
QuickStart Guide
Page 22
... Done and press OK. 45% Complete • If the channel scan is completed, you wish to remove, use see Locking and Unlocking Channels on the remote to view. Skipping Channels After a channel scan is canceled, the channels that have been removed with the Skip Channel feature can remove these channels from...
... Done and press OK. 45% Complete • If the channel scan is completed, you wish to remove, use see Locking and Unlocking Channels on the remote to view. Skipping Channels After a channel scan is canceled, the channels that have been removed with the Skip Channel feature can remove these channels from...
QuickStart Guide
Page 24
...: • USA TV - You might not want to block all lower ratings can use the TV's Rating Block feature to block content based on the remote to select On. 18 To enable or disable the Program Rating feature: Menu > TV Channels > Parental Controls > Locks > Off/On Locking and Unlocking Channels When...
...: • USA TV - You might not want to block all lower ratings can use the TV's Rating Block feature to block content based on the remote to select On. 18 To enable or disable the Program Rating feature: Menu > TV Channels > Parental Controls > Locks > Off/On Locking and Unlocking Channels When...
QuickStart Guide
Page 25
...Closed Closed Captions Caption_s. _ Closed Captions Off 2. Note that can also enable/disable accessibility features using the included remote. If included by the broadcaster, provides a narrated description of Digital Closed Captions Digital closed captions can display closed ... Text-to providing intuitive, user-friendly products. Closed captions display a transcription of the screen by the app). 3 ACCESSIBILITY SETTINGS VIZIO is committed to -Speech is spoken. Talk Back* - MENTU IP: Closed CapINtFioOning is selected. To access the Video Description menu...
...Closed Closed Captions Caption_s. _ Closed Captions Off 2. Note that can also enable/disable accessibility features using the included remote. If included by the broadcaster, provides a narrated description of Digital Closed Captions Digital closed captions can display closed ... Text-to providing intuitive, user-friendly products. Closed captions display a transcription of the screen by the app). 3 ACCESSIBILITY SETTINGS VIZIO is committed to -Speech is spoken. Talk Back* - MENTU IP: Closed CapINtFioOning is selected. To access the Video Description menu...
QuickStart Guide
Page 26
... TEXT SAMPLE 20 Change the opacity of the text, such as the text appears. This is red. Use the Up/Down Navigation buttons on the remote to highlight the setting you wish to change, then use the Left/Right Navigation buttons to change the settings (choose "As Broadcast" to keep default...
... TEXT SAMPLE 20 Change the opacity of the text, such as the text appears. This is red. Use the Up/Down Navigation buttons on the remote to highlight the setting you wish to change, then use the Left/Right Navigation buttons to change the settings (choose "As Broadcast" to keep default...
QuickStart Guide
Page 27
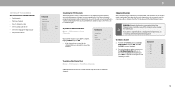
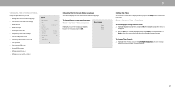
... Saving Time on or off • Set up timers • Set a system PIN code • Adjust CEC settings • Manage paired devices • Manage a voice remote control System Menu Language Time TV Name Input Name Hide from Input List Power Mode USB Power Power Indicator Timers System PIN Code English Living...
... Saving Time on or off • Set up timers • Set a system PIN code • Adjust CEC settings • Manage paired devices • Manage a voice remote control System Menu Language Time TV Name Input Name Hide from Input List Power Mode USB Power Power Indicator Timers System PIN Code English Living...

QuickStart Guide
Page 29
... . To set the Auto Power Off feature: Menu > System > Timers > Auto Power Off > Off Setting Timers When activated, the TV's timer will turn on the remote to highlight the period of time after which you prefer the light to turn the Power Indicator Light On or Off: Menu > System > Power Indicator...
... . To set the Auto Power Off feature: Menu > System > Timers > Auto Power Off > Off Setting Timers When activated, the TV's timer will turn on the remote to highlight the period of time after which you prefer the light to turn the Power Indicator Light On or Off: Menu > System > Power Indicator...

QuickStart Guide
Page 30
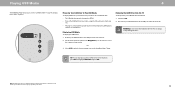
...: Not all HDMI devices support CEC. Managing Mobile Devices Your TV can be paired with the VIZIO TV remote, without any programming Menu > System > CEC Select a setting and then press OK. • CEC - Using CEC, your VIZIO TV remote can easily control your TV across multiple devices. 3 Setting a System PIN Code You can set...
...: Not all HDMI devices support CEC. Managing Mobile Devices Your TV can be paired with the VIZIO TV remote, without any programming Menu > System > CEC Select a setting and then press OK. • CEC - Using CEC, your VIZIO TV remote can easily control your TV across multiple devices. 3 Setting a System PIN Code You can set...
QuickStart Guide
Page 34
... from the home screen. SmartCast Home makes finding something to control and configure your TV Visit www.vizio.com/smartcastapp for minimium requirements. 28 Home Button Launch SmartCast Home with Google Assistant and other details.... from the home screen. • Unlock your content like it here, or visit www.vizio.com/smartcastapp on yCoCur remote. SmartCast Home™ INPUT 4 What is SmartCast Home?MENU INFO SmartCast Home lets you ... the SmartCast Mobile™ App Download the VIZIO SmartCast Mobile app and turn your smartphone into a remote to watch easy and fun.
... from the home screen. SmartCast Home makes finding something to control and configure your TV Visit www.vizio.com/smartcastapp for minimium requirements. 28 Home Button Launch SmartCast Home with Google Assistant and other details.... from the home screen. • Unlock your content like it here, or visit www.vizio.com/smartcastapp on yCoCur remote. SmartCast Home™ INPUT 4 What is SmartCast Home?MENU INFO SmartCast Home lets you ... the SmartCast Mobile™ App Download the VIZIO SmartCast Mobile app and turn your smartphone into a remote to watch easy and fun.

QuickStart Guide
Page 35
... 205 The City The Area 4 INPUT How to Launch WatchFree To launch and begin watching entertainment offered on WatchFree: • Press the WatchFree bMuENttUon onINyFoOur remote. -or- • Select WatchFree from the list of inputs. BACK CC + PREV + VOL CH _ _ 1 2 3 4 5 6 7 8 9 PIC 0 - Use ...Dark Zone" 2018 • 2h • TV-G • Sci-Fi Outer space: The closest known resemblance to move about freely. VIZIO WatchFree takes your cord-cutting entertainment experience one man's journey in Canada. And it's all FREE-no fees, no friction, allowing ...
... 205 The City The Area 4 INPUT How to Launch WatchFree To launch and begin watching entertainment offered on WatchFree: • Press the WatchFree bMuENttUon onINyFoOur remote. -or- • Select WatchFree from the list of inputs. BACK CC + PREV + VOL CH _ _ 1 2 3 4 5 6 7 8 9 PIC 0 - Use ...Dark Zone" 2018 • 2h • TV-G • Sci-Fi Outer space: The closest known resemblance to move about freely. VIZIO WatchFree takes your cord-cutting entertainment experience one man's journey in Canada. And it's all FREE-no fees, no friction, allowing ...
QuickStart Guide
Page 36
... your TV and play . -or- 3. Note: The image shown here is for illustrative purposes only and may be formatted as FAT32. • Files on the remote to select the content you want to play media from the bottom streaming icons on . Displaying USB Media To display your USB flash drive from...
... your TV and play . -or- 3. Note: The image shown here is for illustrative purposes only and may be formatted as FAT32. • Files on the remote to select the content you want to play media from the bottom streaming icons on . Displaying USB Media To display your USB flash drive from...


