
Download
Page 9
...images below to ensure nothing is not properly secured Quick Start Guide Power Cord 4 x 20mm M5 Phillips Screws 4 x 23mm M5 Phillips Screws PACKAGE CONTENTS 3 TV ON STAND However, the TV can still fall over . Installing the TV 1 INSPECTING THE PACKAGE CONTENTS Before installing ...in two ways: • On a flat surface, using the included stand • On a wall, using a VESA-standard wall mount (not included) Installing the TV Stand Your TV includes a stand designed to inspect the package contents. VIZIO LED HDTV with Stand INPUT LIST EXIT MENU INFO BACK VOL GUIDE CH 3D 1 2 3...
...images below to ensure nothing is not properly secured Quick Start Guide Power Cord 4 x 20mm M5 Phillips Screws 4 x 23mm M5 Phillips Screws PACKAGE CONTENTS 3 TV ON STAND However, the TV can still fall over . Installing the TV 1 INSPECTING THE PACKAGE CONTENTS Before installing ...in two ways: • On a flat surface, using the included stand • On a wall, using a VESA-standard wall mount (not included) Installing the TV Stand Your TV includes a stand designed to inspect the package contents. VIZIO LED HDTV with Stand INPUT LIST EXIT MENU INFO BACK VOL GUIDE CH 3D 1 2 3...

Download
Page 10
Place the TV screen-down on a soft surface, such as shown. 4 Insert and tighten the four (4) included M5 20mm Phillips screws into the back of the TV. To prevent scratches or damage to the screen, place the TV on a clean, flat surface. Align the neck piece with the back of the TV as carpet, rug, or blanket. 2. 1 To install the base: 1. Remove any plastic wrapping from the TV and stand. It is recommended that two people take part in the base installation.
Place the TV screen-down on a soft surface, such as shown. 4 Insert and tighten the four (4) included M5 20mm Phillips screws into the back of the TV. To prevent scratches or damage to the screen, place the TV on a clean, flat surface. Align the neck piece with the back of the TV as carpet, rug, or blanket. 2. 1 To install the base: 1. Remove any plastic wrapping from the TV and stand. It is recommended that two people take part in the base installation.

Download
Page 12
... the installation. Remove the base and neck by loosening and removing the screws. 4. Consult the information below to the wall. 6 1 WALL-MOUNT SCREW LOCATIONS For some wall mounts, you choose is clear of the TV. M602i-B3 M702i-B3 Screw Size: Hole Pattern: Weight w/o Stand: M6 400mm (V) x 400mm (H) 53.77 lbs M6 400mm (V) x 400mm (H) 60.56 lbs...
... the installation. Remove the base and neck by loosening and removing the screws. 4. Consult the information below to the wall. 6 1 WALL-MOUNT SCREW LOCATIONS For some wall mounts, you choose is clear of the TV. M602i-B3 M702i-B3 Screw Size: Hole Pattern: Weight w/o Stand: M6 400mm (V) x 400mm (H) 53.77 lbs M6 400mm (V) x 400mm (H) 60.56 lbs...

Download
Page 5
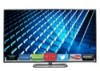
PACKAGE CONTENTS VIZIO LED HDTV with Stand Two-Sided Remote with Keyboard (Batteries Included) This Quick Start Guide Power Cord 4 x 20mm M5 Phillips Screws 4 x 23mm M5 Phillips Screws
PACKAGE CONTENTS VIZIO LED HDTV with Stand Two-Sided Remote with Keyboard (Batteries Included) This Quick Start Guide Power Cord 4 x 20mm M5 Phillips Screws 4 x 23mm M5 Phillips Screws


