User Manual
Page 2
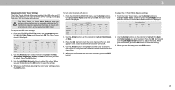
... heat source, such as the power-supply cord or plug is intended to alert you register your new VIZIO product, read the accompanying important warning or notice. Safet ertificatio THANK YOU FOR CHOOSING VIZIO And congratulations on your TV. When you see this symbol, please read the accompanying helpful tip. • Use only with the cart, stand, tripod, bracket, or table specified...
... heat source, such as the power-supply cord or plug is intended to alert you register your new VIZIO product, read the accompanying important warning or notice. Safet ertificatio THANK YOU FOR CHOOSING VIZIO And congratulations on your TV. When you see this symbol, please read the accompanying helpful tip. • Use only with the cart, stand, tripod, bracket, or table specified...

User Manual
Page 3
..., particularly to loud sounds can be avoided by the manufacturer of the television set on the power cord may be located between the television set and the supporting furniture. • Unplug your hearing dropped and the housing is • WARNING: xposure to children, can damage your TV during a lightning storm or when it cannot be replaced when using different voltage than...
..., particularly to loud sounds can be avoided by the manufacturer of the television set on the power cord may be located between the television set and the supporting furniture. • Unplug your hearing dropped and the housing is • WARNING: xposure to children, can damage your TV during a lightning storm or when it cannot be replaced when using different voltage than...

User Manual
Page 6
... Settings 34 Using the Parental Controls 34 Accessing the Parental Controls Menu 34 Enabling or Disabling Program Ratings 34 Locking and Unlocking Channels 34 Blocking and Unblocking Content by Rating 35 Changing the Parental Control PIN 35 Resetting the Content Locks 35 Changing the View Mode Settings 36 Changing the Screen Aspect Ratio 36 Adjusting the CEC Settings 37 Turning the ower Indicator On or Off 37 Using the Reset & Admin Menu 38 Restoring the TV to Play USB Media 43 Displaying USB Media 43 Removing the USB...
... Settings 34 Using the Parental Controls 34 Accessing the Parental Controls Menu 34 Enabling or Disabling Program Ratings 34 Locking and Unlocking Channels 34 Blocking and Unblocking Content by Rating 35 Changing the Parental Control PIN 35 Resetting the Content Locks 35 Changing the View Mode Settings 36 Changing the Screen Aspect Ratio 36 Adjusting the CEC Settings 37 Turning the ower Indicator On or Off 37 Using the Reset & Admin Menu 38 Restoring the TV to Play USB Media 43 Displaying USB Media 43 Removing the USB...

User Manual
Page 9
... the appropriate mount for the weight load of this page to help you choose is clear of the TV. To install your TV, you have determined that can begin the installation. emove the stands by loosening and removing the screws. 4. e sure the mount you . Disconnect any cables connected to the wall, carefully following the instructions that came with a UL-listed wall mount bracket rated for your mount. Use only...
... the appropriate mount for the weight load of this page to help you choose is clear of the TV. To install your TV, you have determined that can begin the installation. emove the stands by loosening and removing the screws. 4. e sure the mount you . Disconnect any cables connected to the wall, carefully following the instructions that came with a UL-listed wall mount bracket rated for your mount. Use only...

User Manual
Page 10
... www.vi io.com environment. hen needed, VIZIO recommends replacing the batteries that the and - Display the on -screen menu. 11. OK / Enter - Channel Up/Down - PIC - onfirm channel or passcode entered using the number pad. 10. Insert two batteries into the remote control. WARNING: keep the remote control batteries away from children. Closed Captions - or video description hold key for accessibility options may cause choking and or...
... www.vi io.com environment. hen needed, VIZIO recommends replacing the batteries that the and - Display the on -screen menu. 11. OK / Enter - Channel Up/Down - PIC - onfirm channel or passcode entered using the number pad. 10. Insert two batteries into the remote control. WARNING: keep the remote control batteries away from children. Closed Captions - or video description hold key for accessibility options may cause choking and or...

User Manual
Page 13
...; Channel Digital Audio à Spanish/ Video Description. * Only available when Talk Back is spoken. Select Slow, Normal (Default), or Fast. • Zoom Mode - ACCESSIBILITY Talk ack Speech Rate Zoom Mode Off Normal Off 2 13 To access the Accessibility menu: 1. Adjusts the rate in which Text-to-Speech is turned On. ** Input must be set to tuner for Closed Caption or Video Description to speak all settings changes adjustments, and status using the remote in settings menu...
...; Channel Digital Audio à Spanish/ Video Description. * Only available when Talk Back is spoken. Select Slow, Normal (Default), or Fast. • Zoom Mode - ACCESSIBILITY Talk ack Speech Rate Zoom Mode Off Normal Off 2 13 To access the Accessibility menu: 1. Adjusts the rate in which Text-to-Speech is turned On. ** Input must be set to tuner for Closed Caption or Video Description to speak all settings changes adjustments, and status using the remote in settings menu...

User Manual
Page 14
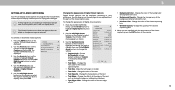
...CHANGING THE INPUT SOURCE External devices such as DVD players, Blu-ray Players, and video game consoles can : • Adjust the Picture settings • Adjust the Audio settings VIZIO • Setting the Timers TV SETTINGS Wide • Adjust the Channel settings Picture Audio • Set up Closed Captioning Timers Network Exit • Name Inputs Channels • Adjust TV settings CC Closed Captions Devices • View User Manual System Input User Manual To open the on-screen menu, press the MENU button on the Input menu to select that appear on the remote...
...CHANGING THE INPUT SOURCE External devices such as DVD players, Blu-ray Players, and video game consoles can : • Adjust the Picture settings • Adjust the Audio settings VIZIO • Setting the Timers TV SETTINGS Wide • Adjust the Channel settings Picture Audio • Set up Closed Captioning Timers Network Exit • Name Inputs Channels • Adjust TV settings CC Closed Captions Devices • View User Manual System Input User Manual To open the on-screen menu, press the MENU button on the Input menu to select that appear on the remote...
User Manual
Page 15
... the image is being stretched, the display image may vary by Input source. If the program is already formatted for any video content on the top and bottom of the screen. Tip: The aspect ratio cannot be changed for Ultra HD content or for widescreen viewing (1.85:1 or 2.35:1), then black bars will appear on HDMI-5. 3 15 Each mode displays the picture differently. stretched.
... the image is being stretched, the display image may vary by Input source. If the program is already formatted for any video content on the top and bottom of the screen. Tip: The aspect ratio cannot be changed for Ultra HD content or for widescreen viewing (1.85:1 or 2.35:1), then black bars will appear on HDMI-5. 3 15 Each mode displays the picture differently. stretched.

User Manual
Page 16
... preferences and viewing conditions. Adjusts the white level of the picture colors. • Tint - Adjusts the intensity of the picture. This setting is too low, the picture may appear dark. 3 ADJUSTING THE PICTURE SETTINGS Your TV display can be too dark to distinguish details. Use the Arrow buttons on the remote to highlight that does not otherwise exist. 5. Sharpness - For the best picture, switch to values that Calibrated mode does not...
... preferences and viewing conditions. Adjusts the white level of the picture colors. • Tint - Adjusts the intensity of the picture. This setting is too low, the picture may appear dark. 3 ADJUSTING THE PICTURE SETTINGS Your TV display can be too dark to distinguish details. Use the Arrow buttons on the remote to highlight that does not otherwise exist. 5. Sharpness - For the best picture, switch to values that Calibrated mode does not...
User Manual
Page 18
... Save Picture Mode Unlock Picture Mode Delete Picture Mode - To save a group of the preset mode. • The custom picture mode is saved) • Reset Picture Mode† - The LOCK PICTURE MODE menu is displayed. 2. Press the EXIT button to factory default values. Make any preset picture mode will be locked/unlocked with a unique PIN to prevent accidental changes to exit the menu screens. 3 Adjusting the Picture Mode Edit Settings Picture Mode Edit Settings allow you wish to adjust, then press OK to change the setting: • Save Picture Mode - Inputs...
... Save Picture Mode Unlock Picture Mode Delete Picture Mode - To save a group of the preset mode. • The custom picture mode is saved) • Reset Picture Mode† - The LOCK PICTURE MODE menu is displayed. 2. Press the EXIT button to factory default values. Make any preset picture mode will be locked/unlocked with a unique PIN to prevent accidental changes to exit the menu screens. 3 Adjusting the Picture Mode Edit Settings Picture Mode Edit Settings allow you wish to adjust, then press OK to change the setting: • Save Picture Mode - Inputs...
User Manual
Page 20
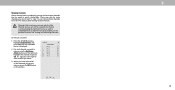
... EXIT button. 3 Adjusting the Color Tuner Settings The Color Tuner settings allow technicians to manually calibrate the TV. Calibration requires specialized training, an input with the color channels, press the EXIT button. To adjust the HSB color settings: 1. From the COLOR CALIBRATION menu, use the Arrow buttons to highlight Color Tuner, and then press OK. To turn off for testing, and display color bar, at the same time. 5. From the COLOR CALIBRATION menu, use the Arrow buttons to highlight Color Tuner, and then press OK. Color Tuner Red Green Blue...
... EXIT button. 3 Adjusting the Color Tuner Settings The Color Tuner settings allow technicians to manually calibrate the TV. Calibration requires specialized training, an input with the color channels, press the EXIT button. To adjust the HSB color settings: 1. From the COLOR CALIBRATION menu, use the Arrow buttons to highlight Color Tuner, and then press OK. To turn off for testing, and display color bar, at the same time. 5. From the COLOR CALIBRATION menu, use the Arrow buttons to highlight Color Tuner, and then press OK. Color Tuner Red Green Blue...

User Manual
Page 22
... loudness of processing for audio with the TV's volume controls, or select Fixed if an external audio device (sound bar or AV receiver) will control the volume. • Equalizer - Adjusts the synchronization between program content, AV formats, and input sources. Changes the type of the audio output from the TV's internal speakers. Select Auto, PCM, Dolby D or Bitstream. You must select Bitstream for digital audio out and HDMI ARC output when connected to change to highlight a frequency and...
... loudness of processing for audio with the TV's volume controls, or select Fixed if an external audio device (sound bar or AV receiver) will control the volume. • Equalizer - Adjusts the synchronization between program content, AV formats, and input sources. Changes the type of the audio output from the TV's internal speakers. Select Auto, PCM, Dolby D or Bitstream. You must select Bitstream for digital audio out and HDMI ARC output when connected to change to highlight a frequency and...

User Manual
Page 25
... or RJ45 MAC address may be needed to set up your network when you have connected the TV to your network when yoAuBChave connected the TV to your network with an Ethernet cable, you to enter the TV's MAC address in use the Left/Right Arrow buttons to change advanced network settings: 1. Sleep Timer Picture Audio Network Settings Help 4. Press the MENU button on the remote to highlight Network and press OK. DNS Server...
... or RJ45 MAC address may be needed to set up your network when you have connected the TV to your network when yoAuBChave connected the TV to your network with an Ethernet cable, you to enter the TV's MAC address in use the Left/Right Arrow buttons to change advanced network settings: 1. Sleep Timer Picture Audio Network Settings Help 4. Press the MENU button on the remote to highlight Network and press OK. DNS Server...

User Manual
Page 27
...-Cwall connection (without a cable box). A channel scan is complete. Wide Zoom Normal Panoramic Wide Zoom Normal Panoramic Exit 2D 3D Exit 2D 3D ABC Input Wide ACBCC Input Wide CC Sleep Timer Sleep Timer Picture Audio Picture Audio Network Settings Help Network Settings Help You can select either Antenna (Over-the-air) or Cable (Out-of-the-wall) connections. 1. From the CHANNELS menu, highlight Channel Source and press OK. NeWtwaoirtk uSnetttiilngths e cHhelapnnel scan is required for free over-the-air channels (using . 3 SETTING UP CHANNELS...
...-Cwall connection (without a cable box). A channel scan is complete. Wide Zoom Normal Panoramic Wide Zoom Normal Panoramic Exit 2D 3D Exit 2D 3D ABC Input Wide ACBCC Input Wide CC Sleep Timer Sleep Timer Picture Audio Picture Audio Network Settings Help Network Settings Help You can select either Antenna (Over-the-air) or Cable (Out-of-the-wall) connections. 1. From the CHANNELS menu, highlight Channel Source and press OK. NeWtwaoirtk uSnetttiilngths e cHhelapnnel scan is required for free over-the-air channels (using . 3 SETTING UP CHANNELS...
User Manual
Page 28
... view. The SKIP CHANNEL menu is entered using the Number Pad. See Locking and Unlocking Channels. VIZIO SKIP CHANNEL 1 Test 0 1 Test 1 P 1-2 Test 2 P 2 Test 3 2-2 Test 4 P 2-3 Test 5 Wide Zoom Normal Panoramic Exit 2D 3D ABC Input Wide CC Sleep Timer Picture Audio Network Settings Help 3 28 If you wish to completely block a channel from the TV's memory with the Skip Channel feature can remove these channels from being viewed, use the Up/Down Arrow buttons on the remote...
... view. The SKIP CHANNEL menu is entered using the Number Pad. See Locking and Unlocking Channels. VIZIO SKIP CHANNEL 1 Test 0 1 Test 1 P 1-2 Test 2 P 2 Test 3 2-2 Test 4 P 2-3 Test 5 Wide Zoom Normal Panoramic Exit 2D 3D ABC Input Wide CC Sleep Timer Picture Audio Network Settings Help 3 28 If you wish to completely block a channel from the TV's memory with the Skip Channel feature can remove these channels from being viewed, use the Up/Down Arrow buttons on the remote...
User Manual
Page 30
... Sleep Timer Picture Audio Network Settings Help Press the MENU button on the remote to change each Input settWinidge. Use the Arrow buttons on the remote to select the caption channel you are viewing is displayed. CC • Text Style - Change the transparency of the text. • Text Opacity - Change the color of the closed captioning box. • Window Opacity - WidehenZyooomu areNosrmaatlisfPieandorwamitich the appearance of the closed captions, press the EXIT button on the remote to highlight either Analog or Digital Closed Captions...
... Sleep Timer Picture Audio Network Settings Help Press the MENU button on the remote to change each Input settWinidge. Use the Arrow buttons on the remote to select the caption channel you are viewing is displayed. CC • Text Style - Change the transparency of the text. • Text Opacity - Change the color of the closed captioning box. • Window Opacity - WidehenZyooomu areNosrmaatlisfPieandorwamitich the appearance of the closed captions, press the EXIT button on the remote to highlight either Analog or Digital Closed Captions...

User Manual
Page 36
... displayed. ills a p or p screen. • 1080p and 1080i HD - ills a p screen • 1080p and 1080i - 3 Changing the View Mode Settings ou can display images in the space to right edges. Some programs have black bars on the remote. Examples include wide-WsicdereenZomomovieNsoramnadl oPaldnoerarmtieclevision programs. To change the view mode settings: 1. If the program is open. Use the Arrow buttons on the remote to highlight System and press OK. Each mode displays the picture...
... displayed. ills a p or p screen. • 1080p and 1080i HD - ills a p screen • 1080p and 1080i - 3 Changing the View Mode Settings ou can display images in the space to right edges. Some programs have black bars on the remote. Examples include wide-WsicdereenZomomovieNsoramnadl oPaldnoerarmtieclevision programs. To change the view mode settings: 1. If the program is open. Use the Arrow buttons on the remote to highlight System and press OK. Each mode displays the picture...

User Manual
Page 49
... the Power/Standby button on the remote or on the back of the channel may be low. See Replacing the Batteries. Ensure your device's user manual for Channels on . and + symbols. • Replace the batteries with 480i input, press the button on the remote to the TV, scan for the best signal. Ensure your devices with new ones. See Adjusting the Picture Settings. • Select a pre-set picture mode. Connect your antenna is connected securely...
... the Power/Standby button on the remote or on the back of the channel may be low. See Replacing the Batteries. Ensure your device's user manual for Channels on . and + symbols. • Replace the batteries with 480i input, press the button on the remote to the TV, scan for the best signal. Ensure your devices with new ones. See Adjusting the Picture Settings. • Select a pre-set picture mode. Connect your antenna is connected securely...

User Manual
Page 56
... your product to a (j) products with VIZIO. BEFORE USING YOUR VIZIO PRODUCT, hours are unable to ALL USER DATA AND DOWNLOADED APPLICATIONS STORED ON A resolve the issue informally and wish to file a formal claim against defects in materials and workmanship serviced, regardless of warranty service. attempt to resolve the issue informally with unreadable or removed serial numbers; (k) products This warranty contains a binding arbitration agreement and...
... your product to a (j) products with VIZIO. BEFORE USING YOUR VIZIO PRODUCT, hours are unable to ALL USER DATA AND DOWNLOADED APPLICATIONS STORED ON A resolve the issue informally and wish to file a formal claim against defects in materials and workmanship serviced, regardless of warranty service. attempt to resolve the issue informally with unreadable or removed serial numbers; (k) products This warranty contains a binding arbitration agreement and...

User Manual
Page 58
... usually be serviced in accordance be no charge for parts or labor during the warranty WARRANTY OF MERCHANTABILITY AND FITNESS FOR A PARTICULAR look for the "zero bright pixel" guarantee on select new product If VIZIO determines that affords or power surges; (e) signal issues; (f) damage from shipping; (g) set -up, or repairs attempted by anyone other forth below for additional help and troubleshooting. The...
... usually be serviced in accordance be no charge for parts or labor during the warranty WARRANTY OF MERCHANTABILITY AND FITNESS FOR A PARTICULAR look for the "zero bright pixel" guarantee on select new product If VIZIO determines that affords or power surges; (e) signal issues; (f) damage from shipping; (g) set -up, or repairs attempted by anyone other forth below for additional help and troubleshooting. The...


