
E420VSE User Manual
Page 1
USER GUIDE MMODDEELLS // E3D320VX // EE34D42200VVX SE // E3D470VX INSTALLING YOUR new TV CONTROLS & CONNECTIONS CONNECTING YOUR DEVICES USING THE ON-SCREEN MENU USING USB photo slideshow TROUBLESHOOTING & SUPPORT SPECs, warranty & LEGAL
USER GUIDE MMODDEELLS // E3D320VX // EE34D42200VVX SE // E3D470VX INSTALLING YOUR new TV CONTROLS & CONNECTIONS CONNECTING YOUR DEVICES USING THE ON-SCREEN MENU USING USB photo slideshow TROUBLESHOOTING & SUPPORT SPECs, warranty & LEGAL

E420VSE User Manual
Page 3
...(including amplifiers) that you see this symbol, please read the accompanying helpful tip. To get the most out of your new VIZIO product, read the accompanying important warning or notice. It is designed and manufactured to operate within defined design limits. Misuse may ...or fire.To prevent your TV from the apparatus. • Only use this apparatus near any ventilation openings. Welcome Thank You for Choosing VIZIO And congratulations on your investment beyond the standard warranty, VIZIO offers on or pinched, particularly at www.VIZIO.com • Complete and...
...(including amplifiers) that you see this symbol, please read the accompanying helpful tip. To get the most out of your new VIZIO product, read the accompanying important warning or notice. It is designed and manufactured to operate within defined design limits. Misuse may ...or fire.To prevent your TV from the apparatus. • Only use this apparatus near any ventilation openings. Welcome Thank You for Choosing VIZIO And congratulations on your investment beyond the standard warranty, VIZIO offers on or pinched, particularly at www.VIZIO.com • Complete and...

E420VSE User Manual
Page 4
.... • Never push any heat source, such as when the power-supply cord or plug is always flowing into the slots and openings on your TV to avoid causing fire, electric shock, or component damage. • A distance of electric shock to persons. • Do not overload power strips...the type of power supplied to qualified service personnel. Doing so could short circuit parts causing a fire or electric shock. Do not install your TV. This may cause fire or electric shock. • Do not touch the power cord during lightning storms or when unused for ventilation. Overloading ...
.... • Never push any heat source, such as when the power-supply cord or plug is always flowing into the slots and openings on your TV to avoid causing fire, electric shock, or component damage. • A distance of electric shock to persons. • Do not overload power strips...the type of power supplied to qualified service personnel. Doing so could short circuit parts causing a fire or electric shock. Do not install your TV. This may cause fire or electric shock. • Do not touch the power cord during lightning storms or when unused for ventilation. Overloading ...

E420VSE User Manual
Page 5
...other moisture. - To reduce the risk of electrical shock to dripping or splashing and no objects filled with instructions. Do not try to repair your TV will not be exposed to persons. Pulling on the apparatus. • The mains plug or appliance coupler is used as sunshine, fire or the...to alert the user to do not perform any servicing other than that may be placed on the power cord may function abnormally. Operating your TV in environments with heavy dust or high humidity. Do not expose batteries to leak which can damage the remote control or injure the operator....
...other moisture. - To reduce the risk of electrical shock to dripping or splashing and no objects filled with instructions. Do not try to repair your TV will not be exposed to persons. Pulling on the apparatus. • The mains plug or appliance coupler is used as sunshine, fire or the...to alert the user to do not perform any servicing other than that may be placed on the power cord may function abnormally. Operating your TV in environments with heavy dust or high humidity. Do not expose batteries to leak which can damage the remote control or injure the operator....

E420VSE User Manual
Page 6
... through an antenna now need a converter box to continue to digital television broadcasting was complete on June 12, 2009. Analog-only TVs should continue to work as appropriate: FCC (US Federal Communications Commission) Web: www.fcc.gov Phone: 1-888-CALL-FCC (1-888-225-5322) TTY: 1-888-..., please contact the parties listed below, as before to digital-only broadcasting. DTV Transition Advisory The nationwide switch to receive over-the-air TV. No extra converter box is needed. Watch your local stations to find out when they will turn off their analog signal and switch to receive...
... through an antenna now need a converter box to continue to digital television broadcasting was complete on June 12, 2009. Analog-only TVs should continue to work as appropriate: FCC (US Federal Communications Commission) Web: www.fcc.gov Phone: 1-888-CALL-FCC (1-888-225-5322) TTY: 1-888-..., please contact the parties listed below, as before to digital-only broadcasting. DTV Transition Advisory The nationwide switch to receive over-the-air TV. No extra converter box is needed. Watch your local stations to find out when they will turn off their analog signal and switch to receive...

E420VSE User Manual
Page 7
...locate the antenna near overhead light or power circuits, or where it is left unattended or unused for long periods of time, unplug the TV from the wall outlet and disconnect the antenna or cable system. Ground Clamp Antenna Lead In Wire Electric Service Equipment Antenna Discharge Unit (NEC...charges. Remember, the screen of the coaxial cable is intended to be connected to the TV, make sure that the antenna or cable system is electrically grounded to grounding electrodes, and requirements of the TV during a lightning storm or when it could fall into such power lines or circuits. ...
...locate the antenna near overhead light or power circuits, or where it is left unattended or unused for long periods of time, unplug the TV from the wall outlet and disconnect the antenna or cable system. Ground Clamp Antenna Lead In Wire Electric Service Equipment Antenna Discharge Unit (NEC...charges. Remember, the screen of the coaxial cable is intended to be connected to the TV, make sure that the antenna or cable system is electrically grounded to grounding electrodes, and requirements of the TV during a lightning storm or when it could fall into such power lines or circuits. ...

E420VSE User Manual
Page 8
... Position 22 Resetting the Picture Settings 22 Adjusting the Audio Settings 23 Adjusting the Advanced Audio Settings 24 Resetting the Audio Settings 25 Changing the TV Settings 25 Changing the Input Source 25 Setting the Tuner Mode 26 Scanning for Channels 26 Adding New Channels 26 Skipping Channels 27 Changing the... Language 31 Setting the Time and Local Settings 31 Adjusting the CEC Settings 31 Using the Help Menu 32 Displaying System Information 33 Resetting the TV Settings 33 Restoring the TV to Factory Default Settings 33 Using Setup Wizard 34 Using the Info Window 35 1
... Position 22 Resetting the Picture Settings 22 Adjusting the Audio Settings 23 Adjusting the Advanced Audio Settings 24 Resetting the Audio Settings 25 Changing the TV Settings 25 Changing the Input Source 25 Setting the Tuner Mode 26 Scanning for Channels 26 Adding New Channels 26 Skipping Channels 27 Changing the... Language 31 Setting the Time and Local Settings 31 Adjusting the CEC Settings 31 Using the Help Menu 32 Displaying System Information 33 Resetting the TV Settings 33 Restoring the TV to Factory Default Settings 33 Using Setup Wizard 34 Using the Info Window 35 1

E420VSE User Manual
Page 9
Using the USB Media Player 36 Using the USB Photo slideshow 36 Connecting a USB Thumb Drive to the TV 36 Playing USB Media 36 Troubleshooting & Technical Support 38 Specifications 41 Limited Warranty 43 Legal & Compliance 44 2
Using the USB Media Player 36 Using the USB Photo slideshow 36 Connecting a USB Thumb Drive to the TV 36 Playing USB Media 36 Troubleshooting & Technical Support 38 Specifications 41 Limited Warranty 43 Legal & Compliance 44 2

E420VSE User Manual
Page 10
Use the images below to ensure nothing is not properly secured VIZIO LCD HDTV 4 x M4 8mm Screws Quick Start Guide Remote Control 4 x M4 14mm with Batteries Screws Package Contents 3 TV on an uneven, unstable, or non-level surface • It is pushed, pulled, or otherwise improperly moved •...; If an earthquake occurs and the TV is missing or damaged. However, the TV can begin installing the TV. Your TV can be installed in two ways: • On a flat surface, using the included stand • On a ...
Use the images below to ensure nothing is not properly secured VIZIO LCD HDTV 4 x M4 8mm Screws Quick Start Guide Remote Control 4 x M4 14mm with Batteries Screws Package Contents 3 TV on an uneven, unstable, or non-level surface • It is pushed, pulled, or otherwise improperly moved •...; If an earthquake occurs and the TV is missing or damaged. However, the TV can begin installing the TV. Your TV can be installed in two ways: • On a flat surface, using the included stand • On a ...

E420VSE User Manual
Page 11
To prevent scratches or damage to the screen, place the TV on a clean, flat surface. Align the neck piece with the TV and tighten the four (4) included 14mm phillips screws. 4 Place the TV screen-down on a soft surface, such as a carpet, rug, or blanket. Then slide the collar piece over the neck. 2. Align the base with the base stand and tighten the four (4) included 8mm phillips screws from the bottom. 1 To install the TV stand: 1 2 Assembled Base 1.
To prevent scratches or damage to the screen, place the TV on a clean, flat surface. Align the neck piece with the TV and tighten the four (4) included 14mm phillips screws. 4 Place the TV screen-down on a soft surface, such as a carpet, rug, or blanket. Then slide the collar piece over the neck. 2. Align the base with the base stand and tighten the four (4) included 8mm phillips screws from the bottom. 1 To install the TV stand: 1 2 Assembled Base 1.

E420VSE User Manual
Page 12
Move the TV with attached stand into place. 4. 1 3. Slide the base cover downward into an upright position and place on a flat, level, and stable surface. 5. To ensure proper ventilation, leave at least 1" of space between the back of the TV and any other objects (walls, etc). 5
Move the TV with attached stand into place. 4. 1 3. Slide the base cover downward into an upright position and place on a flat, level, and stable surface. 5. To ensure proper ventilation, leave at least 1" of space between the back of the TV and any other objects (walls, etc). 5

E420VSE User Manual
Page 13
...surface is capable of supporting the weight of this TV. Use only with right-angle connectors. For some wall mounts, you may want to help you choose is clear of this TV. See Appendix B - Consult the information below to the wall. 6 E420VSE Screw Size: Screw Length: Hole Pattern: M6 12mm... 300mm (V) x 400mm (H) Be sure the mount you . This allows the TV to rest closer to find the appropriate mount for ...
...surface is capable of supporting the weight of this TV. Use only with right-angle connectors. For some wall mounts, you may want to help you choose is clear of this TV. See Appendix B - Consult the information below to the wall. 6 E420VSE Screw Size: Screw Length: Hole Pattern: M6 12mm... 300mm (V) x 400mm (H) Be sure the mount you . This allows the TV to rest closer to find the appropriate mount for ...

E420VSE User Manual
Page 15
Increase or decrease volume level INPUT - CHANNEL UP/DOWN - VOLUME UP/DOWN - Change input source. 8 2 Side Panel Open the on . Change the channel. Side Panel POWER - Turn TV off or on -screen menu. MENU -
Increase or decrease volume level INPUT - CHANNEL UP/DOWN - VOLUME UP/DOWN - Change input source. 8 2 Side Panel Open the on . Change the channel. Side Panel POWER - Turn TV off or on -screen menu. MENU -
E420VSE User Manual
Page 17
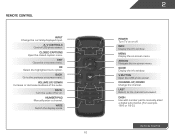
... Control Dash Use with number pad to the channel last viewed. Ok Select the highlighted menu option. WIDE Switch the display mode. 10 2 Power Turn TV on or off or on. Channel Up/Down Change the channel. Back Go to the previous on -screen menu. Volume Up/Down Increase or decrease...
... Control Dash Use with number pad to the channel last viewed. Ok Select the highlighted menu option. WIDE Switch the display mode. 10 2 Power Turn TV on or off or on. Channel Up/Down Change the channel. Back Go to the previous on -screen menu. Volume Up/Down Increase or decrease...

E420VSE User Manual
Page 19
... your device has a video port that matches an available port on . BACK OF TV Connect to the TV and the device. 4. Turn the TV and your device on the TV (HDMI, Component, etc). 2. Set the TV's input to match the connection you used to display output from most devices. 1. Verify ...that your device off. 3. Connecting Your Devices Connecting A Device Your TV can be used (HDMI, Component, etc). Connect the appropriate cable (not included) to component inputs: Y/V L R 3 Cable/Satellite Box DVD/Blu...
... your device has a video port that matches an available port on . BACK OF TV Connect to the TV and the device. 4. Turn the TV and your device on the TV (HDMI, Component, etc). 2. Set the TV's input to match the connection you used to display output from most devices. 1. Verify ...that your device off. 3. Connecting Your Devices Connecting A Device Your TV can be used (HDMI, Component, etc). Connect the appropriate cable (not included) to component inputs: Y/V L R 3 Cable/Satellite Box DVD/Blu...

E420VSE User Manual
Page 20
This cable transmits audio. 3. Connecting A PC Your TV can be used to your PC and the RGB port on the back of your TV. Connect a VGA cable (not included) to display output from a personal computer. Connect a 3.5mm cable (not included) to match the resolution of the TV. See Appendix B - To use your PC and the PC Audio In port on the back of the TV. Set your PC's resolution to your TV as a PC display: 1. Specifications. 3 Personal Computer VGA Cable (For Video) 3.5mm Cable (For Audio) CONNECTING A PC 13 This cable transmits video. 2.
This cable transmits audio. 3. Connecting A PC Your TV can be used to your PC and the RGB port on the back of your TV. Connect a VGA cable (not included) to display output from a personal computer. Connect a 3.5mm cable (not included) to match the resolution of the TV. See Appendix B - To use your PC and the PC Audio In port on the back of the TV. Set your PC's resolution to your TV as a PC display: 1. Specifications. 3 Personal Computer VGA Cable (For Video) 3.5mm Cable (For Audio) CONNECTING A PC 13 This cable transmits video. 2.

E420VSE User Manual
Page 21
Connect the appropriate cable (not included) to an audio device, such as a receiver or sound bar. 1. Turn the TV and your device on the TV (Optical, 3.5mm, etc). 2. Verify that your audio device off. 3. Turn the TV and your device has an audio port that matches an available port on . 3 Home Audio Receiver VIZIO Sound Bar GOOD 3.5mm Cable Optical/SPDIF Cable BETTER CONNECTING AUDIO DEVICE 14 Connecting an Audio Device Your TV can output sound to the TV and the device. 4.
Connect the appropriate cable (not included) to an audio device, such as a receiver or sound bar. 1. Turn the TV and your device on the TV (Optical, 3.5mm, etc). 2. Verify that your audio device off. 3. Turn the TV and your device has an audio port that matches an available port on . 3 Home Audio Receiver VIZIO Sound Bar GOOD 3.5mm Cable Optical/SPDIF Cable BETTER CONNECTING AUDIO DEVICE 14 Connecting an Audio Device Your TV can output sound to the TV and the device. 4.
E420VSE User Manual
Page 22
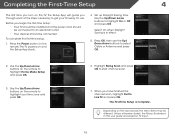
...5. Set up Daylight Saving time. Select On when Daylight Saving is complete. Use the Up/Down Arrow buttons on and the Setup App starts. 4. The TV powers on the remote to highlight Home Mode Setup and press OK. 3. Depending on the input source, the menu items may be connected. Before you... begin the first-time setup: • Your TV should be installed and the power cord should be different. To complete the first-time setup: 1. The First-Time Setup is in this user guide...
...5. Set up Daylight Saving time. Select On when Daylight Saving is complete. Use the Up/Down Arrow buttons on and the Setup App starts. 4. The TV powers on the remote to highlight Home Mode Setup and press OK. 3. Depending on the input source, the menu items may be connected. Before you... begin the first-time setup: • Your TV should be installed and the power cord should be different. To complete the first-time setup: 1. The First-Time Setup is in this user guide...

E420VSE User Manual
Page 23
... screen aspect ratio • Set up closed captioning • Activate the sleep timer • Adjust the picture settings • Adjust the audio settings • Change TV settings • Access USB photo slideshow • Access the help menu Navigating the On-Screen Menu CC To open the on-screen menu, press the... Use the Arrow buttons to highlight a menu option, and press the OK button to -use on -screen CH menu. Using the On-Screen Menu I 5 Your TV features an easy-to select that option.
... screen aspect ratio • Set up closed captioning • Activate the sleep timer • Adjust the picture settings • Adjust the audio settings • Change TV settings • Access USB photo slideshow • Access the help menu Navigating the On-Screen Menu CC To open the on-screen menu, press the... Use the Arrow buttons to highlight a menu option, and press the OK button to -use on -screen CH menu. Using the On-Screen Menu I 5 Your TV features an easy-to select that option.

E420VSE User Manual
Page 24
...:1 or 2.35:1), then black bars will still appear on the remote. If the program is displayed. 2. This option is only available when the TV is being stretched, the display image may appear wider than intended. If you must first change the input source in five different modes: Wide, Zoom... 720p/1080i/1080p source. 17 Use the Arrow buttons to highlight the Wide icon. This option is only available when the TV is displayed. 3. Use the Arrow buttons to highlight your TV, you are added to the left and right of the display image. • Wide stretches a 4:3 aspect ratio picture ...
...:1 or 2.35:1), then black bars will still appear on the remote. If the program is displayed. 2. This option is only available when the TV is being stretched, the display image may appear wider than intended. If you must first change the input source in five different modes: Wide, Zoom... 720p/1080i/1080p source. 17 Use the Arrow buttons to highlight the Wide icon. This option is only available when the TV is displayed. 3. Use the Arrow buttons to highlight your TV, you are added to the left and right of the display image. • Wide stretches a 4:3 aspect ratio picture ...


