
Camera Manual
Page 1
Windows and the Windows logo are the property of Microsoft Corporation. All rights reserved. All other trademarks are registered trademarks of their respective companies. DVR 810HD Digital Video Camcorder User's Manual © 2009 Sakar International, Inc.
Windows and the Windows logo are the property of Microsoft Corporation. All rights reserved. All other trademarks are registered trademarks of their respective companies. DVR 810HD Digital Video Camcorder User's Manual © 2009 Sakar International, Inc.
Camera Manual
Page 3
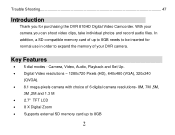
... the memory of up to 8GB 2 Trouble Shooting...47 Introduction Thank you can shoot video clips, take individual photos and record audio files. With your DVR camera. In addition, a SD compatible memory card of your camera you for purchasing the DVR 810HD Digital Video Camcorder.
... the memory of up to 8GB 2 Trouble Shooting...47 Introduction Thank you can shoot video clips, take individual photos and record audio files. With your DVR camera. In addition, a SD compatible memory card of your camera you for purchasing the DVR 810HD Digital Video Camcorder.
Camera Manual
Page 4
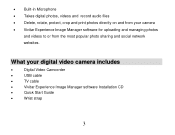
What your camera Vivitar Experience Image Manager software for uploading and managing photos and videos to or from the most popular photo sharing and social network websites. Built-in Microphone Takes digital photos, videos and record audio files Delete, rotate, protect, crop and print photos directly on and from your digital video camera includes Digital Video Camcorder USB cable TV cable Vivitar Experience Image Manager software Installation CD Quick Start Guide Wrist strap 3
What your camera Vivitar Experience Image Manager software for uploading and managing photos and videos to or from the most popular photo sharing and social network websites. Built-in Microphone Takes digital photos, videos and record audio files Delete, rotate, protect, crop and print photos directly on and from your digital video camera includes Digital Video Camcorder USB cable TV cable Vivitar Experience Image Manager software Installation CD Quick Start Guide Wrist strap 3

Camera Manual
Page 8
Insert the batteries in accordance with the polarity indicated in the battery compartment. 3. Open the battery compartment on the side of the camera. 2. Return and close the battery cover. 7 Preparing Your Camera for Use Battery Installation Your DVR camcorder requires 4 "AAA" batteries (not included). It is recommended that alkaline batteries be used. 1.
Insert the batteries in accordance with the polarity indicated in the battery compartment. 3. Open the battery compartment on the side of the camera. 2. Return and close the battery cover. 7 Preparing Your Camera for Use Battery Installation Your DVR camcorder requires 4 "AAA" batteries (not included). It is recommended that alkaline batteries be used. 1.

Camera Manual
Page 14
... You can select different Video resolutions - Press the OK button to take photos in almost every type of environment - Press the OK button. 2. Scene Your camcorder comes supplied with different scenes for the present light and environmental conditions. 1. Auto, Scenery, Night Scenery, Portrait, Night Portrait, Beach, Sports and Party. High Definition...
... You can select different Video resolutions - Press the OK button to take photos in almost every type of environment - Press the OK button. 2. Scene Your camcorder comes supplied with different scenes for the present light and environmental conditions. 1. Auto, Scenery, Night Scenery, Portrait, Night Portrait, Beach, Sports and Party. High Definition...
Camera Manual
Page 16
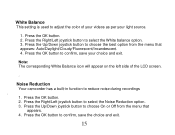
... Right/Left joystick button to select the Noise Reduction option. 3. Press the Right/Left joystick button to select the White balance option. 3. Noise Reduction Your camcorder has a built-in function to adjust the color of the LCD screen. . Press the OK button. 2. White Balance This setting is used to reduce noise...
... Right/Left joystick button to select the Noise Reduction option. 3. Press the Right/Left joystick button to select the White balance option. 3. Noise Reduction Your camcorder has a built-in function to adjust the color of the LCD screen. . Press the OK button. 2. White Balance This setting is used to reduce noise...
Camera Manual
Page 17
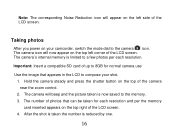
.... Note: The corresponding Noise Reduction icon will now appear on the top left side of the LCD screen. Taking photos After you power on your camcorder, switch the mode dial to compose your shot. 1.
.... Note: The corresponding Noise Reduction icon will now appear on the top left side of the LCD screen. Taking photos After you power on your camcorder, switch the mode dial to compose your shot. 1.

Camera Manual
Page 18
When the camcorder's internal memory is full, "Disk Full" will also take a photo. Delete last file While in the section "Transfer photos and videos to your computer" and ... mode. 17 The number of photos that can delete the last photo taken. 1. Press the OK button to confirm and save your computer using the Vivitar Experience Image Manager software as described below in camera mode, you attempt to press the Shutter button to continue taking more memory on the resolution...
When the camcorder's internal memory is full, "Disk Full" will also take a photo. Delete last file While in the section "Transfer photos and videos to your computer" and ... mode. 17 The number of photos that can delete the last photo taken. 1. Press the OK button to confirm and save your computer using the Vivitar Experience Image Manager software as described below in camera mode, you attempt to press the Shutter button to continue taking more memory on the resolution...
Camera Manual
Page 23
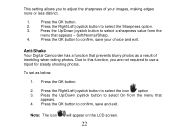
Press the Up/Down joystick button to confirm, save your images, making edges more or less distinct. 1. Anti-Shake Your Digital Camcorder has a function that appears. 4. Press the OK button to select a sharpness value form the menu that appears - Press the Up/Down joystick button to use a ...
Press the Up/Down joystick button to confirm, save your images, making edges more or less distinct. 1. Anti-Shake Your Digital Camcorder has a function that appears. 4. Press the OK button to select a sharpness value form the menu that appears - Press the Up/Down joystick button to use a ...

Camera Manual
Page 24
... choice and exit. 23 Press the OK button. 2. Press the OK button. 2. Auto, Scenery, Night Scenery, Portrait, Night Portrait, Beach, Sports and Party. Scene Your camcorder comes supplied with different scenes for the present light and environmental conditions. 1.
... choice and exit. 23 Press the OK button. 2. Press the OK button. 2. Auto, Scenery, Night Scenery, Portrait, Night Portrait, Beach, Sports and Party. Scene Your camcorder comes supplied with different scenes for the present light and environmental conditions. 1.
Camera Manual
Page 27
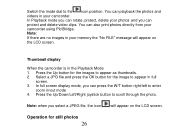
...memory the "No FILE" message will appear on the LCD screen. In full screen display mode, you can playback the photos and videos in your camcorder using PictBridge. In Playback mode you can rotate, protect, delete your photos and you select a JPEG file, the icon will appear on the LCD... screen. Note: when you can also print photos directly from your camcorder. Thumbnail display When the camcorder is in /out mode 4. Switch the mode dial to scroll through the photo. Operation for the images to enter zoom in the Playback...
...memory the "No FILE" message will appear on the LCD screen. In full screen display mode, you can playback the photos and videos in your camcorder using PictBridge. In Playback mode you can rotate, protect, delete your photos and you select a JPEG file, the icon will appear on the LCD... screen. Note: when you can also print photos directly from your camcorder. Thumbnail display When the camcorder is in /out mode 4. Switch the mode dial to scroll through the photo. Operation for the images to enter zoom in the Playback...
Camera Manual
Page 29
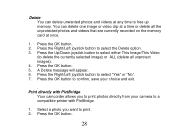
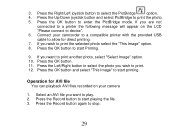
... unwanted photos and videos at once. 1. Press the OK button. 2. Press the OK button to confirm, save your camera to a compatible printer with PictBridge Your camcorder allows you want to select "Yes" or "No". 7. A Delete message will appear. 6. Print directly with PictBridge. 1.
... unwanted photos and videos at once. 1. Press the OK button. 2. Press the OK button to confirm, save your camera to a compatible printer with PictBridge Your camcorder allows you want to select "Yes" or "No". 7. A Delete message will appear. 6. Print directly with PictBridge. 1.
Camera Manual
Page 30
... to print. 12. Press the Left/Right button to select the photo you are not connected to a printer the following message will appear on your camcorder to a compatible printer with the provided USB cable to allow for AVI file You can playback AVI files recorded on the LCD "Please connect to...
... to print. 12. Press the Left/Right button to select the photo you are not connected to a printer the following message will appear on your camcorder to a compatible printer with the provided USB cable to allow for AVI file You can playback AVI files recorded on the LCD "Please connect to...
Camera Manual
Page 35
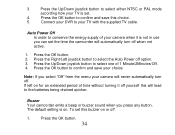
... of time without turning it is on. Press the Up/Down joystick button to select one of your TV is set the time the camcorder will automatically turn off yourself this choice. 5. Press the Up/Down joystick button to select either NTSC or PAL mode according how your ...Left joystick button to conserve the energy supply of 1 Minute/2Minutes/Off. 4. Buzzer Your camcorder emits a beep or buzzer sound when you can set . 4. Press the OK button. 34 Press the OK button to your DVR to confirm and save this will never automatically turn off option. 3. Connect your TV ...
... of time without turning it is on. Press the Up/Down joystick button to select one of your TV is set the time the camcorder will automatically turn off yourself this choice. 5. Press the Up/Down joystick button to select either NTSC or PAL mode according how your ...Left joystick button to conserve the energy supply of 1 Minute/2Minutes/Off. 4. Buzzer Your camcorder emits a beep or buzzer sound when you can set . 4. Press the OK button. 34 Press the OK button to your DVR to confirm and save this will never automatically turn off option. 3. Connect your TV ...


