

Camera Manual
Page 1
Windows and the Windows logo are the property of Microsoft Corporation. DVR 610 Digital Camcorder with Camera User Manual © 2009-2011 Sakar International, Inc. All other trademarks are registered trademarks of their respective companies. All rights reserved.
Windows and the Windows logo are the property of Microsoft Corporation. DVR 610 Digital Camcorder with Camera User Manual © 2009-2011 Sakar International, Inc. All other trademarks are registered trademarks of their respective companies. All rights reserved.

Camera Manual
Page 2
WINDOWS OS 9 Computer System Requirements - MAC OS 9 Powering ON/OFF Your Digital Camcorder 10 Changing Camera Mode ...10 Navigating the Menus...11 Video Capture Mode ...12 Video Playback Mode...20 Photo Capture Mode ...24 Photo Playback Mode ...37 ...
WINDOWS OS 9 Computer System Requirements - MAC OS 9 Powering ON/OFF Your Digital Camcorder 10 Changing Camera Mode ...10 Navigating the Menus...11 Video Capture Mode ...12 Video Playback Mode...20 Photo Capture Mode ...24 Photo Playback Mode ...37 ...
Camera Manual
Page 3
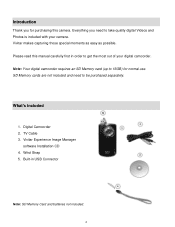
TV Cable 3. Digital Camcorder 2. Built-in order to get the most out of your camera. Vivitar Experience Image Manager software Installation CD 4. Wrist Strap 5. Please read this camera. Vivitar makes capturing those special moments as easy as possible. What‟s Included 1. Everything you... for normal use. Introduction Thank you need to be purchased separately. Note: Your digital camcorder requires an SD Memory card (up ...
TV Cable 3. Digital Camcorder 2. Built-in order to get the most out of your camera. Vivitar Experience Image Manager software Installation CD 4. Wrist Strap 5. Please read this camera. Vivitar makes capturing those special moments as easy as possible. What‟s Included 1. Everything you... for normal use. Introduction Thank you need to be purchased separately. Note: Your digital camcorder requires an SD Memory card (up ...
Camera Manual
Page 6
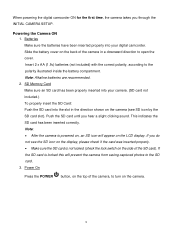
... batteries have been inserted properly into your camera. (SD card not included.) To properly insert the SD Card: Push the SD card into your digital camcorder. Note: Alkaline batteries are recommended. 2. Note: After the camera is locked this will appear on the camera (see the SD icon on the display... an SD card has been properly inserted into the slot in a downward direction to the polarity illustrated inside the battery compartment. When powering the digital camcorder ON for the first time, the camera takes you through the INITIAL CAMERA SETUP.
... batteries have been inserted properly into your camera. (SD card not included.) To properly insert the SD Card: Push the SD card into your digital camcorder. Note: Alkaline batteries are recommended. 2. Note: After the camera is locked this will appear on the camera (see the SD icon on the display... an SD card has been properly inserted into the slot in a downward direction to the polarity illustrated inside the battery compartment. When powering the digital camcorder ON for the first time, the camera takes you through the INITIAL CAMERA SETUP.

Camera Manual
Page 7
The Language selection menu will be prompted to select a language for you to confirm the selection. Press the SET button to capture your choice by pressing the UP or DOWN direction control buttons. 3. After selecting a language, the digital camcorder opens with the Video Capture mode ready for the camera. You will appear. 2. Setting the Camera Language 1. Select the language of your videos. 6
The Language selection menu will be prompted to select a language for you to confirm the selection. Press the SET button to capture your choice by pressing the UP or DOWN direction control buttons. 3. After selecting a language, the digital camcorder opens with the Video Capture mode ready for the camera. You will appear. 2. Setting the Camera Language 1. Select the language of your videos. 6
Camera Manual
Page 8
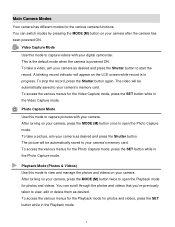
... to capture pictures with your camera‟s memory card. To take a picture, aim your camera as desired and press the Shutter button to your digital camcorder. The video will appear on your camera as desired and press the Shutter button. To take a video, aim your camera. You can scroll through the...
... to capture pictures with your camera‟s memory card. To take a picture, aim your camera as desired and press the Shutter button to your digital camcorder. The video will appear on your camera as desired and press the Shutter button. To take a video, aim your camera. You can scroll through the...

Camera Manual
Page 9
... Balance Multi SnapShots Exposure ISO Slide Show Language Speaker File Format TV out / Headset Power Saving Battery Transmission interface Working temperature Computer System Requirements Digital Camcorder 640*480 pixels (30fps) / 320*240 pixels(30fps ) 2M (1600x1200), 1.3M (1280x1024), VGA (640x480) CMOS Sensor 1.8 Inch TFT Limited for test images (3 seconds for video...
... Balance Multi SnapShots Exposure ISO Slide Show Language Speaker File Format TV out / Headset Power Saving Battery Transmission interface Working temperature Computer System Requirements Digital Camcorder 640*480 pixels (30fps) / 320*240 pixels(30fps ) 2M (1600x1200), 1.3M (1280x1024), VGA (640x480) CMOS Sensor 1.8 Inch TFT Limited for test images (3 seconds for video...
Camera Manual
Page 11
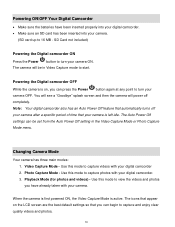
... While the camera is on the LCD screen are the best default settings so that you can begin to 16 MB - Note: Your digital camcorder also has an Auto Power Off feature that automatically turns off completely. Changing Camera Mode Your camera has three main modes: 1. Photo Capture Mode - When ... view the videos and photos you can be in the Video Capture Mode or Photo Capture Mode menu. SD Card not included) Powering the Digital camcorder ON Press the Power button to start. You will see a "Goodbye" splash screen and then the camera will be set from the Auto Power Off...
... While the camera is on the LCD screen are the best default settings so that you can begin to 16 MB - Note: Your digital camcorder also has an Auto Power Off feature that automatically turns off completely. Changing Camera Mode Your camera has three main modes: 1. Photo Capture Mode - When ... view the videos and photos you can be in the Video Capture Mode or Photo Capture Mode menu. SD Card not included) Powering the Digital camcorder ON Press the Power button to start. You will see a "Goodbye" splash screen and then the camera will be set from the Auto Power Off...
Camera Manual
Page 13
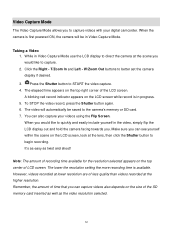
... the camera display if desired. 3. To STOP the video record, press the Shutter button again. 6. Taking a Video 1. Make sure you can also capture your digital camcorder. W/Zoom Out buttons to capture videos with your videos using the Flip Screen. Video Capture Mode The Video Capture Mode allows you . You can capture...
... the camera display if desired. 3. To STOP the video record, press the Shutter button again. 6. Taking a Video 1. Make sure you can also capture your digital camcorder. W/Zoom Out buttons to capture videos with your videos using the Flip Screen. Video Capture Mode The Video Capture Mode allows you . You can capture...
Camera Manual
Page 14
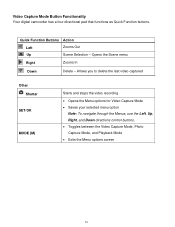
Video Capture Mode Button Functionality Your digital camcorder has a four-directional pad that functions as Quick Function buttons. Quick Function Buttons Action Left Zooms Out Up Scene Selection - Opens the Scene menu Right ...
Video Capture Mode Button Functionality Your digital camcorder has a four-directional pad that functions as Quick Function buttons. Quick Function Buttons Action Left Zooms Out Up Scene Selection - Opens the Scene menu Right ...
Camera Manual
Page 16
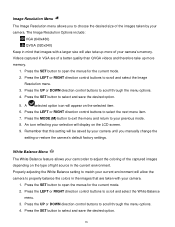
... your camera. 1. Press the LEFT or RIGHT direction control buttons to select the next menu item. 7. White Balance Menu The White Balance feature allows your camcorder to adjust the coloring of the captured images depending on the type of the images taken by your camera until you to scroll through the...
... your camera. 1. Press the LEFT or RIGHT direction control buttons to select the next menu item. 7. White Balance Menu The White Balance feature allows your camcorder to adjust the coloring of the captured images depending on the type of the images taken by your camera until you to scroll through the...
Camera Manual
Page 20
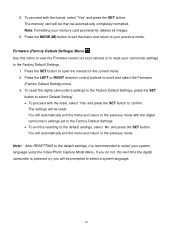
...;s settings to the Factory Default Settings, press the SET button to select „Default Setting‟. To proceed with the digital camcorder‟s settings set to the Factory Default Settings. To exit the resetting to the default settings, select „No‟ and press the ...this menu to view the Firmware version on , you do not, the next time the digital camcorder is recommended to the previous mode. Press the MODE (M) button to exit the menu and return to your camcorder settings to select a system language. 19 The settings will be reset. If you will be...
...;s settings to the Factory Default Settings, press the SET button to select „Default Setting‟. To proceed with the digital camcorder‟s settings set to the Factory Default Settings. To exit the resetting to the default settings, select „No‟ and press the ...this menu to view the Firmware version on , you do not, the next time the digital camcorder is recommended to the previous mode. Press the MODE (M) button to exit the menu and return to your camcorder settings to select a system language. 19 The settings will be reset. If you will be...

Camera Manual
Page 21
... captured image (both videos and photos) is playing all the icons on the top section of the LCD screen. 2. Press the Left - Select your digital camcorder‟s memory card until you find the image you wish to the LCD, press the UP button. Videos appear with an „AVI‟ icon...
... captured image (both videos and photos) is playing all the icons on the top section of the LCD screen. 2. Press the Left - Select your digital camcorder‟s memory card until you find the image you wish to the LCD, press the UP button. Videos appear with an „AVI‟ icon...

Camera Manual
Page 22
... in Thumbnail view. Right Allows you to full screen the selected thumbnail image and exits Thumbnail view. Video Playback Mode Button Functionality Your digital camcorder has a four-directional pad that functions as Quick Function buttons. Other Shutter SET/OK MODE (M) PLAYS the selected video file with sound. PAUSES...
... in Thumbnail view. Right Allows you to full screen the selected thumbnail image and exits Thumbnail view. Video Playback Mode Button Functionality Your digital camcorder has a four-directional pad that functions as Quick Function buttons. Other Shutter SET/OK MODE (M) PLAYS the selected video file with sound. PAUSES...
Camera Manual
Page 25
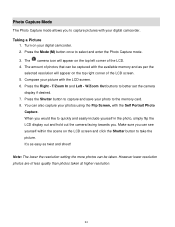
...‟s as easy as per the selected resolution will appear on your picture with your digital camcorder. Press the Mode (M) button once to capture pictures with the LCD screen. 6. Press the Right - Turn on the top left corner of the LCD screen. 5. T/...
...‟s as easy as per the selected resolution will appear on your picture with your digital camcorder. Press the Mode (M) button once to capture pictures with the LCD screen. 6. Press the Right - Turn on the top left corner of the LCD screen. 5. T/...
Camera Manual
Page 26
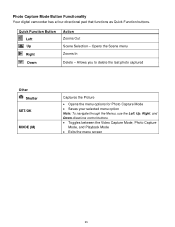
...; Toggles between the Video Capture Mode, Photo Capture Mode, and Playback Mode Exits the menu screen 25 Photo Capture Mode Button Functionality Your digital camcorder has a four-directional pad that functions as Quick Function buttons. Quick Function Button Left Up Right Down Action Zooms Out Scene Selection -
...; Toggles between the Video Capture Mode, Photo Capture Mode, and Playback Mode Exits the menu screen 25 Photo Capture Mode Button Functionality Your digital camcorder has a four-directional pad that functions as Quick Function buttons. Quick Function Button Left Up Right Down Action Zooms Out Scene Selection -
Camera Manual
Page 27
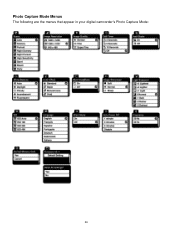
Photo Capture Mode Menus The following are the menus that appear in your digital camcorder‟s Photo Capture Mode: 26
Photo Capture Mode Menus The following are the menus that appear in your digital camcorder‟s Photo Capture Mode: 26
Camera Manual
Page 37
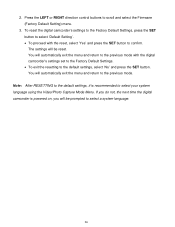
...default settings, it is powered on, you do not, the next time the digital camcorder is recommended to the default settings, select „No‟ and press the SET button. To reset the digital camcorder‟s settings to the Factory Default Settings, press the SET button to select „...;Default Setting‟. To proceed with the digital camcorder‟s settings set to the Factory Default Settings. To exit the resetting to select your system language using the Video/Photo Capture...
...default settings, it is powered on, you do not, the next time the digital camcorder is recommended to the default settings, select „No‟ and press the SET button. To reset the digital camcorder‟s settings to the Factory Default Settings, press the SET button to select „...;Default Setting‟. To proceed with the digital camcorder‟s settings set to the Factory Default Settings. To exit the resetting to select your system language using the Video/Photo Capture...
Camera Manual
Page 38
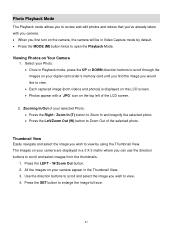
Select your Photo: Once in Playback mode, press the UP or DOWN direction buttons to scroll through the images on your digital camcorder‟s memory card until you find the image you would like to view. Each captured image (both videos and photos) is displayed on the ...
Select your Photo: Once in Playback mode, press the UP or DOWN direction buttons to scroll through the images on your digital camcorder‟s memory card until you find the image you would like to view. Each captured image (both videos and photos) is displayed on the ...
Camera Manual
Page 39
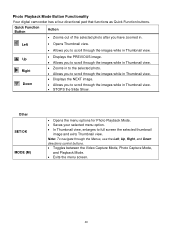
... in Thumbnail view. STOPS the Slide Show. Note: To navigate through the images while in Thumbnail view. Photo Playback Mode Button Functionality Your digital camcorder has a four-directional pad that functions as Quick Function buttons. Up Right Down Displays the PREVIOUS image. Allows you to scroll through the...
... in Thumbnail view. STOPS the Slide Show. Note: To navigate through the images while in Thumbnail view. Photo Playback Mode Button Functionality Your digital camcorder has a four-directional pad that functions as Quick Function buttons. Up Right Down Displays the PREVIOUS image. Allows you to scroll through the...


