Camera Manual
Page 2
... Camcorder for Use 8 Inserting an SD Memory Card 9 Maintenance and Care 11 DVR Function Control 12 Capturing Videos 15 Taking Photos 21 Audio Mode 34 Playback mode 35 Setup Mode 50 Connecting the Camcorder to a TV 59 Install the Vivitar Experience Image Manager Software 59 Connect your camcorder to the computer 63 Get...
... Camcorder for Use 8 Inserting an SD Memory Card 9 Maintenance and Care 11 DVR Function Control 12 Capturing Videos 15 Taking Photos 21 Audio Mode 34 Playback mode 35 Setup Mode 50 Connecting the Camcorder to a TV 59 Install the Vivitar Experience Image Manager Software 59 Connect your camcorder to the computer 63 Get...
Camera Manual
Page 3
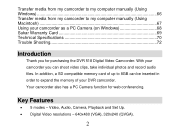
... memory card of up to expand the memory of your camcorder you for web conferencing. Your camcorder also has a PC Camera function for purchasing the DVR 518 Digital Video Camcorder. Transfer media from my camcorder to my computer manually (Using Windows) ...66 Transfer media from my camcorder to my computer manually (Using... Warranty Card 69 Technical Specifications 70 Trouble Shooting 72 Introduction Thank you can be inserted in order to 8GB can shoot video clips, take individual photos and record audio files. With your DVR camcorder. Key Features 5 modes -
... memory card of up to expand the memory of your camcorder you for web conferencing. Your camcorder also has a PC Camera function for purchasing the DVR 518 Digital Video Camcorder. Transfer media from my camcorder to my computer manually (Using Windows) ...66 Transfer media from my camcorder to my computer manually (Using... Warranty Card 69 Technical Specifications 70 Trouble Shooting 72 Introduction Thank you can be inserted in order to 8GB can shoot video clips, take individual photos and record audio files. With your DVR camcorder. Key Features 5 modes -
Camera Manual
Page 4
... external SD memory card up to 8GB Built-in Microphone Takes digital photos, videos and record audio files Delete, rotate, protect, crop and print photos directly on and from your digital video camcorder includes Digital Video Camcorder ...USB cable 3 What your camcorder Vivitar Experience Image Manager software for uploading and managing photos and videos to or from the most popular photo sharing and social network websites. 5 digital camera resolutions - 8M(3264X2448); ...
... external SD memory card up to 8GB Built-in Microphone Takes digital photos, videos and record audio files Delete, rotate, protect, crop and print photos directly on and from your digital video camcorder includes Digital Video Camcorder ...USB cable 3 What your camcorder Vivitar Experience Image Manager software for uploading and managing photos and videos to or from the most popular photo sharing and social network websites. 5 digital camera resolutions - 8M(3264X2448); ...
Camera Manual
Page 5
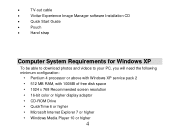
TV-out cable Vivitar Experience Image Manager software Installation CD Quick Start Guide Pouch Hand strap Computer System Requirements for Windows XP To be able to download photos and videos to your PC, you will need the following minimum configuration: Pentium 4 processor or above with Windows XP...
TV-out cable Vivitar Experience Image Manager software Installation CD Quick Start Guide Pouch Hand strap Computer System Requirements for Windows XP To be able to download photos and videos to your PC, you will need the following minimum configuration: Pentium 4 processor or above with Windows XP...
Camera Manual
Page 6
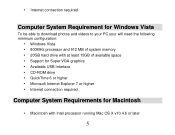
Internet connection required Computer System Requirement for Windows Vista To be able to download photos and videos to your PC your will need the following minimum configuration: Windows Vista 800MHz processor and 512 MB of system memory ...
Internet connection required Computer System Requirement for Windows Vista To be able to download photos and videos to your PC your will need the following minimum configuration: Windows Vista 800MHz processor and 512 MB of system memory ...

Camera Manual
Page 10
...A SD Memory card is not lost if no SD Memory Card has been inserted in the DVR or when you change your batteries. We strongly recommend downloading your photos and videos regularly to your DVR camcorder. Media sitting on the memory card is required to expand the memory in order to ... will not be inserted into your computer. Remove the batteries from the DVR camcorder when not in use for an extended period. Inserting an SD Memory Card An SD compatible memory card of movies, photos and audio that can be captured before transferring them to 8GB (not included) should...
...A SD Memory card is not lost if no SD Memory Card has been inserted in the DVR or when you change your batteries. We strongly recommend downloading your photos and videos regularly to your DVR camcorder. Media sitting on the memory card is required to expand the memory in order to ... will not be inserted into your computer. Remove the batteries from the DVR camcorder when not in use for an extended period. Inserting an SD Memory Card An SD compatible memory card of movies, photos and audio that can be captured before transferring them to 8GB (not included) should...
Camera Manual
Page 14
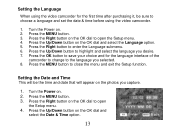
... the MENU button to enter the Language submenu. 6. Turn the Power on the OK dial and select the Language option. 5. Turn the Power on the photos you capture. 1. Press the Right button to close the menu and exit the Setup function. Press the MENU button. 3. Setting the Language When using the...
... the MENU button to enter the Language submenu. 6. Turn the Power on the OK dial and select the Language option. 5. Turn the Power on the photos you capture. 1. Press the Right button to close the menu and exit the Setup function. Press the MENU button. 3. Setting the Language When using the...

Camera Manual
Page 15
...you wish to update. 8. Press the MENU button to open the date and time settings. 6. Display Title Capture mode Description For taking still photos. Audio mode For recording audio files. Press the OK button to close the menu and exit the Setup function Change the camcorder`s mode There are... four modes in this DVR camcorder. 1. Press the OK button to turn on the LCD. 3. The video default capture mode appears on the camcorder. 2. Press the Up/...
...you wish to update. 8. Press the MENU button to open the date and time settings. 6. Display Title Capture mode Description For taking still photos. Audio mode For recording audio files. Press the OK button to close the menu and exit the Setup function Change the camcorder`s mode There are... four modes in this DVR camcorder. 1. Press the OK button to turn on the LCD. 3. The video default capture mode appears on the camcorder. 2. Press the Up/...

Camera Manual
Page 22
... taken as jpeg and saved to the 21 Use the image that appears in the LCD to expand the memory and capture many more memorable photos. The camcorder will appear on the bottom left corner of the LCD. The camera icon appears in order to compose your camcorder, press the DV.../DSC mode button on the top of the screen. Taking Photos After you power on your shot. 1. Hold the camcorder steady and press the Shutter button on the top of the LCD screen. The camcorder`s internal...
... taken as jpeg and saved to the 21 Use the image that appears in the LCD to expand the memory and capture many more memorable photos. The camcorder will appear on the bottom left corner of the LCD. The camera icon appears in order to compose your camcorder, press the DV.../DSC mode button on the top of the screen. Taking Photos After you power on your shot. 1. Hold the camcorder steady and press the Shutter button on the top of the LCD screen. The camcorder`s internal...

Camera Manual
Page 23
... to take up (like a torch) to continue taking more memory on the card. memory. 3. Either download the photos to your computer using the Vivitar Experience Image Manager software as described below in the section "Transfer photos and videos to your computer" or insert an SD card to offer better lighting. The number of...
... to take up (like a torch) to continue taking more memory on the card. memory. 3. Either download the photos to your computer using the Vivitar Experience Image Manager software as described below in the section "Transfer photos and videos to your computer" or insert an SD card to offer better lighting. The number of...
Camera Manual
Page 24
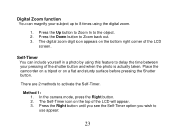
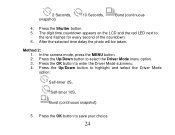
Method 1: 1. Self-Timer You can magnify your pressing of the shutter button and when the photo is actually taken. Press the Down button to use appear: 23 The digital zoom digit icon appears on the bottom right corner of the LCD ... see the Self-Timer option you wish to Zoom back out. 3. There are 2 methods to the object. 2. Digital Zoom function You can include yourself in a photo by using this feature to delay the time between your subject up to 8 times using the digital zoom. 1. The Self-Timer icon on a flat and...
Method 1: 1. Self-Timer You can magnify your pressing of the shutter button and when the photo is actually taken. Press the Down button to use appear: 23 The digital zoom digit icon appears on the bottom right corner of the LCD ... see the Self-Timer option you wish to Zoom back out. 3. There are 2 methods to the object. 2. Digital Zoom function You can include yourself in a photo by using this feature to delay the time between your subject up to 8 times using the digital zoom. 1. The Self-Timer icon on a flat and...
Camera Manual
Page 25
... OK button to highlight and select the Driver Mode option: Self-timer 2S, Self-timer 10S, Burst (continuous snapshot) 5. After the selected time delay the photo will be taken. Press the Up/Down button to enter the Driver Mode submenu. 4. Press the OK button to the lens flashes for every second...
... OK button to highlight and select the Driver Mode option: Self-timer 2S, Self-timer 10S, Burst (continuous snapshot) 5. After the selected time delay the photo will be taken. Press the Up/Down button to enter the Driver Mode submenu. 4. Press the OK button to the lens flashes for every second...
Camera Manual
Page 26
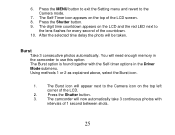
... memory in the Driver Mode submenu. Press the MENU button to exit the Setting menu and revert to use this option. Burst Take 3 consecutive photos automatically. The Self-Timer icon appears on the top left corner of the LCD screen. 8. The digit time countdown appears on the LCD and ... for every second of 1 second between shots. 25 Press the Shutter button. 9. The camcorder will be taken. After the selected time delay the photo will now automatically take 3 continuous photos with the Self-timer options in the camcorder to the Camera mode. 7. Press the Shutter button. 3.
... memory in the Driver Mode submenu. Press the MENU button to exit the Setting menu and revert to use this option. Burst Take 3 consecutive photos automatically. The Self-Timer icon appears on the top left corner of the LCD screen. 8. The digit time countdown appears on the LCD and ... for every second of 1 second between shots. 25 Press the Shutter button. 9. The camcorder will be taken. After the selected time delay the photo will now automatically take 3 continuous photos with the Self-timer options in the camcorder to the Camera mode. 7. Press the Shutter button. 3.
Camera Manual
Page 28
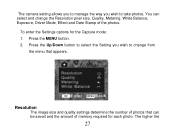
To enter the Settings options for each photo. Press the MENU button. 2. Resolution The image size and quality settings determine the number of photos that can select and change from the menu that appears. Press the Up/Down button to select the Setting you wish to change the Resolution pixel size, Quality, Metering, White Balance, Exposure, Driver Mode, Effect and Date Stamp of memory required for the Capture mode: 1. You can be saved and the amount of the photos. The higher the 27 The camera setting allows you to manage the way you wish to take photos.
To enter the Settings options for each photo. Press the MENU button. 2. Resolution The image size and quality settings determine the number of photos that can select and change from the menu that appears. Press the Up/Down button to select the Setting you wish to change the Resolution pixel size, Quality, Metering, White Balance, Exposure, Driver Mode, Effect and Date Stamp of memory required for the Capture mode: 1. You can be saved and the amount of the photos. The higher the 27 The camera setting allows you to manage the way you wish to take photos.

Camera Manual
Page 29
Press the Up/Down button to open the Resolution submenu. 3. To set the camcorder`s resolution: 1. Press the Up/Down button to confirm, save your photo effectively. Press the OK button to select the Resolution menu. 2. Press the MENU button to revert back to the Camera capture mode to the Setting ...menu. 5. Press the OK button to highlight and select one of the photo the more memory it will take. Quality 28 The image size and quality will appear on the top of the LCD. VGA(640X480) 4. Note: After...
Press the Up/Down button to open the Resolution submenu. 3. To set the camcorder`s resolution: 1. Press the Up/Down button to confirm, save your photo effectively. Press the OK button to select the Resolution menu. 2. Press the MENU button to revert back to the Camera capture mode to the Setting ...menu. 5. Press the OK button to highlight and select one of the photo the more memory it will take. Quality 28 The image size and quality will appear on the top of the LCD. VGA(640X480) 4. Note: After...
Camera Manual
Page 30
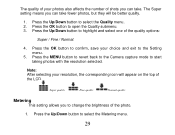
... affects the number of shots you can take . Super quality Fine quality Normal quality Metering This setting allows you can take fewer photos, but they will appear on the top of the LCD. The quality of your choice and exit to the Setting menu. 5. Press the Up/Down ...button to change the brightness of the quality options: Super / Fine / Normal. 4. Press the Up/Down button to highlight and select one of the photo. 1. The Super setting means you to select the Metering menu. 29 Press the Up/Down button to select the Quality menu. 2.
... affects the number of shots you can take . Super quality Fine quality Normal quality Metering This setting allows you can take fewer photos, but they will appear on the top of the LCD. The quality of your choice and exit to the Setting menu. 5. Press the Up/Down ...button to change the brightness of the quality options: Super / Fine / Normal. 4. Press the Up/Down button to highlight and select one of the photo. 1. The Super setting means you to select the Metering menu. 29 Press the Up/Down button to select the Quality menu. 2.
Camera Manual
Page 31
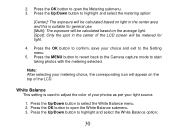
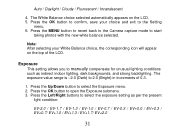
...LCD screen will be metered for light. 4. Press the OK button to open the White Balance submenu. 3. Press the Up/Down button to start taking photos with the metering selected. Press the Up/Down button to highlight and select the metering option: [Center]: The exposure will appear on the average light... select the White Balance menu. 2. Press the Up/Down button to the Setting menu. 5. Press the OK button to adjust the color of your photos as per your metering choice, the corresponding icon will be calculated based on light in the center area and this is used to open the...
...LCD screen will be metered for light. 4. Press the OK button to open the White Balance submenu. 3. Press the Up/Down button to start taking photos with the metering selected. Press the Up/Down button to highlight and select the metering option: [Center]: The exposure will appear on the average light... select the White Balance menu. 2. Press the Up/Down button to the Setting menu. 5. Press the OK button to adjust the color of your photos as per your metering choice, the corresponding icon will be calculated based on light in the center area and this is used to open the...
Camera Manual
Page 32
...+0.7/ EV+1.0 / EV+1.3 / EV+1.7/ EV+2.0 31 Note: After selecting your choice and exit to the Setting menu. 6. The exposure value range is -2.0 (Dark) to start taking photos with the new white balance selected. Press the MENU button to revert back to the Camera capture mode to 2.0 (Bright) in increments of the LCD...
...+0.7/ EV+1.0 / EV+1.3 / EV+1.7/ EV+2.0 31 Note: After selecting your choice and exit to the Setting menu. 6. The exposure value range is -2.0 (Dark) to start taking photos with the new white balance selected. Press the MENU button to revert back to the Camera capture mode to 2.0 (Bright) in increments of the LCD...
Camera Manual
Page 33
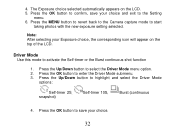
... 10S, Burst (continuous 4. Press the OK button to activate the Self-timer or the Burst continuous shot function 1. Press the OK button to start taking photos with the new exposure setting selected. Driver Mode Use this mode to enter the Driver Mode submenu. 3. 4. Press the MENU button to revert back to...
... 10S, Burst (continuous 4. Press the OK button to activate the Self-timer or the Burst continuous shot function 1. Press the OK button to start taking photos with the new exposure setting selected. Driver Mode Use this mode to enter the Driver Mode submenu. 3. 4. Press the MENU button to revert back to...
Camera Manual
Page 34
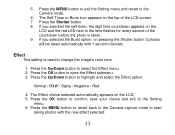
... / Negative / Red 4. Press the Up/Down button to the Camera mode. 6. The Effect choice selected automatically appears on the top of the countdown before the photo is used to the lens flashes for every second of the LCD screen. 7. Press the Shutter button. 8. Press the OK button to confirm, save your.... 6. Press the MENU button to revert back to the Camera capture mode to select the Effect menu. 2. Press the Up/Down button to start taking photos with 1 second intervals. 5. If you selected the self-timer, the digit time countdown appears on pressing the Shutter button...
... / Negative / Red 4. Press the Up/Down button to the Camera mode. 6. The Effect choice selected automatically appears on the top of the countdown before the photo is used to the lens flashes for every second of the LCD screen. 7. Press the Shutter button. 8. Press the OK button to confirm, save your.... 6. Press the MENU button to revert back to the Camera capture mode to select the Effect menu. 2. Press the Up/Down button to start taking photos with 1 second intervals. 5. If you selected the self-timer, the digit time countdown appears on pressing the Shutter button...

