Vivitar 5399 Support and Manuals
Get Help and Manuals for this Vivitar item
View All Support Options Below
Free Vivitar 5399 manuals!
Problems with Vivitar 5399?
Ask a Question
Free Vivitar 5399 manuals!
Problems with Vivitar 5399?
Ask a Question
Vivitar 5399 Videos

Underwater Videos using Vivitar 5399 5mp camera.
Duration: 1:40
Total Views: 1,855
Duration: 1:40
Total Views: 1,855
Popular Vivitar 5399 Manual Pages
Warranty - Page 1
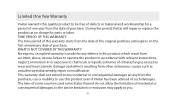
During the period, Vivitar will repair or replace the product at no charge for a period of one year from the date of ... accident, abuse, misuse, failure to operate the product in accordance with relevant instructions, neglect, immersion in material and workmanship for parts or labor. Limited One Year Warranty
Vivitar warrants this quality product to be free of defects in or exposure to chemicals...
Warranty - Page 2
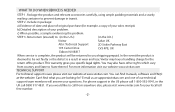
... our website www.vivitar.com TECHNICAL SUPPORT
support team members will be not faulty or the defect is complete, the product will answer your problem.
If you shipping prepaid. c) When possible, a sample evidencing the problem. STEP 3.
STEP 2. Include in package:
a) Evidence of date and place of your questions. WHAT TO DO WHEN SERVICE IS NEEDED
STEP...
ManualEnglish - Page 2

I Getting to know your camera 1. Configuration & installation
English
1 Shutter button 2 Power button 3 Flash light 4 Macro switch 5 USB jack 6 Lens 7 TFT monitor screen 8 Left/self-timer button 9 Playback button 10 Zoom out button 11 Zoom in button 12 Busy light 13 Macro light 14 Up/Display button 15 Ok button 16 Right / Flash button 17 Down/Mode button...
ManualEnglish - Page 4

...select "Yes";and press the OK button to delete the file.
4.3 Shooting setup
Press "MENU" to enter review mode. Attention:
z Do not take pictures. Press the LEFT or RIGHT ...SHUTTER button to take the memory card or battery out when camera is not in working status for 2 options: "Image" mode and "Setup" mode:
Select "Image", the following settings are: Resolution, Quality, White Balance, ...
ManualEnglish - Page 7

...to the light
Flash on: Force on the flash
Flash off: Force off the flash
In capture mode, press the FLASH button to save power, the flash will cause the incorrect exposure. Note: digital zoom ...when the charge is low. In the camera/video/playback mode, press the ZOOM IN or ZOOM OUT button to exit. Attention: The flash does not work when battery is completed. ●If shooting with flash...
ManualEnglish - Page 8

... available when connecting with TV or PC.
5.2 Delete video file
See page 3 for detail set up.
5.3 Video recording setup
In the video mode press the "MENU" button to view the video file.
Attention: Please note that this camera does not support the speaker; Video recording:
English
1): Press the "MODE" button to select video mode...
ManualEnglish - Page 11

... current file by the DELETE button.
7.2 Lock image
a) Press the UP or DOWN button
to
10 7:Image review setup:
English
In image playback mode, press the "MENU" button to enter the main menu for 4 options: "lock current...: "play " mode: Delete Current, Delete All, lock, thumbnail, set logo, rotate, slideshow.
7.1 Delete image
a) Press the UP or DOWN button "delete all the images.
ManualEnglish - Page 13
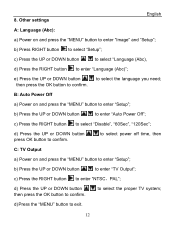
... or DOWN button press OK button to enter "Auto Power Off";
B: Auto Power Off
a) Power on and press the "MENU" button to enter "Image" and "Setup";
Other settings
English
A: Language (Abc):
a) Power on and press the "MENU" button to confirm. b) Press the UP or DOWN button
to confirm. to select power off...
ManualEnglish - Page 14

... RIGHT button button to enter "Setup" mode; F: Date/Time
a) Power on and press the "MENU" button to enter "Date/Time"; e) Press the UP or DOWN button
to exit.
d) Press the MENU button to set up the year, month, date
hour and minute; c) Press the RIGHT button to select "Light Frequency"; b) Press the UP...
ManualEnglish - Page 15

... to select "Setup" mode;
J: USB Mode
14
c) Press the MENU button to the default setting. c) Press the RIGHT button memory or SD card.
c) Press the RIGHT button for 2 options: "Load", "NO",
d) Press the UP or DOWN button to select "load" to back to exit.
to select "Yes" to format the camera internal
d) Press...
ManualEnglish - Page 16

... button
to install the camera driver.
15 b) Press the UP or DOWN button
to exit. a) Power on and press the "MENU" button to select; e) Press the OK button to confirm and press MENU button to select "Firmware version"; d) Press UP or DOWN button
to enter "Setup";
II. Software & Download 1. c) Press the RIGHT button and updated date.
ManualEnglish - Page 24

... condition. 1.
III. c): Double click "
Vivicam 5399 " icon
d): Double click "DCIM" file folder; Camera Use dry, soft and clean cloths to your camera and accessories in this case, you copy the files to PC, otherwise the files might be destroyed or lost.
2. do not take out the SD card or the batteries when you can restart...
ManualEnglish - Page 25

... a low temperature environment to avoid the surface scrape of the camera.
z Don't take out the battery when power on ). Note: z Manganese battery is used frequency of flashlight; … Quantity of the battery when the
camera is not allowed for this camera; Do not put the camera in the sun or under the high-temperature environment (such as...
ManualEnglish - Page 26

... and unable to format the card first when it has been formatted before using. Don't insert the leakage, eroded or inflated battery into the camera.
Please replace new battery when battery low, and follow the battery instruction on ; Memory card
The format is formatted, please backup the data before using . Keep the card in "unlock" status before...
ManualEnglish - Page 27
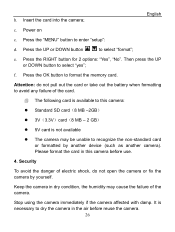
...
c. Press the RIGHT button for 2 options: "Yes", "No". f. Attention: do not open the camera or fix the camera by another device (such as another camera).
Then press the UP or DOWN button to enter "setup":
d. Please format the card in this camera:
z Standard SD card(8 MB -2GB)
z 3V(3.3V)card(...
Vivitar 5399 Reviews
We have not received any reviews for Vivitar yet.