
PRO8300 User Guide
Page 7
... Size ...19 Locking control keys ...20 Menu Operation ...21 Maintenance 29 Cleaning the Lens ...29 Cleaning the Projector Housing ...29 Cleaning the Filter Cover ...30 Replacing the Lamp ...31 Specifications 33 Dimensions ...34 Ceiling mount installation ...34 Appendix 35 LED Indicator Messages! ...35 Compatibility Modes ...36 Troubleshooting ...38 RS-232 Command and...
... Size ...19 Locking control keys ...20 Menu Operation ...21 Maintenance 29 Cleaning the Lens ...29 Cleaning the Projector Housing ...29 Cleaning the Filter Cover ...30 Replacing the Lamp ...31 Specifications 33 Dimensions ...34 Ceiling mount installation ...34 Appendix 35 LED Indicator Messages! ...35 Compatibility Modes ...36 Troubleshooting ...38 RS-232 Command and...
PRO8300 User Guide
Page 38
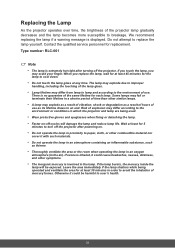
...). If you touch the lamp, you replace the lamp, wait for at least 45 minutes for each lamp. Do not attempt to an end. When you may differ from lamp to lamp and according to the environment of the projector lamp gradually decreases and the lamp becomes more susceptible to cool...conditions in which the projector and lamp are being operated and ventilate the area for at least for replacement. If the lamp bursts, the mercury inside the lamp will damage the lamp and reduce lamp life. If ozone is displayed. We recommend replacing the lamp if a warning message is inhaled,...
...). If you touch the lamp, you replace the lamp, wait for at least 45 minutes for each lamp. Do not attempt to an end. When you may differ from lamp to lamp and according to the environment of the projector lamp gradually decreases and the lamp becomes more susceptible to cool...conditions in which the projector and lamp are being operated and ventilate the area for at least for replacement. If the lamp bursts, the mercury inside the lamp will damage the lamp and reduce lamp life. If ozone is displayed. We recommend replacing the lamp if a warning message is inhaled,...
PRO8300 User Guide
Page 39
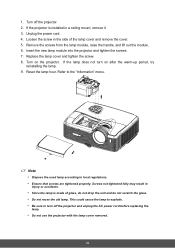
...accidents. • Since the lamp is made of the lamp cover and remove the cover. 5. 1. Remove the screws from the lamp module, raise the handle, and lift out the module. 6. Insert the new lamp module into the projector and tighten the screws. 7. Replace the lamp cover and tighten the screw.... 8. Turn on after the warm-up period, try reinstalling the lamp. 9. If the lamp does not turn off the projector. 2. Screws not tightened...
...accidents. • Since the lamp is made of the lamp cover and remove the cover. 5. 1. Remove the screws from the lamp module, raise the handle, and lift out the module. 6. Insert the new lamp module into the projector and tighten the screws. 7. Replace the lamp cover and tighten the screw.... 8. Turn on after the warm-up period, try reinstalling the lamp. 9. If the lamp does not turn off the projector. 2. Screws not tightened...


