
CD4200 Specification Sheet
Page 1
...-530 Network Media Player and choose scheduling software from CastaVista or Best Wave to your message across, brilliantly. ViewSonic's 42" CD4200 Commercial Display is designed for all your digital signage needs. HIGH DEFINITION DIGITAL SIGNAGE > Vivid graphics, clear text, stunning.... Wide viewing angles, high brightness and contrast and 1366x768 native resolution display crystal clear images in educational, retail, public and commercial signage applications. CD4200 42" COMMERCIAL LCD DISPLAY Get your LCD display with support for HDMI with enough room for movies, Internet content, ...
...-530 Network Media Player and choose scheduling software from CastaVista or Best Wave to your message across, brilliantly. ViewSonic's 42" CD4200 Commercial Display is designed for all your digital signage needs. HIGH DEFINITION DIGITAL SIGNAGE > Vivid graphics, clear text, stunning.... Wide viewing angles, high brightness and contrast and 1366x768 native resolution display crystal clear images in educational, retail, public and commercial signage applications. CD4200 42" COMMERCIAL LCD DISPLAY Get your LCD display with support for HDMI with enough room for movies, Internet content, ...

CD4200 Specification Sheet
Page 2
... offers and programs may be required. CD4200 42" COMMERCIAL LCD DISPLAY Complete Your Digital Signage Solution Add a ViewSonic® NMP-530 Network Media Player Choose a scheduling software Recommended for more product information, visit us on parts and backlight ViewSonic Corporation's QMS & EMS have been ...and stand SPK-006 • Stand STND-007 • Wall mount kit WMK-014 LCD Type 42" color TFT active matrix, wide LCD Display Area 36.6" horizontal x 20.5" vertical; 42" diagonal Native Resolution 1366x768 Contrast Ratio 1200:1 (typ) Viewing Angles 178° horizontal, ...
... offers and programs may be required. CD4200 42" COMMERCIAL LCD DISPLAY Complete Your Digital Signage Solution Add a ViewSonic® NMP-530 Network Media Player Choose a scheduling software Recommended for more product information, visit us on parts and backlight ViewSonic Corporation's QMS & EMS have been ...and stand SPK-006 • Stand STND-007 • Wall mount kit WMK-014 LCD Type 42" color TFT active matrix, wide LCD Display Area 36.6" horizontal x 20.5" vertical; 42" diagonal Native Resolution 1366x768 Contrast Ratio 1200:1 (typ) Viewing Angles 178° horizontal, ...
CD4200 User Guide
Page 2
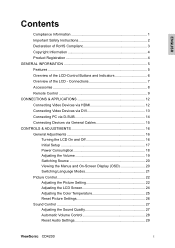
... Menus and On-Screen Display (OSD 20 Switching Language Modes 21 Picture Control 22 Adjusting the Picture Setting 22 Adjusting the LCD Screen 24 Adjusting the Color Temperature 25 Reset Picture Settings 26 Sound Control 27 Adjusting the Sound Quality 27 Automatic Volume Control 28 Reset Audio Settings 29 ViewSonic CD4200 i ENGLISH Contents Compliance...
... Menus and On-Screen Display (OSD 20 Switching Language Modes 21 Picture Control 22 Adjusting the Picture Setting 22 Adjusting the LCD Screen 24 Adjusting the Color Temperature 25 Reset Picture Settings 26 Sound Control 27 Adjusting the Sound Quality 27 Automatic Volume Control 28 Reset Audio Settings 29 ViewSonic CD4200 i ENGLISH Contents Compliance...

CD4200 User Guide
Page 11
...; ENGLISH Copyright Information Copyright © ViewSonic® Corporation, 2007. For Your Records Product Name: Model Number: Document Number: Serial Number: Purchase Date: CD4200 ViewSonic 42" LCD Commercial Display VS11778 CD4200-1_UG_ENG Rev. 1A 03-12-07 ...Product disposal at the end of product life The lamp in this document may be liable for you to ViewSonic. Please dispose of this product properly at end of its useful life. Taiwan: recycle.epa.gov.tw 4 ViewSonic CD4200 ViewSonic...
...; ENGLISH Copyright Information Copyright © ViewSonic® Corporation, 2007. For Your Records Product Name: Model Number: Document Number: Serial Number: Purchase Date: CD4200 ViewSonic 42" LCD Commercial Display VS11778 CD4200-1_UG_ENG Rev. 1A 03-12-07 ...Product disposal at the end of product life The lamp in this document may be liable for you to ViewSonic. Please dispose of this product properly at end of its useful life. Taiwan: recycle.epa.gov.tw 4 ViewSonic CD4200 ViewSonic...

CD4200 User Guide
Page 12
ENGLISH GENERAL INFORMATION Features Your LCD is designed with the latest technology and is a high-performance unit that includes the following special features : ‹ Multi-sources input included D-SUB, HDMI, Composite, S-... video input, resolution up to 720p, 1080i. ‹ Automatic Picture Control (APC) and Aspect Ratio Control (ARC) functions for end user customization of viewing preferences. ViewSonic CD4200 5
ENGLISH GENERAL INFORMATION Features Your LCD is designed with the latest technology and is a high-performance unit that includes the following special features : ‹ Multi-sources input included D-SUB, HDMI, Composite, S-... video input, resolution up to 720p, 1080i. ‹ Automatic Picture Control (APC) and Aspect Ratio Control (ARC) functions for end user customization of viewing preferences. ViewSonic CD4200 5

CD4200 User Guide
Page 13
... confirm. 6. NOTE 2 : The drawing of the LCD-Control Buttons and Indicators Front Panel Overview ENGLISH FUNCTION KEYS 1. Press SOURCE button on right side and the source menu will appear on or off NOTE 1 : These buttons on the LCD is only for menu. 3. POWER INDICATOR : BULE ... ViewSonic CD4200 When OSD (on right side to select your preferred source input and press MENU to select or access a sub-menu. 5. SOURCE : Select the input source (Video 1, Video 2 , YPbPr 1 , YPbPr 2 , HDMI, PC ). Press the CHANNEL (c / d) button on -screen display) is for menu. 4. The actual LCD ...
... confirm. 6. NOTE 2 : The drawing of the LCD-Control Buttons and Indicators Front Panel Overview ENGLISH FUNCTION KEYS 1. Press SOURCE button on right side and the source menu will appear on or off NOTE 1 : These buttons on the LCD is only for menu. 3. POWER INDICATOR : BULE ... ViewSonic CD4200 When OSD (on right side to select your preferred source input and press MENU to select or access a sub-menu. 5. SOURCE : Select the input source (Video 1, Video 2 , YPbPr 1 , YPbPr 2 , HDMI, PC ). Press the CHANNEL (c / d) button on -screen display) is for menu. 4. The actual LCD ...

CD4200 User Guide
Page 14
Overview of the LCD - Connections Side and Rear Panel ENGLISH ViewSonic CD4200 7
Overview of the LCD - Connections Side and Rear Panel ENGLISH ViewSonic CD4200 7

CD4200 User Guide
Page 15
Connect to the audio input jacks on your LCD's component video (YPbPr) and audio (L/R) jacks. Connect to your Amplifier/Home theater. 10 Service Port Only for service use. 8 ViewSonic CD4200 Connect to the Composite video and audio output jacks on your VCR or other video devices, for a sharper picture. Please use . ...on your VCR or other video devices. Please use additional cable for a sound. 3 PC Audio In Connect to the audio output jack of the LCD with a DVI output by using HDMI-to-DVI cable or adapter. 2 D-Sub Connect to the video output on your PC. You can also ...
Connect to the audio input jacks on your LCD's component video (YPbPr) and audio (L/R) jacks. Connect to your Amplifier/Home theater. 10 Service Port Only for service use. 8 ViewSonic CD4200 Connect to the Composite video and audio output jacks on your VCR or other video devices, for a sharper picture. Please use . ...on your VCR or other video devices. Please use additional cable for a sound. 3 PC Audio In Connect to the audio output jack of the LCD with a DVI output by using HDMI-to-DVI cable or adapter. 2 D-Sub Connect to the video output on your PC. You can also ...

CD4200 User Guide
Page 17
...Press to increase or decrease the volume.If the audio is 24 mute and press VOL + / - will navigate back through the menu. 10 ViewSonic CD4200 When using the remote control in the desired direction. VCR 04 Control DVD player or VCR. ENGLISH Remote Control This universal remote control can operate... up to move the on-screen highlight in LCD(TV) mode, please point the remote directly toward the Remote Control Sensor on the front panel. The Left arrow button will un-mute the audio. 10 CH + / - 11 Info ...
...Press to increase or decrease the volume.If the audio is 24 mute and press VOL + / - will navigate back through the menu. 10 ViewSonic CD4200 When using the remote control in the desired direction. VCR 04 Control DVD player or VCR. ENGLISH Remote Control This universal remote control can operate... up to move the on-screen highlight in LCD(TV) mode, please point the remote directly toward the Remote Control Sensor on the front panel. The Left arrow button will un-mute the audio. 10 CH + / - 11 Info ...

CD4200 User Guide
Page 18
...ENGLISH OK Press to select PC or HDMI mode. NOTE : In page 8 and 9, the descriptions of buttons in gray are not available in this LCD. PC / HD Press to select a currently highlighted choice on-screen. The sequence is Video 06 05 1→Video 2→YPbPr 1→YPbPr 2→... 15 Movie→Sports→Custom→Standard. 21 SLEEP 16 17 18 19 22 ARC(Aspect Ratio Control) 20 21 Toggle the picture mode. ViewSonic CD4200 11 YPbPr Press to select Video 1 or Video 2 mode. Press to control some widgets, toggling between 2 different settings such as ON and OFF...
...ENGLISH OK Press to select PC or HDMI mode. NOTE : In page 8 and 9, the descriptions of buttons in gray are not available in this LCD. PC / HD Press to select a currently highlighted choice on-screen. The sequence is Video 06 05 1→Video 2→YPbPr 1→YPbPr 2→... 15 Movie→Sports→Custom→Standard. 21 SLEEP 16 17 18 19 22 ARC(Aspect Ratio Control) 20 21 Toggle the picture mode. ViewSonic CD4200 11 YPbPr Press to select Video 1 or Video 2 mode. Press to control some widgets, toggling between 2 different settings such as ON and OFF...

CD4200 User Guide
Page 20
ENGLISH NOTE 1 : To receive video, connect a HDMI-to-DVI cable or HDMI-to-DVI adapter between the PC Audio In jack on the LCD and Audio Out jack on the DVD player/ Set-Top box. NOTE 3: Cables above are not offered. ViewSonic CD4200 13 Connecting Video Devices via DVI * This can be applied only if there is the DVI Output connector on the DVD player/ Set-top box. NOTE 2 : To receive sound, connect an audio cable between the HDMI connector on the LCD and the DVI connector on the external device.
ENGLISH NOTE 1 : To receive video, connect a HDMI-to-DVI cable or HDMI-to-DVI adapter between the PC Audio In jack on the LCD and Audio Out jack on the DVD player/ Set-Top box. NOTE 3: Cables above are not offered. ViewSonic CD4200 13 Connecting Video Devices via DVI * This can be applied only if there is the DVI Output connector on the DVD player/ Set-top box. NOTE 2 : To receive sound, connect an audio cable between the HDMI connector on the LCD and the DVI connector on the external device.

CD4200 User Guide
Page 21
NOTE 2 : To receive sound, connect a PC audio cable between D-Sub connector on the LCD and the D-Sub output connector on your PC. Connecting PC via D-SUB ENGLISH NOTE 1 : To receive video, connect a VGA cable between PC Audio In jack on the LCD and the Audio Out jack of the sound card on your PC. NOTE 3 : Cables above are not offered. 14 ViewSonic CD4200
NOTE 2 : To receive sound, connect a PC audio cable between D-Sub connector on the LCD and the D-Sub output connector on your PC. Connecting PC via D-SUB ENGLISH NOTE 1 : To receive video, connect a VGA cable between PC Audio In jack on the LCD and the Audio Out jack of the sound card on your PC. NOTE 3 : Cables above are not offered. 14 ViewSonic CD4200

CD4200 User Guide
Page 23
... Turn Off Press the power button on the remote control or right side of the LCD to turn it off automatically, if the input source keeps unavailable. 16 ViewSonic CD4200 Press the power button on . The display will power off . Please refer to page 16 to turn it on the remote... control or right side of the LCD. ENGLISH CONTROLS & ADJUSTMENTS General Adjustments Turning the LCD On and Off Turn On Plug the ...
... Turn Off Press the power button on the remote control or right side of the LCD to turn it off automatically, if the input source keeps unavailable. 16 ViewSonic CD4200 Press the power button on . The display will power off . Please refer to page 16 to turn it on the remote... control or right side of the LCD. ENGLISH CONTROLS & ADJUSTMENTS General Adjustments Turning the LCD On and Off Turn On Plug the ...

CD4200 User Guide
Page 25
...5W and it takes 12-15 seconds to the previous screen. 18 ViewSonic CD4200 High : The LCD can turn on LCD soon. Press Exit button to dismiss all menu or press ◄ button to return to turn on the LCD. There are three modes: Low/Medium/High Low : The power... to select Low, Medium or High. 6. Press ▲▼ and OK buttons to select Power Consumption. 4. Press the ▲▼ buttons to display the sub-menu. 5. Press ► button to select Settings. 3. ENGLISH Power Consumption Power Consumption is a power management technique which helps to turn on the...
...5W and it takes 12-15 seconds to the previous screen. 18 ViewSonic CD4200 High : The LCD can turn on LCD soon. Press Exit button to dismiss all menu or press ◄ button to return to turn on the LCD. There are three modes: Low/Medium/High Low : The power... to select Low, Medium or High. 6. Press ▲▼ and OK buttons to select Power Consumption. 4. Press the ▲▼ buttons to display the sub-menu. 5. Press ► button to select Settings. 3. ENGLISH Power Consumption Power Consumption is a power management technique which helps to turn on the...

CD4200 User Guide
Page 26
buttons to the previous volume level. Using Mute At any time, you can adjust the sound output of external devices which are connected to Audio Out sockets of this LCD. buttons to return audio back to increase or decrease the volume. Using Volume Control Press the VOL + / - buttons either on this remote control or this LCD, a user can turn off . 2. Press the Mute button and the sound turns off the sound using the Mute button. 1. Press Mute again or VOL + / - ViewSonic CD4200 19 ENGLISH Adjusting the Volume By pressing VOL + / -
buttons to the previous volume level. Using Mute At any time, you can adjust the sound output of external devices which are connected to Audio Out sockets of this LCD. buttons to return audio back to increase or decrease the volume. Using Volume Control Press the VOL + / - buttons either on this remote control or this LCD, a user can turn off . 2. Press the Mute button and the sound turns off the sound using the Mute button. 1. Press Mute again or VOL + / - ViewSonic CD4200 19 ENGLISH Adjusting the Volume By pressing VOL + / -

CD4200 User Guide
Page 27
.... With the power on the screen 3. A user can use the control buttons on the right side of the LCD or use the remote control to viewing the menus. 1. Viewing the Menus and On-Screen Display (OSD) You can also press the SOURCE button repeatedly to YPbPr 1 or YPbPr 2 mode. ENGLISH Switching Source... dismiss all menu or press Menu button to return to choose the source. 3. Press AV/SV, YPbPr, PC/HD buttons to the main menu. 20 ViewSonic CD4200 Select an input source as described below : AV/SV YPbPr PC/HD switch to page 10~13 and connect external devices. 2. Refer to Video 1 or...
.... With the power on the screen 3. A user can use the control buttons on the right side of the LCD or use the remote control to viewing the menus. 1. Viewing the Menus and On-Screen Display (OSD) You can also press the SOURCE button repeatedly to YPbPr 1 or YPbPr 2 mode. ENGLISH Switching Source... dismiss all menu or press Menu button to return to choose the source. 3. Press AV/SV, YPbPr, PC/HD buttons to the main menu. 20 ViewSonic CD4200 Select an input source as described below : AV/SV YPbPr PC/HD switch to page 10~13 and connect external devices. 2. Refer to Video 1 or...

CD4200 User Guide
Page 31
... menu. 6. ENGLISH 5. Press ► button again to select Settings. 3. Press ►/ ▼ button to display the main menu. 2. Adjusting the LCD Screen 1. Press the Menu button to select Aspect Ratio. Full Screen: stretch the image to fit the screen (None of the image is cut off, ... appear distorted ) Zoom : scale the image larger, and will cut off part of the image Subtitle : shift the image up to show the subtitle. 24 ViewSonic CD4200
... menu. 6. ENGLISH 5. Press ► button again to select Settings. 3. Press ►/ ▼ button to display the main menu. 2. Adjusting the LCD Screen 1. Press the Menu button to select Aspect Ratio. Full Screen: stretch the image to fit the screen (None of the image is cut off, ... appear distorted ) Zoom : scale the image larger, and will cut off part of the image Subtitle : shift the image up to show the subtitle. 24 ViewSonic CD4200

CD4200 User Guide
Page 40
...4 Enter the 5-digit code for a minimum of this LCD (Default) Universal VCR, DVD, PVR Universal Cable, Satellite, Video Accessory Universal Tuner, Amplifier, CD, Mini Disc. NOTE 3 : A long LED display indicates invalid code sequence. ViewSonic CD4200 33 The LED blinks located on the remote control once for... every digit entered except for the last digit, where it shall blink twice to this LCD, you can specify other devices to be ...
...4 Enter the 5-digit code for a minimum of this LCD (Default) Universal VCR, DVD, PVR Universal Cable, Satellite, Video Accessory Universal Tuner, Amplifier, CD, Mini Disc. NOTE 3 : A long LED display indicates invalid code sequence. ViewSonic CD4200 33 The LED blinks located on the remote control once for... every digit entered except for the last digit, where it shall blink twice to this LCD, you can specify other devices to be ...

CD4200 User Guide
Page 41
... the category and works through to normal operation. As the Remote searches its library, it shall blink twice to this LCD (Default) Universal VCR, DVD, PVR Universal Cable, Satellite, Video Accessory Universal Tuner, Amplifier, CD, Mini Disc. ...; (2 blinks) →[9]→[9]→[1] (2 blinks) → [2] (2 blinks) → [POWER]→[CH +] →[CH +]→... [SET] (2 blinks). 34 ViewSonic CD4200 STEP 4 Press Power button. STEP 5 Pressing SET button will work. Mode TV VCR CBL AUX Device Assignment Locked to confirm that [9][9][1] are entered correctly. The...
... the category and works through to normal operation. As the Remote searches its library, it shall blink twice to this LCD (Default) Universal VCR, DVD, PVR Universal Cable, Satellite, Video Accessory Universal Tuner, Amplifier, CD, Mini Disc. ...; (2 blinks) →[9]→[9]→[1] (2 blinks) → [2] (2 blinks) → [POWER]→[CH +] →[CH +]→... [SET] (2 blinks). 34 ViewSonic CD4200 STEP 4 Press Power button. STEP 5 Pressing SET button will work. Mode TV VCR CBL AUX Device Assignment Locked to confirm that [9][9][1] are entered correctly. The...

CD4200 User Guide
Page 49
Check the Hue, Saturation and Color adjustments 42 ViewSonic CD4200 The picture is in the right mode (TV / VCR / CBL / AUX) There are stripes on the screen or colors fade. ▪ There may be interference .... ▪ Check the Brightness of its life. ENGLISH Picture is light or improperly tinted. ▪ Check the Hue, Saturation and Color adjustments. ▪ Reset the LCD to the factory default settings. Contact an authorized service center.
Check the Hue, Saturation and Color adjustments 42 ViewSonic CD4200 The picture is in the right mode (TV / VCR / CBL / AUX) There are stripes on the screen or colors fade. ▪ There may be interference .... ▪ Check the Brightness of its life. ENGLISH Picture is light or improperly tinted. ▪ Check the Hue, Saturation and Color adjustments. ▪ Reset the LCD to the factory default settings. Contact an authorized service center.


