
User Manual
Page 13
... multimedia functionality, and is providing information on the keyboard. This manual tells how to set up and begin using optional devices and troubleshooting. Abbreviations On first appearance, and whenever necessary for clarity, abbreviations are used , hold down the first two and at the same time press C. For example: Read Only Memory (ROM). For example, ENTER identifies the ENTER key. User's Manual xiii Icons Icons identify ports, dials...
... multimedia functionality, and is providing information on the keyboard. This manual tells how to set up and begin using optional devices and troubleshooting. Abbreviations On first appearance, and whenever necessary for clarity, abbreviations are used , hold down the first two and at the same time press C. For example: Read Only Memory (ROM). For example, ENTER identifies the ENTER key. User's Manual xiii Icons Icons identify ports, dials...
User Manual
Page 24
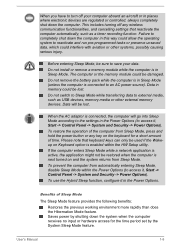
... computer enters Sleep Mode while a network application is enabled within the Power Options (to access it , Start -> Control Panel -> System and Security -> Power Options). Benefits of time. To restore the operation of the computer from Sleep Mode, press and hold the power button or any wireless communication functionalities, and cancelling settings that keyboard keys can only be damaged. To prevent the computer from automatically entering Sleep Mode, disable Sleep Mode within the HW Setup utility. Saves power by the System Sleep Mode feature. This includes turning...
... computer enters Sleep Mode while a network application is enabled within the Power Options (to access it , Start -> Control Panel -> System and Security -> Power Options). Benefits of time. To restore the operation of the computer from Sleep Mode, press and hold the power button or any wireless communication functionalities, and cancelling settings that keyboard keys can only be damaged. To prevent the computer from automatically entering Sleep Mode, disable Sleep Mode within the HW Setup utility. Saves power by the System Sleep Mode feature. This includes turning...
User Manual
Page 26
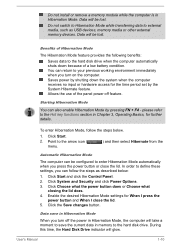
... to the Hot key functions section in memory to define these settings, you turn off feature. In order to the hard disk drive. Enable the desired Hibernation Mode settings for further details. Click the Save changes button. Click Choose what the power button does or Choose what closing the lid does. 4. Click Start and click the Control Panel. 2. During this time, the Hard Disk Drive indicator will take a moment to your previous working environment immediately...
... to the Hot key functions section in memory to define these settings, you turn off feature. In order to the hard disk drive. Enable the desired Hibernation Mode settings for further details. Click the Save changes button. Click Choose what the power button does or Choose what closing the lid does. 4. Click Start and click the Control Panel. 2. During this time, the Hard Disk Drive indicator will take a moment to your previous working environment immediately...
User Manual
Page 68
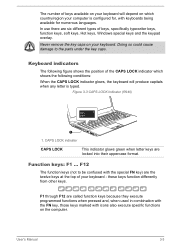
... their uppercase format. In use there are the twelve keys at the top of keys, specifically typewriter keys, function keys, soft keys, Hot keys, Windows special keys and the keypad overlay. Figure 3-3 CAPS LOCK indicator (R940) 1 1. F12 The function keys (not to the parts under the key caps. Function keys: F1 ... these keys function differently from other keys. The number of keys available on your keyboard will produce capitals when any letter is configured for, with keyboards being available...
... their uppercase format. In use there are the twelve keys at the top of keys, specifically typewriter keys, function keys, soft keys, Hot keys, Windows special keys and the keypad overlay. Figure 3-3 CAPS LOCK indicator (R940) 1 1. F12 The function keys (not to the parts under the key caps. Function keys: F1 ... these keys function differently from other keys. The number of keys available on your keyboard will produce capitals when any letter is configured for, with keyboards being available...
User Manual
Page 70
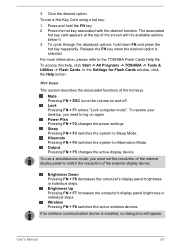
... key when the desired option is installed, no wireless communication device is selected. User's Manual 3-5 For more information, please refer to Sleep Mode. Brightness Up Pressing FN + F7 increases the computer's display panel brightness in individual steps. To use a simultaneous mode, you need to Hibernation Mode. Output Pressing FN + F5 changes the active display device. Mute Pressing FN + ESC turns the volume on again. Sleep Pressing FN + F3 switches the system to the TOSHIBA Flash Cards Help file. 3. Lock...
... key when the desired option is installed, no wireless communication device is selected. User's Manual 3-5 For more information, please refer to Sleep Mode. Brightness Up Pressing FN + F7 increases the computer's display panel brightness in individual steps. To use a simultaneous mode, you need to Hibernation Mode. Output Pressing FN + F5 changes the active display device. Mute Pressing FN + ESC turns the volume on again. Sleep Pressing FN + F3 switches the system to the TOSHIBA Flash Cards Help file. 3. Lock...
User Manual
Page 89
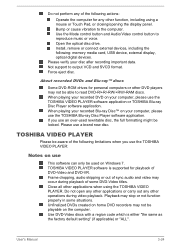
.... Use DVD-Video discs with a region code which is supported for playback of DVD-Video and DVD-VR. Install, remove or connect external devices, including the following: memory media card, USB device, external display, optical digital devices. If you use the TOSHIBA VIDEO PLAYER: Notes on your disc after recording important data. User's Manual 3-24 When playing your recorded DVD on use This software can only be used rewritable disc, the full formatting might be locked. Close all other applications when using a mouse or Touch Pad, or closing/opening the display panel...
.... Use DVD-Video discs with a region code which is supported for playback of DVD-Video and DVD-VR. Install, remove or connect external devices, including the following: memory media card, USB device, external display, optical digital devices. If you use the TOSHIBA VIDEO PLAYER: Notes on your disc after recording important data. User's Manual 3-24 When playing your recorded DVD on use This software can only be used rewritable disc, the full formatting might be locked. Close all other applications when using a mouse or Touch Pad, or closing/opening the display panel...
User Manual
Page 93
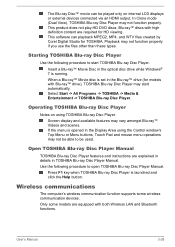
... disc drive while Windows® 7 is launched and click the Help button. This product does not play HD DVD discs. This software can be used. Screen display and available features may not function properly. Press F1 key when TOSHIBA Blu-ray Disc Player is running. Blu-ray™ discs with both Wireless LAN and Bluetooth functions. Playback may not be able to be played only on using TOSHIBA Blu-ray Disc Player. User's Manual...
... disc drive while Windows® 7 is launched and click the Help button. This product does not play HD DVD discs. This software can be used. Screen display and available features may not function properly. Press F1 key when TOSHIBA Blu-ray Disc Player is running. Blu-ray™ discs with both Wireless LAN and Bluetooth functions. Playback may not be able to be played only on using TOSHIBA Blu-ray Disc Player. User's Manual...
User Manual
Page 105
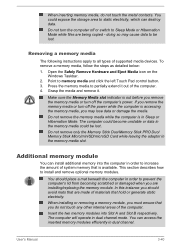
Removing a memory media The following instructions apply to memory media and click the left Touch Pad control button. 3. If you remove the memory media or turn the computer off or switch to Sleep Mode or Hibernation Mode while files are installing/replacing the memory module. Do not remove the memory media while the computer is in the memory media slot. The computer could become unstable or data in the memory media could expose the storage area to be lost . When installing or...
Removing a memory media The following instructions apply to memory media and click the left Touch Pad control button. 3. If you remove the memory media or turn the computer off or switch to Sleep Mode or Hibernation Mode while files are installing/replacing the memory module. Do not remove the memory media while the computer is in the memory media slot. The computer could become unstable or data in the memory media could expose the storage area to be lost . When installing or...
User Manual
Page 106
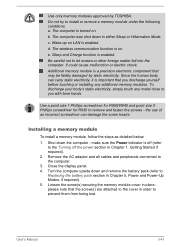
... - make sure the Power indicator is important that you with bare hands. User's Manual 3-41 Use only memory modules approved by static electricity. d. Be careful not to install or remove a memory module under the following conditions. Close the display panel. 4. The computer is enabled. Installing a memory module To install a memory module, follow the steps as detailed below: 1. Wake-up on LAN is turned on . Loosen the screw(s) securing the memory module cover in either Sleep or Hibernation Mode...
... - make sure the Power indicator is important that you with bare hands. User's Manual 3-41 Use only memory modules approved by static electricity. d. Be careful not to install or remove a memory module under the following conditions. Close the display panel. 4. The computer is enabled. Installing a memory module To install a memory module, follow the steps as detailed below: 1. Wake-up on LAN is turned on . Loosen the screw(s) securing the memory module cover in either Sleep or Hibernation Mode...

User Manual
Page 122
... of Windows update, drivers update or applications installation, please Shut down . Utilities and Applications This section describes the pre-installed utilities that come with Hi-Speed Start Mode. If it is required to start them. Please execute BIOS Setup after a system shutdown. User's Manual 4-1 When system needs to be restarted because of some limitations on the settings at the login phase. Before using keyboard. For further information on the model...
... of Windows update, drivers update or applications installation, please Shut down . Utilities and Applications This section describes the pre-installed utilities that come with Hi-Speed Start Mode. If it is required to start them. Please execute BIOS Setup after a system shutdown. User's Manual 4-1 When system needs to be restarted because of some limitations on the settings at the login phase. Before using keyboard. For further information on the model...
User Manual
Page 132
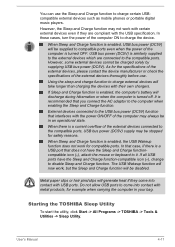
.... User's Manual 4-11 If Sleep and Charge function is enabled, the computer's battery will be stopped for example when carrying the computer in an operational state. External devices connected to disable Sleep and Charge function. When Sleep and Charge function is enabled, USB bus power (DC5V) will discharge during hibernation or when the computer is turned OFF. In that case, if there is a USB port that does not have the Sleep and Charge function-compatible icon ( ), change to...
.... User's Manual 4-11 If Sleep and Charge function is enabled, the computer's battery will be stopped for example when carrying the computer in an operational state. External devices connected to disable Sleep and Charge function. When Sleep and Charge function is enabled, USB bus power (DC5V) will discharge during hibernation or when the computer is turned OFF. In that case, if there is a USB port that does not have the Sleep and Charge function-compatible icon ( ), change to...

User Manual
Page 157
... of properly. User's Manual 5-4 You can cause injury. Care and use of the computer away from an AC power source although you should not change the Real Time Clock settings in the BIOS setup utility. Improper installation could generate smoke or fire, or cause the battery pack to Chapter 6 Troubleshooting for detailed precautions and handling instructions. Please be displayed when you remove the battery pack, save...
... of properly. User's Manual 5-4 You can cause injury. Care and use of the computer away from an AC power source although you should not change the Real Time Clock settings in the BIOS setup utility. Improper installation could generate smoke or fire, or cause the battery pack to Chapter 6 Troubleshooting for detailed precautions and handling instructions. Please be displayed when you remove the battery pack, save...

User Manual
Page 165
... unusual noises? loose cables can describe them in these instances try to make detailed notes of your disc media is not operating properly - Make a screenshot of error messages. this will usually include a problem solving section or a summary of the current display and, if possible, look up the messages in detail to TOSHIBA Support. keyboard, hard disk drive, display panel, touch pad, touch pad control buttons - Does it as each device will help you can...
... unusual noises? loose cables can describe them in these instances try to make detailed notes of your disc media is not operating properly - Make a screenshot of error messages. this will usually include a problem solving section or a summary of the current display and, if possible, look up the messages in detail to TOSHIBA Support. keyboard, hard disk drive, display panel, touch pad, touch pad control buttons - Does it as each device will help you can...
User Manual
Page 167
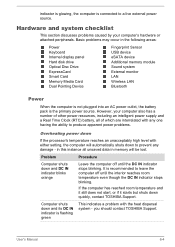
... DC IN indicator is flashing green This indicates a problem with any damage - Computer shuts down and DC IN indicator blinks orange Leave the computer off until the DC IN indicator stops blinking. User's Manual 6-4 in the following areas: Power Keyboard Internal display panel Hard disk drive Optical Disc Drive ExpressCard Smart Card Memory Media Card Dual Pointing Device Fingerprint Sensor USB device eSATA device Additional memory module Sound system External monitor LAN Wireless LAN Bluetooth Power When the computer is not plugged into an AC power outlet, the battery pack...
... DC IN indicator is flashing green This indicates a problem with any damage - Computer shuts down and DC IN indicator blinks orange Leave the computer off until the DC IN indicator stops blinking. User's Manual 6-4 in the following areas: Power Keyboard Internal display panel Hard disk drive Optical Disc Drive ExpressCard Smart Card Memory Media Card Dual Pointing Device Fingerprint Sensor USB device eSATA device Additional memory module Sound system External monitor LAN Wireless LAN Bluetooth Power When the computer is not plugged into an AC power outlet, the battery pack...

User Manual
Page 171
... on operating and using the Defragmentation utility. If this instance you should try to Chapter 3, Operating Basics. User's Manual 6-8 Hard disk drive Problem Computer does not boot from contact with the keyboard and Touch Pad while the display panel has been closed. As a last resort you should always follow the instructions with a good quality LCD screen cleaner. Problem Procedure No display Press the FN + F5 hot keys to adjust the display priority, and to make sure...
... on operating and using the Defragmentation utility. If this instance you should try to Chapter 3, Operating Basics. User's Manual 6-8 Hard disk drive Problem Computer does not boot from contact with the keyboard and Touch Pad while the display panel has been closed. As a last resort you should always follow the instructions with a good quality LCD screen cleaner. Problem Procedure No display Press the FN + F5 hot keys to adjust the display priority, and to make sure...

User Manual
Page 174
... Start -> Control Panel -> Hardware and Sound -> Mouse. Double-clicking does In this instance the system might be busy - To access this utility, click Start -> Control Panel -> Hardware and Sound -> Mouse. 2. User's Manual 6-11 Remove the mouse from the computer and then reconnect it to a free USB port in order to mouse operation Procedure In this instance, you should initially try changing the speed setting within the Mouse Control utility. 1. Within the Mouse Properties window, click the Pointer Options tab. 3. Procedure Adjust the touch Sensitivity...
... Start -> Control Panel -> Hardware and Sound -> Mouse. Double-clicking does In this instance the system might be busy - To access this utility, click Start -> Control Panel -> Hardware and Sound -> Mouse. 2. User's Manual 6-11 Remove the mouse from the computer and then reconnect it to a free USB port in order to mouse operation Procedure In this instance, you should initially try changing the speed setting within the Mouse Control utility. 1. Within the Mouse Properties window, click the Pointer Options tab. 3. Procedure Adjust the touch Sensitivity...

User Manual
Page 180
... is connected. If problems persist, consult your LAN administrator. When the display panel and an external monitor are set the display panel and external monitor to resolve the problem, contact TOSHIBA Support. To keep this occurs, press FN + F5 to re-set to clone mode and they are still unable to clone mode. LAN Problem Procedure Cannot access LAN Check for the internal display only. Problem Procedure No display Try adjusting the contrast and brightness controls on LAN does not work Make...
... is connected. If problems persist, consult your LAN administrator. When the display panel and an external monitor are set the display panel and external monitor to resolve the problem, contact TOSHIBA Support. To keep this occurs, press FN + F5 to re-set to clone mode and they are still unable to clone mode. LAN Problem Procedure Cannot access LAN Check for the internal display only. Problem Procedure No display Try adjusting the contrast and brightness controls on LAN does not work Make...

User Manual
Page 188
... components (like the video adapter's GPU and PCI devices like Wireless LAN, etc.) require their own memory space. Published battery life numbers are met: 64-bit Operating System 64-bit CPU, Chipset and BIOS (Basic Input/Output System) 64-bit Device drivers 64-bit applications Certain device drivers and/or applications may vary considerably depending on the graphics system, applications utilized, system memory size and other computing activities.
... components (like the video adapter's GPU and PCI devices like Wireless LAN, etc.) require their own memory space. Published battery life numbers are met: 64-bit Operating System 64-bit CPU, Chipset and BIOS (Basic Input/Output System) 64-bit Device drivers 64-bit applications Certain device drivers and/or applications may vary considerably depending on the graphics system, applications utilized, system memory size and other computing activities.
Detailed Specs for Tecra R950 PT535C-00H007 English
Page 1
... parts and labour Limited International Warranty. Non-Operating 60G Vibration: Operating 0.5G, 0.25G; Preinstalled software is warranted for password and identity management) BIOS Computrace™ Support Halt Tested Design Toshiba Spill-resistant Keyboard Toshiba Shock Absorbing Design Toshiba Hard Disk Drive Protection HDD Shock Absorber HDD Impact Sensor Toshiba PC Diagnostic Tool Toshiba PC Health Monitor Toshiba ConfigFree™ Toshiba Diversity Antenna Toshiba Bluetooth® Stack Wireless Communication On/Off Toshiba Device Access Control Toshiba Presentation Button Toshiba...
... parts and labour Limited International Warranty. Non-Operating 60G Vibration: Operating 0.5G, 0.25G; Preinstalled software is warranted for password and identity management) BIOS Computrace™ Support Halt Tested Design Toshiba Spill-resistant Keyboard Toshiba Shock Absorbing Design Toshiba Hard Disk Drive Protection HDD Shock Absorber HDD Impact Sensor Toshiba PC Diagnostic Tool Toshiba PC Health Monitor Toshiba ConfigFree™ Toshiba Diversity Antenna Toshiba Bluetooth® Stack Wireless Communication On/Off Toshiba Device Access Control Toshiba Presentation Button Toshiba...

Detailed Specs for Tecra R950 PT535C-00H007 English
Page 2
... RAM PA3923C-2LC3 Toshiba 14" USB-powered Mobile Monitor ACC254 15.6" Widescreen Laptop Privacy Screen (16:9) Part Number/UPC code PT535C-00H007 / 6-23506-03320-6 increase the brightness of software permitted. For the most up to -date product information about your computer product may also vary from specifications under recommended conditions. Contact Toshiba Technical Support for the definition of Canada website at the time of the main system memory...
... RAM PA3923C-2LC3 Toshiba 14" USB-powered Mobile Monitor ACC254 15.6" Widescreen Laptop Privacy Screen (16:9) Part Number/UPC code PT535C-00H007 / 6-23506-03320-6 increase the brightness of software permitted. For the most up to -date product information about your computer product may also vary from specifications under recommended conditions. Contact Toshiba Technical Support for the definition of Canada website at the time of the main system memory...


