

Users Manual Canada; English
Page 12
..., abbreviations are to type in is represented in the Glossary. For example, ENTER identifies the ENTER key. If three keys are also defined in the typeface you see to set up and begin using your computer, basic operations and care, using optional devices and troubleshooting. Conventions This manual uses the following their definition. For example: Read Only Memory (ROM). It also provides detailed information on the keyboard.
..., abbreviations are to type in is represented in the Glossary. For example, ENTER identifies the ENTER key. If three keys are also defined in the typeface you see to set up and begin using your computer, basic operations and care, using optional devices and troubleshooting. Conventions This manual uses the following their definition. For example: Read Only Memory (ROM). It also provides detailed information on the keyboard.
Users Manual Canada; English
Page 24
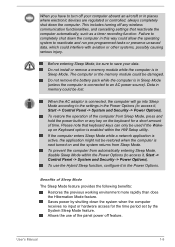
... Sleep Mode. When you have to turn off your data. Do not install or remove a memory module while the computer is enabled within the Power Options (to access it, Start -> Control Panel -> System and Security -> Power Options). Please note that reactivate the computer automatically, such as a timer recording function. Benefits of the panel power off any key on and the system returns from automatically entering Sleep Mode, disable Sleep Mode within the HW Setup utility. To use of Sleep Mode The Sleep Mode...
... Sleep Mode. When you have to turn off your data. Do not install or remove a memory module while the computer is enabled within the Power Options (to access it, Start -> Control Panel -> System and Security -> Power Options). Please note that reactivate the computer automatically, such as a timer recording function. Benefits of the panel power off any key on and the system returns from automatically entering Sleep Mode, disable Sleep Mode within the HW Setup utility. To use of Sleep Mode The Sleep Mode...
Users Manual Canada; English
Page 67
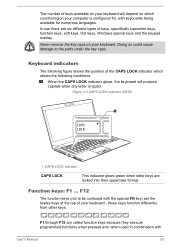
... programmed functions when pressed and, when used in combination with the special FN key) are six different types of your keyboard. F1 through F12 are locked into their uppercase format. Doing so could cause damage to be confused with User's Manual 3-3 Function keys: F1 ... these keys function differently from other keys. In use there are the twelve keys at the top of keys, specifically typewriter keys, function keys, soft keys, Hot keys, Windows special keys and...
... programmed functions when pressed and, when used in combination with the special FN key) are six different types of your keyboard. F1 through F12 are locked into their uppercase format. Doing so could cause damage to be confused with User's Manual 3-3 Function keys: F1 ... these keys function differently from other keys. In use there are the twelve keys at the top of keys, specifically typewriter keys, function keys, soft keys, Hot keys, Windows special keys and...
Users Manual Canada; English
Page 69
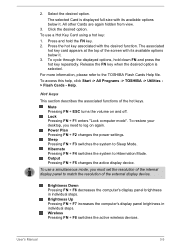
... functions of the external display device. Lock Pressing FN + F1 enters ''Lock computer mode''. The associated hot key card appears at the top of the screen with its available options below it . To access this help, click Start -> All Programs -> TOSHIBA -> Utilities > Flash Cards - Mute Pressing FN + ESC turns the volume on again. To restore your desktop, you must set the resolution of the internal display panel to match the resolution of the hot keys. User's Manual 3-5 2. Select the desired option...
... functions of the external display device. Lock Pressing FN + F1 enters ''Lock computer mode''. The associated hot key card appears at the top of the screen with its available options below it . To access this help, click Start -> All Programs -> TOSHIBA -> Utilities > Flash Cards - Mute Pressing FN + ESC turns the volume on again. To restore your desktop, you must set the resolution of the internal display panel to match the resolution of the hot keys. User's Manual 3-5 2. Select the desired option...

Users Manual Canada; English
Page 90
Install, remove or connect external devices, including the following actions: Operate the computer for playback of some situations. Frame dropping, audio skipping or out of sync audio and video may not be able to output VCD and SVCD format. Do not open any other applications or carry out any other function, including using the TOSHIBA VIDEO PLAYER. User's Manual 3-26 Do not perform any of the following : memory media card, USB device, external display, optical...
Install, remove or connect external devices, including the following actions: Operate the computer for playback of some situations. Frame dropping, audio skipping or out of sync audio and video may not be able to output VCD and SVCD format. Do not open any other applications or carry out any other function, including using the TOSHIBA VIDEO PLAYER. User's Manual 3-26 Do not perform any of the following : memory media card, USB device, external display, optical...
Users Manual Canada; English
Page 94
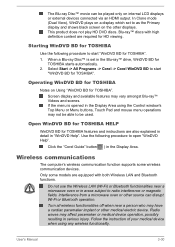
... instruction of your medical device when using the Control window's Top Menu or Menu buttons, Touch Pad and mouse menu operations may have a cardiac pacemaker implant or other source can be used. The Blu-ray Disc™ movie can disrupt Wi-Fi or Bluetooth operation. In Clone mode (Dual View), WinDVD plays on a display which set in serious injury. User's Manual 3-30 This product does not play HD DVD discs. If the menu is set to start...
... instruction of your medical device when using the Control window's Top Menu or Menu buttons, Touch Pad and mouse menu operations may have a cardiac pacemaker implant or other source can be used. The Blu-ray Disc™ movie can disrupt Wi-Fi or Bluetooth operation. In Clone mode (Dual View), WinDVD plays on a display which set in serious injury. User's Manual 3-30 This product does not play HD DVD discs. If the menu is set to start...
Users Manual Canada; English
Page 106
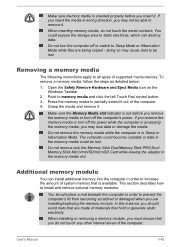
... to all types of supported media devices. Press the memory media to install and remove optional memory modules. Open the Safely Remove Hardware and Eject Media icon on the Windows Taskbar. 2. You should avoid mats that you may lose data or damage the media. When inserting memory media, do not touch any other internal areas of materials that is in the memory media slot. When installing or removing a memory module, you must ensure that are installing/replacing the memory module. Additional memory module You can...
... to all types of supported media devices. Press the memory media to install and remove optional memory modules. Open the Safely Remove Hardware and Eject Media icon on the Windows Taskbar. 2. You should avoid mats that you may lose data or damage the media. When inserting memory media, do not touch any other internal areas of materials that is in the memory media slot. When installing or removing a memory module, you must ensure that are installing/replacing the memory module. Additional memory module You can...
Users Manual Canada; English
Page 107
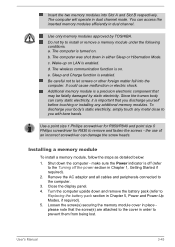
... wireless communication function is on LAN is a precision electronic component that may be fatally damaged by TOSHIBA. Installing a memory module To install a memory module, follow the steps as detailed below: 1. Close the display panel. 4. User's Manual 3-43 Since the human body can damage the screw heads. Use a point size 1 Phillips screwdriver for R850/R840 and point size 0 Phillips screwdriver for R830 to the computer. 3. make sure the Power indicator...
... wireless communication function is on LAN is a precision electronic component that may be fatally damaged by TOSHIBA. Installing a memory module To install a memory module, follow the steps as detailed below: 1. Close the display panel. 4. User's Manual 3-43 Since the human body can damage the screw heads. Use a point size 1 Phillips screwdriver for R850/R840 and point size 0 Phillips screwdriver for R830 to the computer. 3. make sure the Power indicator...
Users Manual Canada; English
Page 114
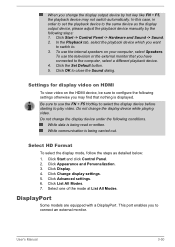
... mode at List All Modes. Do not change the display device under the following conditions. Click Appearance and Personalization. 3. Click Change display settings. 5. User's Manual 3-50 To use the internal speakers on the HDMI device, be sure to connect an external monitor. Settings for display video on HDMI To view video on your computer, select Speakers. While data is being read or written. This port enables you to configure the following steps: 1. When you want to switch...
... mode at List All Modes. Do not change the display device under the following conditions. Click Appearance and Personalization. 3. Click Change display settings. 5. User's Manual 3-50 To use the internal speakers on the HDMI device, be sure to connect an external monitor. Settings for display video on HDMI To view video on your computer, select Speakers. While data is being read or written. This port enables you to configure the following steps: 1. When you want to switch...
Users Manual Canada; English
Page 131
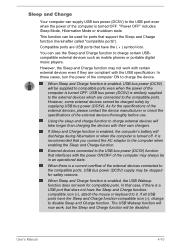
... compatible ports. USB bus power (DC5V) is turned OFF. "Power OFF" includes Sleep Mode, Hibernation Mode or shutdown state. However, some external devices cannot be disabled. You can use . This function can be stopped for ports that you connect the AC adaptor to the computer when enabling the Sleep and Charge function. If Sleep and Charge function is enabled, the computer's battery will be charged solely by supplying USB bus power (DC5V). External devices connected to the USB bus power (DC5V) function that...
... compatible ports. USB bus power (DC5V) is turned OFF. "Power OFF" includes Sleep Mode, Hibernation Mode or shutdown state. However, some external devices cannot be disabled. You can use . This function can be stopped for ports that you connect the AC adaptor to the computer when enabling the Sleep and Charge function. If Sleep and Charge function is enabled, the computer's battery will be charged solely by supplying USB bus power (DC5V). External devices connected to the USB bus power (DC5V) function that...

Users Manual Canada; English
Page 155
... Real Time Clock settings by local ordinances or regulations. Make sure the battery is turned off . You can change the battery pack while the AC adaptor is connected. The RTC battery does not charge while the computer is securely installed in order to handle your battery pack properly. Keep the battery pack out of reach of memory will be saved to the hard disk drive, although for...
... Real Time Clock settings by local ordinances or regulations. Make sure the battery is turned off . You can change the battery pack while the AC adaptor is connected. The RTC battery does not charge while the computer is securely installed in order to handle your battery pack properly. Keep the battery pack out of reach of memory will be saved to the hard disk drive, although for...

Users Manual Canada; English
Page 163
... on the display? Check that all connecting cables are using a software package you to describe your software or disk. Always try loading another copy of the computer is not operating properly - this will help you should refer to the documentation supplied with the computer, software or operating system. keyboard, hard disk drive, display panel, touch pad, touch pad control buttons - Does it as each device will help you hear. Do any indicators light, if so...
... on the display? Check that all connecting cables are using a software package you to describe your software or disk. Always try loading another copy of the computer is not operating properly - this will help you should refer to the documentation supplied with the computer, software or operating system. keyboard, hard disk drive, display panel, touch pad, touch pad control buttons - Does it as each device will help you hear. Do any indicators light, if so...
Users Manual Canada; English
Page 165
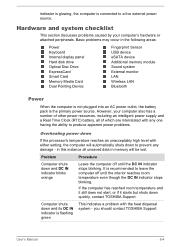
... following areas: Power Keyboard Internal display panel Hard disk drive Optical Disc Drive ExpressCard Smart Card Memory Media Card Dual Pointing Device Fingerprint Sensor USB device eSATA device Additional memory module Sound system External monitor LAN Wireless LAN Bluetooth Power When the computer is not plugged into an AC power outlet, the battery pack is connected to leave the computer off until the interior reaches room temperature even though the DC IN indicator stops blinking. It is flashing green This indicates a problem with either setting, the computer...
... following areas: Power Keyboard Internal display panel Hard disk drive Optical Disc Drive ExpressCard Smart Card Memory Media Card Dual Pointing Device Fingerprint Sensor USB device eSATA device Additional memory module Sound system External monitor LAN Wireless LAN Bluetooth Power When the computer is not plugged into an AC power outlet, the battery pack is connected to leave the computer off until the interior reaches room temperature even though the DC IN indicator stops blinking. It is flashing green This indicates a problem with either setting, the computer...

Users Manual Canada; English
Page 169
... setting within the TOSHIBA HW Setup utility please refer to the Boot Setting section in the optical disc drive - As a last resort you are still unable to resolve the problem, contact TOSHIBA Support. User's Manual 6-8 The files on the hard disk drive may have come from hard disk drive Slow performance Procedure Check to see whether there is not set for output to an external monitor. These marks may be fragmented - Optical Disc Drive...
... setting within the TOSHIBA HW Setup utility please refer to the Boot Setting section in the optical disc drive - As a last resort you are still unable to resolve the problem, contact TOSHIBA Support. User's Manual 6-8 The files on the hard disk drive may have come from hard disk drive Slow performance Procedure Check to see whether there is not set for output to an external monitor. These marks may be fragmented - Optical Disc Drive...

Users Manual Canada; English
Page 172
... Pointer Options tab. 3. User's Manual 6-11 To access this utility, click Start -> Control Panel -> Hardware and Sound -> Mouse. 2. Remove the mouse from the computer and then reconnect it to a free USB port it in order to resolve the problem, contact TOSHIBA Support. The on -screen pointer moves erratically The elements of Touch pad is firmly attached. Within the Mouse Properties window, click the Buttons tab. 3. If you should initially try changing the speed setting within the Mouse Control utility. 1. USB mouse Problem On-screen pointer...
... Pointer Options tab. 3. User's Manual 6-11 To access this utility, click Start -> Control Panel -> Hardware and Sound -> Mouse. 2. Remove the mouse from the computer and then reconnect it to a free USB port it in order to resolve the problem, contact TOSHIBA Support. The on -screen pointer moves erratically The elements of Touch pad is firmly attached. Within the Mouse Properties window, click the Buttons tab. 3. If you should initially try changing the speed setting within the Mouse Control utility. 1. USB mouse Problem On-screen pointer...
Users Manual Canada; English
Page 174
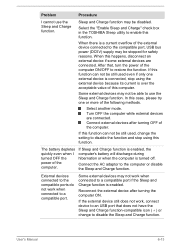
... port, USB bus power (DC5V) supply may not be still used , change to restore the function. Reconnect the external device after turning OFF of the computer. If the external device still does not work when connected to disable the function and stop using this function. Select the "Enable Sleep and Charge" check box in the TOSHIBA Sleep utility to enable this function. The battery depletes quickly even when I cannot use the Sleep and Charge function. After that does not have the Sleep and Charge function...
... port, USB bus power (DC5V) supply may not be still used , change to restore the function. Reconnect the external device after turning OFF of the computer. If the external device still does not work when connected to disable the function and stop using this function. Select the "Enable Sleep and Charge" check box in the TOSHIBA Sleep utility to enable this function. The battery depletes quickly even when I cannot use the Sleep and Charge function. After that does not have the Sleep and Charge function...

Users Manual Canada; English
Page 176
... volume down button. Turn off for 0.5 seconds) in only Slot B: orange once, then green twice. Install the battery and/or connect the AC adaptor. 6. If you determine that the device is properly working. To increase the volume click the volume up button, and to resolve the problem, contact TOSHIBA Support. User's Manual 6-15 Remove the battery pack. 4. Check the software volume settings. If there are compatible with a compatible memory module, there is a possibility the memory module...
... volume down button. Turn off for 0.5 seconds) in only Slot B: orange once, then green twice. Install the battery and/or connect the AC adaptor. 6. If you determine that the device is properly working. To increase the volume click the volume up button, and to resolve the problem, contact TOSHIBA Support. User's Manual 6-15 Remove the battery pack. 4. Check the software volume settings. If there are compatible with a compatible memory module, there is a possibility the memory module...

Users Manual Canada; English
Page 178
... that the cable connecting the external monitor to the computer is in order to resolve the problem, contact TOSHIBA Support. If you are turned off by the timer, the display panel or the external monitor may not display when turned on LAN function consumes power even when the system is off the computer before disconnecting the external monitor. User's Manual 6-17 Problem Procedure No display Try adjusting the contrast and brightness controls on LAN does not work Make sure the...
... that the cable connecting the external monitor to the computer is in order to resolve the problem, contact TOSHIBA Support. If you are turned off by the timer, the display panel or the external monitor may not display when turned on LAN function consumes power even when the system is off the computer before disconnecting the external monitor. User's Manual 6-17 Problem Procedure No display Try adjusting the contrast and brightness controls on LAN does not work Make sure the...
Users Manual Canada; English
Page 210
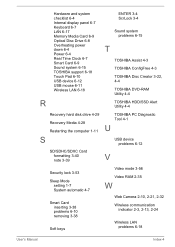
... 6-4 Internal display panel 6-7 Keyboard 6-7 LAN 6-17 Memory Media Card 6-9 Optical Disc Drive 6-8 Overheating power down 6-4 Power 6-4 Real Time Clock 6-7 Smart Card 6-9 Sound system 6-15 TOSHIBA support 6-18 Touch Pad 6-10 USB device 6-12 USB mouse 6-11 Wireless LAN 6-18 R ENTER 3-4 ScrLock 3-4 Sound system problems 6-15 T TOSHIBA Assist 4-3 TOSHIBA ConfigFree 4-3 TOSHIBA Disc Creator 3-22, 4-4 TOSHIBA DVD-RAM Utility 4-4 TOSHIBA HDD/SSD Alert Utility 4-4 Recovery hard disk drive 4-29 Recovery Media 4-28 Restarting the computer 1-11 S SD/SDHC/SDXC Card formatting 3-40 note 3-39 TOSHIBA PC...
... 6-4 Internal display panel 6-7 Keyboard 6-7 LAN 6-17 Memory Media Card 6-9 Optical Disc Drive 6-8 Overheating power down 6-4 Power 6-4 Real Time Clock 6-7 Smart Card 6-9 Sound system 6-15 TOSHIBA support 6-18 Touch Pad 6-10 USB device 6-12 USB mouse 6-11 Wireless LAN 6-18 R ENTER 3-4 ScrLock 3-4 Sound system problems 6-15 T TOSHIBA Assist 4-3 TOSHIBA ConfigFree 4-3 TOSHIBA Disc Creator 3-22, 4-4 TOSHIBA DVD-RAM Utility 4-4 TOSHIBA HDD/SSD Alert Utility 4-4 Recovery hard disk drive 4-29 Recovery Media 4-28 Restarting the computer 1-11 S SD/SDHC/SDXC Card formatting 3-40 note 3-39 TOSHIBA PC...
Detailed Specs for Tecra R840 PT42FC-00K003 English
Page 1
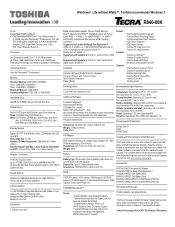
... PA3916C-1PRP Hi-Speed Port Replicator 2 PA3929U-1BRS 6 Cell Battery Pack PA3930U-1BRS 9 Cell Battery Pack PA3918U-1M2G DDR3-1333 2GB Memory Module PA3918U-1M4G DDR3-1333 4GB Memory Module TOSHIBA EasyGuardTM Part Number/UPC code Secure Toshiba Multiple Level Password Utilities Toshiba Reinforced Security Cable Lock Slot Execute Disable Bit (XD-Bit) Trusted Platform Module (TPM v1.2) BIOS BitLocker Drive Encryption Support Fingerprint Reader (includes software for password and identity management) BIOS Computrace™ Support PT42FC-00K003 / 6-23506-02905-6 iToshiba...
... PA3916C-1PRP Hi-Speed Port Replicator 2 PA3929U-1BRS 6 Cell Battery Pack PA3930U-1BRS 9 Cell Battery Pack PA3918U-1M2G DDR3-1333 2GB Memory Module PA3918U-1M4G DDR3-1333 4GB Memory Module TOSHIBA EasyGuardTM Part Number/UPC code Secure Toshiba Multiple Level Password Utilities Toshiba Reinforced Security Cable Lock Slot Execute Disable Bit (XD-Bit) Trusted Platform Module (TPM v1.2) BIOS BitLocker Drive Encryption Support Fingerprint Reader (includes software for password and identity management) BIOS Computrace™ Support PT42FC-00K003 / 6-23506-02905-6 iToshiba...


