User Manual
Page 5
... necessary for repair or limited warranty information, please contact Toshiba Corporation, Toshiba America Information Systems, Inc. Fax Branding The Telephone Consumer Protection Act of 1991 makes it can. Contact the state public utility commission, public service commission or corporation commission for any message unless such message clearly contains in their equipment, operations or procedures. If these changes might affect...
... necessary for repair or limited warranty information, please contact Toshiba Corporation, Toshiba America Information Systems, Inc. Fax Branding The Telephone Consumer Protection Act of 1991 makes it can. Contact the state public utility commission, public service commission or corporation commission for any message unless such message clearly contains in their equipment, operations or procedures. If these changes might affect...

User Manual
Page 29
... and specifications ....49 Turning on the power 49 Adding memory (optional 50 Installing a memory module 51 Removing a memory module 56 Hard Drive Recovery Utilities 58 Creating Recovery CDs/DVDs 59 Hard Disk Drive Recovery Options 60 Installing drivers and applications 66 Using the Toshiba Dual Pointing Device 67 Using the TouchPad 67 Disabling or enabling the TouchPad 68 Using external display devices 68 Directing the display output when you turn on the computer 69 Adjusting the quality of the external display......70 Using an external keyboard 70 Using a mouse 70 Connecting...
... and specifications ....49 Turning on the power 49 Adding memory (optional 50 Installing a memory module 51 Removing a memory module 56 Hard Drive Recovery Utilities 58 Creating Recovery CDs/DVDs 59 Hard Disk Drive Recovery Options 60 Installing drivers and applications 66 Using the Toshiba Dual Pointing Device 67 Using the TouchPad 67 Disabling or enabling the TouchPad 68 Using external display devices 68 Directing the display output when you turn on the computer 69 Adjusting the quality of the external display......70 Using an external keyboard 70 Using a mouse 70 Connecting...
User Manual
Page 43
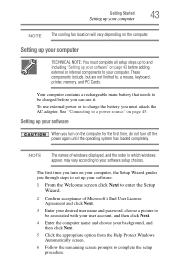
... charge the battery you turn on page 45. The first time you must complete all setup steps up to and including "Setting up your software. 1 From the Welcome screen click Next to enter the Setup Wizard. 2 Confirm acceptance of windows displayed, and the order in which windows appear, may vary according to , a mouse, keyboard, printer, memory, and PC Cards. To use it. Your computer contains a rechargeable main battery that needs...
... charge the battery you turn on page 45. The first time you must complete all setup steps up to and including "Setting up your software. 1 From the Welcome screen click Next to enter the Setup Wizard. 2 Confirm acceptance of windows displayed, and the order in which windows appear, may vary according to , a mouse, keyboard, printer, memory, and PC Cards. To use it. Your computer contains a rechargeable main battery that needs...
User Manual
Page 51
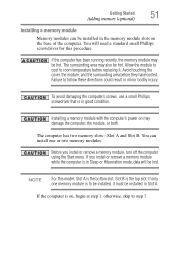
... is in Sleep or Hibernation mode, data will need a standard small Phillips screwdriver for this model, Slot A is the bottom slot. If you install or remove a memory module, turn off the computer using the Start menu. Slot B is to follow these directions could result in good condition. If the computer is in minor bodily injury. Avoid touching the cover, the module, and the surrounding area before replacing it must...
... is in Sleep or Hibernation mode, data will need a standard small Phillips screwdriver for this model, Slot A is the bottom slot. If you install or remove a memory module, turn off the computer using the Start menu. Slot B is to follow these directions could result in good condition. If the computer is in minor bodily injury. Avoid touching the cover, the module, and the surrounding area before replacing it must...
User Manual
Page 53
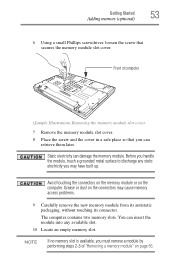
... may cause memory access problems. 9 Carefully remove the new memory module from its antistatic packaging, without touching its connector. Before you handle the module, touch a grounded metal surface to discharge any available slot. 10 Locate an empty memory slot. The computer contains two memory slots. You can insert the module into any static electricity you must remove a module by performing steps 2-3 of computer (Sample Illustration) Removing the memory module slot cover 7 Remove the memory module slot cover. 8 Place the...
... may cause memory access problems. 9 Carefully remove the new memory module from its antistatic packaging, without touching its connector. Before you handle the module, touch a grounded metal surface to discharge any available slot. 10 Locate an empty memory slot. The computer contains two memory slots. You can insert the module into any static electricity you must remove a module by performing steps 2-3 of computer (Sample Illustration) Removing the memory module slot cover 7 Remove the memory module slot cover. 8 Place the...
User Manual
Page 55
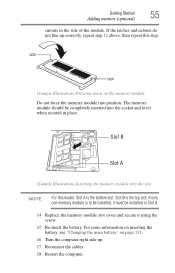
... Started 55 Adding memory (optional) cutouts in Slot A. 14 Replace the memory module slot cover and secure it must be installed in the side of the module. If the latches and cutouts do not line up . 17 Reconnect the cables. 18 Restart the computer. If only one memory module is to be completely inserted into the slot NOTE For this step. The memory module should be installed, it using...
... Started 55 Adding memory (optional) cutouts in Slot A. 14 Replace the memory module slot cover and secure it must be installed in the side of the module. If the latches and cutouts do not line up . 17 Reconnect the cables. 18 Restart the computer. If only one memory module is to be completely inserted into the slot NOTE For this step. The memory module should be installed, it using...
User Manual
Page 58
... has been configured with the socket latches. If you to recover your permission to work. 58 Getting Started Hard Drive Recovery Utilities 4 Replace the memory module slot cover and tighten the screw. 5 Re-insert the battery. TECHNICAL NOTE: You must have at least one memory module installed for the computer to continue." NOTE From time to time, Windows® will display a pop-up . 7 Reconnect the cables. 8 Restart the computer. Hard Drive Recovery Utilities (Available...
... has been configured with the socket latches. If you to recover your permission to work. 58 Getting Started Hard Drive Recovery Utilities 4 Replace the memory module slot cover and tighten the screw. 5 Re-insert the battery. TECHNICAL NOTE: You must have at least one memory module installed for the computer to continue." NOTE From time to time, Windows® will display a pop-up . 7 Reconnect the cables. 8 Restart the computer. Hard Drive Recovery Utilities (Available...
User Manual
Page 61
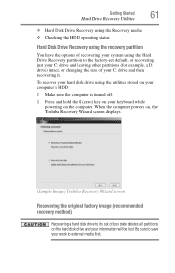
...) Toshiba Recovery Wizard screen Recovering the original factory image (recommended recovery method) Recovering a hard disk drive to external media first. Getting Started 61 Hard Drive Recovery Utilities ❖ Hard Disk Drive Recovery using the Recovery media ❖ Checking the HDD operating status Hard Disk Drive Recovery using the recovery partition You have the options of recovering your system using the utilities stored on your computer's HDD: 1 Make sure the computer is turned off. 2 Press and hold the 0 (zero) key on your keyboard while powering on the hard disk drive and...
...) Toshiba Recovery Wizard screen Recovering the original factory image (recommended recovery method) Recovering a hard disk drive to external media first. Getting Started 61 Hard Drive Recovery Utilities ❖ Hard Disk Drive Recovery using the Recovery media ❖ Checking the HDD operating status Hard Disk Drive Recovery using the recovery partition You have the options of recovering your system using the utilities stored on your computer's HDD: 1 Make sure the computer is turned off. 2 Press and hold the 0 (zero) key on your keyboard while powering on the hard disk drive and...
User Manual
Page 68
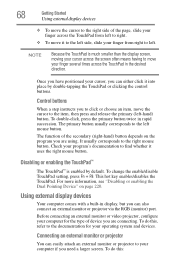
... external monitor or video projector, configure your computer for your operating system and devices. This hot key enables/disables the TouchPad. For more information, see "Disabling or enabling the Dual Pointing Device" on the program you need a larger screen. To do this : 68 Getting Started Using external display devices ❖ To move the cursor to the right side of the page, slide your finger across the TouchPad in rapid succession. To change the enable/disable TouchPad setting...
... external monitor or video projector, configure your computer for your operating system and devices. This hot key enables/disables the TouchPad. For more information, see "Disabling or enabling the Dual Pointing Device" on the program you need a larger screen. To do this : 68 Getting Started Using external display devices ❖ To move the cursor to the right side of the page, slide your finger across the TouchPad in rapid succession. To change the enable/disable TouchPad setting...
User Manual
Page 86
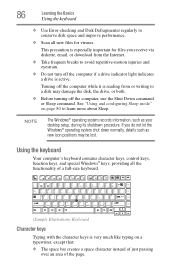
... configuring Sleep mode" on a typewriter, except that: ❖ The space bar creates a space character instead of just passing over an area of the page. This precaution is especially important for viruses. NOTE The Windows® operating system records information, such as new icon positions may damage the disk, the drive, or both. ❖ Before turning off the computer if a drive indicator light indicates a drive is active. Turning...
... configuring Sleep mode" on a typewriter, except that: ❖ The space bar creates a space character instead of just passing over an area of the page. This precaution is especially important for viruses. NOTE The Windows® operating system records information, such as new icon positions may damage the disk, the drive, or both. ❖ Before turning off the computer if a drive indicator light indicates a drive is active. Turning...
User Manual
Page 144
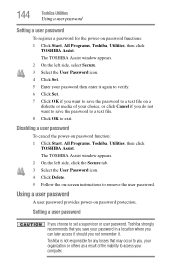
... Set. 5 Enter your computer. 144 Toshiba Utilities Using a user password Setting a user password To register a password for any losses that you save your password in a location where you can later access it should you not remember it again to verify. 6 Click Set. 7 Click OK if you do not want to save the password to a text file. 8 Click OK to remove the user password. Toshiba is not responsible for the power-on -screen instructions...
... Set. 5 Enter your computer. 144 Toshiba Utilities Using a user password Setting a user password To register a password for any losses that you save your password in a location where you can later access it should you not remember it again to verify. 6 Click Set. 7 Click OK if you do not want to save the password to a text file. 8 Click OK to remove the user password. Toshiba is not responsible for the power-on -screen instructions...
User Manual
Page 171
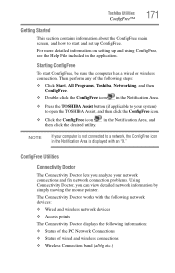
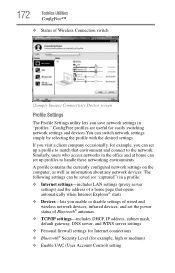
... the TOSHIBA Assist button (if applicable to your network connections and fix network connection problems. Using Connectivity Doctor, you can view detailed network information by simply moving the mouse pointer. Toshiba Utilities ConfigFree™ 171 Getting Started This section contains information about the ConfigFree main screen, and how to start ConfigFree, be sure the computer has a wired or wireless connection. The Connectivity Doctor works with an "X." For more detailed information on setting...
... the TOSHIBA Assist button (if applicable to your network connections and fix network connection problems. Using Connectivity Doctor, you can view detailed network information by simply moving the mouse pointer. Toshiba Utilities ConfigFree™ 171 Getting Started This section contains information about the ConfigFree main screen, and how to start ConfigFree, be sure the computer has a wired or wireless connection. The Connectivity Doctor works with an "X." For more detailed information on setting...
User Manual
Page 172
... occasionally, for easily switching network settings and devices.You can set up a profile to match that opens automatically when Internet Explorer® starts ❖ Devices-lets you enable or disable settings of wired and wireless network devices, infrared devices, and set up profiles to the network. A profile contains the currently configured network settings on the computer, as well as information about any network devices. The following settings can set the power status of Bluetooth® antennas ❖...
... occasionally, for easily switching network settings and devices.You can set up a profile to match that opens automatically when Internet Explorer® starts ❖ Devices-lets you enable or disable settings of wired and wireless network devices, infrared devices, and set up profiles to the network. A profile contains the currently configured network settings on the computer, as well as information about any network devices. The following settings can set the power status of Bluetooth® antennas ❖...
User Manual
Page 179
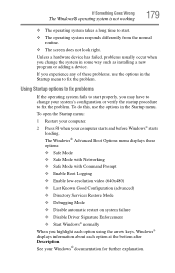
... time to start properly, you may have to change the system in the Startup menu to fix the problem. The Windows® Advanced Boot Options menu displays these problems, use the options in the Startup menu. If you experience any of these options: ❖ Safe Mode ❖ Safe Mode with Networking ❖ Safe Mode with Command Prompt ❖ Enable Boot Logging ❖ Enable low-resolution video (640x480) ❖ Last Known Good Configuration (advanced) ❖ Directory Services Restore Mode ❖ Debugging Mode ❖ Disable automatic...
... time to start properly, you may have to change the system in the Startup menu to fix the problem. The Windows® Advanced Boot Options menu displays these problems, use the options in the Startup menu. If you experience any of these options: ❖ Safe Mode ❖ Safe Mode with Networking ❖ Safe Mode with Command Prompt ❖ Enable Boot Logging ❖ Enable low-resolution video (640x480) ❖ Last Known Good Configuration (advanced) ❖ Directory Services Restore Mode ❖ Debugging Mode ❖ Disable automatic...
User Manual
Page 187
... the secondary control button, then clicking Personalize. For more information see Windows® Help. If this , press Fn and F5 simultaneously (once). To change the display settings by pressing Fn and F1 simultaneously. Click Display Settings to continue working power outlet. ❖ Check that the cable connecting the external monitor to the computer is firmly attached. ❖ Try adjusting the contrast and brightness controls on the external monitor. ❖...
... the secondary control button, then clicking Personalize. For more information see Windows® Help. If this , press Fn and F5 simultaneously (once). To change the display settings by pressing Fn and F1 simultaneously. Click Display Settings to continue working power outlet. ❖ Check that the cable connecting the external monitor to the computer is firmly attached. ❖ Try adjusting the contrast and brightness controls on the external monitor. ❖...
User Manual
Page 232
... that you turn on the network. Internet - Memory cache installed on the screen that activates a memory resident program. A group of computers or other line of pixels is returned to interact with the Fn key can set system options or control system parameters, such as a mouse. See also World Wide Web. L L1 (level one) cache - See also Sleep, Suspend. A method of your work , including all open files...
... that you turn on the network. Internet - Memory cache installed on the screen that activates a memory resident program. A group of computers or other line of pixels is returned to interact with the Fn key can set system options or control system parameters, such as a mouse. See also World Wide Web. L L1 (level one) cache - See also Sleep, Suspend. A method of your work , including all open files...

User Manual
Page 238
... 135 memory 50 adding memory 50 Alt keys 87 Application Cards 207 audio files 130 audio features 130 B backing up files 85 battery changing 113 charge indicator light 47, 107 charge not lasting 185 charging 45, 47 conserving power 110 disposal 117 low charge 109 monitoring power 47, 107 not charging 185 power plan 214 power usage hot key 112 real-time clock (RTC) 104 removing 113 BIOS Setup see Toshiba Hardware Setup button power 50, 60 start 122 C CD creating 99...
... 135 memory 50 adding memory 50 Alt keys 87 Application Cards 207 audio files 130 audio features 130 B backing up files 85 battery changing 113 charge indicator light 47, 107 charge not lasting 185 charging 45, 47 conserving power 110 disposal 117 low charge 109 monitoring power 47, 107 not charging 185 power plan 214 power usage hot key 112 real-time clock (RTC) 104 removing 113 BIOS Setup see Toshiba Hardware Setup button power 50, 60 start 122 C CD creating 99...

User Manual
Page 239
... 45 connection set up 126 control buttons 68 critical applications 3 Ctrl keys 87 D desktop creating new icon 121 major features 121 desktop exploration 120 desktop icons 121 Device Manager 183 checking properties 183 devices keyboard 70 mouse 70 Disk Defragmenter 189 disk drive corrupted/damaged data files 189 missing files/trouble accessing a disk 188 running slow 189 diskette drive cannot insert a diskette 190 cannot read a diskette 190 connecting 72 external, connecting 72 display...
... 45 connection set up 126 control buttons 68 critical applications 3 Ctrl keys 87 D desktop creating new icon 121 major features 121 desktop exploration 120 desktop icons 121 Device Manager 183 checking properties 183 devices keyboard 70 mouse 70 Disk Defragmenter 189 disk drive corrupted/damaged data files 189 missing files/trouble accessing a disk 188 running slow 189 diskette drive cannot insert a diskette 190 cannot read a diskette 190 connecting 72 external, connecting 72 display...
User Manual
Page 241
... slot cover 53 memory module installation 51 installing inserting into socket 54 removing 57 microphone 130 modem determining COM port 123 problem solving 194 resetting port to default settings 123 upgrading 123 monitor 68 connecting 68 not working 187 mouse installing 70 serial 70 N network accessing 125 Dial-Up Networking Wizard 125 networking wireless 125 O opening the display panel 48 optical drive problems 190 troubleshooting 190 other documentation 39 overlay keys 88 P password disabling a user 144, 146 setting a user 144 types 143 passwords instant, using 143 setting 143 PC Card...
... slot cover 53 memory module installation 51 installing inserting into socket 54 removing 57 microphone 130 modem determining COM port 123 problem solving 194 resetting port to default settings 123 upgrading 123 monitor 68 connecting 68 not working 187 mouse installing 70 serial 70 N network accessing 125 Dial-Up Networking Wizard 125 networking wireless 125 O opening the display panel 48 optical drive problems 190 troubleshooting 190 other documentation 39 overlay keys 88 P password disabling a user 144, 146 setting a user 144 types 143 passwords instant, using 143 setting 143 PC Card...
User Manual
Page 243
... 44 worldwide offices 205 Toshiba Assist 137 TOSHIBA Button Controls 156 Toshiba Dual Pointing Device 67 Toshiba Hardware Setup 153 Toshiba online resources 101 Toshiba utilities 136 traveling tips 119 troubleshooting DVD player general problems 197 external keyboard 186 keyboard 186 keypad overlay 186 optical drive 190 turning on the computer 50 turning on the power 49 U user password, disabling 144, 146 user password, setting 144 using a file extension 93 using the Toshiba Dual Pointing Device 67 V video projector adjusting display 70 W warranty limited warranty...
... 44 worldwide offices 205 Toshiba Assist 137 TOSHIBA Button Controls 156 Toshiba Dual Pointing Device 67 Toshiba Hardware Setup 153 Toshiba online resources 101 Toshiba utilities 136 traveling tips 119 troubleshooting DVD player general problems 197 external keyboard 186 keyboard 186 keypad overlay 186 optical drive 190 turning on the computer 50 turning on the power 49 U user password, disabling 144, 146 user password, setting 144 using a file extension 93 using the Toshiba Dual Pointing Device 67 V video projector adjusting display 70 W warranty limited warranty...


